Up next in 10



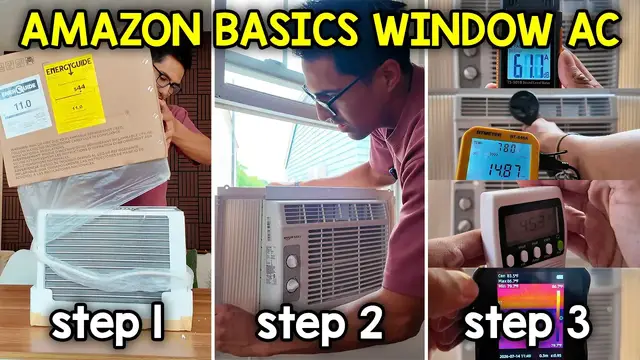
In this video, I go over the full setup and testing of the Amazon Basics 5000 BTU Window Air Conditioner. Check it out here https://geni.us/EcORaE Want FREE Shipping With Amazon Prime? Get a 30-DAY FREE TRIAL by signing up here http://www.amazon.com/tryprimefree?tag=thechrisreview-20 DISCLAIMER: This video and description contains affiliate links, which means that if you click on one of the product links, I’ll receive a small commission. This helps support the channel and allows us to continue to make videos like this. Thank you for the support!
Show More Show Less View Video Transcript
0:00
This is the Amazon Basics 500 BTU window air conditioner
0:03
And in this video, I'm gonna do a full unboxing and installation. And we're also gonna run a few tests with these gadgets
0:08
So let's get started with the unboxing. And in case you're curious, the size of this box is gonna be 17 and 3 fourths
0:17
by 14 and a half by 15 and a half. And that's all in inches
0:30
All right, so let's get all this plastic stuff out of the way first
0:38
And that's actually pretty much it because I could just lift the box up and everything is revealed right over here
0:55
And there it is. And this is actually facing the wrong way, so here you go
0:59
you can get a better look at it. Right on top we're going to get that instruction booklet
1:05
And we're going to get some other things too. So this is going to be for the windows. And there's also a little bit of hardware here
1:13
And then here's these side covers. And then just a bunch more styrofoam and some plastic
1:23
And then here's another piece too. This looks to be like a metal bracket. On the side, there's also some extra protection
1:31
Yeah, this is just some cardboard here. All right, and here's the full unit itself
1:36
And now let's go back to some measurements again. So on the top, this is going to be 16 inches
1:43
And it's going to be 13 and a quarter. And height-wise, it'll be 12 inches
1:50
Now keep in mind on the side, it is going to protrude out a little bit differently depending on where it is
1:55
So in the middle, it'll protrude out more compared to on top since this is going to be angled
2:01
And now let's take a look at the buttons. This is going to be fairly simple. We have the temperature control up top so you can control how cold you want it to be
2:08
And then if you want this to just be fan or AC and there's going to be two modes for each
2:12
And then the vents are on top here. This is just going to be one long continuous one
2:17
Yeah, and then you could just teeter it back and forth to the left or right. So it's always going to shoot forward and that's kind of all the control you have
2:23
So now time for installation and I'm going to install it on this window right over here
2:32
So let's get that started. And actually I skipped a step because we have to install the top rail first before I put it there
2:38
So let's actually go back over here and back to the AC unit
2:43
So that top rail that was in that blue baggie, I took it out and here's what it looks like
2:50
So it's going to have this foam. This is going to go towards the bottom here. And this part the face is going to face towards here And then on the top there going to be some screw holes And so here you can get a better look over here that probably a little bit easier to see and just align them
3:05
and now it's time to screw those in now you can use a screwdriver in this case i'm going to use
3:11
a drill since it's going to be a lot easier with that all right there make sure everything is tight
3:18
i think this one's a little loose there now it's all good and now it's time to install the shutters
3:23
I'm gonna start with this shutter and keep in mind that there is a right and a wrong way to place them
3:28
So if you look On the top here, this is gonna say right. So this is gonna go on the right side and to install it. It's pretty interesting
3:35
Because it has these clips right here. So we actually want to stretch out the accordion part
3:42
So it extends past these top and bottom parts and just slide it in from the top
3:48
To each of those hooks there and there now it's going to stay there so this time when we stretch it out or push it in it'll
3:57
be easier to manage and then they go inside the holes for here at the bottom just like that
4:01
and there right side is done and now time for the left side this cable is slightly in the way so
4:09
I'll move it a little bit and once again stretch out the accordion make sure it goes through each of those clips
4:17
and then slide it through that hole on the top and the bottom
4:23
there just like that and now we're ready to actually install this to the window so let's go
4:36
back over here actually bring it a little bit closer so you can see better
4:41
and then the window can be open and now let me bring the AC unit
4:45
now this will be easier with two people but it's just me for now so
5:02
I'm just going to slide it in here yep it clipped right there and then same thing on the other side
5:09
there so it grabs it a little bit and then this is the tricky part just holding it here
5:14
and pushing the window down until it closes there just like that now we're almost there but it's time for the foams and this part has two of
5:31
them we're going to have the adhesive foam and this one can be cut to the width of this right
5:36
over here, and it can be placed on the top right there
5:40
So like once I lift the window unit, it'll go right there
5:43
I'm not gonna do that for now. And then the second one is gonna be the window sash
5:47
So this is just gonna be a thick foam piece and this is gonna go all the way at the top
5:51
And this is just to seal any air that might be escaping through here So this can literally just be pushed inside It very simple you could use a screwdriver you could use your nails and there it is I already got a little bit in with my nail but I won do that for now so now it time to secure the AC with the brackets and you
6:08
gonna have two different types you're gonna have this one right here that kind of looks like a
6:12
question mark and that's gonna be for window uh wooden windows and then you're gonna have this one
6:18
which is gonna be for the windows that I have and then here you can see how I put it just like so
6:24
you just slide it between the accordion like that and then screw it right in and it's going to be one
6:29
for each side just like so and there's also going to be one more bracket it comes with
6:34
and it's going to be this one right over here and this is going to be for the top part of the window
6:39
so just like so and this is to secure it so it's going to be two screws you can put on the left
6:46
side you can put on the right side whatever you prefer and that's basically it for the installation
6:52
so oh yeah and one more thing you also do have some screw holes over here so you can also screw
6:58
that in so in the case i have one there two and three but now time to actually turn this on and
7:03
test it out all right so here we have the amazon basics window ac fully installed so let's go over
7:08
the controls one more time there's going to be two knobs the one on the left is going to be the cool
7:12
setting we have one one which is going to be this top knob which goes all the way up to seven
7:18
giving us the coolest amount which I'm always going to keep honestly and then we have the air
7:23
speeds slash air control so right over here this is going to be low speed and then low airflow with
7:31
low cooling high airflow with high cooling and then high fan speed so now let's see how noisy
7:37
this gets with this decibel reader I'm going to take a starting reading which you'll see right
7:42
over here and then you'll see the maximum of each of these so let's get started all right so the
7:48
base reading gives me roughly 50.2 decibels and now it's time to turn the knob and I turn it to
7:55
low fan speed and this is going to shoot up to around 63 decibels upwards of 64.4 or so and then
8:02
turning the knob again we're going to be at low airflow and cooling and the reading kind of looks
8:06
stuck at the max setting after a while so I just let it go back to the fast reading and this actually
8:12
went down to around 62 decibels. So I turn the knob another time and this puts us in high airflow
8:18
with cooling and the reading shoots up to around 66.5 decibels plus or minus a little bit and then
8:24
when I turn to the high fan speed it's going to be around the same as well too. Alright with that
8:28
out of the way now let's go for what the fan speed looks like in miles per hour and for the
8:32
low fan speed we're getting around 11 miles per hour. So let's head over to the low cool
8:42
And this is getting me roughly the same as well too around 11
8:46
And now let's head over to high. Yeah, and this is where things change
8:55
So we getting upwards of 14 just shy of 15 miles per hour and now for just the high airflow
9:05
yeah roughly around the same shy of 15 probably around 14 and a half averaging oh now actually went to 15 so now it's time to
9:20
measure the temperature and the wattage too at the same time so i'm going to leave this running
9:24
at the low cool speed setting for about five minutes come back see what the temp is like
9:29
and also what the wattage is showing and then do the same thing for the high one so for now let's
9:34
get a base reading and mind you i just turned this on so it is going to be a little bit cooler than
9:38
it should so right here at the center it says it's roughly 83.7.3 degrees fahrenheit and then
9:45
you can see what the max and the minimum is on the screen here and comparing into like on the
9:50
window shutters, yeah, the window shutters are pretty hot, 87.4 in comparison, and let's check
9:58
me out while we're at it, yeah, I'm about 92.7, all right, so let's go for, cool
10:08
and I'll be back in five minutes, so I actually left this for 10 minutes instead, it's been
10:12
actually nearly 11, and here's what we look like for this, this is at roughly 465 watts
10:18
and now for the camera itself let me make sure i point oh yeah and then you can see a big jump
10:27
there so right over here hopefully you can read the number it's 54 53.1 degrees fahrenheit
10:35
and then now let's look at the shutters shutters are at 84.6 so they did cool down a little bit
10:45
since then but that's it for the low speed now let's turn on the high and we're gonna wait another
10:50
10 minutes and I'll be right back all right so it's been another 10 minutes and now time to check
10:55
and see how cool this is but first let's see the wattage this is at 452 nope 453 around there and
11:04
here is this so yeah basically looks just as blue but let's see what the temperature reading says
11:11
this time. So let me go right there. This one says 55.6 degrees Fahrenheit. Hopefully you can
11:23
see it right over there. Now let's go to the window shutter. 84.4. All right. So hopefully
11:37
found this test useful and again this is the amazon basics 5000 btu window air conditioner
11:42
but there also is a 6000 btu option and the controls look a little bit different
11:46
overall this is very easy to use the knobs are simple the only thing missing i guess would be
11:51
a remote control but more things to break so i guess this is as basic as it comes
11:56
but yeah that's a quick rundown of the amazon basics air conditioner
#Computers & Electronics