Up next in 10



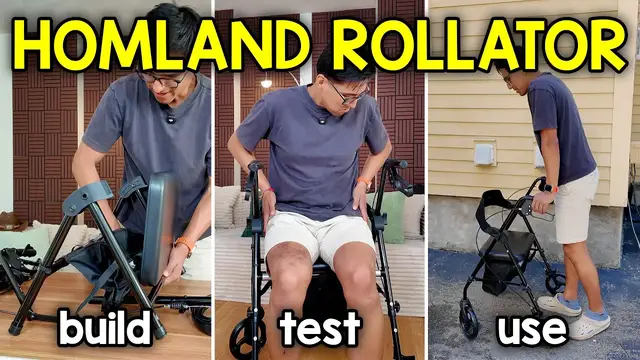
In this video, I go over the Homland Rollator Walker
Check it out here https://geni.us/CK84D
Want FREE Shipping With Amazon Prime? Get a 30-DAY FREE TRIAL by signing up here http://www.amazon.com/tryprimefree?tag=thechrisreview-20
DISCLAIMER: This video and description contains affiliate links, which means that if you click on one of the product links, I'll receive a small commission. This helps support the channel and allows us to continue to make videos like this. Thank you for the support!
Show More Show Less View Video Transcript
0:00
This is the Hamlin Roller Walker. It comes in this box that's roughly 22 pounds. So everything seems
0:05
to be really compact inside and I can just pull everything all out. And yeah that's everything that
0:12
comes in the box. Here's the whole packaging itself and the first thing I see on top is going to be
0:17
this booklet. So it's going to be some construction manual and it also does come with a Phillips head
0:22
screwdriver. All right so I made sure to take off all the plastics and all the zip ties and here's
0:27
we have. I also put all the tools and all the hardware in this little bin that I have and I
0:31
want to see how long it takes to assemble this using the instructions and the tool which is the
0:36
screwdriver provided. And so I'm going to start right now there and then here you can see the time
0:44
on my left side. So the first thing is to remove the whole packaging which I already done
0:48
Now it says to unfasten the hook and loop fastening strap. So this should be on here
0:54
Okay so it's referring to this strap right over here and this is so this whole part can
1:02
actually be pulled apart. There now it can open up. Whoops. Alright so definitely need a bigger table than just this
1:10
I'll leave it here for now. And step three, unfolding the walker
1:15
So pull out the frame from left to right which I already did. I expanded it out and here's what we have
1:21
Now it's time to assemble the wheels. So insert the front wheels labeled one into the tube with the same number
1:27
All right. So here's one. Here's one. And let's see which wheels they are
1:32
Okay. So it's these two wheels here. Yeah. It's this wheel. This wheel is labeled one. And let's see if there's a right or wrong way to put it
1:39
Yeah. Just have to make sure it aligns with the correct one. So this is one. So this goes in here
1:43
And it looks to be like a cap here. So I guess I'll take that off. And this can be placed inside just like so
1:48
All right. Install knobs and washers on the same side. So let's refer to this
1:52
this will go okay just like this. Alright good thing I have another one. Actually I think I was
2:02
supposed to use the smaller one. Yeah I was supposed to use the smaller knob not this one
2:09
And all the washers are going to be like these plastic bits. And I can basically just twist this
2:16
And I will say this actually does make it hard to twist because it doesn't provide me with the
2:20
the right tool so I guess I'll just use my thumb to push it against here that doesn't really help
2:26
actually that's my fault I did it wrong so I'm not supposed to put the washer on that other side
2:37
I actually have to uh all right so yeah I'll say it again I'm not supposed to put the washer
2:42
on the side of the head and that's because there's like a pentagon shake over there
2:47
so this will make it easier just to push this so I can actually just put this one here and then
2:54
screw this in all right that would make a lot more sense because this actually holds it in place
2:59
and I can twist this hard all right so I read the instructions wrong but this is a lot easier
3:06
it's going in it do need to tighten it very hard and it still feels loose wow actually we'll need
3:11
use this. That wheel out of the way now time to put the other wheel and this is
3:17
number two so just like before take that rubber cap out put this inside here and
3:25
by the way these can screw onto different settings I just kind of put whatever setting I think I put it all the way inside yeah there's no more
3:32
exposed ones so make sure that these are like the same size as before yeah this
3:37
about the same length. Put the screw in there, push it all the way in and then
3:43
grab that washer against it and then finally this star cap. I just said before
3:49
just tighten this real good. Now I actually may have to adjust this later
3:53
on depending on my height so I may be tightening it for no reason right now
3:57
But in the meantime let's check the time so it's been eight minutes right now. Five
4:01
of those minutes were actually just spent figuring that part out so that was on me But there that looks to be good Yep that nice Alright so that step is done and now time for the rear wheels and yeah we using the same strategy as before i start with this wheel
4:18
and this wheel is labeled let me see where you see the number oh there it is number four and i'll add
4:24
it i'll just remove it this cap as well too and then put number three on the bottom and also right
4:30
Right now it's becoming a little bit harder because of the size of this table
4:37
Okay that definitely isn't a good idea. There I also want to make sure this is aligned correctly so just like so
4:45
Make sure this fits in, yep. Now time for that washer and then screw this in
4:51
I'll leave it loose for now. Now time for this other side with the wheel that I dropped
4:57
Alright that looks good. Nice. That step is done. All four wheels are attached
5:02
And now let me get that booklet that I dropped. I'm guessing it's going to be time to assemble the handlebars
5:10
So I probably don't need this table anymore. I can actually move it to the side so we can start working on the floor
5:18
Here's the lowest setting. And also let me move the camera a bit so you can see a little bit more of what's going on
5:23
And also so you can see the time. It's been almost 14 minutes. Now this right here is definitely too short for me, so I'm actually going to raise it up
5:32
right around that tip of height. Yeah, it seems to be about one, two, yeah, the third hole actually
5:40
The third hole will be perfect for me, okay. Assemble handlebars, unfold your water completely before you slide the handlebar smoothly into
5:47
the slot. Alright, that's good. Same thing for this other side. Again this will be one, two, three, that foot hole
6:00
Alright sweet, got that. That looks good so far. And now it's time to assemble the backrest
6:06
So here is that backrest. And this looks to just slide right in
6:12
Got to make sure the logo is put correctly. Tomlin. It slides just like this
6:18
Oh okay I see. I just have to get it at the right angle and also it's like a tough one down
6:26
So I have to put a little bit of force to make it slide. Yep
6:29
Oh, actually that's a good amount of force I have to put there
6:33
Let's put on both sides. Yep. Now let's see what's next. So after snapping the backrest into the frame, use the screwdriver to lock the screws on both sides
6:45
And these are going to be these tiny screws that it comes with
6:50
now it's finally time to use the screwdriver that they gave us all right and there it is
6:58
so that should be everything yeah that's everything the rest that it shows me here is how to adjust
7:05
the seat height uh how to walk with the walker and then the brake operations that's basically
7:12
about it for that and it does come with a bunch of extra things so it comes with that extra knob
7:17
the other extra knob, an extra bolt, an extra plastic washer, and an extra screw. And these
7:25
are just going to be the plastic bits that were at the bottom. But yeah, that's it for assembly
7:29
So this took under 20 minutes. Right now it's at 18.55. Realistically, this probably should have
7:36
taken probably under 15 minutes if I didn't mess up that leg. But that concludes the assembly part
7:41
of this portion. All right, so now it's time to go over some of the specs of this roller walker
7:46
And we're going to start with the weight. So right here, I have this weight scale that I used in the
7:50
beginning again, but let's see how much this actually weighs once fully put together. And
7:55
I'll just hold it here from the handle. All right, there it is. And this is roughly 19.84 pounds
8:05
Here it is. Hopefully you can get a better look at that. Now, if you're somebody on the wider frame, this is going to make or break it because if you can't sit here, then what's the point
8:12
So the actual size of the seat itself is around 15 inches by 11 inches But the actual space you get from here to here is going to be a bit more and that going to be 18 and a quarter inches
8:29
And so here's what it looks like for me. So I'm six foot tall. I weigh 180 pounds
8:33
and here's what it looks like. So I do have plenty of space for the side still
8:39
probably about like maybe like an inch and a half on each side so i can still scoot over left and
8:47
right and now let's see how tall this actually is so this is adjustable too if you want to adjust
8:53
the seat height you're just going to have to adjust the legs at the bottom here but in this case
8:58
let's see how tall this is based on what i put it at and this gives me about 20 inches to the top of
9:06
the seat. And now from the bottom all the way to the top of this handle, this is giving me 35 inches
9:11
And if you're somebody even taller or even shorter, you can also adjust this too. So you can have the
9:16
handles go up or you can have them go down. And this is going to be like the perfect height for
9:21
me. Now let's take a look at those wheels. And these are going to be some pretty massive wheels
9:25
which is going to make a big difference if you're going over like rocks, pebbles and such. And these
9:29
are going to be about seven, a little under seven and a half inches wide. And now the thickness of
9:35
the wheels themselves they're going to be a little bit over an inch this looks like to be
9:39
an inch and an eighth but what about the overall quality of this roller walker so at first glance
9:46
this thing looks sturdy and when i actually start using it you can definitely tell it has good build
9:51
quality good mill material and when we look at the handles these are going to be some plastic grips
9:56
but how well do these brakes actually work so if i squeeze them about halfway through it is going
10:03
to give me a little bit of give but that's not really what you want. You actually want to squeeze them as much as possible. Once about three quarters of the way this seems to be good enough
10:11
but if I do give some force I can slide a little bit against this and this is going to be wooden
10:17
floors by the way and of course if I put the handles all the way upwards as much as possible
10:21
this is going to give me the most secure. Now how much strength do you actually need to pull these
10:27
handles all the way upward? That's also what we're going to check out. So it depends on where you
10:31
start. If you want to get as full leverage as possible, then you just go all the way here to
10:35
the end. But this isn't really natural. You're not going to be breaking with all your force at the
10:40
bottom. You're going to be kind of spread out. But just in case you're curious, how much force
10:44
do you actually need to pull this all the way upwards? And we're going to start all the way at
10:50
the end until it reaches the top here. So right. Okay. That's right around there. So this looks to
10:58
be about 8.82 pounds that are needed. And what if I average it out kind of like in the middle or so
11:05
to get all the way upwards? I can't really get the right angle. Yeah, actually this looks to be
11:13
bumping here, but to get about over here, it looks like I need about 12, 12.13 pounds of force
11:23
so if you can squeeze enough then this should be perfectly fine for the brakes and in case you're
11:30
curious how the brakes works it's actually going to be with this part right here so this is going
11:34
to be a metal piece that's going to squish down on the tire as you can see right here and does a
11:40
pretty good job but I still if I give it some give I still can move it out of the way of course this
11:46
is going to make a bigger difference once I actually apply the brakes and also apply some
11:51
weight to it, then that's going to be a lot harder to move around than if I were just breaking it
11:57
like this and then moving it around a little bit. Like I could just lift this up a little bit and
12:01
then the brakes don't really do anything. But when I put my weight against it, yeah, that's going to
12:05
be a lot more secure. And of course that's going to depend on the terrain that you're using it on
12:10
So this was easy to use on actual wooden floors, but how easy is it to get out of an apartment
12:15
So right here, this is a pretty narrow looking hallway. I have like a carpet at the bottom over
12:19
here that you could see and I could just easily roll over this and once I open the door to my
12:25
apartment there going to be a bit of a threshold over here it going to be like a lip going downwards So if I maneuver it like this I am able to go through the doorway
12:36
and it's going to go down, down the threshold and there and here. So you can also get a better
12:44
look at it. So if you see right here, this is pretty flush from here to here, but from here
12:49
to here, the carpet, it's going to be maybe like half an inch of a threshold, three quarters of an
12:54
inch high and if I just try to glide over it yeah it's not going to go as easy as it looks
13:01
I will have to use like a little bit of force so let's say if I like push it over yep I'm able to go over it like this and then the back wheels are just a lot easier
13:10
and let me try that again so to make it even easier you probably will have to like tilt it
13:17
back a little bit and then continue moving forward and then you're able to walk as normal
13:24
And now let's take this walker outside. But first we have to fold this up
13:28
So how easy is this really to fold? Well, you could start by lifting up the seat just like so
13:34
And then there's going to be this strap right here, which has to be pulled upwards. And it's actually going to be pull everything up like this
13:41
Now carrying this is kind of a little bit awkward because there's no, I guess, right way to carry it
13:46
I guess you can hold it like this or on the side or maybe with the strap itself
13:51
You can kind of swing it over your shoulder. Although I will say when I have it here, it's not the most comfortable because my hand is kind of on the inside
13:59
But either way, let's see what happens Let me bring this outside so you can see how it works
14:04
And so right now I'm carrying it downstairs And it looks like the easiest swing is if I put my hand at the bottom and then just fold it just like this
14:11
Alright, so now this is the outside and I'm going to be on some blacktop And this is going to have some bumps, some divots
14:16
It has like a little bit of an indentation here So I want to see how the brakes work with this
14:20
And as you can see, the wheels aren't exactly level This one's not even touching the ground at the moment
14:25
But because this does have four wheels I can still balance And I don't feel like I'm going to fall anytime soon
14:31
And now let's see how the brakes work over here Yeah, so I guess depending on where I am
14:36
If I'm in like a bit of a hole Then one of my wheels is not going to break
14:40
Because it's kind of slanted downwards But when I do get some grip
14:44
This does feel to be very secure on the right side So let's see if I can go on a more flat area
14:49
Yeah, kind of like right over here This feels flat for the back wheels and here so you could see like a little bit better as well too and now let's see if i could just lift
14:58
my body up from here yeah now i definitely would not recommend doing this because if i lean back a
15:04
little bit too much then this can just fall over like so now i'm out here on my deck and moving
15:10
around this with the grain or you know like this it's going to be easy and when i go against that
15:16
i'm going to feel like little bumps here and there but it's not uncomfortable
15:20
and then I can also brake and I guess because this wood is wet is it is going to be like a
15:29
little bit slipperier and it's not going to be the best braking method so yeah as usual if it's wet
15:35
outside be very careful now let's go back inside and that's about it for this homelin rollout walker
15:42
I'd say the biggest complaint for this would be the installation but again that would be on my part
15:48
for messing it up but even so when I did do it correctly the knobs are going to be a bit harder
15:54
so if you don't have most or a lot of force in your hands I definitely would recommend getting
15:58
some help to install this but afterwards everything is pretty easy to use and move around with and
16:05
also I think one thing that I forgot to mention is going to be at the bottom of this seat because
16:09
when you lift up the seat there is going to be this storage compartment so you could store maybe
16:14
like a little bit of groceries you could store some extra shoes maybe a purse and so that's pretty
16:18
nice to have there's also going to be a pocket over here on the front and that's about it but
16:23
if you don't like this basket you think it gets in your way you can just unlatch it and take it out
16:28
just like so but what i will say is right over here because the seat is in the way you will have
16:33
to unscrew this whole seat so you can actually take these out here but yeah that's a quick look
16:39
at the homeland roller walker
#Computers & Electronics