Up next in 10



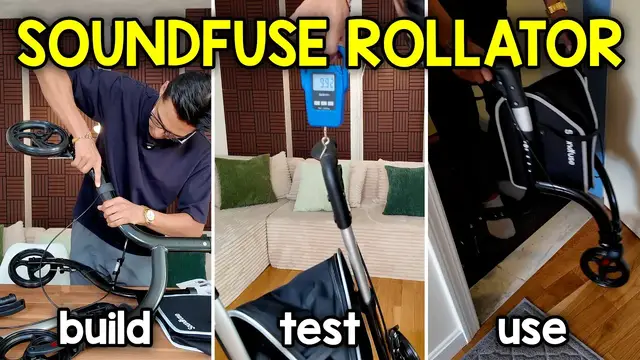
In this video, I go over the Soundfuse 3 Wheel Walker.
Check it out here https://geni.us/KsvSrTI
Want FREE Shipping With Amazon Prime? Get a 30-DAY FREE TRIAL by signing up here http://www.amazon.com/tryprimefree?tag=thechrisreview-20
DISCLAIMER: This video and description contains affiliate links, which means that if you click on one of the product links, I'll receive a small commission. This helps support the channel and allows us to continue to make videos like this. Thank you for the support!
Show More Show Less View Video Transcript
0:00
So in this video I'm going to do a quick unboxing and assembly and give you my first impressions on the SoundFuse Roller Walker
0:05
And we're going to start right now. And I'm going to be using the instruction booklet that it comes with it
0:11
So let's see. Alright, step one, unpack everything, which I already did
0:17
Step two is to unfold the walker and it's going to be this part right here
0:21
So I could just open this up and yeah, that's pretty much it
0:26
Now step three is to assemble the wheels. so on the sides we're going to have labeled two and one and that's going to correspond
0:34
to the correct wheel so right here this is wheel one as you can see right there
0:39
and I'll attach this to the section labeled one just stick it in
0:54
and then there's this button right here that I could push slide in and it'll click
0:58
into place like that and then same thing for this other side good push and it locks into place
1:11
and now this can balance here kind of so what i'm actually going to do is let's see
1:18
i'm going to fold it inside a little bit so it fits on top of the table
1:23
and the next step is to assemble the handlebars and so just like before these are also going to
1:30
be labeled so right here it's labeled four and on the side here it's going to be labeled four so
1:35
that's where it goes so i'll make sure this doesn't get all tangled up all right that's good
1:40
and like before push it in press the button slide it down and it locks into place and by the way
1:49
there's going to be one, two, three, four, five different adjustment levels
1:55
And same thing for this handle. There. All right. So now it says fix cable, or fix the brake cable
2:09
And right over here. Yeah, actually, everything's already fixed in place because it already has these Velcro parts
2:16
And let me see if it says it. actually no it says this to move it up a little bit more so here so you can get a better idea of
2:24
what I'm doing right over here there's this velcro strap and I'm gonna loosen up a bit
2:29
and then just move it more towards the top yeah about right over there this way you can get a better handle on it and also on the inside Right here there this little hole so you can just align it to there And same thing for this other side Align it right inside And then I take this part a little
2:54
bit and move it upwards a bit more. And then tighten this. Yeah, I think that should be
3:01
good for that. Alright, and now it's time for the storage bag. And this time what I'm
3:07
going to do is open this up fully there. Hopefully this won't fall. But in the meantime, I'll just
3:15
put the brakes there so now this won't swivel around as much. And let's see, this is going to
3:23
have these two clips over here. Actually it goes this way. It actually turns out I was wrong about
3:29
this hole. This is not where those cables go. This is actually where this bag gets attached
3:37
and push it all the way down
3:47
and yeah that's basically it and here we have the roller walker and this took a total of about yeah four minutes 20 seconds
4:02
so now let's take a closer look at this all right so here's the roller walker and
4:07
next thing I want to do is to see how heavy or how light this is and I'm going to be using this
4:12
luggage weight scale and I'll hold it by the handle over here and already when I was moving
4:19
this around this felt very lightweight so I wouldn't be surprised if this is less than 10
4:24
pounds. Yep, this is going to be 9.92 pounds and now let's check out some of the measurements of
4:32
this. Now this is as high as it goes and that's because I already have the handle all the way to
4:37
the top so let's start from the bottom all the way from the bottom to the top of the handle this is
4:43
going to be about 38 and three quarters of an inch and up to the brakes it's 36 inches
4:50
and i'm six foot tall and this is how it looks like on me when i hold it so this feels like it
4:57
might be a little bit too um too tall for me i actually want to put it a little bit lower
5:03
so I could probably just push this in. Let me push it in a little bit more, a little bit more
5:10
a little bit more. Yeah, I think all the way to the bottom setting would be perfect for me
5:18
Now, I know this is right because it goes right over here by my wrists
5:22
so this way I can lean on it with my arms still straight like this. And now when I moved it all the way to the lowest setting This is gonna go down to about 34 1 inches And now I can put all my weight down here And this is how it looks like when I move along
5:39
And by the way, because this is going to be three wheels, the turning radius on this is insane
5:44
Like I could just stay in place and just move around in a circle like this
5:49
So if you're moving around objects, this is going to be real easy to use
5:54
All right, but for now, let's put the brakes on in order to activate the big looking wheels as well, too
6:00
And here you can see they're going to be roughly seven and a half inches long
6:06
Right here, we have the brakes. And also, if you want to tighten the brakes, you could just tighten this nut or loosen it
6:12
In this case, the brakes are working well, so I'll leave it as is
6:16
Now, over here for the wheels themselves, there's only one adjustment level for this
6:20
So you can't raise it or lower it. The only way you can raise it or lower it would be through up over here
6:26
And to get the perfect height adjustment for my arm length, I would have to go all the way to the bottom side
6:30
But depending on your height, you might go higher up, depending if you have shorter or longer arms
6:36
Now over here, here's how the front wheel looks like. This is the caster wheel, so it's just going to move all the way around like so
6:42
We have the bag right here with the logo SoundFuse. And also, when you do want to remove the bag, it's pretty simple
6:48
You're just going to have to pull up on both sides. So if I pull on the right, pull on the left, and there it is
6:55
That's how the bag looks like. I'll put it back in for now. Just give it a push there
7:00
And then same thing for the other side. There. And this does have, I guess you can consider it two zippers
7:07
And that's because the way to open this is just by pulling this upwards like this
7:13
And it comes loose like so. This is also going to reveal two pockets you have in here
7:17
so you can fit a phone on either side, maybe some other small objects
7:22
And inside here, this is tall enough that I could fit a gallon of milk. And here's like a better look at so you could see the inside
7:32
And now let's take a look at how deep this pocket actually is. So from the bottom, this goes about 12 inches
7:39
and then from all the way to the highest setting this is going to be about whoops about 13 and
7:46
three quarters of an inch and now let's lock that back into place just one zip two zip and there it
7:55
is and also when it's time to fold this this is pretty simple you can put the bag in here you can
8:01
take it off in this case i'm just going to leave it there and at the bottom here there's going to be
8:05
this part right there, you just give it a push. And with that, close both handles
8:13
And it closes just like so So this is gonna be pretty easy to fit into places such as that corner over here So right over here I have some space between my couch and the wall and it kind of fits
8:27
I guess it's not wide enough because of the wheels, but let's see if I can
8:31
Yeah, I can't really move the wheels, but there it is. And when it's time to open this up, just like pull it out and that's it
8:39
And I can't accidentally push it back in without giving this part a push and then doing this
8:44
With that out of the way, let's take a look at the handles themselves. It does have some sort of rubber grip material, and there's also going to be indentations for your fingers
8:52
So you can see there's like one, two, three bumps, so all your fingers are going to fit
8:59
I guess the pinky doesn't really fit if you put it here. Two fingers can fit over here, there
9:06
And it also does have this lip, which is going to be kind of like a rest for your palm
9:11
And overall, yeah, feels pretty good. Feels solid, feels nice. And when I put all my weight onto it, it doesn't feel like it gives out too much
9:20
You could definitely see a little bit of a bend, but it still feels safe
9:24
So let's see how easy this is to walk over here. So it goes over, I guess, this small little carpet or whatever you call this mat pretty easily
9:33
But that's a small test. Let's see how it goes when you're going outside
9:36
And this is going to be going out of my apartment. So right here, the wood and this part here, the threshold, there's nothing between it
9:43
going to be flat where there actually makes a difference is when it hits this and the carpet
9:49
so here you could see it goes down and then both wheels come down
9:56
now let's see how easy it is to get over this so this is going to be about
10:00
i believe three quarters of an inch high yeah so if i put my full weight against it it's not going to be very easy but if i go with some
10:12
momentum. Let's see, yeah I can sort of do it but that doesn't look like something you'd probably do
10:19
So instead to make it easier you probably have to give it like a little bit of a lift
10:24
and then going with the back wheels are going to be much easier. And then also in case you're
10:28
curious here's how it looks like if I put all my body weight on this
10:32
So there's my legs lifted up and if I try to move out
10:41
Yeah, this feels pretty secure, but of course That's not something that you'd really be doing so overall using this is pretty smooth
10:51
If you're going around corners, this is gonna be very easy just because of that turning radius
10:56
And I just one downside about this is the fact that this doesn't really have a seat
11:00
But if you don't care about that and you care mostly about having a roller to walker, then this one would be a solid pick
Computers & Electronics