Up next in 10



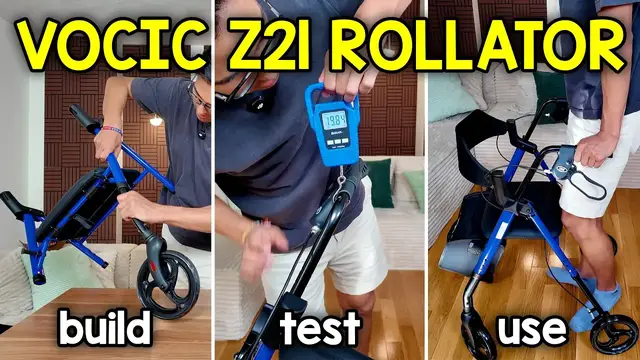
In this video, I go over the Vocic Z21 Rollator Walker.
Check them out here https://geni.us/ZBPSqr1
Want FREE Shipping With Amazon Prime? Get a 30-DAY FREE TRIAL by signing up here http://www.amazon.com/tryprimefree?tag=thechrisreview-20
DISCLAIMER: This video and description contains affiliate links, which means that if you click on one of the product links, I'll receive a small commission. This helps support the channel and allows us to continue to make videos like this. Thank you for the support!
Show More Show Less View Video Transcript
0:00
So this is the Vochuk Walker and in this video I'm going to do a quick unboxing assembly and give you my first impressions of this
0:05
Alright, so here's everything that comes inside the box and then we're also going to have the instruction booklet
0:11
Alright, so now it's time for the assembly portion and I want to see how long it takes. So I'm going to start a timer right over here so you can see how long this actually takes
0:19
So step one is to unfold this main unit, which is going to be this right here
0:24
okay so it does have this strap so i can open that strap up and then i could pull these two apart
0:34
oh that's pretty tough and there it is there's the main unit itself and i'll move these other
0:42
things out of the way for now because i know i'm going to start with the wheels second step is to
0:48
install the front legs and we're going to install let's see i believe these are the front legs
0:55
actually no the ones labeled a are the front legs which are going to be should be these
1:01
yeah the ones that are curved so this is going to be a and b so we'll start with those and i'll
1:11
move these other pieces out of the way for now and this is going to be installed okay that's
1:17
pretty easy. So basically install them where you see it matches. So A goes to A, B goes to B
1:24
And right here, you can see right there, it says A. So I could just stick that up there
1:35
And the good thing is there is a right and a wrong way to put this. This button part is going to go towards the outside. So I just push it in
1:41
and there it clicks on the place and now same thing for this other side
1:48
oops see I put it on the wrong way and it doesn't click
1:57
so oh this little cap came off there so now let me put it on the right way
2:03
there now it clicks and now it's time for the back legs so let's see if
2:08
there's anything special about this. So no, not really. The same thing as before. Make sure to
2:14
match the letters correctly. And I'm going to start with this portion. This is going to be
2:17
C. Again, you can see C right over there. And C is going to be this one over here
2:25
I think it'll be easier if I move this to the side like this. Ooh, and unlike the other ones, there's actually going to be these two clips on both sides
2:39
So I want to make sure I attach this correctly. And this is going to be with the things facing inside
2:47
So all these spring mechanisms, they should be facing towards the inside like so
2:51
In other words, like this, this is going to be on the inside
2:57
And actually this also matches with the sticker too because the sticker is here and the sticker
3:10
is there so it makes it easy to line up. And now time for the other wheel
3:24
And there that pretty much it for that because now we don need this table anymore And I could place this on the floor I just got to be careful because I don want to make these brakes fall
3:39
All right. And then here you could see a little bit more at the bottom. And there's the timer again. So now let's see if there's any special way to put this
3:48
so install the handle tube and yeah we just put it in place and this is also where we're
3:56
going to need some of the hardware uh oh which is going to be actually already attached over
4:03
here the hardware is right here so this can come right out and this goes just like this this is going to face outwards like that
4:17
and i can screw this back into place and this is going to be one two three holes and yeah actually let's see if there's any way to
4:30
make this higher yeah i'm gonna put actually no that is the highest setting actually okay
4:35
so I was putting it correct. All right that's good now time for this other one
4:40
and again this comes right off and there that's basically done there so we're almost complete now it's time for the seat
5:07
and the basket it looks like so let's see so step five is complete now step six which is to install
5:14
the backrest and this is going to be the backrest where you can see the logo
5:18
and let's see this probably goes over here yeah right over here and you can see where these two
5:27
brackets are actually oh actually i was wrong it actually goes up here and this is this has like a
5:35
cap so it can be pushed upwards and then these move into place and then these can go back like so
5:42
actually that's pretty cool yeah this is this actually very easy and yep that's put the wrong
5:48
right yep that's put the right way i meant to say that's done step seven secure the brake cable
5:55
okay so the brake cable is supposed to go oh okay right over here it looks like to have a um a little
6:00
hook so this can slide right in just like so then same thing on the other side and yeah i think
6:09
that's the only one it has. Yeah loops around like this and here's a better
6:15
angle by the way I clipped it onto this part here. Now step 8 install the storage
6:20
bag. So this is the storage bag it's talking about and this is gonna go okay
6:26
towards the yeah towards the same side as this backrest and it looks to be here
6:32
actually I think. Let's see if this comes off. Maybe it's like this. Yeah I think I just slide
6:41
it in like so. This is going to be where these hooks are right here. And there's the watch again
6:51
So these can just slide into place. And yep make sure I put it the right way up with the mesh facing outwards and same thing for this other side there just like that and yeah that it for step eight yeah the rest of this is just
7:13
how to adjust the brakes how to do some other stuff so that's pretty much it for that and now
7:18
the last thing to do is actually go down to the wheels because they have these plastic bits that I want to take off before using them
7:28
There, that's one wheel. That's two. That's three. And finally, that's four
7:38
And so here it is. Now let's go to the stopwatch. Stop. Yeah, this took us less than nine minutes
7:44
This was by far actually one of the easiest roller to walkers to build
7:48
But now, let's check this out. Alright, so again, yeah, this was surprisingly very easy to build
7:53
And the next thing I want to work on is a little bit of measurements. And we're going to start with the weight to see exactly how heavy or how light this is
8:01
And so I think grabbing it from the handle here would be a good idea. Let's see if I can grab the whole thing there
8:09
And this gives me, let's see, I think that's 18.74 pounds. And hopefully you can get a better look at that over here
8:18
it's not too bad pretty pretty good weight for that and now what about some measurements
8:25
so as you saw earlier i was able to sit on this comfortably and here's what it looks like i'm six
8:31
foot tall 180 pounds and it looks like i have probably yeah probably about an inch a little bit
8:41
less than an inch on each side or so and let's see let's actually take some measurements to see
8:45
how wide this is. So for the seat itself, it's going to be about 15 and a half inches. And the
8:55
total space that you can actually fit in here from this to this is going to be about 17 and a quarter
9:01
inches. And now this is the tallest setting it can get. And that's because I put it all the way
9:06
to the bottom. So if you're on the tall side, this is what you'd use. And this goes right up to about
9:12
22 and a half inches, but it can go lower since it does have two more settings. And once again
9:18
here's how it looks like when I sit down. And now let's see how high this is. So all the way to the
9:27
top of the handle, this is going to be roughly 36, a little over 36 inches. And now let's check
9:35
out the brakes themselves because these are very easy to pull up. It doesn't feel like you're
9:40
using a lot of pressure. It also feels very smooth and I want to see exactly how much pressure this
9:45
requires by basically pulling this up to see how high it gets or how much weight you need to pull
9:52
this upwards. Now of course this is going to vary but yeah if I go there this is eight pounds and
9:58
this is of course all the way at the end. You wouldn't really hold the pressure here at the end. You'd hold it more so towards the middle so if I do the middle to get all the way up yeah it
10:06
doesn't really let me do it because this is slide out of place. But from over here, yeah, I'll try to get it in the middle
10:16
Let's say like 8.82 pounds or so. And when you want to lock this in place
10:21
just pull both handles downwards and it stays locked in place. Now depending on the surface it might grip really heavy or if it kind of like this this surface you can probably just give it a tap and it like move on its own because of the friction but of course if you have some
10:36
weight against it and then you're trying to move it's going to be a lot harder although this does
10:40
feel pretty easy to move for some reason so maybe ah okay i see the brakes the brakes on this one
10:47
might need more adjusting yes compared to this one so actually let's take a look at that let's
10:52
adjust the brakes on this bottom one because it looks like it has more give yeah than this other
10:59
wheel so let's look at that and so here's what the current brake situation looks like if i put
11:03
enough force i can move this so what i want to do is just push this upwards a little bit more
11:08
and twist this knob this way when i engage the brakes it's going to be caught up a lot more and
11:18
then while i'm at it let me check the other side yeah the other side seems pretty solid
11:22
So let's go back to that test we were doing before when I put the brakes and see if this is going to move again
11:27
All right, so here's what it feels like loose and now let me engage both brakes like so
11:33
Yeah, and it feels better Although what you are seeing is it's still sliding and that's probably because of the surface
11:43
Yeah, but if I put my whole body weight to it And I shake
11:48
Let's try that again. If I put my whole body weight and shake this does feel secure. Of course this isn't really what you'd be doing since that's not
11:57
the ideal situation. So when I sit down this is fairly comfortable but I will say this isn't the
12:03
softest cushion. It does have some sort of firmness to it but still it's soft enough that I feel that
12:08
I can just stay sitting here whether I'm like watching a game or I just want to sit down for
12:13
a little bit and relax and when I do want to I can put my back against here. Here so I can kind
12:20
of rest against it and it does support my back. Now one thing I am noticing is because these aren't
12:26
fully clipped into place like I can easily move this up so if I accidentally like bump this up
12:32
this kind of can come off a little bit so that's one thing to worry about but of course that
12:38
wouldn't really be something you do accidentally unless you like pull up against this and if you
12:42
pull up against this the seat can come off. Now let's head down over here to the storage compartment
12:48
So this is going to be in the front, unlike some other roller to walkers, which you have to like open the seat and then it'll be down here
12:54
So this means this is going to be pretty easy access. And now this isn't like the biggest, but it's also not the smallest
13:01
So you can fit some things here. Oops, there, got the zipper out
13:06
So it's enough to fit probably like a gallon of milk and then maybe like two soda cans
13:12
Otherwise, you definitely can fit some shoes in here. Maybe a phone on the sides
13:17
or something like a purse. And yeah, that's the only pocket in here
13:23
There's nothing else on the sides and nothing on the back either. But if you don't like this pouch
13:28
it also does come out pretty easily. Again, you just pull it back
13:32
pull this part backwards and then lift it over it. And then you can take this off
13:37
if you don't want the pouch at all. So now it's time to fold this up and we can do so by lifting the seat upwards
13:43
and then we can pull this rod up. and it also does have this velcro strap so we can velcro it into place so it's not accidentally
13:51
going to come loose and there it is that's a quick look at the vcic rollador walker
Computers & Electronics