Up next in 10



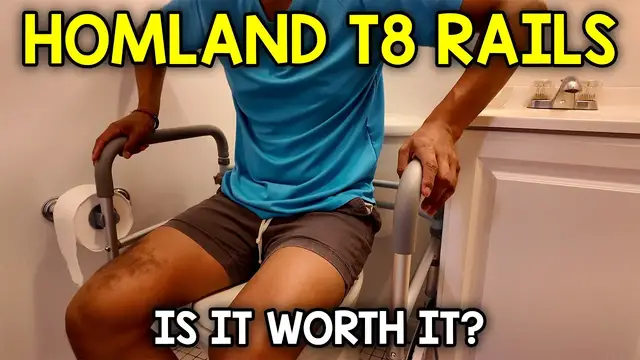
In this video, I go over the HOMLAND T8 Toilet Safety Rails.
Check it out here https://amzn.to/4ctMuje
Want FREE Shipping With Amazon Prime? Get a 30-DAY FREE TRIAL by signing up here http://www.amazon.com/tryprimefree?tag=thechrisreview-20
DISCLAIMER: This video and description contains affiliate links, which means that if you click on one of the product links, I'll receive a small commission. This helps support the channel and allows us to continue to make videos like this. Thank you for the support!
Show More Show Less View Video Transcript
0:00
This is the Hanlon T8 toilet safety rail. So let me show you around it. So this is going to be the
0:04
ones that you can just move around anywhere. This is not going to attach to the toilet seat
0:09
which makes it pretty easy just to move around if you want to move it upstairs or downstairs
0:13
This also does fold, but you do have to remove this screw and this clamp, which we'll do in a
0:19
little bit. But for now, let me show you how this works. Once it's installed, you just go ahead
0:25
grab the rails on the side, sit down, stand back up and boom. Pretty easy to use. Also pretty
0:31
comfortable and that's going to be because it comes with these foam rails. So if you see right
0:37
here it's going to be wrapped all around over here which just makes gripping this a lot more
0:41
comfortable. Now besides that it also does have some unique features that other rails don't have
0:46
For starters it is going to have this toilet paper holder which you can put, I guess technically you
0:52
can put it in the front towards you. You probably shouldn't do this because it'll be in the way
0:57
I'd probably put this either in the front here or towards my right side. And let me just put that
1:03
back. Actually, let me flip it this way. There, this looks a little bit neater. So now toilet
1:08
paper can just go right there or I can shift it to the right side and you could use it right there
1:14
as well too. Now on my other side, there is another thing too, and that's going to be this pouch
1:19
So right here, you can store books, you can store magazines. In this case, I have a journal
1:24
So I could just place it right over there. And it's also pretty wide
1:29
so I can also fit this lengthwise like that too Now something special you should know about these is gonna be the feet because it comes with these suction feet cups which you can use In my case I decided not to use it because when I did install it I didn have the best experience and that because the tile floor
1:45
that I have. So they're supposed to literally suction onto the floor. In this case because
1:50
there's going to be grout there's going to be grooves all over this is just going to pop back
1:54
up as you see here and this is just silly because once I was using this this was sliding in place
1:59
and it did not make it comfortable. But if you have floor that's more flat
2:04
sort of like this over here, like this is literally my tub, like it does stick, it will work
2:10
And it'll probably make it a lot more secure. Yeah, this is hard to get off unless I like pinch it here
2:15
So yeah, if you have floor like this, don't use it. Just stick with the original legs it comes with
2:20
which are going to be like this. And by the way, if you're curious how they look like, they just come right off and here it is
2:26
So they are, these still are made of rubber. And you can see how it looks like compared to the other feet and putting them on is easy
2:34
as well too. Just lift it up, stick it in. And there you go
2:42
Now these are going to be adjustable. So for example, if these rails are a little bit too low or too high, you can adjust the
2:49
feet and to do so simply start by working over here. And in this case, I'm just going to push this pin, push it up and I'm actually going to
2:57
put it all the way to the highest setting. And I'll do that to the other feet as well too
3:05
Oops, this one's kind of hidden, so it's a little tough. There, I got that one. And now let me do it for the other feet as well too Alright there one two and then here the other setting
3:18
Just like that. There, now this is as high as possible. Now let me give you another angle so you can see
3:25
There, that's a little bit better. And there it is. So if you're someone a bit taller or a bit shorter, then adjusting it would be a must
3:35
another must too would be adjusting the width of this so right now this bathroom is pretty narrow
3:41
so i have it a little bit um on the narrower side but if you want it even more narrow for some
3:47
reason then you can do that here let me just push that pin push it inside i can even push it in more
3:53
and this is as narrow as it gets so this is going to be a very tight squeeze and here you
4:00
could see how it looks like. In this case, this paper towel kind of gets in my way. So I'd
4:06
realistically want to move it off to the right side. There, like this. I still do fit, but this
4:13
just feels a bit too narrow for me. So let me go back to adjusting this to make it a little bit wider
4:24
There, right around there. And the reason I put it on this one and not all the way
4:28
to the end is because I have this cabinet right over here and it makes it a bit uncomfortable
4:35
It's going to be uneven. So here, just so you could see how it looks like, let me just
4:40
pull this apart and there. So this isn't exactly even. This will be more towards the left side versus the right But I do get plenty of space so this actually is probably the most comfortable because I can extend my arms out a bit more But again
4:56
it's too wide for my bathroom. Now, the other thing I wanted to show you is going to be the
5:01
folding feature. So that makes it easy to transport, to travel with. So if you want to bring this to
5:06
the upstairs bathroom, the downstairs bathroom, it's going to be easy to do. So here you go
5:13
we're going to start with removing the screws here. So it comes with this knob and I can just
5:19
twist it off. And this is going to be real time. So you could see how long it takes
5:27
There it comes off. Remove that. And here we have that pentagon screw, the copper washer
5:34
followed by the knob. Oops. Let me just screw that in. All right. There's one
5:38
And now let me remove this here. And this is going to be the C clamp. this just comes out very easily and now let's do the same thing for this other side here
5:47
so again remove that screw or that knob yeah whoops there it is and i'll just attach everything together so nothing gets lost
6:03
put that in place there and also this c clamp comes right off it's pretty genius design by the
6:11
way makes it really easy to install and there it is now I could fold everything in place and just
6:17
move this around so overall pretty easy to use pretty easy to travel us so if you're looking
6:22
for a set of toilet safety rails definitely check this one out by Homland
Computers & Electronics