Up next in 10

Globally, airlines handle over 4 billion bags annually, with 99.6% arriving on time. Learn how to automate airport baggage claim systems using PLC programming! This post will explore using programmable logic controllers to streamline the baggage handling process, increasing efficiency and reducing delays. We'll take you through the step-by-step process of designing and programming a Click PLC airport baggage claim machine. This will cover everything from setting up the PLC to writing the code. Whether you're a beginner or an experienced programmer, this method is ideal for anyone seeking to enhance their PLC programming skills.
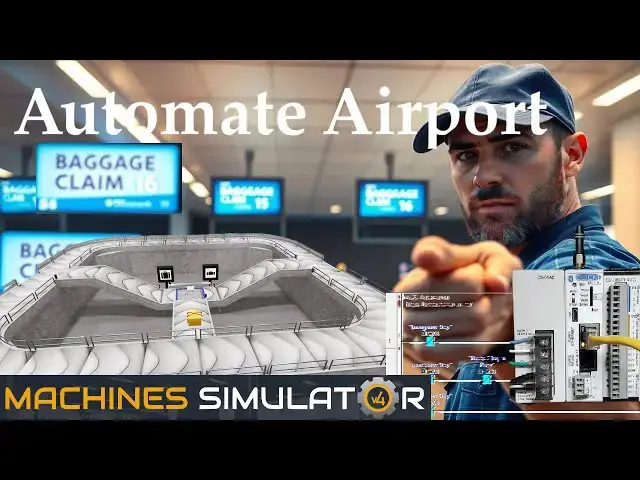
The Airport Baggage Belt is just one of many machines in the Machine Simulator (MS), also known as EasyPLC. This baggage belt claim features sensors to determine the size of the bag and directs it down one of two different ramps. The Click programming software will be used to program this Click PLUS PLC.
Modbus TCP (Ethernet) will connect the Click to the Machine Simulator (EasyPLC). Discrete inputs and outputs will be controlled from the Machine Simulator (Client) to the Click PLC (Server). We will demonstrate how this airport baggage belt is programmed using the five-step program development process. Let's get started.
Our website post provides effortless access to all the relevant links discussed in the video. We have gathered all the necessary information for your convenience, to all the resources mentioned.
https://accautomation.ca/automate-airport-baggage-claim-plc-programming/
00:00 Automate Airport Baggage Claim -PLC Programming!
01:25 Define the task: (Step 1 – Click PLC Airport Baggage Claim)
03:46 Define the Inputs and Outputs: (Step 2 – Click PLC Airport Baggage Claim)
05:20 Develop a logical sequence of operation: (Step 3 – Click PLC Airport Baggage Claim)
07:36 Develop the Click PLC program: (Step 4 – Click PLC Airport Baggage Claim)
14:56 Test the program: (Step 5 – Click PLC Airport Baggage Claim)
The Machine Software (EasyPLC) Suite Series can be found here...
https://accautomation.ca/series/easyplc-software-suite/
Some previous posts include the following:
EasyPLC Installing the Software
https://accautomation.ca/easyplc-installing-the-software/
Show More Show Less View Video Transcript
0:03
globally airlines handle over 4 billion
0:05
bags annually with 99.6% arriving on
0:09
time learn how to automate airport
0:11
baggage claim systems using PLC
0:13
programming this post will explore using
0:16
programmable logic controllers to
0:18
streamline the baggage handling process
0:19
increasing efficiency and reducing
0:21
delays we'll take you through the
0:23
step-by-step process of designing and
0:25
programming a Click PLC airport baggage
0:28
claim machine this will cover everything
0:30
from setting up the PLC to writing the
0:32
code whether you're a beginner or an
0:34
experienced programmer this method is
0:36
ideal for anyone seeking to enhance
0:38
their PLC programming skills the airport
0:41
baggage belt is just one of many
0:42
machines in the machine simulator MS
0:44
also known as easy PLC this baggage belt
0:47
claim features sensors to determine the
0:49
size of the bag and directs it down one
0:51
of two different ramps the click
0:53
programming software will be used to
0:55
program this click plus PLC modbus TCP
0:58
Ethernet will connect the Click to the
1:00
machine simulator easy PLC discrete
1:03
inputs and outputs will be controlled
1:04
from the machine simulator client to the
1:06
Click PLC server we will demonstrate how
1:09
this airport baggage belt is programmed
1:11
using the five-step program development
1:14
process let's get started detailed
1:16
information contained in this video can
1:18
be found at
1:21
accccautomation.ca a link has been put
1:23
in the description below
1:26
step one define the
1:28
task the first step in developing a
1:30
click or any PLC program is determining
1:33
what must be done start the machine
1:35
simulator MS select the machines button
1:38
on the main page or select machines from
1:39
the main menu at the machine simulator
1:44
window all available pre-built machines
1:47
for practicing PLC programming will now
1:49
be displayed move your mouse over the
1:50
airport baggage machine this is the
1:53
machine that we will be programming
1:54
three items will be displayed click the
1:56
information button on the top right of
1:57
the screen this will show you a
1:59
description of the airport baggage belt
2:05
station select close the airport baggage
2:07
simulator has a demo mode this will
2:10
allow you to observe the machine's
2:11
operation enabling us to understand the
2:13
basics of how it functions select the
2:16
demo mode for the baggage belt station
2:24
the demonstration mode will only show
2:26
you the operation the airport baggage
2:28
belt will manage the bags according to
2:30
the following rules one small bags must
2:33
be sent to the right two big bags must
2:35
be sent to the left programming must be
2:37
created to ensure the output bag doesn't
2:39
collide with the one on the conveyor to
2:41
be picked
2:46
up to remove the bags pick them up with
2:48
the mouse and put them on the floor move
2:50
around the 3D virtual environment the
2:53
icons at the top of the window enable
2:55
you to navigate this 3D environment the
2:57
first icon is the default selection this
3:00
will allow you to move around without
3:01
bumping into the components the last
3:03
icon will automatically show you around
3:05
this virtual environment the first
3:07
person mode will mimic a person in your
3:09
3D learning world the third person will
3:11
show you an operator and their
3:12
relationship to the bagging belt station
3:14
machine once we understand what needs to
3:16
be done we can proceed to the next step
3:18
in developing the click PLC program
3:22
[Music]
3:45
[Music]
3:48
step two define the inputs and
3:51
outputs at the top of the baggage belt
3:53
simulator window the view IO will
3:55
display the inputs and outputs required
3:57
for this example the outputs are on the
4:00
lefth hand side and the inputs are on
4:02
the right hand side while still in demo
4:04
mode you can see the operation of the
4:05
inputs and outputs the airport baggage
4:08
claim belt will require seven digital
4:10
outputs and 10 digital inputs if you are
4:12
unsure what the output or input is doing
4:14
start the baggage belt station in start
4:16
mode
4:21
[Music]
4:27
[Music]
4:33
[Music]
4:42
select view IO at the top middle of the
4:44
sorting station simulator window we can
4:46
manually run the airport baggage claim
4:48
without a control system like a click
4:50
PLC clicking on the outputs will allow
4:53
you to turn them on manually you can
4:55
then monitor the inputs to see their
4:57
operation the restart button at the top
4:59
of the machine simulator window resets
5:01
the scene to its starting point the
5:03
following table defines the inputs and
5:05
outputs IO and Modbus addresses we will
5:08
use in the Click PLC for this program we
5:11
can use the Click PLC software to view
5:13
the address picker and determine the
5:14
program's required Modbus
5:20
addresses step three develop a logical
5:22
sequence of operation
5:25
a flowchart or sequence table is used to
5:28
understand the process that needs to be
5:29
controlled thoroughly it must also
5:32
answer questions like the
5:34
following what happens when electrical
5:37
power and pneumatic air is
5:39
lost do we need
5:41
redundancy this step saves you a lot of
5:44
work by helping you understand
5:45
everything about the operation it will
5:47
help prevent you from continually
5:49
rewriting the PLC program logic knowing
5:51
all of these answers up front is vital
5:53
in developing the PLC program
5:56
the emergency stop button will start and
5:58
stop our airport baggage claim station
6:00
the top main conveyor will always be
6:02
running moving the bags around for
6:03
passengers to select their luggage if no
6:06
bags are sensed with photoelectric
6:08
sensors 1 and three a work part output
6:10
will be energized this will create a bag
6:12
and move it to the distribution table
6:13
when photo 2 senses the bag the
6:15
distribution run output will be on as
6:17
the bag moves toward photo 3 if photos
6:20
three and one are on this is a large bag
6:22
the distribution run left will turn on
6:24
sending the bag to the left when photo 9
6:26
sees the bag the left conveyor turns on
6:28
sending it up until it sees photo if
6:30
photo seven or a time delay is not on
6:33
then the bag will enter the top main
6:34
conveyor this is a small bag if photos
6:36
three and not one are on the
6:38
distribution run to the right will turn
6:39
on sending the bag to the right when
6:41
photo 8 sees the bag the right conveyor
6:43
turns on sending it up until it sees
6:45
photo 4 if photo six or a time delay is
6:47
not on then the bag will enter the top
6:49
main conveyor if you are enjoying this
6:51
video please hit the like button below
6:53
keeping up with all the latest
6:54
automation innovations can be difficult
6:56
so hit the subscribe button remember to
6:58
hit the bell beside your subscription to
7:00
receive the
7:01
notifications creating the sequence of
7:04
operations is the hardest part of the
7:06
programming development process getting
7:08
all of the conditions down for each
7:10
output based on the inputs is critical
7:12
let me know if you agree in the comments
7:14
below
7:16
a PLC programmer must know everything
7:18
about the sequence and operation of the
7:20
machine before
7:21
programming did you know that an
7:23
estimated 64 million bags are mishandled
7:25
each year at airports imagine the chaos
7:27
that could be avoided with automation
7:29
ask questions or review existing
7:31
documentation to ensure you understand
7:32
the logical steps involved in the
7:34
machine's
7:35
operation step four develop the PLC
7:38
program
7:39
writing the ladder logic code for our
7:41
click PLC baggage belt station example
7:44
will be the next step in our program
7:45
development we will use the click PLC
7:47
programming software and a click plus
7:57
CPU call up the address picker from the
7:59
home tab select the display modus option
8:01
to see the addresses used for our
8:03
communication we can now enter the names
8:05
for our inputs and outputs from the
8:06
machine simulator for our airport
8:07
baggage claim machine detailed
8:09
information on the click PLC can be
8:11
found in our click PLC series our
8:13
program will be written using ladder
8:14
logic ladder diagram do not worry that
8:17
we do not document all of the names in
8:18
our program this can be added later as
8:20
we need further variables in our
8:27
program save and transfer our program to
8:29
the click PLC it is good practice to
8:32
save often during programming this can
8:33
save you a lot of time if the unexpected
8:35
happens such as a computer crash or a
8:37
power
8:51
outage we will first program the top
8:54
main conveyor the modular conveyor
8:56
advance will be on when the emergency
8:58
stop is not activated the emergency
9:00
button input will be a condition to run
9:02
any rung of our ladder logic
9:14
program when we do not have the photo 3
9:17
bag in place and it is not rotating left
9:19
or right on the distribution table the
9:21
workpl creator will be activated this
9:23
will create the next bag to be placed on
9:25
our airport baggage claim our
9:27
distributed run output will always be on
9:29
when the emergency stop is not
9:32
[Music]
9:43
activated when a bag is in place with
9:45
photo 3 and photo one it indicates a
9:47
large bag and we are not running the
9:49
left conveyor to bring it to the main
9:50
conveyor then set the distribute run
9:52
left output this distributed run left
9:54
will be reset on the trailing edge of
9:56
the photo 9 large bag sensor
10:10
[Music]
10:20
when the distribute rotates left output
10:22
is on we will set an internal bit C1 to
10:24
run the conveyor to the main if the
10:26
internal bit is on and we do not have
10:28
objects in the way to move the bag to
10:30
the main conveyor or not the large bag
10:32
photo end sensor then the modular
10:34
conveyor left will be on our internal C1
10:37
bit will be reset on the trailing edge
10:39
of photo
10:42
[Music]
10:44
5 this is when the bag leaves the
10:47
conveyor and rotates on the main one
10:50
[Music]
11:01
[Music]
11:11
when a bag is in place with photo 3 and
11:13
not photo one it indicates a small bag
11:15
and we are not running the right
11:17
conveyor to bring it to the main
11:18
conveyor then set the distribution run
11:20
right
11:22
[Music]
11:24
output this distributed run rate will be
11:27
reset on the trailing edge of the photo8
11:29
small bag
11:33
sensor when the distribute rotates right
11:35
output is on we will set an internal bit
11:37
C2 to run the conveyor to the main if
11:40
the internal bit is on and we do not
11:41
have objects in the way to move the bag
11:43
to the main conveyor or not the small
11:45
bag photo 4N sensor then the modular
11:47
conveyor right will be
12:02
on our internal C2 bit will be reset on
12:05
the trailing edge of photo 4 this is
12:07
when the bag leaves the conveyor and
12:08
rotates on the main one
12:31
the latter logic rung program for the
12:34
objects in the way on the main conveyor
12:36
is similar on the leading edge of photo
12:38
7 and not the time delay we will set the
12:40
internal bit C11 on to indicate objects
12:42
are in the way so no bags must be moved
12:45
to the main conveyor this is for the
12:47
large bags being moved to the main
12:49
conveyor the leading edge oneshot is
12:51
used because the photo7 sensor must be
12:53
moved to allow the program to work
12:54
correctly you will notice that the
12:56
conveyor movement of the large bag will
12:57
sometimes trigger the photo 7 sensor
12:59
before it gets onto the main conveyor
13:01
when photo 6 and not the time delay we
13:04
will set the internal bit C12 on to
13:06
indicate objects are in the way so no
13:08
bags must be moved to the main conveyor
13:10
this is for the small bags being moved
13:12
to the main conveyor
13:16
save and download the PLC
13:25
program our program is now complete you
13:28
can download this program below
13:54
we communicate with the machine
13:55
simulator using Modbus TCP Ethernet or
13:58
wireless the ports will be set up with a
14:00
fixed IP address so the machine
14:02
simulator Modbus client can find the
14:04
Modbus server select Modbus TCP from the
14:07
communication port on the function tab
14:08
of the navigation window you can also
14:10
use the main menu bar setup bar comport
14:13
the comport setup window will now be
14:15
displayed click on the setup button for
14:17
port one you can now set the static IP
14:19
address on the compport setup details
14:21
window make a note of the IP address we
14:23
will need this to connect to our machine
14:25
simulator
14:41
select Modbus TCP setup from the main
14:44
menu shocks setup ensure the enable
14:46
Modbus TCP server is checked for our
14:48
port ensure that the PLC is in run mode
14:51
select status to see the active status
14:52
of the inputs and outputs on the ladder
14:55
logic step five test the program we will
14:59
use Modbus TCP on our Click Plus PLC to
15:02
communicate with the easy PLC machine
15:04
simulator call up the airport baggage
15:06
claim in start mode
15:11
the status of the machine simulator will
15:13
be at the bottom left of the screen
15:15
currently we have no PLC connected
15:17
select IO drivers at the top of the
15:19
screen the machine simulator IO number
15:21
will be displayed ensure we select more
15:23
IO than required for our baggage belt
15:25
machine the easy PLC driver is selected
15:27
by default under the driver pulld down
15:29
menu select Modbus driver this driver
15:31
supports both Modbus TCP Ethernet and
15:33
Modbus RTU serial protocols
15:37
select the configure
15:41
button we can now enter the information
15:44
for our Modbus driver select TCP IP this
15:47
means the Ethernet port on the computer
15:49
will communicate with the click PLC the
15:51
digital inputs from MS to the click PLC
15:54
will be C101 to C107 this will start at
15:57
address 16484 due to the offset of 1
16:01
digital outputs from MS to the click PLC
16:04
will be C201 to C2110 this will begin at
16:07
addressing 584 due to the offset of one
16:10
select the okay button you will now see
16:13
the inputs and outputs specified for the
16:15
mod bus driver we can now manually
16:17
assign the driver outputs to the PLC
16:19
inputs and the driver inputs to the PLC
16:24
outputs however the automatic assignment
16:26
works well and will save you time select
16:28
automatic assignment from the driver
16:30
option in the main menu
16:32
this will automatically assign the PLC
16:34
IO to the machine simulator IO select
16:37
start driver and exit from the main
16:45
menu on the bottom left side of the
16:47
window the driver communicates with the
16:49
click plus
16:51
PLC ensure that the click PLC is in run
16:54
mode we can see the operation of our
16:56
baggage belt machine test the machine to
16:58
see if errors occur
17:00
we know from our sequence of operation
17:02
that the sensor entry to the main
17:03
conveyor for the large bag will falsely
17:06
trigger on some of the bags mechanically
17:08
this must be moved our program used the
17:10
one shot to compensate for the sensor
17:11
location select view IO to know the
17:13
input and output status of the machine
17:16
simulator the digital inputs and outputs
17:19
of the MS will correspond to the PLC
17:21
controller
17:31
using the data view window of the click
17:33
programming software we can also watch
17:35
the input and output
17:37
[Music]
17:39
operations using a machine simulator MS
17:42
to test the program will ensure that our
17:44
program works troubleshooting is quickly
17:46
done without damage to any physical
17:47
hardware
18:01
[Music]
18:04
you can practice your modification and
18:06
debugging by modifying the sorting
18:08
station operation in the following way
18:10
move the photo before the large bag
18:11
opening to eliminate false triggering
18:13
you will also have to modify the one
18:15
shot in the
18:16
program add a counter for each of the
18:18
sorted bags the counter will show the
18:20
number of large and small bags on the
18:21
appropriate exit conveyor add a reset to
18:24
zero these
18:25
counters calculate the rate of bags per
18:27
hour this can be calculated using the
18:29
PLC ladder logic and indicate when we
18:31
need additional airport baggage claim
18:34
machines let me know how you make out in
18:36
the comments below to learn more about
18:39
using the machine simulator to develop
18:41
your PLC programming skills click here
18:44
click here to learn more about the Click
18:45
Plus PLC
18:49
[Music]
#Industrial Materials & Equipment
#Manufacturing
#Factory Automation