Up next in 10

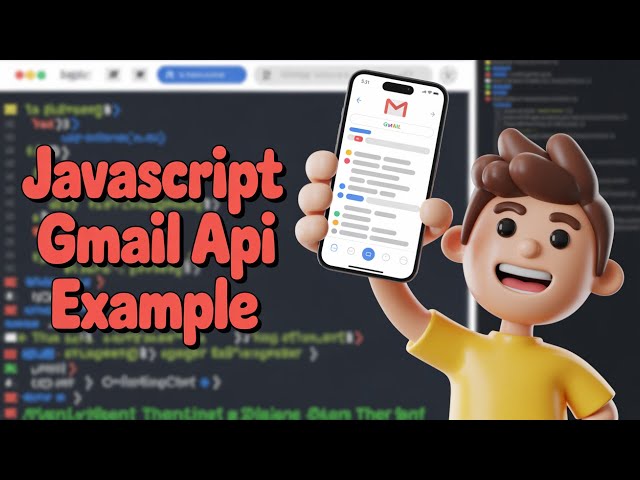
Javascript Gmail API Example to Display All Inbox Messages Using Fetch API & OAuth2 in Browser
Dec 9, 2025
Buy the full source code of application here:
https://procodestore.com/index.php/product/javascript-gmail-api-example-to-display-all-inbox-messages-using-fetch-api-oauth2-in-browser/
Show More Show Less View Video Transcript
0:00
Uh hello friends, today in this tutorial
0:02
I will be showing you that how basically
0:04
we can display the inbox messages inside
0:06
our Gmail account inside the browser
0:08
using the JavaScript Gmail API Google
0:11
Gmail API version 3. So basically you
0:14
can see that guys let me just uh reload
0:16
the application once again. This is my
0:19
application. Let me open this page here.
0:21
You will see as you load the page this
0:23
message will automatically be fetched
0:25
here. This is the date of the message
0:27
from to subject. This is my email
0:29
address. This is the actual email. You
0:31
can even click this email address and
0:33
this will open your email address like
0:35
this in a new window like this. So you
0:38
can see that this was the email address.
0:39
So there is also a slider given here.
0:41
When you load the page only five
0:43
messages will be shown. So if you just
0:45
increase this slider here automatically
0:47
some more new messages will be fetched
0:48
here. You will be displayed right here.
0:50
You will see that. If you once again
0:54
want to increase it, you will see some
0:56
more messages will be displayed here.
0:57
You can see that. So in this way guys,
0:59
you can display these inbox messages
1:01
inside Gmail. So first of all whenever
1:04
you there is also a log out button
1:06
available. You can even log out from
1:08
this application and you will be
1:09
redirected to the homepage. So basically
1:12
this is a oath to login application.
1:15
First of all you need to grant the
1:17
permission for your account here. So you
1:18
need to simply select your Google
1:20
account and go to advance here and
1:23
simply you need to select the scopes. So
1:25
it will read, compose, send and then
1:26
permanently delete all your email. So
1:28
simply click on continue. And now this
1:31
will display the messages straight from
1:32
your Gmail account. So this is the Gmail
1:35
account of mine guys. So it is really
1:37
fetching all these email addresses right
1:39
here and displaying it in the screen. So
1:41
you can see as I increase the slider
1:44
automatically these messages will be
1:45
fetched here and it is displayed in
1:47
inside a nice little table out there. If
1:49
you just go to inspect element, you will
1:51
see it is coming. All these objects are
1:53
returned to us. Each message has some
1:56
properties attached to it. So we are
1:58
just uh basically you can see it. This
2:02
is five messages are there. We have this
2:04
access token. With the help of this
2:05
access token, we are basically access
2:08
token expire in this is actual scope
2:10
that we granted permission. And
2:12
basically this is the object which
2:14
returned. Five messages are returned
2:16
when we load the page. And you can see
2:18
each message has a id property. With the
2:21
help of this id property, we are getting
2:22
some more information about this uh
2:24
message which is called as uh inside
2:27
payload we have this information inside
2:29
header which is you can see inside
2:32
header we have this information called
2:33
as from value. This is the address from
2:36
which the mail has come and we have the
2:38
two value as well to which address the
2:41
email has sent to. This is my email
2:43
address and the subject also. You can
2:45
even display the subject as well. You
2:47
can see that guys subject episode 298.
2:50
You will see that. And then basically
2:52
you you can see that these are the
2:55
different messages. You can see the date
2:57
as well. You can see date as well.
3:00
This is a date that we are displaying
3:02
here. So all these things are displayed
3:04
inside this object guys that we return
3:07
right here. And basically if you want to
3:10
see the snippet that we are displaying
3:12
right here, this is a snippet. So this
3:14
is coming right here from this. You can
3:16
see that this is a snippet that we are
3:18
showing here. So all these things are
3:20
displayed it inside the object. We just
3:22
need to display these details right here
3:24
in the browser. So I will be showing you
3:26
step-by-step process on how to build
3:27
this application from scratch. So
3:29
basically for doing this purpose, I have
3:32
written a complete blog post on my
3:33
tutorial website.com.
3:36
So the link is given in the description
3:38
of this video. So just follow the
3:40
step-by-step instruction guys. you can
3:42
definitely make this uh application. The
3:45
link is given in the description of the
3:46
video. So let's start building this
3:48
application. So we will first of all
3:50
close this folder and start from
3:52
scratch.
3:54
So basically I will go to my projects
3:56
directory guys. Here we will make a new
3:58
project. Let me make a new directory
4:00
here which is make directory uh Gmail
4:04
example. I will cd into this directory
4:07
and basically I will open this inside my
4:09
visual studio code text editor. So
4:11
basically guys this is a I have created
4:14
a playlist and basically this is a
4:16
second tutorial in the playlist and
4:18
there is already one tutorial available
4:20
to you. You can watch that tutorial in
4:23
the playlist and basically in that
4:25
tutorial I have shown you how basically
4:27
you can make a simple o to
4:30
authentication tutorial. So basically
4:32
this one basically contains all the code
4:35
which is required to generate the access
4:37
token. So I have made a uh separate
4:39
video for that. So this is my GitHub
4:42
repository. I will simply first of all
4:44
fetch the starting code for this
4:46
application. So
4:48
in in that tutorial I have explained
4:50
step by step how this application is
4:53
made. So simp go watch that tutorial
4:55
first in the playlist O2.
4:58
So we will simply cd into this. And uh
5:03
now you will see that guys in this we
5:07
have a folder here o2. And basically we
5:10
just need to here
5:13
simply copy all these files here.
5:17
Cut this and simply paste it here.
5:24
[snorts] So simply I will delete this
5:26
folder.
5:30
Let me just delete this folder here.
5:37
So now you can see that guys. So
5:39
basically you can see we have now
5:43
let me open this inside this command
5:45
line. So I can simply open command line
5:48
here. That's it.
5:51
So right here guys if you now open your
5:53
index html and in the blog post also I
5:56
have given this blog post link as well
5:58
if you want the full source code of this
6:00
starting application if you go to my
6:03
blog post I have given this link of this
6:05
blog post where you can read more about
6:07
it JavaScript or to Google login and log
6:10
out example using access token so with
6:12
watching this video you can even read
6:14
this blog post also so all the source
6:16
code is given so let me explain it once
6:19
again what we are doing right here. So
6:20
if you open this application, we have a
6:22
simple button out there which has a sign
6:24
in button. If you click this button, you
6:26
will be redirected to your page here.
6:28
And this time you need to basically uh
6:31
if you go to your uh
6:34
uh I think you need to go to script.js
6:37
if you're building it for your own
6:38
application, you need to replace your
6:40
client ID and redirect URI. So these
6:42
details you can get using if you go to
6:44
Google cloud console and basically you
6:47
need to fetch these details. First of
6:48
all, you need to enable the Gmail API.
6:51
So, enable the Gmail API. Simply search
6:54
for it and simply enable this. So, I
6:57
have already enabled this. So, now go to
7:00
credentials. And here you need to create
7:02
a credential guys. Simply click on that
7:05
oat client ID. Simply select this is a
7:08
web application. And uh here you need to
7:10
add these two things out there. So this
7:13
is our uh if I see here basically let me
7:18
see the homepage. So this is your
7:20
homepage guys. Simply copy this and
7:22
simply here if you go to it simply you
7:24
need to add this. So we don't need to
7:27
write index html here. Simply write
7:29
this. After this you need to write your
7:33
uh
7:34
redirect URI. Redirect URI is something
7:38
when you grant the access on which page
7:40
the Google would redirect. So we will be
7:43
redirecting the user to profile HTML.
7:45
That's it. Click on create. It will give
7:47
you these two two things out there. We
7:49
only need the client ID.
7:52
So simply copy the client ID and simply
7:55
go to script.js. So simply paste it.
7:59
And for the redirect URI guys, you just
8:02
need to provide the same URI that you
8:04
provided here.
8:06
So click on this pencil icon and this is
8:08
your redirect URI. Simply copy this
8:11
redirect URI and simply go to your paste
8:15
it here
8:17
and now open your profile.js guys. So
8:21
access token we will automatically get
8:24
but here you just need to provide the
8:26
URL for the homepage which is localhost
8:30
5500 index.html. That's it. This is all
8:33
the configuration you will need guys.
8:34
Now if you open this now click on this
8:37
button you will see that it will
8:39
redirect you to the page here where you
8:41
can select your account and after this
8:43
automatically your profile details will
8:45
be fetched here. This is the tutorial
8:46
that we done earlier on. You can see in
8:49
the console also we got the object. This
8:52
is access token all that stuff. Now we
8:55
need to simply call the API guys. So we
8:58
need to first of all make some
8:59
modification. go to profile dot html
9:03
and instead of displaying the profile
9:06
picture and name we will display the
9:10
other details. So here we will modify
9:12
the script here which is welcome to
9:15
Gmail inbox.
9:18
So here guys we will display the
9:22
uh we will have a simple div tag. Here
9:25
we will show the total messages which
9:27
will be displayed. So this will be total
9:30
messages
9:33
like this. After this guys you will have
9:35
a simple range element slider where we
9:39
the user can slide for the messages. So
9:41
ID will be number and the value will be
9:44
around uh we will be displaying 10
9:46
messages when you load the page. So by
9:50
default this Gmail API will can display
9:53
up to a max of 500 messages at one go.
9:56
And the minimum value let me say it's uh
9:59
around
10:01
uh one.
10:03
So now simply close it. And after this
10:06
guys you will have a simple table.
10:09
So inside this table we will have the
10:12
table head tag.
10:15
We will have four uh columns guys here
10:17
which is date
10:21
from
10:24
to.
10:27
So instead of uh we can even add a
10:30
subject column as well. So we can also
10:32
add a subject column subject and the
10:36
actual email like this. So these are the
10:38
five fields will be there guys. So
10:40
[snorts] right here uh we also need to
10:43
include the bootstrap. So syn simply
10:45
included CDN right here.
10:49
And we will be giving basically a
10:52
bootstrap class to the table
10:55
table
11:00
and also we need to wrap this all this
11:02
stuff guys inside the container class of
11:04
bootstrap. So simply wrap all this in
11:06
the container class.
11:10
So now if you open this page guys you
11:12
will see this table will be there and uh
11:15
this is a slider. You can slide these
11:17
messages accordingly. And now we need to
11:20
make this profile.js. So inside we need
11:23
to now modify some code here. We need to
11:26
add some code here. So first of all we
11:28
will declare some parameters guys. So we
11:33
will declare a variable here which will
11:34
hold the actual message data such as the
11:38
message subject and the actual message.
11:41
This will be empty object and we also
11:43
will be displaying the total messages.
11:45
So we will need to get the reference. So
11:49
I think I need to give a id to it. So we
11:52
can see we have given the id total
11:55
and we are getting the reference. After
11:57
this we also need to
12:00
give it a ID to the
12:04
table body. If you see we need to create
12:07
a table body here.
12:10
We need to give it a id of result. So we
12:14
are just accessing it inside this and
12:16
declaring it.
12:18
After this guys we just need to declare
12:20
a number how many number of messages you
12:22
want to display. So for now we will only
12:24
be displaying five messages. So number
12:27
is five.
12:30
So after this guys we will be attaching
12:32
total.in HTML we will make it as number.
12:36
And if you now refresh your application,
12:38
you will see uh
12:44
if I go to profile html,
12:47
you will see I think it should display
12:51
five here.
12:53
Total dot inner HTML
12:57
[snorts] and also guys we also need to
12:59
display get messages and basically we
13:02
need to pass a number. So this get
13:05
messages will automatically fetch the
13:07
inbox messages from the Gmail API and we
13:09
are pro providing an argument number
13:11
five here. So after doing this guys
13:17
what we need to do is that if you see in
13:19
the profile HTML we have this total tag
13:22
here.
13:25
So what we need to do is that here we
13:28
need to say plus is equal to
13:35
let me see if it is working.
13:41
Sorry let me make this function and then
13:43
I will see. So this basically guys uh
13:48
this function which is get messages and
13:51
basically takes the number as an
13:53
argument guys. So inside this function
13:55
guys, we will first of all make a simple
13:58
fetch request.
13:59
And if you go to the Gmail API guy guys,
14:02
there is a method out there which allows
14:03
you to fetch all the messages. We will
14:05
make you let me show you that method. If
14:08
you go to the Gmail API
14:12
documentation, you will see this method
14:14
that I'm talking about.
14:19
So you can see search for messages
14:24
and you can even search for messages but
14:27
in this case we will only be displaying
14:29
all the messages here.
14:35
So this is a method we will use
14:36
messages.list.
14:39
So here you just need to provide the
14:40
user ID the user email address like
14:43
this. So this takes these parameters
14:45
maximum results you can provide.
14:48
So maximum is 500 and minimum is default
14:51
value is 100 messages. [snorts] So page
14:54
token is also there. If you want to
14:56
search for a specific message, you can
14:58
provide a Q parameter here. So this one.
15:02
So we will simply make this get request
15:04
guys to this URL guys. You can see that
15:07
you can simply copy this and we will
15:09
simply paste it here.
15:13
[snorts] So
15:13
httpgmail.googleapis.com/gmail
15:14
googleapis.com/gmail
15:17
version 1 users and also you need to add
15:20
the scope guys inside your script.js you
15:23
need to change the scope here to
15:27
gmail.com I think the scope is different
15:30
for gmail
15:33
you can uh see inside my blog post what
15:36
I'm talking about so this is the scope
15:39
mailgoogle.com
15:40
so just change it to
15:45
So this is a scope permission that we
15:47
need and now go to this one and user id
15:50
for this one guys we need to fetch our
15:53
own mail id messages. So here we can
15:55
write simply me like this. Put a comma
15:59
and here we provide to method will be
16:02
get.
16:04
And here we need to attach the headers
16:06
guys which will be new headers. And here
16:09
we need to attach the authorization
16:10
header which is uh b e a r e r error and
16:15
followed by your access token. So we can
16:18
just provide this dynamic string access
16:22
token. So this access token that we uh
16:25
storing inside local storage you will
16:27
see that
16:30
uh oh I think we need to move this code
16:34
just
16:36
yeah we need to move this code below
16:40
just above this so that access token
16:41
variable is a variable sorry available
16:44
so paste it. So now you can see we are
16:46
getting this access token from the local
16:48
storage and we are simply providing this
16:51
access token. That's it. So let me
16:53
delete this fetch request. We don't need
16:55
this.
16:57
So this is our method guys which we are
16:59
declaring get messages. So we are
17:01
providing a simple fetch request and we
17:04
are passing the access token and also
17:07
guys this takes a parameter which is
17:09
maximum results and we can provide it
17:11
like this question mark maximum results
17:14
and then we can concatenate the number
17:16
which is passed. So it will only display
17:19
five messages by this property
17:22
and after this guys we just need to now
17:27
it returns a promise. So we can say dot
17:30
then and our promise will be returned to
17:32
us and data will be there. So first of
17:35
all we need to convert the data to JSON.
17:38
Then again this returns a promise. We
17:40
can simply say here
17:43
info and
17:46
we can console log info like this. So
17:49
what will happen guys if I execute this
17:51
application
17:53
you need to first of all grant a
17:54
permission for the Gmail API. So you
17:58
need to grant this permission and you
18:00
can see inside our console
18:05
it is saying document is not defined. I
18:08
think I made a mistake here. Yeah.
18:11
Inside here uh
18:17
yeah yeah document this needs to be
18:19
document.
18:21
So that is a mistake is there. So let me
18:24
change it. So now if you refresh it
18:30
click it.
18:32
So five you can see it is displaying
18:34
here as I am changing value it is not
18:36
updating it because we need to attach a
18:38
event listener. So whenever its value
18:39
slider value is changed we need to
18:41
update this value. So if you now see
18:44
guys uh basically it will give me this
18:46
uh error that uh cannot
18:50
uh this one which is button on click log
18:53
out
18:57
uh we need to have a log out button as
18:59
well. You can see these messages are
19:00
fetched here. Five messages are fetched
19:02
here. So each message has two properties
19:06
ID and the thread ID. So we need to make
19:08
use of this id parameter guys to fetch
19:11
more information about this message and
19:13
uh such as the subject from to email
19:17
address all that stuff. So we need to
19:19
get this ID. This is very important. So
19:23
after this uh let me first of all add
19:27
the log out button guys. So
19:34
ID log out and
19:38
log out. If you now see we will have a
19:40
log out button as well. So if you click
19:42
it you will be sign out. So if you again
19:46
sign in you need to grant the permission
19:47
for this. So
19:50
click on this
19:54
you need to allow these permissions and
19:56
once again you will see this uh response
19:59
will be coming from the API that we made
20:01
a m you can see five messages are there.
20:04
So basically you can see messages is a
20:07
basically an array. So we need to use a
20:09
for each loop for this. So you can
20:11
simply say here we can use and basically
20:15
here uh uh let me just make a for each
20:18
loop. So array from we can use this
20:22
method and we can simply say info dot
20:25
messages. This is an array and here
20:27
we'll use the for each loop and for each
20:30
message we need to display the
20:32
properties guys. So for each message we
20:34
will be displaying the properties.
20:37
So first of all what we need to do here
20:39
we need to make a simple
20:44
uh again a fetch request.
20:48
So [snorts] basically this will be the
20:49
endpoint and uh let me show you the
20:52
endpoint that I'm using. If you go to
20:53
the documentation you will see this is
20:55
the method get method that we are using
20:57
of the Gmail API. So get method is you
21:01
can see get method it basically uh gets
21:04
the detail of individual message. You
21:06
need to provide the ID of the message
21:07
like this at the later half. Here you
21:10
can see that. So this is a simple get
21:12
request we need to make
21:15
from the fetch API.
21:21
So you can simply just paste it here
21:23
like this.
21:25
And here we can simply uh use a back
21:28
tick symbol.
21:33
[snorts] And we can simply uh paste the
21:37
id which is coming through message dot
21:40
id. That's it.
21:42
So just put a comma and again we need to
21:45
provide the method to be get.
21:49
And again we need to attach the headers
21:51
guys which is new headers
21:54
authorization
21:58
b e a r e r and uh this is the access
22:02
token. So again you can use actic
22:05
symbol.
22:10
[snorts] So that's it guys. So this is
22:12
again this will return a promise. So we
22:15
can simply say here dot then.
22:19
So first of all we need to convert this
22:21
to JSON.
22:24
This will again return a info here.
22:30
we can console log the info. So if you
22:33
do if you open this your profile html
22:36
guys what will happen it will also
22:39
display the details of each message. If
22:41
you see
22:44
it is saying that
22:47
it is saying login required
22:49
unauthenticated credential missing.
22:53
Uh
22:58
let me see guys what is the error
23:03
let me log out. Sign in once again.
23:14
Click on continue and
23:19
uh once you can see this one is coming
23:22
successfully. This is the message is
23:23
coming but this request is unsuccessful.
23:27
Let me check.
23:34
Okay. Okay. User ID. We also need to
23:36
replace the user ID guys. So you need to
23:38
put here me.
23:40
Put again me here because we are
23:42
fetching our own messages. So put a me
23:44
here. And uh once again refresh this.
23:49
[snorts] So you can see automatically
23:51
this is the ID of the message. It
23:54
basically fetches more details about
23:56
that message. History ID, ID, label ID,
24:00
payload which contains information about
24:02
the attachment, images, all that stuff.
24:05
We have this headers here. Inside this
24:07
headers guys you will see that we have
24:10
different information date from to sub
24:12
subject all this stuff. This is a
24:15
snippet also. So we just need to display
24:18
this information right here inside this
24:20
table guys. So what we can do is that
24:28
we can first of all store this
24:30
information which is message data.
24:33
Basically this is an object
24:37
and inside this we need to first of all
24:40
uh store the id of the message. So data
24:44
do ID and we also need to store the
24:47
message actual actual message data dots
24:51
snippet.
24:52
That's it.
24:56
So after this guys what we need to do is
24:58
that after storing this detail we need
25:01
to now
25:03
make a
25:06
result.
25:07
This will be empty array
25:10
and as you can see guys this we need to
25:13
fetch the details of the headers. So we
25:16
will simply loop through again array
25:18
from. So this is a uh simple array
25:21
data.p payload do headers.
25:24
Again we will use the for each loop for
25:27
looping through all the headers that are
25:29
available.
25:30
So this will be let me take a index
25:33
variable message.
25:36
This will be in an arrow function. So
25:38
this is slightly complicated guys but
25:40
still I will give the all this source
25:43
code in the description of the video. So
25:44
don't worry about it.
25:47
So now we need to fetch all this
25:49
information. So we only need three
25:51
information here. We need the date from
25:54
to and subject. So basically we will
25:56
simply say if message dot name property.
26:01
There is a name property here. So we
26:03
will simply compare it in if condition.
26:05
>> [clears throat]
26:05
>> If it date,
26:08
if it is a basically
26:11
subject [snorts]
26:13
and if it is we can uh transfer it
26:19
message.name name is if it is
26:23
to
26:27
and if it is uh from.
26:34
So in either of these four cases guys if
26:37
these properties exist then we need to
26:39
display these properties.
26:46
So inside [snorts] this if condition
26:47
what we need to do we need to simply
26:50
push these entries inside this result
26:52
array that we are storing. So we can say
26:55
result dotpush
26:59
we can say message
27:04
dot value. We need to push the value. So
27:07
we can push the value here. That's it.
27:12
And uh just after this guys uh if you
27:15
now
27:21
I think yeah if you now console log the
27:23
result here just to check if these
27:27
information are stored or not. Let me
27:29
just uh again refresh the application.
27:36
So if you check here guys, it is saying
27:38
that data is not defined.
27:41
Uh let me see
27:49
message.
27:55
Okay, sorry. This is info, not data.
27:57
Sorry. Sorry. Info. This is info here.
27:59
So we need to replace here info.
28:05
So just [snorts] replace it as info
28:06
guys. So now if you once again refresh
28:08
it.
28:14
So you can see that our constructed
28:16
array is constructed. This contains the
28:18
date. This contains the from. This
28:21
contains the to and this contains the
28:24
actual subject. You can see that four
28:26
details are there. So we need to simply
28:28
display these four details first inside
28:31
these columns. And lastly we will
28:33
display the snippet.
28:35
So in this way guys you can simply
28:37
display these details inside the
28:39
browser. So now let me just do this
28:43
process very easily.
28:46
So if you are watching it for the very
28:47
first time please hit that like button
28:49
subscribe the channel as well. So after
28:52
doing this guys uh we will simply
28:55
render all these values inside the
28:57
table. So we got the DOM reference which
29:00
is div result. we will make inner HTML
29:04
plus is equal to inside back tip symbol
29:07
we will write multiple lines of
29:10
JavaScript code. So this will be table
29:12
rotac and basically guys inside this we
29:16
will say here table data
29:20
we will simply here
29:24
say result zero. Basically this is an
29:27
array. So that's why we can use this
29:29
indexing structure like this.
29:34
We can copy three more times.
29:39
This is one. This is two and this is
29:42
three.
29:50
So now if you just uh refresh your
29:52
application guys hopefully these details
29:55
will be
29:57
you can see that this is a date this is
30:01
a from this is the two and this is a
30:04
subject I think sorry subject and two is
30:08
so what we can
30:12
uh we can just uh place two here and
30:15
three here.
30:20
So you can see so it is slightly
30:24
complicated. So you you get the point
30:26
that we are basically fetching all these
30:28
details here. You can see that this is a
30:30
date all these details are fetched. And
30:32
if you increase this number this will
30:35
not update because why it is not
30:37
updating we need to add a simple event
30:39
here. So whenever this value changes we
30:41
need to change this. So we can simply
30:44
here bind a on click here. So as you can
30:48
see we have given this element an ID.
30:52
This input element I have given this ID
30:54
of number.
30:58
So here we can simply say here
31:02
number number input.
31:11
So after getting this reference guys we
31:13
can simply attach a
31:15
number input dot onchange
31:18
we can attach a function here which will
31:22
ex automatically execute. So here we
31:25
will first of all inside this function
31:27
guys we will change the value of this
31:30
total
31:31
total dot inner HTML
31:36
will be equal to
31:39
number input dot value
31:44
and also we need to update the value of
31:46
number as well
31:48
similar to number input
31:51
and then we need to call the same
31:53
function once again get messages and
31:55
pass this number value like like this.
31:58
So if you now refresh your application
32:00
now you will now see
32:03
this will update automatically as you
32:05
can see that
32:08
more messages are fetched here you will
32:09
see.
32:15
So in this way guys you can fetch all
32:18
these messages like this you can
32:20
increase it to very large value. You can
32:22
see that how many messages are.
32:25
It is tremendous application guys. You
32:27
can basically fetch all the messages
32:29
inbox messages very quickly using this
32:32
Gmail API.
32:34
All the source code is given in the
32:36
description of this video and uh I will
32:39
make more videos in this playlist. So I
32:42
will extend some functionality. I will
32:44
add some more buttons here where you can
32:46
uh search for messages. We can also add
32:49
delete button as well where we can
32:51
delete messages.
32:53
So keep watching this playlist and I
32:56
think one more thing is remaining. We
32:58
need to add it like this. We need to add
33:01
a message property as well. So as you
33:05
can see that we are storing this uh
33:07
inside our message data. We are storing
33:09
this
33:12
sorry this is message data.
33:15
You can see we are storing this uh two
33:18
variables id and the message. So here we
33:21
need to
33:22
lastly display the actual message.
33:26
You can see we are embedding this
33:27
message ID and message data actual
33:30
message. So now what will happen if you
33:34
open this
33:36
you will also have this clickable
33:38
message as well like this. So anyone you
33:41
can click this and basically it will
33:44
open it inside a new window inside your
33:46
Gmail account. So here you can view the
33:48
message whatever message is there you
33:52
can increase the number like this.
34:00
So in this way guys you can see that how
34:02
it is very nice application we have
34:05
built here. So I think it's a very
34:07
tremendous application. you should also
34:11
make this application.