Up next in 10

Angular 14 Project to Show List Data in Material Dialog Popup Window on Button Click in TypeScript
Dec 22, 2025
Get the full source code of application here:
https://codingshiksha.com/angular/angular-ngx-dialogs-example-to-display-data-image-popup-modals-dialogs-in-browser-using-ts/
Show More Show Less View Video Transcript
0:07
Uh hello friends. Today in this tutorial
0:09
I'll be showing you that how to uh show
0:14
pop-up window inside your angular 14
0:17
application and display some data inside
0:20
it. So basically there is angular
0:23
material kind of library inside angular
0:27
application. So basically this is a demo
0:29
of the application. You can see here if
0:31
I basically hit this button here this
0:35
popup uh material dialogue box will be
0:39
appearing here. You can uh also show
0:43
here full screen. You can see this is
0:45
the full screen dialogue window and it
0:47
contains some data inside it. This is a
0:49
list data. It is showing here list item.
0:53
So this is a first list item, second
0:55
list item.
0:57
So it's unordered list and there is also
1:00
a button to close this uh material
1:03
pop-up window. So basically if I close
1:05
this window the window
1:09
uh goes away. So this is a simple
1:12
application we will be building in this
1:14
tutorial where we will be showing this
1:17
popup window inside Angular 14
1:20
application.
1:23
So we will be making use of angular
1:25
material library.
1:27
So you can see that.
1:30
So for this I have written a complete
1:33
blog post on my tutorial website. So you
1:35
can see this is the material dialogue
1:37
box which contains some unordered list
1:40
data. So if you want to get all the
1:43
source code you can go to the
1:44
description of this live stream. So
1:46
step-by-step instruction is given. So
1:49
how to build this? You can also position
1:52
this uh dialogue box anywhere on the
1:54
screen by using X and Y coordinate. So
1:58
this is the application we will be
1:59
building. So let's start building it. So
2:02
let me delete all this source code and
2:04
start from scratch.
2:10
So the very first thing you will do guys
2:12
is you need to install this uh
2:14
dependency which is angular material.
2:18
Let me delete this all this source code.
2:21
So after you make your angular project
2:24
there is a command here which you need
2:26
to execute. I have given this command
2:30
here in the description of the live
2:31
stream. So basically you will see here
2:35
this is a command which is ng add the
2:39
rate angular/material.
2:41
So basically just execute this command
2:43
here and uh this will ask some questions
2:47
to you. Basically you need to choose a
2:51
theme here. I have choosed indigo pink
2:53
here and then it will say setup global
2:56
angular material typography style. So
2:59
for this you will say no.
3:01
So setup brow browser animation. So you
3:04
will say yes. So now basically this will
3:06
install the packages and all the
3:09
packages are installed. So after this
3:11
you will go to your app.module.ts
3:14
file and here you will just uh import
3:17
the dependency which is uh one line you
3:20
need to write here material dialogue
3:26
module. So matt dialog module so
3:30
basically this will be coming from
3:32
angular/material.
3:35
So here you just need to material/
3:39
dialogue
3:41
and then you need to add this inside
3:43
your imports array. So you will say matt
3:45
dialog module. So this is the only thing
3:48
that you need to do inside your app
3:49
domodule.ts file. So just close this
3:52
file and now you need to write inside
3:54
app do.component html file. So now to
3:58
start your application just write
4:00
ngsurf. So this will start the angular
4:02
14 application. So right here guys we
4:05
will have a simple button. So the button
4:08
will be simply open model window.
4:13
So basically whenever we click this
4:15
button.
4:18
So this will be a matt button.
4:24
And so whenever we click this we will be
4:28
opening a method which will be open temp
4:32
dialogue.
4:34
This is a method we will call.
4:38
So for the template of the dialogue box
4:42
we will have ng template.
4:47
So we will give it a reference to it so
4:49
that we can target an typescript which
4:52
is dialog ref
4:55
and then we also need to show some data.
4:57
So here we will say let my data.
5:00
So this is the name of the data that we
5:02
will be showing. So inside this we will
5:04
have H5 tag. So we will simply give it a
5:08
heading I am template dialogue
5:11
following list. So here we will be
5:14
showing unordered list. So we will make
5:17
use of this ng if directive
5:21
my data. So if this my data is set then
5:25
only we will show
5:28
LI tag. So here we will loop through by
5:32
using ng4.
5:36
So we will loop through let item of my
5:38
data
5:40
and we will uh show this item here like
5:44
this
5:46
and also we will be having a simple
5:49
button after this unordered list to
5:51
close the pop-up windows. So
5:55
basically Matt button
5:58
Matt dialogue
6:01
close.
6:04
So basically the label will be simply
6:07
close. So when you click this button the
6:09
dialogue box will be closed. I am from
6:14
dialogue land.
6:18
So now if you see here there will be an
6:21
error. It is saying that open temp
6:23
dialogue doesn't is not defined. So we
6:25
need to define this function. So just go
6:27
to app do.component.ts file. So here you
6:30
need to define this function.
6:32
So here
6:35
inside this you will need to define
6:37
this. So open temp dialogue.
6:41
So inside this function guys
6:45
but before that we also need to get the
6:47
reference. So here
6:50
we will use view child
6:53
and here we will need to give the
6:55
reference that we have given inside app
6:57
do.component html file. So if you check
7:01
here we have given this reference which
7:03
is uh uh this reference here dialograph.
7:06
So we are simply copy pasting this
7:08
reference here like this
7:11
and then dialog ref
7:17
and we will say template ref to any like
7:21
this. So this is imported here at the
7:24
very top here you will see
7:25
automatically.
7:28
So now we we need to uh just uh have the
7:32
list of data that will be displayed. So
7:35
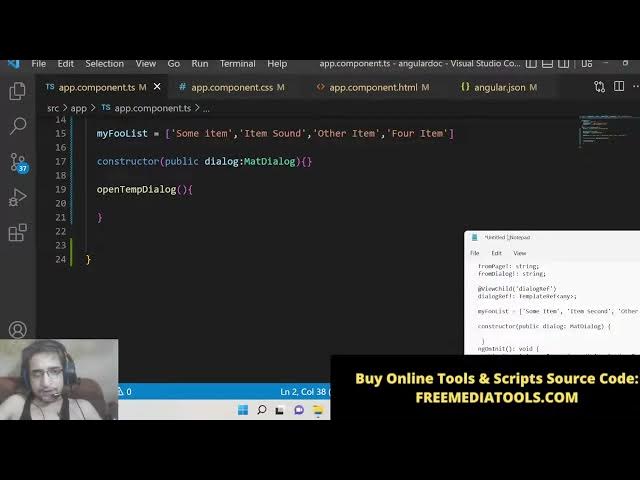
this is an simple array.
7:39
So which will contain list of items.
7:47
So we will have four items here in this
7:50
array which will be displayed in the
7:52
dialogue box. So then guys we will have
7:55
this constructor
7:58
public dialogue
8:01
which will be of the type matt dialogue.
8:05
So if you see here it will be
8:07
automatically imported here from this
8:09
add the rate angular/material/
8:11
dialogue.
8:13
So after this what we need to do is that
8:16
we also need to write this implement on
8:20
in it.
8:21
So this will implement this uh template
8:25
uh sorry
8:26
interface.
8:28
So inside this interface
8:32
we need to initialize our from dialogue.
8:36
So here we need to declare this at the
8:38
very top these two variables
8:41
from
8:44
dialogue.
8:45
This will be of the type string.
8:49
So here you need to uh initialize this.
8:51
So this dot from dialogue will be equal
8:54
to
8:59
like this. So just initialize this.
9:03
So now we can simply open this. So if
9:06
you see here if I refresh here localhost
9:09
4200.
9:15
So it is saying that
9:17
open temp dialogue.
9:24
Let me see what is
9:30
open temp dialogue.
9:48
Angular material
9:54
open temp dialogue.
9:57
We have
10:02
so when we click this button you will
10:03
see that we are calling this function
10:05
which is open temp dialogue.
10:09
[snorts] So let me just
10:13
Copy this once again. This can be
10:15
writing mistake.
10:25
So now you can see it is compiled
10:27
successfully. So basically if you check
10:29
here we have a simple got a simple
10:31
button out there. If I click it nothing
10:33
happens because we haven't written this
10:35
code. So we now need to show a dialogue
10:38
window material dialogue window.
10:41
[snorts] So inside this we will make a
10:44
variable my comp dialogue. So here we
10:49
will use this dot dialogue dot open
10:51
method and this dot dialogue ref we will
10:54
pass as a reference and the second
10:57
parameter will be the data that needs to
10:59
be shown.
11:01
So data will be coming here our list
11:04
data which is this dot my full list. You
11:08
will see that this is the data that we
11:11
need to show which contains four items.
11:14
And lastly what we need to do is that we
11:16
need to
11:19
after this we need to simply
11:24
have the different kinds of events. If I
11:27
just refresh it now, you will now see
11:30
this pop-up window will appear. This uh
11:33
dialogue box, this is a material
11:35
dialogue box which contains these four
11:38
items, first, second, third and fourth.
11:41
And there is also this close button. If
11:43
you close this, the pop-up window
11:46
closes. So this is a simple dialogue box
11:49
that we have materialized in Angular 14
11:52
with this open method. And now basically
11:55
you can play with this. You can also
11:57
make it full screen. There is a
11:59
different option out there. What you can
12:01
do after this put a comma and there is
12:04
also a option to make it full screen.
12:08
So there is a option here which is panel
12:12
class. So here you can give it a class
12:15
to it of uh
12:18
full screen. So there is a class full
12:21
screen dialogue
12:24
full screen
12:26
dialogue.
12:30
So now if you refresh it.
12:32
So we need to make slight changes here.
12:35
After this we need to also
12:38
put a height of
12:42
100 view height
12:46
height of
12:49
100 VH
12:52
and also
12:55
width we need to initialize to 100%.
13:04
So after doing this guys what we need to
13:06
do is that we also need to go to app dot
13:09
component uh css file and here you need
13:12
to give this style to it just uh target
13:15
this class which is full screen dialogue
13:18
and make the max width property of 100%
13:21
important. So now if you hit this it
13:24
will make full screen. So basically it
13:27
will take entire width of the browser.
13:29
So this is a full screen material
13:32
dialogue box which contains these four
13:34
items and a close button. You can even
13:37
increase the items. It totally depends
13:39
upon you whether it is coming through an
13:40
API
13:42
like this.
13:46
You can has as many items that you want
13:49
to display. It is totally up to you. Now
13:52
you can see that. So it is that easy to
13:56
make this material dialogue box with
13:59
data list data [snorts]
14:02
and also you can also place it
14:06
by using coordinates. So there is also a
14:08
property of position
14:11
and this position is an object which
14:13
takes the left position. You can specify
14:16
the left position of 50 pixel
14:20
and put a comma and the top position to
14:22
10 pixel. Similarly you can like this.
14:27
So now if you refresh it so basically it
14:30
will move through
14:32
in this position. So you can have this
14:36
80 pixel. So you can play with this
14:39
parameters positioning. You can place
14:42
your models in different kinds of
14:43
position by using you can also
14:46
manipulate this 10 to
14:49
50 pixel this uh left and the top
14:53
position.
14:55
So if you're watching it for the very
14:56
first time guys then please hit the like
14:58
button subscribe the channel as well. So
15:00
in this way you can do it and also there
15:03
are different kinds of events out there
15:05
which is uh there
15:11
which is uh after opened after the
15:15
dialogue box is opened this event will
15:17
fire before it is closed and after it is
15:20
closed. So now to check these events in
15:23
action just right click inspect element
15:25
and go to console and whenever you click
15:28
this open this you will see this event
15:30
will fire.
15:32
So whenever you close it two events will
15:35
fire before close and after close. So
15:38
this is a simple crash course on
15:40
material dialogue box in angular 14 guys
15:43
how to display data inside them. I have
15:46
shown you from scratch. So if you want
15:48
to get all the source code, go to the
15:50
description of this live stream and I
15:53
will be seeing you in the next live
15:55
stream. Until then, thank you very much.