Up next in 10

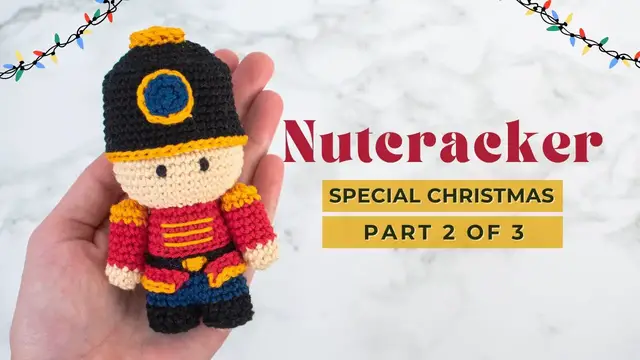
Nutcracker amigurumi pattern | How to crochet the Nutcracker crochet ornament PART 2
Nov 4, 2022
Learn how to crochet the Nutcracker, royal soldier amigurumi with this crochet tutorial!!! Super cute Nutcracker ornament, only 12cm tall. This is one of the eight amigurumi Christmas Ornaments tutorials available here on this channel!
Chapters:
00:00 Finishing the body
01:21 Head
10:08 Arms
14:24 Starting the hat
For PART 1: https://youtu.be/u6aUt_5AQW4
For PART 3: https://youtu.be/AHpvUtuyYxY
You can find the Nutcracker amigurumi crochet pattern free on my website here: https://littlecrochetfarm.com/nutcracker-the-royal-soldier-amigurumi-free-pattern/
For a low cost (3 USD) and printable pattern, you can find it here:
Ravelry: https://www.ravelry.com/patterns/library/nutcracker-amigurumi-2
Etsy: https://www.etsy.com/listing/1312363762/crochet-nutcracker-the-royal-soldier
If this video was helpful to you, consider supporting my channel by doing one of these little actions below:
★ You can like this video, or
★ You can share with your friends on social media, or
Show More Show Less View Video Transcript
0:00
Great, look at this! It's a body already! I add a little bit of stuffing material
0:06
so it's easy for me to hold the toy. So you can do that as well. Let's add here
0:12
stitch marker. I don't add stitch marker sometimes when it's too much of color
0:17
changes. And now let's work here the size of this body. So for rounds number 14 to
0:25
to 16 you will work 24 single crochet super easy so work here your 24 single
0:32
crochet and I will catch you up for the round number 17
0:40
super good look at this very nice now let's move on here for round number 17
0:47
and here you will work two single crochet, one decrease, repeat six times and you should have
0:58
a total of 18 stitches at the end of this round. So when I say the decrease here, I work invisible
1:04
decrease, which is when you grab just the front loop of the stitches. Again, there is a complete
1:09
tutorial here only about the invisible decrees. Repeat this all the way around
1:16
and once you reach your last decrease we will work here a color change. This is
1:25
the last color change from this body, okay? We will start working the head now
1:29
So for round number 18 you work back loop slip stitch. So now here I believe
1:35
you are trained with the back loops. To work here the back loop slip stitch
1:45
and I want to show you here, because for the next round we will work a bit different
1:51
So, you work here, let us just cut this yarn off, we don't need the red anymore
1:58
You give a simple knot. Okay. Again, just a simple note, this will be facing inside of the toy
2:08
It's not going to be seen. And you see this line here, these are the remaining front loops
2:19
So first let's just add here a bit of stuffing material. So stop here, add your stuffing material, and let's continue
2:31
For this next round, I want to show you this, we will work in the remaining front loop of
2:38
the previous round, okay? This one in red here. So for round number 19, you will work in the front loop, one single crochet, one increase
2:49
repeat nine times and you should have 27 stitches at the end of this round, okay
2:56
Here I will show you later why we are working in the front loop, in this remaining front
3:01
loop of the previous round. Here, let me finish my first repetition. Let's move on for the
3:09
next one. One single crochet here and one increase. Okay. Super good. You see the slip stitch will be
3:26
facing inside of the toy. Okay? Work all the way around and this is how it should be looking like
3:34
And remember to add your stitch marker. Sometimes I'm forgetting to do this but I highly tell you
3:40
to add stitch marker every time so you don't get lost. Now for round number 20, you work two single
3:48
crochet one increase repeat again nine times or all the way until the end and you should have 36 stitches here at the end of this round Count how many stitches you have
4:00
at the end of every round, okay? This is, this helps a lot. All right, we are done
4:09
with this round and now let's move on for with the last round with increases
4:14
Here for round 21 you will work 5 single crochet, 1 increase, repeat 6 times, and
4:20
you should have 42 stitches at the end of this round. So as always let's work
4:27
here first repetition together. And here it's my increase. Count how many stitches
4:39
okay? This helps a lot. One, two, three, four, five, and this is my increase. Repeat all the
4:47
way until the end or repeat six times. Great! So now we achieve the size of the head we want
4:54
and now let's work a couple of rounds here without increases. So for round 22 to 29
5:01
you work 42 single crochet. So here I always say is the fun part, you only have to work the 42
5:07
single crochet. It's a lot of repetitions. So, work your rounds here and I will catch you up once
5:14
you finish all of these rounds for the round number 30. Great, look at this. This is very nice
5:23
So, here we have the three rounds with increases and here you have the 22, 23, 24, 24
5:33
I lost my count, but it's eight rounds with 42 single crochet
5:43
Now for round number 31, for round number 30, you will work five single crochet, one
5:50
decrease, repeat six times, and you should have 36 stitches at the end of this round
5:56
So here I worked the five stitches and now my invisible decrease
6:01
I'm sorry if I got a little bit confused, I'm having pregnancy brain
6:07
Okay, work all the way around. And now here for round 31, now it's 31, you work 4 single crochet, 1 decrease, repeat 6
6:20
times and you should have 30 stitches here at the end of this round
6:24
And I will go decreasing here 6x6 until you achieve 12 sc at the end
6:32
So once again my invisible decrease here. Alright, work all the way around
6:41
And let's move on for round number 32. Here you work 3 sc, 1 decrease, repeat 6 times and you should have 24 stitches at the end
6:52
of this round. And we will be almost done with the head of this delightful toy
7:02
Super good. My invisible decrease. First repetition here with you. Work all the way around
7:11
And let's move on now for round number 33. You work two single crochet, one decrease, repeat six times and you should have a total
7:20
here of 18 stitches at the end of this round. Oops. I lost a little bit of stitch here
7:35
So one, two, and my decrease here. Okay now it correct Let finish this first repetition Five more to go So work here all the way around And now this is how it should be looking like and we
7:57
add a little bit of stuffing material here. Okay? So stop your video here, add as
8:04
much as you want of stuffing material and I will catch you up for the last round
8:10
Great. Now here for the last round you will work one single crochet, one decrease
8:16
repeat six times and you should have a total of 12 stitches at the end of this
8:22
round, okay? Super good
8:40
all right now you can cut this thread here you leave a tail here for fastening this off
8:49
and I will show you how we will do it is together all right you grab here only the front loop of the
8:59
stitches okay so front loop here front loop here watch out so you don't take the the loops you know
9:09
in between the thread, between the plies. So this can make it difficult for you when
9:17
you're pulling up to close this. So grab just the front loop, try not to be in the middle
9:23
of the thread, you know, between the plies. This will make you, this will help you to
9:29
be more neat, the ending. But we will add a hat here so even if it's not neat it's not
9:35
going to be seen. Now you pull it tight to close, okay? And we will secure this tail
9:42
here going around inside the last round here, the last round inside the stitches
9:50
And once you do this couple of times, you wave in this remaining tail a bit of time
10:00
cut the yarn and tada very nice all right moving on here and starting to work the arms of this toy
10:11
okay so with the magic ring once again you work five single crochet this time inside the magic
10:23
ring so if you don't know how to make the magic ring if you need further help if this
10:30
video. Always if this video is too fast for you, check the links in the
10:35
description. There is tutorials in this channel of everything. One, two, three
10:40
four, five. Super good. Pull it. The yarn, close this magic ring and let's move on
10:48
here for the second round. Here you will work five increases, having a total of 10
10:54
stitches at the end of this round. So here work your increases all the way
11:00
around. So this is one increase, this is another one. Work all the way around, I'll
11:10
move fast here. And I will just remind you to secure the beginning of your yarn
11:20
so these arms can be secured and closed okay super good that's enough now we'll
11:35
work one round here more with single crochet okay so for round number three you work 10 single crochet here in beige
11:46
And then we'll work a color change, of course. This soldier is full of color changes
11:54
Check the link in the description where I show you the most used ways to change colors in toys
12:00
Sometimes I use the most basic ones. Sometimes I use my favorite one, which is the second one from the tutorial of the color changes
12:11
All right, let's work here now the color change on the last stitch of this round
12:18
And now for round four to eight, you will work 10 single crochet
12:22
Okay, so here we give the length of the arm the size here
12:28
so work here your single crochet and i will catch you up for one more color change why not
12:37
super good so here will change again to this golden yellow and you work round nine and ten
12:47
ten single crochet okay so it's very easy and we will stop there don't worry it's almost done
12:57
We don't have the creases here for this arm. Okay. So, here we'll stop a little bit
13:08
You can cut your threads. You see I cut the red already
13:12
Let's cut this with a little bit of room because we will fasten this off and we will later
13:17
on sew. And we'll add a bit of stuffing material here. Here, differently than the other arms where we add a little bit of material, you can add
13:26
here all the way until the top the stuffing material and for fastening this off you grab
13:33
again the front loop of the stitches, okay? So, here grab all the front loop of the stitches and then you pull it tight
13:55
pull it tight you can you can as I showed you before just waving this inside
14:01
the last round the last the stitches from the last round and you bring this
14:08
tail here to the central of the arm because we will sew this on the sides
14:15
later starting from there okay so like this one you make another one
14:22
good now with the black thread here we will start working the head of this toy
14:30
okay so once again you start here with the magic ring and you work here six
14:39
single crocheted inside the magic ring so work here your single crochets I will
14:52
move this fast because you've seen this a couple of times here already. Double
14:56
secure the beginning of your thread and move on for the round number two. You work
15:01
here six increases and you have a total of 12 stitches. Here once again I will go
15:07
fast. We've done this a couple of times in this tutorial already. So work your
15:13
round number two and let's move on. Here we'll start working the increases. Remember
15:19
to double secure the beginning of your thread, okay? So, for the third round, we start increasing
15:25
So, you will make one single crochet, one increase, repeat six times
15:30
and you should have a total of 18 stitches at the end of this round
#Arts & Entertainment
#Crafts
#Fiber & Textile Arts
#Toys
#Stuffed Toys
#Art & Craft Supplies
#Educational Toys