Up next in 10


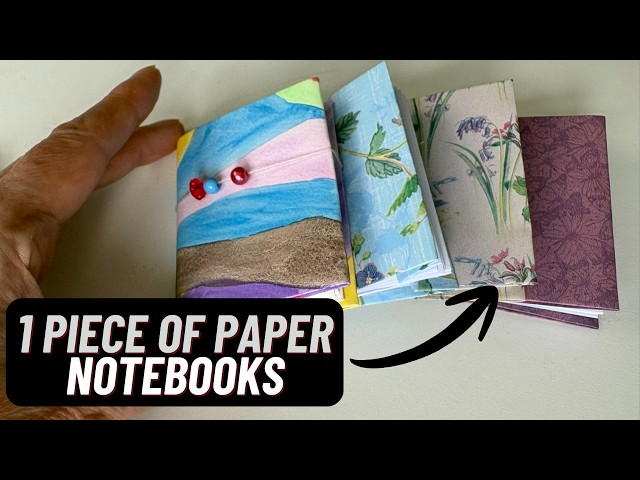
Make a tiny notebook from just ONE sheet of copier paper. Perfect for beginners and brilliant for budgets. In this tutorial I'll show you step-by-step how to make a miniature notebook from a single piece of A4 paper. It takes about five minutes, costs absolutely nothing, and you end up with a real little working notebook with 8 pages. One of my favourite quick paper crafts!
This is brilliant for:
✅ Beginners and kids
✅ Using up paper you've already got at home
✅ Budget-friendly handmade gifts
✅ Classroom activities or party favours
All you need:
📄 1 sheet of A4 or letter-size copier paper
✂️ Scissors
👆 Your fingers to crease — no tools needed
More Papercraft ideas 👇
https://www.youtube.com/playlist?list=PLJDvtpQDF0PesspIWBs7l0jGcjHJc_Vwu
#paperfolding #paperfoldingcraft #papercrafts #budgetcrafting
Get vidIQ to grow your channel faster! 🚀
https://vidiq.com/ChristinesCrafts
Show More Show Less View Video Transcript
0:00
Most people think you need lots of
0:02
equipment to make tiny notebooks.
0:04
You just need a piece of this
0:06
to make cute little book like this.
0:09
Obviously, I've put a cover on it. I'm
0:10
going to show you exactly how to do it,
0:11
all the folds, all the cuts. Let's get
0:14
going.
0:15
So, you need your piece of paper. Mine's
0:17
A4, but letter size works just the same,
0:19
and this is ordinary copy paper.
0:22
Now, you'll see that you can use a
0:23
thicker paper. I've sometimes used a
0:24
watercolor paper,
0:26
but all you need is a piece of ordinary
0:28
copy paper.
0:29
So, fold it in half lengthways.
0:33
And just be as precise as you can be.
0:36
You want to be nice and accurate, and
0:38
make it a good crease. Now, you can see
0:39
I'm using a little boning tool,
0:42
plastic one. Um you could use the back
0:44
of a ruler. You could just use your
0:46
fingernail. It really doesn't matter.
0:49
And then fold it again
0:51
lengthways.
0:53
Again, you'll see I'm taking care
0:56
and getting a good crease on there.
0:59
And then open it back up.
1:03
See if we can get it open.
1:05
And you'll see you've folded it that
1:06
way.
1:07
And then you're going to fold it in half
1:10
the other way.
1:12
Again, be nice and careful. I mean, the
1:15
crucial thing with these is really just
1:17
be nice and careful with your folds.
1:19
Try and get a good fold in the right
1:21
place, and it just makes it really easy.
1:24
So, you're going to fold again. Now,
1:26
just make sure you hold the paper
1:28
together.
1:29
So, again, you're getting that accurate
1:31
fold.
1:34
But as you can see, there's nothing
1:35
really complicated here.
1:38
You've just split your paper up into
1:41
Let's open it up.
1:43
16 rectangles.
1:46
Okay?
1:48
And now we're going to get our scissors,
1:50
and we're going to cut exactly where I'm
1:53
showing you, but we're only cutting
1:56
along three of those rectangles.
1:59
Okay? So, I've done it up up that fold
2:00
at the right-hand side. And I'm going to
2:02
do the same up the fold on the left-hand
2:05
side, and not the middle one.
2:07
Okay? Let's be clear. I've gone the
2:09
right-hand side and the left-hand side.
2:13
Not the middle one.
2:15
And then turn the whole page round
2:18
and cut the middle one the opposite way.
2:21
Again, just the three rectangles. And
2:24
this is going to allow you to fold it
2:27
correctly.
2:28
So,
2:29
there you go. It should look like that.
2:33
And then you're just going to start at
2:35
one end
2:36
and fold. And you're folding alternate
2:40
ways. So, you fold to the front,
2:44
to the back,
2:46
to the front,
2:48
to the back, to the front, to the back,
2:51
to the front, to the back, and so on.
2:55
And keep going, and make sure you go
2:56
front, back, front, back, front, back,
2:59
and it will end up right.
3:02
And you can see how it looks.
3:04
And you can see
3:06
that I've got that side that opens up
3:10
the same on both sides. Okay?
3:13
See what I mean if I can open it. You've
3:16
got that one sheet that opens on both
3:18
sides, and then all those pages in the
3:20
middle.
3:21
And you've basically got a little
3:22
notebook. And you could just stick along
3:25
that edge with a piece of tape, and that
3:27
would act as a spine, but that's quite
3:29
dull. So, the best thing to do is to get
3:31
a piece of pretty paper, any paper you
3:33
like,
3:35
and so long as it's big enough to wrap
3:36
round your little notebook, it's big
3:39
enough.
3:40
So,
3:41
I'm just going to do it where I'm just
3:43
going to mark that top,
3:45
and I'm going to fold the top in. So, I
3:48
haven't done any fancy measuring. I
3:49
haven't told you what size piece of
3:51
paper because it doesn't matter.
3:53
Just get a piece that's big enough,
3:55
and then fold that top over. And you
3:58
really just want this about the same top
4:01
and bottom. You don't want it to look
4:02
out of proportion, but about the same
4:04
top and bottom.
4:05
So, you can see I can put my little
4:07
notebook back on,
4:08
and I don't want it right on that top
4:10
edge. [laughter] I just want a little
4:12
gap so that it's slightly bigger than my
4:15
pages.
4:16
And then I'll fold up from the bottom
4:18
and just mark it at the bottom.
4:21
Again, I'm going to put my ruler on and
4:23
fold up my ruler. I haven't done lots of
4:25
measuring. It's not super precise. This
4:27
makes it a great craft for everybody.
4:29
It's great to do with children as well
4:31
as adults.
4:33
And then let's go along there.
4:35
So, now I've got a cover, and it wraps
4:38
around my little notebook and looks
4:40
lovely.
4:41
And then how much you want to wrap round
4:44
to stick inside the front cover and the
4:46
back cover is entirely up to you. You
4:48
see, I just squeezed it to mark where
4:50
the middle is.
4:53
And then you can position your notebook
4:55
and just mark where you need to fold it
4:58
just by folding it over.
5:03
Okay? Just fold that over.
5:06
And later on in this video, I'm going to
5:08
show you different ways you can fasten
5:09
these up. Um cuz you can just leave it
5:13
as it is, or you can fasten it up. So,
5:15
again, I'm just making sure that's a
5:16
good crease. And you can see mine's
5:18
overlapping quite a long way, but you
5:19
could just have a little
5:20
a small overlap. That's what I was
5:23
trying to say.
5:24
You can see how that's going to stick in
5:25
there.
5:27
And so, position it,
5:30
and then
5:31
fold this side
5:33
so you know where to fold it.
5:36
Okay? And if it's in the way, just take
5:38
your little book out again
5:40
and get a good fold on this side. And
5:42
you can see you're just lining it up so
5:44
it sits inside the main cover.
5:47
Let's get a good fold on there.
5:50
Now, I'm just going to put the little
5:51
notebook in and check everything's okay.
5:56
Yep, it's looking good. It's looking
5:58
nice. It all works.
6:01
And then I'm just going to glue it in.
6:02
Now, I'm just using an ordinary paper
6:05
glue stick. You can use any glue you've
6:07
got. Okay? You don't need something
6:09
super strong or super exciting. You're
6:11
just sticking paper to paper.
6:13
So, I've done it with a glue stick to
6:14
show you that it does work.
6:17
And then place your little notebook in
6:19
your pages,
6:21
and stick that down.
6:24
And just apply some pressure.
6:27
Okay? And then we're going to do the
6:29
same with the back cover of this
6:32
notebook.
6:33
So, if you're enjoying this video, could
6:35
you give it a thumbs up so it spreads to
6:36
more people, please? I do think they're
6:38
really cute little notebooks, which are
6:40
so easy to make. Nothing complicated
6:42
here.
6:45
And at the end, I'm also going to give
6:46
you the opportunity to see some um
6:49
notebooks that you can buy ready printed
6:52
that you can make up from one page,
6:54
which is another way of doing this.
6:56
Okay, so I'm just squeezing that, and
6:58
I'll probably leave it to dry, maybe
7:00
even put a book on top of it so it it
7:02
sticks nice and flat.
7:04
So, let's look at these other notebooks.
7:05
There's just another one done in the
7:07
same way.
7:10
You see, it's just the same. And here's
7:12
one I've made out of watercolor paper,
7:14
and I've fastened it by getting a little
7:16
bit of elastic and putting some beads on
7:18
it and tying it into a loop. But you can
7:21
see the paper's a little bit thicker, so
7:23
that would be great as a little art
7:24
journal if I want to go and draw little
7:26
pictures or paint little pictures while
7:27
I'm out and about.
7:30
So, you can see I can just hold that
7:32
with that, or
7:34
just put a hairband on it.
7:36
A little hairband works really well to
7:38
hold these closed, too.
7:40
So, another way you can hold these
7:42
closed is by making them
7:45
with a ribbon to fasten.
7:48
So, all I've done is cut an extra
7:50
rectangle of paper to go in the front,
7:52
and an extra rectangle of paper to go in
7:53
the back.
7:54
And then you need to glue a piece of
7:57
ribbon in both sides.
8:00
So, the piece of paper we're adding in
8:02
is just going to hide it. Now, because
8:03
we're gluing the ribbon, I've decided to
8:06
use tacky glue.
8:08
You'll see me wrestling with the tacky
8:09
glue because
8:10
I always have trouble with the nozzle
8:12
blocking up when you leave it. Now, if
8:14
anyone could tell me in the comments
8:16
below how to stop that happening if you
8:18
use tacky glue, I'd love to hear it.
8:21
But when I've finished wrestling with
8:23
it, I'm just going to run tacky glue all
8:25
over
8:27
the piece of paper that I'm going to
8:28
stick in.
8:29
And I'm going to stick my ribbon in the
8:31
center of the cover.
8:34
And I haven't got them down to length or
8:36
anything. I've just got a decent length
8:38
of ribbon.
8:40
You could decide how long you want it,
8:42
but I decided I'd got these pieces, I
8:44
would just use them.
8:45
I keep a lot of bits and pieces of
8:47
ribbon, and they're great for projects
8:49
like this.
8:50
So, you can see it didn't have to be
8:52
exact. It's not as big as the inside of
8:55
the cover, but it's covering most of it.
8:57
And that ribbon is just trapped in
8:59
there.
9:01
And as I say, because it's tacky glue,
9:03
it will stick really well.
9:06
A multi-purpose glue would do really
9:08
well here, too.
9:09
Um but you could try it with a glue
9:11
stick
9:12
or glue stick, whichever brand you use,
9:16
um and it would probably work, to be
9:18
honest. And when it's dried,
9:21
you can tie up your ribbons and work out
9:24
how long you want them.
9:26
And it's really common to cut your
9:29
ribbons at an angle. They look really
9:31
good, and it stops them fraying.
9:34
So, let's just put that through there.
9:37
And you can see it looks really nice
9:39
when you've got a little tie on the end.
9:41
You could even use twine for this, but I
9:42
think ribbon sticks better
9:45
cuz you've got more area to glue it. And
9:48
you can see I'm just going to cut them
9:49
at an angle.
9:51
And I love that. I love a little tied
9:53
notebook like that.
9:54
I I I'd show you at the end some little
9:56
notebooks that you can get from my Etsy
9:58
store that are printable that you
9:59
download and make with one page. So, I
10:02
hope you'll enjoy those and go and have
10:03
a look at those. There's a link in the
10:05
description below and on the screen.
10:07
Whichever notebooks you're making, enjoy
10:09
yourself.
#Crafts