Up next in 10

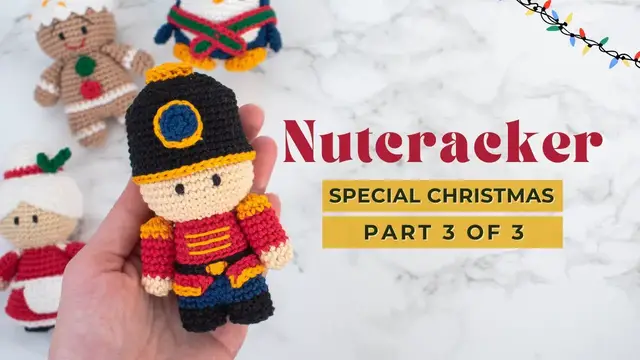
Nutcracker amigurumi pattern | How to crochet the Nutcracker crochet ornament PART 3
Nov 4, 2022
Learn how to crochet the Nutcracker, royal soldier amigurumi with this crochet tutorial!!! Super cute Nutcracker ornament, only 12cm tall. This is one of the eight amigurumi Christmas Ornaments tutorials available here on this channel!
Chapters:
00:00 Hat
03:32 Top of the hat detail
04:28 Front of the hat detail
09:12 Assembly
16:01 Embroidering the eyes
For PART 1: https://youtu.be/u6aUt_5AQW4
For PART 2: https://youtu.be/ByX8Ng3HohQ
You can find the Nutcracker amigurumi crochet pattern free on my website here: https://littlecrochetfarm.com/nutcracker-the-royal-soldier-amigurumi-free-pattern/
For a low cost (3 USD) and printable pattern, you can find it here:
Ravelry: https://www.ravelry.com/patterns/library/nutcracker-amigurumi-2
Etsy: https://www.etsy.com/listing/1312363762/crochet-nutcracker-the-royal-soldier
If this video was helpful to you, consider supporting my channel by doing one of these little actions below:
★ You can like this video, or
Show More Show Less View Video Transcript
0:00
Once you reach the end, this is how it should be looking like
0:05
Now for round number 4, you work 2 single crochet, 1 increase, repeat 6 times, and you
0:11
should have a total of 24 stitches here at the end of this round
0:15
Alright, repeat all the way around. Super good. Now for round number 5, you will work 3 single crochet, 1 increase, repeat 6 times, and you
0:27
should have 30 stitches here at the end of this round. Okay, so I work here the
0:35
first repetition with you. All right, work all the way around. Once you're done, for
0:43
round number six you will work four single crochet, one increase, repeat six
0:47
times, and you should have a total of 36 stitches at the end of this round. So
0:53
let's work here our first repetition together. Great, repeat all the way around
1:04
and let's move on now for the last round with increases. So for round number seven
1:10
you work five single crochet, one increase, repeat six times and you should
1:14
have a total of 42 stitches at the end of this round. Count how many stitches
1:20
you have at the end of every round, okay? It's a good, it's just one thing that
1:26
it's fast and secures you that you are right on track. Okay, so once you're done
1:33
this is how it should be looking like and now for round number eight you will
1:38
work 42 back loop single crochet, okay? Working the back loop here it's nice it
1:45
will give a nice edge from the, for the head. So this is super easy. Work your back
1:53
loops here and I will catch you up for round, for the next rounds. Super good! So
2:00
once you're done here, now we'll work a couple of rounds here with just 42
2:05
single crochet. So for round 9 to 16 you work 42 single crochet here. So stop the
2:15
video here, plus play on your favorite series and I will catch you up for the
2:21
next round. Super good! Look at this! Once you're done with all your repetitions
2:27
and you are in the last stitch of round 16, we will work a color change here to
2:33
yellow okay great and you will work 42 back loop slip stitch in yellow all
2:46
right so here we work a couple of times in the back loop of the stitches so you
2:54
are a master on the back loop by now great once you're done you can cut this
3:03
yellow and for the black you leave a room I'll just show you here one thing
3:10
first let's bring this yarn here in the back loop of course of the next stitch
3:18
okay and we can fasten this yellow off and the black one you cut with a big like you leave a big
3:26
tail here because we will use it for sewing later okay so you can fasten this off and we will move
3:34
on for some details here with the yellow you work six single crochet in the magic ring six increases
3:41
you have a total of 12 stitches and then you work 12 back post single crochet. This, what we are
3:49
working here, is the detail that's going to be on the top of the head, okay? So it's very simple and
3:56
easy. We work a couple of times this also in this tutorial. So work here your details, your detail
4:05
it's just one, and we will stop here on the third round, okay? After the back post single crochet
4:13
you can leave a tail here for sewing, and we will bring this to the back just because it makes
4:23
it nicer to sew it later So this is the detail of the top of the hat Now for the detail in front the hat you will work again in the magic ring 6 single crochet And then for the second round you will work 6 increases
4:43
And once you're working, you're here. I'm finishing these increases. I will move fast forward here so we can move on for the third round
4:54
Always remember to double secure the beginning of your yarn so the magic ring is very nice
4:58
enclosed. On the last stitch here you will work a color change, okay? So from the blue
5:05
you start working with yellow. And you will work for the third round 12 back loop slip
5:12
stitch. Here I advise you to leave the slip stitch long, you know, so it's not bringing
5:20
any pressure to the stitches closing this detail together. So make long slip stitches
5:27
here and once you're done you can leave a tail here for sewing we will bring this
5:37
yarn here to the back okay and you can cut this blue yarn and fasten it off all right super good now
5:54
let's just assembly fast here the hat so the first detail the one all in yellow
6:00
you will sew in the central part of the hat okay so find here you see the back
6:07
side of the hat and try to aim here to be straight the back with the back back
6:13
side of the hat with the back of the detail and you have 12 stitches here from
6:19
the detail and the second round of your hat is with 12 stitches so you'll sew
6:26
this together so you grab one stitch from the hat and one stitch from the
6:34
detail okay one stitch here from the hat and one stitch from the detail
6:49
All right. And like this, you will repeat all the way here around
7:01
For the front detail here, you see this is the line where we work the back loop single
7:06
crochet in the hat. Right below you will sew this detail, this front detail
7:13
But this one you will sew a little bit different. I will show you here why
7:19
Instead of grabbing the full stitch, you'll grab the stitch from down to up, or from the
7:30
inside to outside. And you'll bring your yarn to the stitch next to it, from up to down
7:48
And this is how you repeat all the way around, okay? So you grab one stitch from the hat
7:55
And this is very floppy for me to hold in this position that I am right now to show you
8:02
I need to work on my position for shooting. So you bring the yarn outside here of the stitch
8:22
Okay, I didn't take the stitch. So let's take here the stitch from down to the top
8:31
Okay. And then the stitch next to it from up to down
8:37
okay and that's it this is how you're going to be sewing all the way around you see that I'm always
8:46
stopping patient patiently and so the state the detail is not moving and it can be in the strength
8:54
central part like this so I didn cut the tails I just secured them and now we add stuffing material here And we have the head So we just put the head on the side for now Let work the details of the body before we assemble this
9:14
Okay, so with a piece of yellow here we will work a couple of lines in the
9:20
central part of the chest. So let's just bring this yarn here to
9:24
the front. And you leave a little bit of yarn left over on the back because we will secure this thread later
9:35
Okay, this is not in the center row. I will go back a little bit
9:44
All right Super good now with the length here of what I think it's six stitches check the written pattern in the description below
9:55
okay there it's very detailed where you're gonna make the embroidery how many
10:02
stitches how many rounds apart from each other so here is six stitches you grab
10:10
and you're gonna make three lines here in the central position of this chest of
10:19
his chest so you start two rounds under the neck and that's it very simple now
10:28
once you're done you bring this tail here to the front central part of the
10:33
belt you remember here in the central part we have two stitches right and this
10:39
is where you will embroidery the buckle of this belt so now it will look like a
10:46
belt right now hopefully all right I'll just move fast forward here there is no
11:00
trick you just make a couple of lines straight lines and now I will embroider
11:04
two side lines here so it's kind of a square. All right and I will bring this tail to the same place where I started. So try to
11:29
to bring in the same same so you can fasten this off in a nice way so you
11:35
won't have any loose edges here. Okay, this looks fine to me. And now on the
11:44
backside, very nice, now on the backside here of this toy you give a simple knot
11:50
Okay, give a simple knot, cut this and hide it inside of the toy. And that's
11:58
enough to secure. Now for the arms, you see here I use pins to fasten this in the
12:04
central part here aligned with the legs and here we will sew kind of three
12:12
stitches from the arm with the three stitches from the body going up like this
12:18
because we want this top part of the shoulder, how does it called it
12:25
a palwet, palwet, right, on the shoulder. I don't know if I say it correct, the name, but that thing on the shoulder of the soldier
12:35
to be loose, not to be loose, but to be kind of outside
12:40
So we are sewing the arms horizontally, let's say like that. No
12:50
Vertical, vertical, yes. Well, I have excuses to say things wrong because I'm pregnant
12:58
And I can easily lose my concentration So bear here with me
13:05
You know, I will be back to be more detailed Explaining the things
13:09
But here you can see, you see, you can see It's a straight, you go up Up Vertically
13:18
Taking three stitches from one side three stitches from the other side and that's it. And you pull it tight so it's
13:30
tight on the body, okay? But you can also pull it tight when you are fastening
13:34
this off later on Like after you sew you see the bodies you once again bring to the same stitch From the both sides and now you give a very tight
13:47
Knot so the arms it's stiff, you know, it's nice. It's like a nutcracker, but
13:55
He's not cracking any nut. Oh Do you like my joke? I
14:01
Think I have a good mood even though my concentration is not good let's hide this inside of the toy okay okay okay go inside go inside great this
14:19
looks nice for now for the hat you introduce this hat this hat has also 42
14:26
stitches so it's very stiff to to put it inside of the inside no but to put it
14:33
over the head and you add a lot of pins so this will not be moving, alright? And
14:40
this what you're gonna do is you will sew this, you don't need to sew it in every
14:45
stitch because as I told you it's very stiff because they have the same sizes
14:50
and you need to pull this hat until above round number 26 from the face, okay
14:59
and you can go removing the how you call this man pins you can go removing the
15:11
pins and here you see I'm cleaning the stuffing material because everything is
15:17
so tight in this toy that I'm pulling out some stuffing material while I'm
15:24
sewing and it's nice if you just go cleaning while you're doing the sewing
15:28
because it will save you some time to do this now is better than to do once
15:36
you're done with the sewing. See cleaning a lot of cleaning. So remember here
15:47
introduce the hat until round 26 of the head so it's like inside you know the
15:55
the face it's covering his forehead let's say it like that super good look at this
16:02
now let's take care of these eyes I like to embroider the eyes okay you
16:09
probably know that if you've been in this channel for some time but if you're
16:15
using safety eyes check the written pattern in the description below it's in
16:20
website and it's a free reading pattern and there is the exact position where I
16:25
add the eyes so if you're using plastic eyes you can just go there check where
16:31
is the position and use the eyes that you are used to work with here to
16:37
embroider the eyes I use a black thread and I make a lot of straight lines here
16:44
in the repetition okay so here you'll see the sizes I like to make it small
16:51
eyes you can make the way that you like and here you make a couple of straight
16:58
lines here it's many of them exactly like this so I will just move fast
17:05
forward here of all this repetition. And you can see here exactly that it's a lot
17:17
of straight repetition. I will bring this tail here to the other side and
17:22
replace it with VIN. Okay, so one eye is done, I will embroider the other one
17:29
great after you embroider the other one once again you bring to the same stitch you make a
17:37
tight knot to double secure the disc will not move out will not go out will not unravel
17:42
it's secure and you hide it inside of the toy okay gone forever and look at this this is the
17:51
final result. I really hope you enjoyed this soldier. He was asked so much from you. And
18:00
I will see you next Thursday for the next pattern. Bye
#Crafts
#Fiber & Textile Arts
#Headwear