Up next in 10

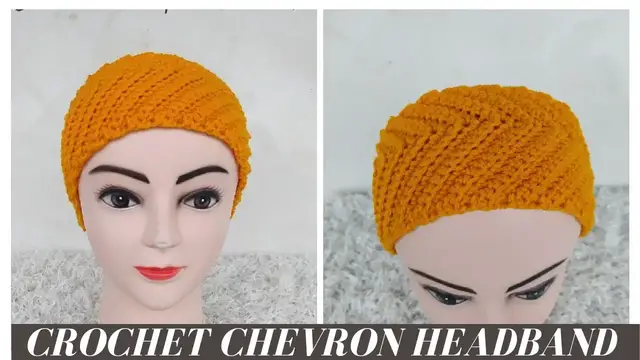
Crochet Chevron Headband
Oct 25, 2022

This easy crochet adult chevron headband tutorial uses the chevron stitch to achieve this beautiful earwarmer. This tutorial is for medium adult size. It's beginner friendly as it makes use of simple crochet stitches and clear instructions.
The free written pattern is available on my blog at
https://toyslabcreations.com/2021/09/24/crochet-chevron-headband/
Materials
Worsted weight yarn
5.0 mm crochet hook
Stitch markers
The pdf pattern which contains two sizing options is available in my Ravelry and etsy stores via the links below
https://www.ravelry.com/patterns/library/crochet-chevron-headband
https://www.etsy.com/listing/1076538312/crochet-pattern-pdf-crochet-headband?ref=shop_home_active_1
You might be interested in my other hat tutorials
Show More Show Less View Video Transcript
0:00
hi everyone this is toiba from tesla creations today i'm going to be making this lovely chevron
0:22
headband i'm making it to look like my button skirt if you'd like to have a look at that i'm
0:28
to link it up there so for this chef runner we are going to need um 5.0 mm hook
0:34
worsted with yarn and then stitch marker just to keep counting to make counting easy this
0:41
headband is going to be for size 22 inches that's medium adult size so without further ado let's
0:46
get started i'm going to start with the slip knot then i'll chain 20
0:58
so great I'm chain 20 now join you and I'm through it's my chains so I've chained
1:05
20 I'm going to skip the first chain and make a single crochet into the second
1:11
chain from the hook and I'll make six more single crochets so that'll be
1:17
total of seven single crochets so that's three four five six and seven so into the next stitch
1:39
I'm going to be making three single crochets one two and three all in the same chain then I'll make
1:53
one single crochet into the remaining 11 chains so go ahead and I will join you when I'm through
1:59
with the row so I'm through with row one now so moving on to row two I'm going to chain one turn
2:05
I'm going to be working into the back loops only so I'm going to start the row with the single crochet two together
2:14
I'm going to go into the first stitch set my hook yarn over and pull through
2:19
I will not complete the single crochet I'm going to the next stitch yarn over and pull through we have three loops on our hook then yarn over and pull through all three loops
2:29
so I've made two stitches into one so that's the single crochet two together
2:34
means going to the next stitch and make them more single crochets So we have 11 stitches
2:48
1, 2, 3, 4, 5, 6, 7, 8, nine ten
3:12
and eleven the next stitch is the middle stitch remember we made three stitches into this this is the
3:23
middle stitch so in order to make our work easier i will i would recommend that you use
3:29
a stitch marker into the middle stitch so into this next one now which is our middle stitch
3:33
I'm going to be making three single crochets. So every time I'm going to be making three single crochets into the middle stitch or the peak point rather
3:42
So this one, two. So I'm going to be marking that second one on every row to make counting easier than three
3:56
So then we go ahead with our single crochet into back loops only for the next six stitches
4:03
I'm going to finish the row again with single crochet two together
4:09
So basically we are increasing two stitches in the middle and we are reducing one on each end
4:17
So our stitch count is going to remain the same on each row
4:27
So I've made six single crochets and I have two stitches left
4:31
so I'm going to finishing the row with single crochet two together
4:38
so I'm going on to row 3 chain 1 turn single crochet two together
4:49
remember I will be working into back loops only then single crochet into the next six stitches
5:19
So when you get to this point you move your stitch marker and then work three single crochets into this stitch
5:31
Mark the second one again just to make counting easier. Then we'll continue with single crochet
5:44
into each back loop all the way across and we'll finish the row with single crochet two together
5:57
into the last two stitches so basically i'm just going to keep repeating
6:04
rows two and three over and over again until we get to row 56
6:14
if you'd like to work with the free written patterns available on my blog you can find
6:24
the link in the description box below and the pdf pattern is available also in my
6:29
variety and lovecraft stores you can find the link to that also in the description box
6:35
so i have two stitches left now i'm going to finish the row with single crochet two together
6:40
so you can see what our headband looks like so far so i just go ahead and walk off camera
6:49
repeating rows two and three over and over again until i get to row 56 and i'll come back to show
6:57
you what the headband looks like and now we are going to finish it up so i've made it through
7:03
row 56 so the next thing to do now is chain one turn i'm going to be folding the sides over
7:19
so i'm going to start with the first stitches i'm going to work in the back loops only
7:24
so you go into the back loop of the first stitch and then you join it with the starting chain
7:33
Then slip stitch through both. Then go to the second stitch, work into the back loops only remember
7:45
Then grab the next chain from the beginning
7:56
If you find this difficult you can just end the top width by sewing it with a tapestry needle
8:34
6 and into the next one 7
8:48
Now the next 3 are going to be making them are going to be making single crochet 3 together
8:56
so go into this go into the next one I need to do one after
9:07
I'm going to the middle stitch on the other end You can see that it's kind of wide here
9:18
I need to go through that And the end of our pull through all
9:32
So just going to continue, going to the next stitch and through the next chain, all the
9:47
way to the end. skip any chain else if you're having you know we're having enough chains to finish off so i'll just
10:03
go ahead and finish this off camera and i'll come back to show you what the final piece looks like
10:08
i mean to the end i'm just going to chain one and cut my yarn
10:14
so that's it i'm going to turn it to the other side so you can see what it looks like
10:21
so i hope you enjoy i'm just going to review my insulator so i hope you enjoyed watching this
10:29
tutorial to subscribe to my channel and remember to turn on the notification bell so that you get
10:35
notified when i release new tutorials thanks for watching bye
#Crafts