Up next in 10

**WRITTEN PATTERN IN THE DESCRIPTION**
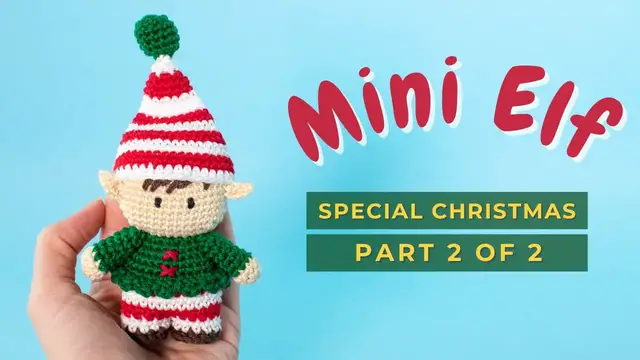
Complete Mini Elf amigurumi crochet tutorial!!! The third of 4 amigurumi Christmas ornament tutorial!
Chapters:
00:00 Hat
09:05 Arms
11:40 Hat top
15:07 Assembly the arms
16:52 Ears
18:03 Embroidering the face
For the PART ONE check: https://youtu.be/4A94BauDIA4
You can find the Mini Elf amigurumi crochet pattern free on my website here:
https://littlecrochetfarm.com/elf-christmas-ornament-free-amigurumi-pattern/
For a low cost (3 USD) and printable pattern, you can find it here:
Ravelry: https://www.ravelry.com/patterns/library/mini-elf-amigurumi
Etsy: https://www.etsy.com/listing/1105911522/crochet-elf-amigurumi-pattern-mini-elf
Show More Show Less View Video Transcript
0:00
Super good! Now we'll start working his hat. We start with the white yarn and you'll make 6 single crochet inside the magic ring
0:12
Again, if you don't know how to make the magic ring, take a look in the description below
0:18
There is a complete tutorial dedicating on how I make the magic ring
0:30
Okay, pull it tight to close this magic ring and continue for the second round
0:47
Here how we're gonna work is you're gonna make two rounds, number two and three, just
0:52
six single crochet. We will not work increases here for now. Alright
0:58
So for the second and the third round you just work 6 single crochet in white here
1:17
Okay, I like to close very tight the crochet toys with the sewing needle
1:23
And now we will move on. Here I need to make one more round, I stopped to close it with the sewing needle
1:34
So now I'm working my third round. And here we arrive on the last stitch
1:42
And we will make a color change here. We will introduce the red because we will start working with both colors
1:48
So for round number four, you will work six increases. So you should have a total of 12 stitches at the end of this round, alright
2:00
So work your six increases here, and I will catch you up for the next rounds
2:09
Here you'll see we'll have some small pattern to follow up, because we won't be increasing
2:16
in every round of this hat. Okay, so for the round number five and six you'll work 12 single crochet. So again we
2:33
will have two rounds here where you're not increasing stitches. So work your two
2:39
rounds here and it will catch you up for the round number seven. Here I am on
2:46
working on my last stitch of the round number six and we will again change the
2:53
color to white. Okay and for round number seven you will work one single crochet
3:00
one increase, repeat six times and you should have a total of 18 stitches at the
3:05
end of this round. There is a link in the description below that will take you to
3:13
four different ways to change colors in crochet toys. It's the four most
3:19
common ways to change colors. If you want, you take a look there. Great, so here
3:26
again for round eight and nine we will work 18 single crochets. So, one more time
3:32
you will work two rounds without increases, just a single crochet. Okay, so
3:40
So you can stop the video here, work your 2 rounds with 18 sc and I will catch you up for round number 10
3:53
Alright, we are here on the last stitch and again making a color change
3:59
So for round number 10 you will work 2 sc, 1 increase, repeat 6 times and you should have a total of 24 sts at the end of this round
4:09
Once you're done with round number 10 with increases, you will make one more round, the round number 11 with 24 single crochet
4:19
Okay? So from now on we will work like this. One round with increases, one round just with a single crochet in the same color
4:28
Okay? So finish your round 11 and I will catch you up for round 12
4:34
Here we will again change the color to the white and you will work for round 12
4:43
3 sc, 1 increase, repeat 6 times and you should have a total of 30 stitches at the end of
4:50
this round. Then again, once you finish the round with the increases, you will work 1 round with just
4:59
single crochet. So the round number 13 will be 30 single crochet and that's how
5:05
we're gonna be working here. Let me just count. Yeah. Okay, so work here your two
5:15
rounds and I will catch you up for round number 14 before we change colors and
5:19
move on for the next round with the increases. Okay, we can see it here, the two
5:31
rounds with the same colors. So I'm on my last stitch from the round number 13
5:39
and we will work now a color change. So for round number 14 you will work four
5:46
4 sc, 1 increase, repeat 6 times and you should have a total of 36 sts at the end of this round
5:54
And then again, for round number 15, you will work just 36 sc
6:03
So, you work one more time these 2 rounds and I will catch you up for round number 16
6:09
before we change colors again to the white color. Alright so I here arriving on my last stitch of the previous round round number 15 and starting to work round number 16
6:29
Here you will work 5 sc, 1 increase, repeat 6 times, and you should have a total of 42
6:36
sc at the end of this round. And for round number 17, you will work again 1 round without increases
6:43
For round number 17 you will work 42 sc. This is the last round that we will make with increases
6:50
because we already arrived with the 42 sc and I will catch you up here for the next rounds
6:59
Okay, so we are on the last stitch of the round number 17 and for round number 18 and 19
7:06
you will work 42 single crochet in red okay so here you will work your two rounds and i will
7:16
catch you up for the last round of this hat we will work with the white
7:23
okay so we are here on the last stitch of the round number 19 and now for round 20 you will
7:42
work half double crochet in white okay so here we'll go slow just in case you don't know how to
7:49
to do the half double crochet we then use this stitch this notch here in my
7:54
channel okay so you yarn over inside the stitch pull it through yarn over inside
8:03
the loops from your needle yarn over inside the stitch pull it through yarn
8:12
over again inside the three loops of your needle okay all the way around and
8:18
will catch you up here super good and now here you just join with a slip stitch and we are done
8:29
with this hat very nice here you can use your imagination change your colors making red and
8:36
yellow making green and white you can use whichever color you prefer you think it's nice and if it's
8:47
not Christmas, make with different colors, elf is always there. Alright, here we'll
8:55
just make sure that this will not unravel, fasten this off, and let's sit. Now
9:04
let's move on and start working the arms of this elf, okay? So for the arms you'll
9:11
work five single crochet inside the magic ring with the same color you use
9:17
for his face okay so let's work here the five single crochet inside the magic ring
9:27
all right one two three four five let's close this pull this yarn to close this magic ring
9:46
and continue for the second round so here you work five increases and you should have a total
9:52
of 10 stitches at the end of this round okay so go a little bit fast here all
10:18
Alright, I'll just secure the beginning of my yarn and now for round number three, you'll work 10 single crochet
10:27
So the arms are very fast and easy to make. So here work your 10 single crochet and I will catch you up at the end of this round
10:40
before we finish off because we will make a color change here also
10:44
all right so I'm here on my last stitch and I will change to green so for round
10:55
number four to nine you will work ten single crochet and that's it okay you
11:04
work all of these rounds with ten single crochet in green and I will catch you up
11:09
here at the end of round number nine when my arm is ready. Great! This is how
11:22
cute is this! So small, nice! So you cut the yarn here, you leave a small tail for
11:29
sewing. Okay and you make another one following the same instructions
11:39
Great, now we will do a small detail for the hat, the hat top
11:49
Here is very fast, it'll work 6 single crochet inside the magic ring using the green collar yarn
11:58
Okay, and here I'll move a little bit faster
12:09
And for the next round you'll work 6 increases. I went a bit faster here because you've done it this before in this video already, so I
12:21
don't need to repeat myself. So here we work 12 single crochet, right
12:28
increases making 2 single crochet inside of each stitch That great Now you work for round 3 to 6 12 single crochet
12:53
So you'll make here 4 rounds with just 12 single crochet and we will be done very fast
13:01
with this hat top. You can make a pompom here also to put on the top of his head
13:10
Okay, so this is how it should be looking like, very small
13:14
Let's cut this yarn. And I will add a little bit of stuffing material here inside
13:25
And we will close like we close the head of the elf
13:29
So you take a sewing needle and you grab just the front loop of the stitches, okay
13:40
Just the front loop, very easy
13:52
And you pull and you have this little ball here
14:02
Very nice. This is what we are searching for. This is great
14:06
Now let me just fasten this off before continuing for the final details of our little elf
14:17
We are almost done with this cutie. Great. So here, on the central part, in the very first beginning, I will grab this yarn and
14:30
I will sew this on the top of the hat. Okay? Very simple, easy
14:37
Just go grabbing one stitch from the little ball and one stitch from the hat
14:47
That's it, once you're done, you just hide this yarn and cut it. Great
15:01
So we have here the hat, it's so pretty. Alright, so now let's take this out and start sewing these arms on the side
15:11
Use pins to fasten the arms. Find the best position and it looks nice for you
15:17
And here is very simple. You grab one stitch from the arm, one stitch from the body
15:30
and the stitches from the arm, okay? Here we go slow and I show you, I will leave this running to show you how I sew it
15:41
I want to make a video dedicating only to the sewing in crochet toys because I
15:49
see that a lot of people have some problems in sewing pieces together but
15:55
here you see I like to open and see where I'm putting my needle you shouldn't
16:01
be afraid to stretch a little bit your toy because you can always shape it back
16:07
to its form so you see I grabbed these two fingers and I open to have a space
16:14
so I can see between the neck and the body so I see perfectly where my needle
16:21
is going alright and that's it you have ten stitches in total of the arm right
16:33
so when you fold it you have five and five so you should make five times this
16:39
you should take five stitches from the arm and five stitches from the body and
16:48
that's it now here we'll make the ear which is super easy and fast detail to
16:57
make so with the same color you work the head you make a simple slip knot and you
17:04
chain four here you make four chains skip the first chain and you make one
17:15
slip stitch, one single crochet, and one double crochet. That's it! That's it! So
17:41
chain 4, skip the first chain, 1 slip stitch, 1 single crochet, 1 double crochet
17:47
Here you cut the yarn, you can make a simple knot, and you make another one. So
17:55
you have two ears. Here I use some pins to fake the eyes, because I don't use the
18:05
plastic eyes but if you want to use the safety eyes there is a link in the
18:11
description below that will take you to the written pattern where I show you the
18:15
exact position I add my eyes late not my eyes with my elf size okay so here for
18:26
the year now you will again add in a sewing needle and you will sew this one
18:38
row above the eyes and a couple of stitches on the side again there is the
18:45
exact position I'm sewing everything on the written pattern here because I'm
18:52
shooting I just go with the flow where I think it looks symmetrical to me, which
18:57
you can also do that If you don like where it my ears positioned where is my eyes positioned use your imagination and sew it whatever you think it prettier for you
19:13
Important is that you should be happy with your result. Great. And that's it
19:22
So here, we'll just grab a little bit here on the back
19:26
so the years it's nice on a nice place. Yes, that's super good
19:35
And I will bring here to the head top. Okay, this is looking great
19:44
Super good. Now we'll take this other piece of yarn. I don't need to sew this
19:50
I just need to hide this, right? So I'll bring it back on the same place on the head top of the elf so I can fasten this off
20:11
Alright, super good. That's it. I will sew the other one and I will come back here so we can embroider the eyes together
20:21
Tada! Look at this! We have a bold elf now. Okay, so for the eyes I take again my
20:30
sewing needle and a black thread. Okay, so here I like, I prefer to embroider the
20:39
eyes and I start making just straight lines of the size of one stitch. So I
20:47
cover one full stitch of the toy with straight lines to make the eyes, okay
20:54
Again I will leave the camera recording here so you can see. And because the
21:01
thread is thin you should make these lines a couple of times until it's shape
21:08
up like a round nice eye, okay? all right it is looking great I will start now making the same process on the
21:45
one beside. Okay, the exact position is in the written pattern. You can
21:52
check in the link in the description below. It's on the website. Okay, great
21:58
Look at this! He's super cute! We have a bold elf. Now let's make some small
22:03
details here on his shirt. So you just grab a small piece of red collar yarn
22:10
and here I will just show it very fast because you're just supposed to make two
22:14
axes on his chest okay so you start two lines above the neck and make sure that
22:24
this lens is secure and you make two axes here that's it very simple right
22:30
you leave one round between the two axes okay now we'll start embroidering a
22:36
little detail of a head a hair so here we can measure you see where the hat is
22:44
gonna stay so just for you to know how I measure but again in the written pattern
22:50
there is the exact number of which round I'm working this hair so here I grab
22:57
some brown color yarn is the same one I use for his shoes and I'm using double
23:03
line here you see I make a knot in the beginning so it's two lines I'm using at
23:10
same time. Here it doesn't matter how high you go on his head because it's not
23:16
gonna be seen because we will add the hat and sew it around his hair his head
23:21
but the two first lines are the ones who's going to be seen. So here you just
23:33
go embroidering some little lines I did mine a little bit leaning on the side
23:45
you can make them even and even you can make them all around his head I just made
23:52
on the front part so just his fringe is showing okay go slow here take a look if
24:13
you like if it's enough add the hat and once you're done you're done look at this very nice
24:23
so here what I'm gonna do is I will sew this hat around his hair around his head I will use pins
24:33
to fasten his hat and once I'm done with this he is ready all right so that's it I really hope you
24:44
enjoyed this pattern I will sew this off the camera it's really not important to show this here and I
24:51
hope you enjoy this next part and will be the reindeer and I see you on the next time okay
24:57
thank you for being here with me and bye Thank you
#Arts & Entertainment
#Crafts
#Fiber & Textile Arts