Up next in 10


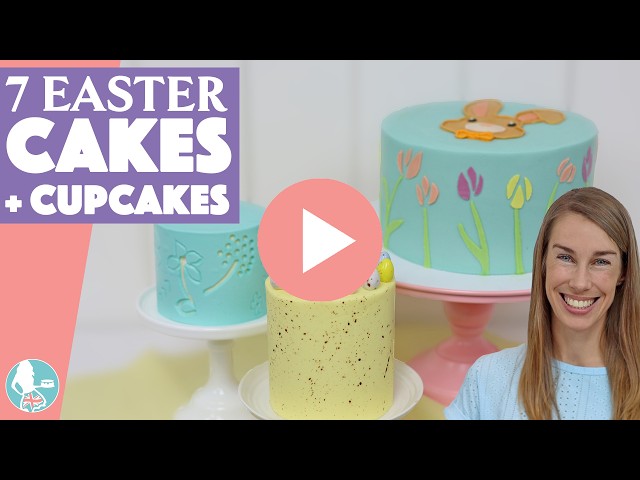
Looking for ideas for Easter cake and cupcake ideas? This tutorial shows you exactly how to decorate 7 designs, step by step. From a cute bunny cake to a speckled egg cake, carrot cake decorations, lots of flowers, and stunning cupcakes, these techniques are all achievable with basic tools.
⭐Join my channel for members-only perks!
https://www.youtube.com/channel/UC1k3PDqnjUG8wMH1vY3yojA/join
🥣My Recommended Cake Decorating Tools: https://www.britishgirlbakes.com/my-recommended-tools-for-cake-decorating
💫Start your FREE 7 day trial on my cake school: https://britishgirlbakes.teachable.com/p/all-you-can-cake
🎂Take my FREE course on 10 Frosting Techniques: http://britishgirlbakes.com/free-course
👩🏼🍳My 4 Minute Buttercream recipe
https://www.britishgirlbakes.com/recipes/buttercream-frosting/
📄READ a written version of this tutorial (with photos!)
https://www.britishgirlbakes.com/7-ideas-for-easter-cakes-and-cupcakes/
👍Please LIKE and SUBSCRIBE to my channel for a new cake decorating tutorial every week!
💬 SAY HI!
Show More Show Less View Video Transcript
0:00
These Easter cake and cupcake ideas are cute, colourful, and surprisingly simple to decorate.
0:05
I'm going to show you seven Easter cake and cupcake decorating ideas using buttercream,
0:09
including homemade stencil designs, speckled egg cakes, piped roses, carved buttercream,
0:14
and a really fun technique that reveals a hidden design inside the frosting. Most of these use
0:18
basic tools and simple techniques for impressive results. The first technique uses homemade
0:24
stencils. Start by drawing or tracing your design. I'm tracing a bunny face from my computer screen
0:29
onto a piece of paper. Now, place parchment paper or wax paper over your sketch. Trace around the
0:35
background shape first, which will be your first stencil and your first colour. Then, trace the
0:39
details using a separate piece of parchment or wax paper for each colour. Once everything is drawn,
0:44
cut out the shapes. When you layer the pieces together, you should see how they combine to
0:48
create the full design. Chill your cake after frosting it so the buttercream is firm. Next,
0:53
mix the buttercream colours you'll need. A really handy tip is to use a cupcake pan as your colour
0:58
palette. Just put a spoonful of buttercream into each hole. They're the perfect size and you only
1:02
have one thing to wash at the end. And then start with the background stencil, pressing it onto the
1:07
cake. Spread buttercream over the top. Smooth over it a few times to leave just a thin layer and then
1:12
carefully peel the stencil off. If there are any smudges, you can tidy them up with a toothpick.
1:16
Put the cake back into the fridge or the freezer for about 10 minutes to set that buttercream
1:21
before adding the next stencil. Continue layering the stencils from the back of the design to the
1:26
front. And at the end, optionally, you can pipe around the coloured sections to make the design
1:31
really pop. I'm piping the eyes instead of using a tiny stencil. And I'm scoring the mouth with a
1:37
toothpick. And there's a buttercream stencil Easter bunny cake! The next cake is inspired
1:41
by speckled chocolate eggs. After assembling your cake layers with filling and frosting,
1:46
take your time smoothing the frosting for this design because there won't be many decorations
1:50
covering up the sides of the cake. While the frosting is still soft and sticky, press
1:55
colourful mini eggs onto the top in a ring. Now for the speckled effect, mix one teaspoon of cocoa
2:00
powder with one and a half teaspoon of hot water. Before splattering it onto the cake, I recommend
2:05
protecting your work surfaces with cloths or towels because this can get a bit messy. Dip
2:10
a paintbrush into the cocoa powder mixture, pull the bristles back with your finger, and then let
2:15
go so they snap forwards and the cocoa splatters onto the cake. This creates a speckled egg effect.
2:20
It's fine if the speckles land on the eggs, too. It actually helps bring everything together.
2:25
Next is a carrot cake, which feels perfect for Easter. Starting with the decorations, before
2:30
you add cream cheese to the frosting, set aside a few spoonfuls of the buttercream base, which is
2:35
stiffer and easier to pipe with. Tint most of it orange and pipe zigzag shapes onto parchment paper
2:40
to create the carrots. Add green food colouring to the rest of the buttercream, and the leftover
2:44
orange in the bowl will make the green slightly muted, which actually works well for the carrot
2:48
tops. Put this into a piping bag with the same small round piping tip - this is a number
2:53
four - and pipe three little spikes at the top of each carrot. Freeze these for about 10 minutes
2:58
so they firm up. While they chill, assemble your carrot cake with cream cheese frosting. The full
3:03
recipe is on www.britishgirlbakes.com. Smooth the frosting or add texture using the back of a spoon
3:08
or an offset spatula or palette knife and then lift the frozen carrots off the parchment and
3:12
arrange them on the cake. I like placing them where I'll cut the cake later so that they mark
3:17
out the portions. This is a simple decoration and it only takes a few minutes, but it looks
3:21
so pretty! The next cake is a carved buttercream design. Start by crumb coating your cake and then
3:26
spread on a smooth layer of frosting and freeze it for about 15 minutes. Then add another final
3:31
layer of frosting, but a different colour. Both layers of frosting should be neat and smooth. And
3:36
the second layer should be as thin as possible without exposing the colour underneath. Chill
3:39
the cake again until the buttercream is firm. And now dip a clay modeling tool into warm water and
3:44
start carving into the frosting. This hook-shaped tool works well for things like dandelion seeds,
3:49
and a round tool can carve larger circular shapes. A pointed tool is great for stems, for leaves,
3:55
or for the outline of flower petals. After each time you carve, dip the tool back into warm water
4:01
to remove the buttercream and keep it warm so it glides through the frosting. You can combine
4:05
colours and designs to create really striking carved buttercream cakes. You can carve cupcakes,
4:11
too. Pipe two blobs of different coloured buttercream onto a cupcake using a large
4:15
round piping tip. This is a 1A. Then flip it over and press down onto a piece of parchment
4:20
or wax paper and put this into the freezer for 30 minutes to chill and set the buttercream. Now, use
4:25
clay modeling tools or the pointed end of a petal piping tip will work instead on cakes or cupcakes.
4:31
Next, let's make a buttercream rose cupcake. Use a petal-shaped piping tip - this is a number
4:36
104 - and start by piping a blob of buttercream in the center of the cupcake to give the rose
4:41
some height. Hold the petal tip with the narrow part pointing upwards and pipe a spiral around
4:46
the blob while spinning the cupcake to form a rose bud. Next, pipe arcs around this. Each arc should
4:52
overlap the previous one by about half. Angle the piping tip so that the top points slightly inward,
4:58
which helps the petals wrap tightly around the center. And as you move outward, gradually angle
5:02
the piping tip backwards so that the petals fan out from the rose. This is beautiful as a single
5:08
cupcake, but it also looks amazing as part of a cupcake bouquet. Next, I'll show you how to
5:12
stencil around the sides of a cake. Cut parchment or wax paper to the same height as your cake and
5:18
draw or trace your design onto it. Cut out the shapes while leaving the surrounding paper intact
5:22
so it works as a stencil. Wrap the stencil around the cake and spread buttercream over the cutouts.
5:28
For these stems, I'm spreading the frosting up and down rather than sideways so I don't
5:32
pull the stencil away from the cake. For larger shapes that are completely surrounded by paper,
5:37
spread inwards towards the middle of the cutout for the same reason so that you don't lift the
5:41
stencil away from the cake. Peel the stencil off and clean up any smudges with a toothpick. Chill
5:46
the cake before adding the next stencil so that the first parts set. Because the flowers in my
5:51
design are close to the stems, I ended up making separate stencils so that the colors wouldn't
5:56
smudge. Ideally, you'll leave about an inch around each shape on the stencil to prevent spreading
6:01
frosting over the edges and onto your cake. Place each stencil onto your cold cake, spread frosting
6:07
over it, scrape away the excess to leave a smooth, thin layer behind, and then peel the
6:11
stencil off. As long as your cake is really cold, this technique is very forgiving. This final cake
6:16
uses a technique I call facelift frosting. You pipe a design onto a cake and then turn it into
6:21
a completely flat design. Start by piping your design onto the cake and freeze the cake for about
6:26
20 minutes. Then pipe buttercream over the entire design to cover it completely. Freeze the cake
6:32
again for another 20 minutes and now warm a cake scraper by dipping it into hot water or running it
6:37
under a hot tap. You can also warm it with a hair dryer or a blowtorch. Then start scraping around
6:42
the cake. At first it will feel like a terrible mistake because you're scraping away frosting
6:47
you just piped. But as you continue, the hidden design underneath starts to reveal itself, and
6:52
it's actually really exciting to watch. The final result is a perfectly flat cake with an embedded
6:57
buttercream design. And one last quick tip before you take your Easter cakes outside: as the weather
7:02
gets warmer, remember that butter melts and so does buttercream. So, if you're displaying
7:07
your cakes outside for an Easter party or a spring celebration, try to keep them in the shade instead
7:12
of placing them in direct sunlight. Otherwise, the buttercream can start melting very quickly.
7:17
So, tell me in the comments which of these seven Easter cake and cupcake decorating ideas you're
7:21
going to try next. And to learn hundreds more cake decorating techniques and designs, visit
7:25
my cake school on www.britishgirlbakes.com. Join my channel membership on YouTube to get access to
7:30
my perfectly smooth frosting course, exclusive videos, and other perks. Thanks for watching!
#Arts & Entertainment
#Desserts
#Hobbies & Leisure
#Holidays & Seasonal Events