0:00
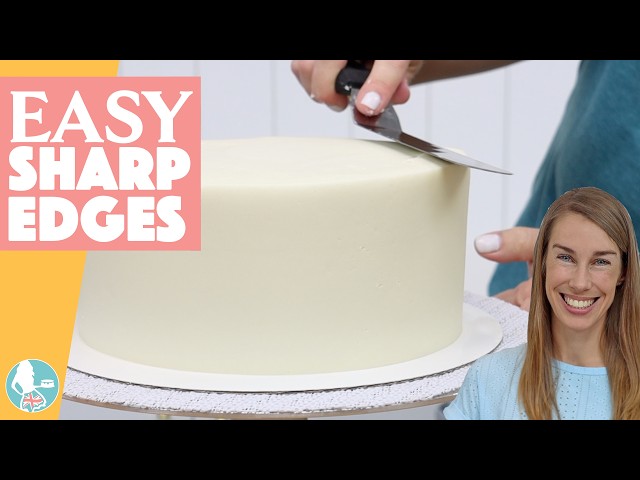
Sharp edges from the sides over onto the top of a cake make the cake look really professional
0:04
and in this tutorial, I'll share all of my tips and tricks for achieving this. Start with a cold
0:09
cake. Wrap the cake and leave it in the fridge overnight or place it unwrapped in the freezer
0:13
for about 15 minutes. Then assemble your cake. Attach the first layer to the cakeboard with some
0:18
buttercream to act as glue so that it doesn't move around and then spread on a layer of filling. I'm
0:23
using my 4 Minute Buttercream with Nutella mixed in. Then place your next layer on top and make
0:27
sure it's centered so that the cake is straight, not leaning. Repeat with more filling and cake and
0:32
you'll notice that this is much easier to do when your cake is cold rather than at room temperature
0:36
when it's very crumbly. Next, it's time for a crumb coat. Ideally, put your cake into the fridge
0:41
for about 20 minutes or the freezer for 10 minutes to set that buttercream glue down on the cakeboard
0:46
to hold the cake securely in place while you frost it. Cold cake is also much firmer and less
0:52
delicate and crumbly than room temperature cake, so it's easier to frost now that it's cold. I like
0:57
to start with the top and then move down to the sides and this doesn't need to be perfectly neat,
1:01
but make sure there are no bulges of buttercream sticking out sideways or up above the top edge
1:06
because those will get hard in the next step and stick through your final layer of frosting. Put
1:11
the crumb coated cake back into the fridge for 20 minutes or the freezer for 10 and now it's
1:16
time for the final coat, which is where your sharp edges really happen. Wipe the cakeboard
1:20
clean with a towel or paper towel because if there are any cold, hard smudges of frosting,
1:25
your cake scraper will bump into them as you scrape around the cake and knock into your cake,
1:30
creating dents in the frosting. Okay. As you spread buttercream onto the top of the cake,
1:35
push outwards to nudge the buttercream over the edges of the cake and this will prevent gaps
1:39
around the top edge. The other really important part is to spread the buttercream around the
1:44
sides of the cake so that it sticks up above the top edge and this prevents a domed top of
1:49
the cake. You should end up with a wall or lip of buttercream sticking up all around the cake like
1:55
this. Work your way all the way down to the bottom of the cake down to the cake board to completely
2:00
cover the cake and now it's time to smooth this. Pressing the base of your cake comb down on the
2:05
cake board will line it up straight to make the sides of your cake straight. Scrape a few times,
2:10
reaching all the way around your turntable to get a nice long spin. And then spread more
2:15
buttercream over any parts that are shallower or thinner, these gaps or indents in the frosting
2:21
and then scrape again and again until the sides of the cake are smooth. Now for the top edge,
2:25
swipe sideways with your offset spatula or angled pallet knife, or you can use your cake scraper
2:30
instead. So you're pushing this wall of frosting towards the middle of the cake and then swiping up
2:36
and away to lift the excess buttercream off the cake. Wipe your blade after each use so that it's
2:41
clean for the next one. Otherwise, you'll drag this buttercream back onto the top edge and leave
2:46
texture there. Notice that I'm pushing sideways, not down, because pushing down will create a bulge
2:52
of frosting underneath. Don't push more than halfway across the cake before swiping up or
2:57
you can drag this buttercream over the edge on the other side. If in doubt, swipe a little bit higher
3:02
than you think you need to because you can always swipe again a bit lower. But if you start too low,
3:07
you'll either expose the crumb coat or the cake underneath. Or if you start low and try to correct
3:12
it by moving upwards in a diagonal swipe, you'll create that dreaded domed top of the cake instead
3:18
of nice sharp 90° angles from the side of the cake over onto the top. Work your way around the whole
3:23
cake and then get down to eye level and spin the cake to check that the top edge is level and if
3:28
it goes up anywhere, swipe over that part again until the whole top edge is flat and level. Then
3:34
the final step, which is very important, is to put the cake into the fridge to chill and set this
3:39
buttercream frosting so that it's firm and holds its shape because if you decorate the sides now,
3:44
you'll damage that smoothness. And if you pipe onto the top, the weight of the buttercream piping
3:49
will push down on the top of the cake and cause the edges to droop or bulge out. So, make sure
3:54
the frosting is cold and firm first. I hope this tutorial has been helpful! Subscribe to my channel
4:00
for more cake decorating tips and tricks. Join my channel for exclusive videos and other perks and
4:05
visit my cake school on www.britishgirlbakes.com to learn hundreds of cake decorating techniques
4:09
and designs with my online courses and memberships. See you there! Thanks for watching!