Up next in 10

**WRITTEN PATTERN IN THE DESCRIPTION**
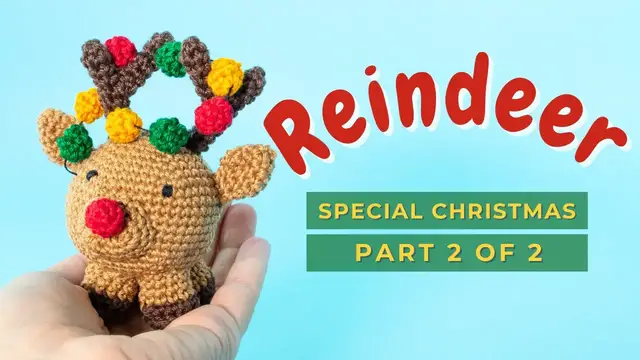
Complete Chubby Reindeer amigurumi crochet tutorial!!! The fourth of 4 amigurumi Christmas ornament tutorial!
Chapters:
00:00 Ears
05:25 Snout
09:16 Sewing the details
14:03 Embroidering the eyes
15:35 Nose and baubles
For the PART ONE check: https://youtu.be/Sv6yGJ31EXo
You can find the Chubby Reindeer amigurumi crochet pattern free on my website here:
https://littlecrochetfarm.com/rudolph-reindeer-crochet-christmas-ornament-free-pattern/
For a low cost (3 USD) and printable pattern, you can find it here:
Ravelry: https://www.ravelry.com/patterns/library/chubby-reindeer-2
Etsy: https://www.etsy.com/listing/1110461794/crochet-rudolph-the-reindeer-amigurumi
If this video was helpful to you, consider supporting my channel by doing one of these little actions below:
Show More Show Less View Video Transcript
0:00
Alright, super good. Now let's start here with a light brown yarn and we will prepare the ears
0:07
So again with a magic ring but this time we will work 3 single crochet inside the magic ring
0:14
three now let's close this and let's crochet the second round
0:38
Here for the second round you will work three increases so you should have a total of six
0:46
stitches at the end of this round. This can be a little bit tough because it's very small but it
0:52
looks very nice the shape at the end. I'm sorry my screen is blinking this means that my lights are
1:02
are losing the power and need to change. I will change before continuing for next round
1:10
Let me just finish this
1:23
Okay, you see again, curling to the outside, so let's just organize this bit
1:28
and move on now with better lights and working our round number three you will
1:37
work one single crochet one increase you will repeat for three times and it
1:42
should have nine stitches at the end of this round okay let's go slow here it's
1:53
It's a small detail, so I like to be, I like you to see how it holds, how is the position
2:01
how it looks like, because I think as small as the detail is, it will be tougher is to crochet
2:11
Alright, this is how it should be looking like, now let's move on for the next round
2:20
So for round number 4 you will work 2 sc, 1 increase, repeat 3 times and you should have
2:26
a total of 12 sts at the end of this round. you
2:56
go right so here you can see very nice now for round number five you work 12
3:05
single crochet easy-peasy so just work your 12 single crochet here
3:20
All right, so this is how it should be looking like at the end of round number five
3:43
And now we work for round number six. we will make six decreases. So you should have total of six stitches at the end of
3:51
this round. So one decrease after another. Right? Just decreases here and you
3:59
should have six stitches at the end. So go slow, make it nice, so you have six
4:08
stitches at the end. Very nice! Now you will work one row only with single crochet. So
4:25
for round number seven you will make six single crochet. Here pay attention, go slow. It's a very
4:33
small detail and just make the decreases so maybe it's a little bit hard for you
4:38
to find the stitches but with patience you can find it and I will leave this
4:43
showing to you all my six stitches Great, so this is the end of the year
5:02
Now let's cut this beginning of the tail here. You can cut it with no problem
5:07
We already secured this yarn in the beginning of the detail. And cut this yarn leaving a small tail for sewing later in the reindeer
5:20
Now you should make another one following the same instructions for this. Great
5:27
Super good! Now we will do the snout. For here we start with a slip knot and you will chain 5
5:41
we begin a little bit different You will work five chains here Okay so we have here four and five you skip the first chain and start
5:55
working on the second chain okay so here you'll start with three
6:00
single crochet once you reach the last chain you will work four single crochet in that same chain
6:08
and then you continue the pattern i will leave this showing here exactly how you work the first round
6:15
okay so here i arrive in my last chain i'm working my four single crochet
6:22
inside this last chain and we are turning the detail you see
6:32
okay so now we will work two single crochet So one here inside this chain and another one here inside this other chain
6:45
And then you will work three single crochet in the last chain, right
6:51
Here you should have a total of 12 stitches at the end of this round
6:57
All right? That's super good. and I suggest you to count how many stitches you have here just to make sure
7:04
that you have the correct amount of stitches. Okay now I will add my stitch
7:12
marker here, I will use just a piece of a different color yarn before moving for
7:19
our second round. Okay for the second round you will work one increase, three
7:28
single crochet one increase one single crochet and you repeat this for two times
7:33
at the end of this round you should have 16 stitches you
7:57
I'm hearing one single crochet and now I repeat again one increase three single
8:10
Alright, this is super good
8:34
This is how it should be looking like. You see some small holes here. that happened you can use this tail later on so you just insert inside and
8:43
you close all of those open stitches so you don't have any see-through in this
8:50
knot okay now for round number three you will work 16 single crochet so just
8:56
make six single crochet all around here and this will be our last round for this
9:03
is not all right super good now we'll start assembling this reindeer and we'll start with the
9:21
legs okay so for a starter here we will add a little bit of stuffing material in
9:27
the legs so we have a more firm legs just a little bit it's enough
9:42
Okay, that's very nice
9:56
And then you see here, at the bottom part, in the central part, you see the center here
10:05
we will crochet the four legs around here, the central part. Okay, so I will use pins to fasten my detail here
10:15
So it helps me while I'm sewing so nothing moves around. So I'll add this here
10:25
And I'll add all the four so I know exactly the position of all of them
10:35
Okay, this is looking very nice. Now, let's add the other ones and prepare for sewing it here
10:43
So, what's going to happen here is you take one stitch from the ball and one stitch from
10:53
the leg. Okay? One stitch here from the leg. And that's it
11:01
This is very simple. This is how you do. So you have 12 stitches in the leg, in each of the leg, right
11:08
So you should make this process 12 times, taking every single stitch of the leg
11:14
This is very important, don't skip and try to make the best for you to see where are
11:20
all those stitches. Alright this is super good
11:44
You can see here the beginning. And now let's move on to sew the rest of the pieces
11:53
So here I add the ears. You see in the central part here between the legs and it's all straight
12:00
exact position in which round I sew this is in the written pattern. You can find it in the
12:06
description below. You can see the exact position where I'm sewing everything. But here I just want
12:12
to show you how I add my details and I go sewing while those details are there because I want to
12:22
make sure that everything is symmetrical, it's on the way that it's where it's supposed to be
12:28
So here, same thing. You have, say, six stitches from the ear, so you will sew with six stitches from the body
12:58
All right, this is super good. Now I did the same with the snout
13:08
I add the snout with some pins. Also the exact position where I'm sewing the snout you can find in the written pattern
13:18
Here I just go with where I think it's symmetrical to me, but it looks nice to me
13:23
You can do that also. You don't need to find the exact location, you can use where you think it's better
13:33
And one more time, you take one stitch from the body, one stitch from the detail
13:55
Okay, this is super good. Now here I put some pins to fake the eye because I like to embroider
14:06
the eyes of the reindeer. If you're using safety eyes, you can check in the written pattern
14:15
the exact position where I add the eyes. But here in the case, for you to embroider the
14:23
eyes you just go making straight lines taking the length of one stitch. Okay, this is a very
14:31
simple process and this is how I make all the eyes of my amigurumi. I always embroider them
14:37
instead of using the safety eyes. This is my choice. I like better to work like this
14:45
but if you're working with the safety eyes there is the exact position there in the written pattern
14:49
you can check there so you can add while you are still crocheting this, the ball, the body of the reindeer
15:19
Okay, this is super good. Look at this
15:29
Now, we will start adding the reindeer nose. So for this, we will work a fast detail here
15:36
You will start with a magic ring and you will crochet 6 single crochet inside the magic ring
15:49
Okay, so you pull this tight and we'll start working the next rounds here. What
16:13
you're gonna do is you will crochet for round number two and three six single
16:23
crochet. Okay? So here I will stop very fast just to secure this yarn. So I just
16:31
make the first stitch so I can secure this yarn and make sure that it's not
16:38
going to unravel. Doing this later, as I told you in the when we were crocheting
16:42
horns is a little bit more complicated, so I like to do it now. So here you will work two more rounds
16:49
only with the single crochet, all right? I will keep this recording, I will show you how I make
16:57
these two next rounds because the detail is small and I want to show you pretty well how it's done
17:05
And again you can see here already that the stitches are curling to the outside
17:09
and we will stop soon when we finish this round to organize the stitches to the outside
17:16
so we are not crocheting with the wrong side facing out. Now this
17:26
Okay so now all of our stitches are out and we work one more round because here we
17:34
have to work for three rounds, right? Super good, we are done with this
18:09
Now we can cut very tight here this yarn and cut it here to leave a tail for closing this
18:19
tiny little ball. All right, and now we will close this detail like we close any other toy. So, we'll just
18:37
grab the front loop of the stitches, okay. So, we have six stitches here, we will grab
18:43
six front loops, okay. Once you grab all the six stitches, you pull it tight and
18:52
you just fasten this off. Great! So for this detail we will cut this yarn very close, you see, and we have
19:08
one tiny little red ball here. You can make one that you leave the tail instead
19:14
of cutting it, because this one we will sew in the reindeer snout. So you have
19:19
the Rudolph the red nose and for this little balls you make from other colors
19:27
so you make three of each colors, okay? So you have this nice detail. Here now we
19:37
will sew the red detail in the reindeer nose. It's very simple, you just sew
19:49
it on the tip of the snout here. This is looking very pretty. Let's hide this red
20:08
yarn and that's it. This little Rudolph reindeer is ready but we want to add a
20:14
little bit of Christmas light on its horn. So here what we're gonna do, we take
20:20
this black thread, is the same one that you use for embroidering the eyes, if you
20:25
did embroider the eyes, and you will insert all of these bubbles inside of
20:33
this thread. All right, now you will just roll over here in a way that you think it's nice
20:53
I will do it like this because I think it gives a nice mix
20:58
And you can see that the bubbles are loose inside so you can move them and organize the
21:03
way you want and it will be loose like this. What you're going to do is these two threads you make a knot here and you hide it inside
21:11
of the toy. Okay? this is how it should be looking like. Now we'll add a little bit of a tail, just
21:20
one small tail. So you take two small pieces of light brown color yarn and you
21:28
attach it here in the center part of the reindeer, on the back of the reindeer
21:38
the again the exact location is in the written pattern and here okay I'll
21:47
continue working here with my hands because this all of this yarn it's very
21:55
thick for my needle so let's do it here with hands And great, and that's it
22:19
Let's pull this tight and cut in some reasonable size here for this little chubby reindeer
22:28
Okay, this is great, super good
22:42
That's looking very cute. Nice, your reindeer is ready. If you want, you can attach a little bit of yarn here to hang in the tree
22:53
And that's it. I hope you enjoyed this pattern and I see you in the next time
#Crafts
#Fiber & Textile Arts