Up next in 10

React.js Facebook Avatar Profile Component Library to Crop Rotate & Zoom Using react-avatar-editor
Dec 22, 2025
Buy the full source code of application here:
https://buy.stripe.com/dR603kd3zbsYarK2uK
Show More Show Less View Video Transcript
0:09
Uh hello friends, today in this tutorial
0:11
I will be telling you that how to create
0:14
a very advanced profile pick avatar
0:17
editor such as Facebook. So whenever you
0:20
upload any sort of image you will be
0:23
able to crop your image, rotate your
0:25
image and also you can able to zoom your
0:27
image uh with live preview. So this
0:31
feature will be available inside your
0:33
ReactJS application and we will be using
0:35
a very special library called as this
0:38
library which is called as react avatar
0:41
editor. So this is a very special
0:43
library which ables which able to resize
0:46
your image, crop your image and also at
0:48
the same time rotate and uh rotate your
0:51
image and you will be seeing the live
0:53
preview of the image side by side and
0:56
you can see how many weekly downloads
0:58
are available one lakh over one lakh
1:01
week weekly downloads. So it's a very
1:03
popular library among developers out
1:05
there. So I will be showing you with a
1:08
live demo of this tutorial library how
1:10
to use this inside your ReactJS
1:12
application. So let me just show you a
1:14
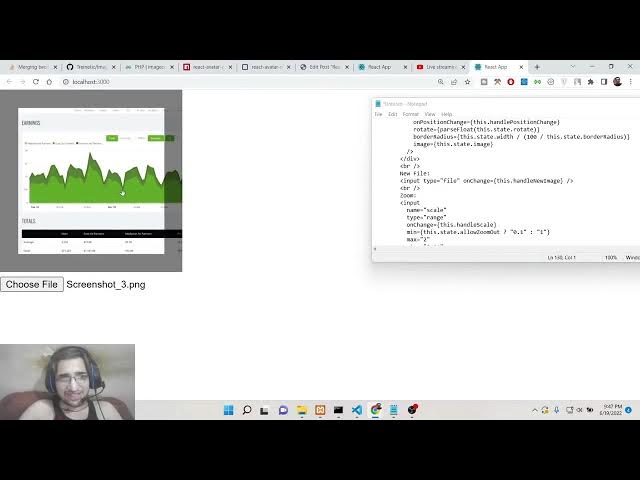
very simple demo here. So when you load
1:17
your ReactJS application for the very
1:19
first time guys you will be able to
1:21
choose your input file. So there is a
1:23
choose file button. If you hit this
1:25
button you will be redirected and you
1:27
can select your image whatever image
1:29
that you want to select here. Let me
1:31
select uh this image and you can see
1:34
that guys how it is uh having these user
1:37
controls out there. You can zoom it. You
1:40
can see how you can zoom it inside your
1:42
image. You can see this how you can also
1:46
rotate your image also in the left
1:47
position like this. You can also rotate
1:50
the image in the right direction. So
1:52
these are the different kind of controls
1:53
which are available for you inside this
1:55
library. So you can just see here how
1:57
you can zoom it, zoom out, rotate this
2:00
image and also there is a option of live
2:04
preview. So basically if you hit this uh
2:06
button here of preview your image will
2:08
be cropped and you will see the live
2:10
preview and then you will be able to
2:12
download the image by sing simply right
2:15
clicking it and simply saving this image
2:18
right here inside your computer. So now
2:20
the image is successfully saved here.
2:22
Now you can see the image resulted image
2:25
which is saved here. Right here you can
2:26
see it is cropped. So in this easy way
2:29
guys this is the very special library
2:31
which is called as react avatar editor
2:34
which allows you to zoom your images,
2:36
crop and rotate your images with live
2:39
preview inside your reacts application.
2:41
So if you are watching it for the very
2:43
first time guys then I will highly
2:45
recommend that you hit the like button,
2:47
subscribe the channel and uh let's start
2:50
uh building this application from
2:52
scratch inside the ReactJS application.
2:54
So first of all you need to make a very
2:56
simple ReactJS project and just inside
3:00
your app dot JS I will write the code
3:02
step by step. So let's start writing the
3:04
code. So the very first thing you need
3:06
to do is that guys just go to the
3:08
command line and you need to install
3:10
this library. So there is very simple
3:12
command out there which allows you to
3:14
install this. So npmi
3:17
react-vatar-editor.
3:21
So simply install this library by
3:23
executing this command which is npm
3:25
react avatar editor. So this will hardly
3:28
take 5 to 10 seconds and then it will
3:30
install this library. So now it is just
3:32
installing it. So just wait for the
3:34
process to finish. So now it is
3:35
successfully installed here. And now you
3:37
can start your application by simply npm
3:40
start. So this will start your
3:42
application at localhost 4200. So you
3:45
can see that localhost 3000 mind you. So
3:48
nothing is there guys. It is currently
3:50
empty react you haven't done anything.
3:53
So let's start the coding process here.
3:55
So the very first thing we will import
3:57
the react library from the actual react
4:00
library and then we will import this
4:03
library which is avatar editor and we
4:06
will be importing it from react avatar
4:08
editor. So visual studio code
4:10
automatically does that for me. So this
4:13
is an example of you advantage of using
4:16
visual studio code and text editor. So
4:18
then we will make our c uh default class
4:20
which is uh app and this will extends
4:23
the react component library. So this is
4:27
a class level component and now we need
4:30
to declare some state variables guys. So
4:32
this is the data which will be there
4:34
inside our reactjs application. So this
4:36
is a state object as you already know.
4:38
So here we need to declare the actual
4:40
image which will be uploaded. So this
4:42
will be empty by default and there is
4:44
the option which allows you to zoom out
4:47
and zoom in inside the image. Currently
4:49
this will be false and the position of
4:52
the image. So this will be having the x
4:54
coordinate and the y-coordinate. So we
4:56
will be giving x coordinate 0.5 and y
4:59
coordinate as 0.5. You can give any
5:02
position to of your choice. Then we have
5:04
the scale parameter. Scale will be equal
5:07
to one. Rotate how many how much
5:09
rotation you want inside the image. So
5:11
the default value is zero. How much
5:14
border radius you want inside the image.
5:16
So these are the different variables
5:18
which are there inside the library. And
5:20
preview live preview this will be null
5:22
by default. And the width of the image
5:25
is 200. You can just manipulate the
5:27
width and the height. This is totally up
5:28
to you how you want to do that. So width
5:31
and the height I am just uh
5:34
saying that width should be 200 and
5:36
height should be 200. So now guys we
5:40
need to render out something on the
5:42
screen. So we will use the render method
5:44
and inside this we will return something
5:46
on the screen. So here we will have a
5:49
simple div and here I will say hello
5:52
world. So now basically if I refresh my
5:54
ReactJS application you will see that
5:56
hello world is printed out on the
5:57
screen. So instead of this hello world
5:59
we want the avatar editor to be uh
6:03
published on the screen. So we will say
6:05
that avatar editor. So basically guys
6:08
this takes some options here and uh we
6:11
need to pass these options inside this
6:13
widget. So the very first option is
6:15
takes is a reference. So the reference
6:18
will be the this dot set editor
6:22
uh reference. So this function I will
6:25
declare. So don't worry about this and
6:28
the scale parameter guys. So the scale
6:30
parameter will be equal to parse. We
6:33
will parse it in the float floating
6:35
number. So this is a function that is
6:38
there inside JavaScript. And here we
6:40
will pass the state variable. This dot
6:43
state doscale. So how we can access the
6:45
state variables that we declare inside
6:47
this state object. We need to use the
6:50
this keyword. So this dot state dots
6:52
scale. Currently the scale is equal to
6:55
one. You can see that. And the next
6:57
option is take is the width guys. So
6:59
width will be actually again this dot
7:01
state dot width. This is 200 that we
7:04
have configured. height also this will
7:06
be very same this dot state dot height
7:10
and uh position position we also
7:12
configured in the state object so we
7:15
will be this dotstate dotposition this
7:17
is very easy and then we have the
7:20
callback functions which are there so
7:22
whenever the position is changed inside
7:24
your image so this callback function
7:27
will execute this call back function we
7:29
will write this is a custom function so
7:31
this dot handle position change
7:36
And then
7:39
then we will have the rotation. So
7:42
rotation again we will parse it in the
7:44
floating number. So we will take the
7:47
value from the state variable which is
7:48
state object. This dot state dot rotate.
7:51
So the next option is take is guys the
7:54
border radius once again we have
7:55
configured it inside our state object.
7:57
So this will be coming this state dot
8:00
width. What is the width of the image?
8:02
We need to divide this by 100 divided by
8:08
this dot sorry 100 divided by this dot
8:13
state dot border radius. So we whatever
8:17
border radius that we have configured.
8:19
So basically this is just the
8:20
mathematical formula to calculate the
8:22
border radius. And lastly the image guys
8:25
what what will be the image which will
8:26
be shown to the user. So this state dot
8:29
image. So image currently will be empty.
8:33
So these are the option guys which we
8:35
have configured here. You will see that
8:36
now we need to write this these
8:37
functions which is call back function
8:39
handle position change. This function we
8:42
need to write. So right here we need to
8:45
write this function at the very top
8:46
here. So we can write this handle
8:50
position change. So basically this will
8:52
be a call back function arrow function
8:55
and inside this
8:58
uh we need to set the position. So here
9:01
inside this uh position will be pass
9:04
sorry position.
9:06
So we need to set this to the state. So
9:08
we will say this stat state and here we
9:11
will pass the position like this. That's
9:13
it. So basically indirectly we are just
9:16
setting the state by using set state. So
9:20
whatever is the position here, whatever
9:22
the position is passed here. So on
9:25
position change. So what we are doing is
9:27
that in handle position change, whatever
9:29
is the position passed, we are just
9:31
setting it to the state using this dot
9:34
set state. So we are doing like this. So
9:37
after this guys uh we need to have a
9:40
break tag.
9:42
Uh this doesn't have to be a break. You
9:46
can write like this. And after that we
9:48
will have a break tag just to create
9:51
some space. And uh after this we will
9:54
have uh the input field where you can
9:58
upload your own image. So input type
10:01
will be of file and on change on change.
10:06
So whenever this uh we need to execute a
10:10
new function here which is handle new
10:13
image.
10:15
So close this input field here. So
10:17
whatever we are just doing here guys you
10:19
will see that uh if I just show you the
10:21
application you will see that the avatar
10:24
is displayed on the screen and also
10:26
there is a choose file button. So
10:27
basically if you hit this button here
10:29
this pop-up window will appear here and
10:31
allowing you to select any sort of
10:32
image. So whenever you select any sort
10:34
of image we need to pass this image
10:36
inside this function here which is this
10:38
function we will write here this dot
10:40
handle new image. So we need to write
10:42
this function right here at the very
10:43
top.
10:45
to display that image which is selected.
10:48
So right here at the very top we will
10:50
write this function here handle new
10:52
image. So this will be a async function
10:55
guys async arrow function and inside
10:58
this we need to await this dot set
11:01
state. Once again we will use this
11:02
method set state to set the state of the
11:04
application. So whatever is the image
11:06
passed here we will need to have e dot
11:09
target dotfiles zero. So now to get the
11:13
image which is selected by the user we
11:14
are using just e.target.file. So
11:17
basically this is a syntax and then we
11:19
are equating it to the image this is a
11:22
uh this is a state image op uh variable
11:25
here which is currently empty. We are
11:26
setting it to the image which is
11:28
selected by the user. So but now what
11:30
will happen guys you will see that uh if
11:33
I select any sort of image here that
11:36
image will be uh stored inside this
11:39
image variable. So that's it. Uh after
11:42
this guys we need to have a preview
11:44
here. Uh after this what has happened
11:48
here? Uh
11:53
image this dot state dot image.
11:57
So what is you can see that uh whatever
12:00
image we select here now it is displayed
12:02
inside this avatar editor. So that's the
12:05
use of this function here which is
12:07
handle image. So basically if you omit
12:10
this line this will not be displayed
12:12
here. You will see if you select any
12:14
sort of image this will not be displayed
12:16
here in the avatar. So basically we are
12:19
selecting the image and we are just
12:20
populating it inside the editor which is
12:23
avatar editor through which you can just
12:25
zoom your image save this image or
12:28
rotate the image all sorts of controls
12:30
you can do it. So now basically we need
12:33
to create those buttons which will
12:35
handle the operations for us.
12:39
After this input field you will see that
12:42
we need to rotate this. So
12:45
uh uh uh sorry after this just handle
12:50
new image. So we have the break tag and
12:54
then we will say zoom. In order to zoom
12:56
this image we will have another input
12:58
field. The name will be now scale
13:03
and the type will be of range and uh
13:06
there will be on change and this
13:09
function we will write this dot handle
13:11
scale
13:13
and the minimum value will be guys this
13:17
dot state dot allow zoom out and uh the
13:22
minimum value will be 0.1 and the
13:25
maximum value will be one like this the
13:29
Max value will be two.
13:33
Sorry, this needs to be like this. Max
13:35
two. And what is the step variable?
13:39
0.01.
13:41
This is the increase. And the default
13:42
value
13:45
default value basically will be one.
13:50
So close this. So now basically guys we
13:54
need to write this function here handle
13:56
scale. So
13:59
handle scale let me see this is a
14:02
function here in order to zoom the
14:06
image. So handle scale
14:09
this is arrow function.
14:12
So inside this guys we need to scale the
14:14
image. Whatever the value is passed here
14:16
inside the e parameter we need to first
14:18
of all convert to a floating point
14:19
number. So e.target dot value whatever
14:22
the value is selected and then we just
14:24
need to set to the state. So again we
14:26
will use set state and then we will pass
14:28
the scale value. That's it. So now
14:31
basically if you select your image here
14:32
there will be a slider here. If you zoom
14:34
in you will able to zoom your image. So
14:36
this is very easy guys. You can see that
14:38
how we can simply zoom our image
14:40
accordingly. You can just zoom it at any
14:43
location like this.
14:45
So if you're watching it for the very
14:47
first time guys then please hit the like
14:48
button subscribe the channel as well and
14:51
uh if you want to see more videos like
14:53
this then obviously hit the notification
14:55
bell icon as well. One question has been
14:57
asked by Uwell Kumar Sharma. Hello sir
14:59
yesterday I asked a question for an
15:01
application that generates a PDF after
15:02
feeding the required information. I want
15:04
to embed QR code inside that PDF. Do you
15:06
have any idea about that? U I I have
15:09
that idea. I will want to tell you that
15:11
I will make that video certainly uh in a
15:14
few days because I am doing some
15:16
research out there. So I need some time
15:18
to for this video. So I I promise that I
15:21
will definitely make this video. So
15:23
don't worry about it. So you will get
15:25
your video. So now proceeding with the
15:27
video uh with the application guys. Now
15:30
we are done with the zoom. So now we
15:32
need to rotate this image. So after this
15:35
we will have another break tag.
15:39
So break tag we will have and then we
15:42
will do the rotation part. So rotation
15:45
part will be similar to this guys. We
15:48
will have now the rotation part. So
15:52
there will be two buttons. Either you
15:53
can rotate in the left direction or you
15:55
can rotate in the uh right direction. So
15:59
we will have the first button. So we
16:01
will say left.
16:04
The second button will be say right and
16:07
then we will say that uh we will
16:10
configure the on click. So whenever you
16:11
click this button we will execute these
16:14
methods which are custom functions which
16:16
is rotate left and rotate right. Rotate
16:19
left and uh again on click
16:25
and uh this dot rotate
16:30
right.
16:31
So
16:33
after this we will have two more break
16:37
tags
16:40
and then we will have also need to show
16:42
you a live preview of the image. So for
16:44
that we will have another button here
16:46
which will be uh if you see here uh we
16:50
will need to execute this function which
16:52
is handle save. So whatever
16:56
this live preview will be shown to the
16:58
user. So the value will be simply
17:00
preview. Value will be simply preview.
17:05
So close this.
17:07
So now guys we need to write these three
17:09
functions. Rotate left, rotate left and
17:12
handle save. So right here we will first
17:14
of all write rotate left. So this will
17:17
rotate the image in the left direction.
17:20
So
17:21
rotate left. So once again this will be
17:25
a arrow function. E.trevent dot prevent
17:28
default. We need to prevent the auto
17:30
submission of the form and then we need
17:32
to set the state using again set state
17:36
and uh here we will need to pass the
17:38
value which is passed here simply by
17:40
this dot state dot rotate
17:43
plus 90°. So if you're rotating it in
17:46
the left direction, you need to just
17:48
keep on adding 90°
17:50
to the degree which is rotated. And for
17:54
the rotating it in the right direction
17:57
this will be in reverse. So again we
18:01
need to this is will be arrow function
18:03
we need to prevent the auto submission
18:04
of the form and then once again we need
18:07
to set the state and rotation will be
18:11
occurred uh this state dot rotate. So
18:15
once again we need to
18:18
90° plus sorry this here we will be
18:20
minus minus 90° but in the rotation in
18:24
the right direction you need to plus 90
18:26
like this.
18:29
So after this guys what we need to do is
18:32
that uh
18:35
we need to also
18:38
save this image.
18:40
So let me just uh delete this for now.
18:44
and also focus on the rotation part. So
18:46
if you now see we have these rotation
18:49
buttons out there if you select the
18:50
image. So you can zoom it. You can also
18:53
rotate this image in the left direction
18:54
and also in the right direction. And
18:57
then now we need to have a simple live
18:59
preview button from which if you just
19:02
click it this preview button you need to
19:05
show the live preview. So live preview
19:07
it is very easy. We will execute this
19:11
handle save method. This will be having
19:15
this. This is arrow function. And uh
19:18
first of all we will get the image by
19:20
this dot editor dot get image scale
19:26
to canvas
19:29
and we will convert this to a data URL B
19:32
64 string using this method which is to
19:35
data URL. And then we will uh construct
19:38
a rectangle
19:40
like this. this dot uh
19:44
editor
19:46
get cropping. So here we are actually
19:49
doing the cropping part. Here you can
19:51
see that guys this dot editor dot
19:53
getcropping rectangle. So basically we
19:56
are just cropping this image whatever
19:58
image the user has selected. And now we
20:01
are need to set the state again we will
20:03
use the this dot set state and the
20:07
preview object we will construct.
20:10
So inside the preview object we will
20:11
pass the image. We will pass the
20:14
rectangle which the user has selected
20:16
cropped scale will be equal to this
20:18
dotstate do.cale
20:21
and the width of the image this do.state
20:24
dot width
20:26
and the height this dot state dot height
20:33
and the border radius this dot state dot
20:37
border radius.
20:39
So this has constructed the preview
20:41
object guys. Now hopefully you will be
20:42
able to see the live preview of the
20:44
image as well. So now if you select any
20:47
sort of image, you pull out all the
20:49
customizations. You zoom this image, you
20:52
rotate this image in the left and the
20:54
right position. If you click the preview
20:56
button and uh it is saying that uh
20:59
cannot read properties of undefined get
21:02
image scale to canvas. Uh sorry I think
21:06
I forgot to write a
21:10
this function which is this sorry we
21:12
need to write this function guys which
21:14
is set editor reference I haven't
21:18
written this method you will see that we
21:20
need to write this you can see set
21:22
editor reference so this function is
21:25
necessary so write this function
21:29
if you write this function here now
21:32
hopefully this will
21:41
Uh handle position change
21:48
handle x position handle y position.
21:57
I think I missed these two functions as
21:59
well. We need to write these two
22:00
functions as well which is handle x
22:02
position and handle y position. So
22:04
basically just write this. This will
22:06
just manipulate and set the x position
22:09
and y position. So copy paste it. So
22:13
mind you I have guys I have written a
22:15
complete blog post on my tutorial
22:17
website coding sea which is there inside
22:19
video description. If you want the full
22:20
source code you can go to the video
22:22
description link and copy paste all the
22:24
source code. This is a single file which
22:25
is there. So simply you can copy paste
22:28
it simply here. uh copy it and simply
22:31
paste it here like this.
22:36
So anytime you have any sort of problem
22:38
just go to the video description link
22:39
and copy paste that source code. So now
22:41
if you select your image
22:44
live review will also be there. Save
22:47
this image on your computer. So in this
22:49
easy way guys you can use react avatar
22:51
editor to crop images rotate and also c
22:55
live preview it.
22:57
So this is all that I need to show you
22:59
in this live stream. Thanks very much
23:01
for watching this video. If you like
23:03
this video then please hit the like
23:04
button, subscribe the channel and I will
23:06
be seeing you in the next video. Until
23:08
then thank you very much.