Up next in 10

Angular 13 Google Places Autocomplete API Example to Search & Place Markers on Maps in TypeScript
Dec 22, 2025
Buy the full source code of application here:
https://buy.stripe.com/14kdUa0gN8gM0Raguf
Show More Show Less View Video Transcript
0:07
Uh hello friends, today in this tutorial
0:09
I will be showing you that how to place
0:12
uh Google markers inside the Google maps
0:14
and I will be showing you how to search
0:17
for any sort of Google places using
0:20
Google autocomplete inside Angular 13
0:22
application. So basically you will see
0:25
this is the application which we will be
0:27
building in this tutorial. So you will
0:29
see that there is a search box. So if
0:32
you type any sort of address here, this
0:34
autocomplete will be showing to you. So
0:38
all the places inside the world it will
0:40
be showing you. So if you just select
0:43
any sort of address here and then it
0:47
will automatically put the pointer at
0:49
the particular location that you have
0:51
selected. You can see that it has play
0:55
placed the marker the red marker. You
0:58
can also remove this marker by clicking
1:00
this remove button. So that the marker
1:02
will be removed. So once again if you
1:05
pick the location let's suppose
1:08
now you will see that at pinpoint
1:11
location it will place this marker at
1:14
this location. You will see that and
1:15
also you can uh drag the map also
1:19
uh to see the whole location. You can
1:22
also put the in in full mode in uh full
1:25
screen mode. So this is kind of this
1:28
application. You can change this to
1:29
satellite. So we are doing this inside
1:31
angular 13 and we are using the Google
1:34
places autocomplete API and also we are
1:37
using Google maps API to render out this
1:40
map. So we are we need to use the Google
1:44
API key for doing this process. So I
1:46
will be showing you step-by-step process
1:48
on how to integrate it inside our
1:50
Angular 13 application. So this is very
1:53
easy and uh you will be able to search
1:56
for any sort of address which is
1:58
available inside. So just put the
2:01
address and it will pinpoint this marker
2:03
at that particular location that you
2:05
have selected. You will see that. So
2:08
this is the location that you have
2:10
selected and it has put the pointer
2:13
here. This is the marker rectangular
2:15
marker and it has highlighted that
2:18
place. So this is very much necessary in
2:21
each and every application. So basically
2:24
it will give you more information about
2:25
the address that you have selected. It's
2:28
a district. You will see it's a
2:30
locality, administrative name, city
2:33
name, state code, country code. It will
2:36
also show you country name also. And uh
2:39
you're going to see that
2:41
all this information will be fetched
2:43
from the API and it will be displayed on
2:46
the screen. So we will try to build out
2:48
this application. I have given all the
2:50
source code in the video description.
2:52
This is my blog post I have written
2:53
here. So if you want to download all the
2:56
source code, you can go to the video
2:57
description link to download all the
2:59
source code. So step-by-step instruction
3:02
is given to you and all the source code
3:04
is given. So you will see that app
3:07
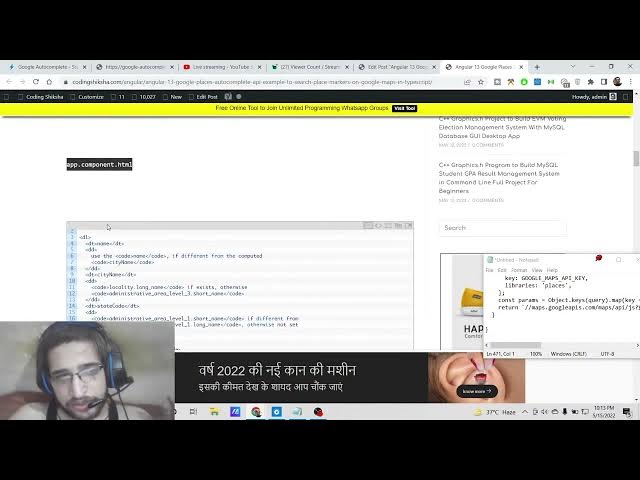
dotule.ts file and uh this is the
3:10
app.component.html
3:13
and this is the app.component.ts.
3:16
So these are the three files which is
3:18
necessary for this project and also we
3:20
are using external service to
3:24
connect to the Google places
3:25
autocomplete API and also render out the
3:28
address on the actual map. So this is
3:30
the actual service code.
3:33
So these are the four files which are
3:35
necessary for this application and uh
3:38
this is deployed on this URL. So simply
3:40
click it and uh you will be able to see
3:43
this simply search it.
3:48
So here first of all guys please hit the
3:50
like button subscribe the channel and uh
3:53
now to build out this application it is
3:55
very simple I have shown you the example
3:57
let me summarize the code for you. So
4:00
basically here you need to copy paste
4:02
the API key for your project. So you
4:06
need to go to your Google cloud console
4:09
account. So wherever you are creating
4:11
this,
4:13
so you need to be having that uh Google
4:16
cloud console account. Simply search
4:19
Google Cloud Console and uh just go to
4:23
your project and uh you need to verify
4:26
it using credit card. So once you have
4:29
verified go to the Google maps platform
4:31
and you need to get the API key for this
4:34
project. So simply
4:40
Go to your credentials and simply click
4:43
on create credentials. Go to the API
4:45
key. Simply copy this API key that it
4:48
gives you. So don't copy my API key.
4:51
Just create your own API key and simply
4:53
paste it. So once again if you search
4:56
it, it will once again work. You will
4:59
see that. So after this guys, now we are
5:02
simply inside the service. We are API.ts
5:07
file. we are simply interacting with the
5:09
API. We are creating a dynamic script
5:11
element and inside this we are uh just
5:16
uh creating this appending it to the
5:18
body like this. So here we are calling
5:21
the actual API. So it's a version 3 API
5:24
and we are passing the API key and we
5:27
are calling the Google places API
5:30
and uh this is the address you will see
5:33
that we are passing the API key also
5:36
like this. So this is all the
5:39
API.service.ts
5:40
code. Coming back to the app.component
5:43
html file. So here you will see this is
5:46
the actual input field. So where you put
5:48
the location where you want to search
5:50
for the location. This is autocomplete
5:53
field. So you will see search for the
5:56
location. So you will see so whenever
6:00
you type any sort of location here it is
6:04
captured using this search parameter
6:06
which is attached to it. And inside this
6:08
div we are populating this whole map. So
6:11
we have given it a class of map and
6:14
lastly we are using the for loop and we
6:18
are displaying all the details inside
6:20
this. And we have a simple button here
6:22
to remove the
6:24
uh marker.
6:27
After that it will display all these
6:29
details which is mentioned inside this
6:32
which is the longitude name, short name,
6:34
types. So all this coming back to
6:38
app.component.ts
6:39
code. So this is actual code for this
6:42
application. Here we have configured all
6:44
the colors. So you can add more colors
6:46
here. After that we are getting the
6:50
locations you will see that we are
6:53
initializing it the autocomplete
6:56
whenever something the place has been
6:58
changed this function will trigger it
7:01
will get the place which the user has
7:03
entered. First of all we will initialize
7:05
the map. We can pass the zoom level to
7:08
accordingly you can pass it to nine as
7:10
well.
7:14
So the zoom will be increased here. You
7:15
will see that. So it will you can play
7:17
with this zoom value accordingly pass.
7:20
So when you click the map what will
7:22
happen it will zoom in. You will see
7:24
that.
7:28
So all these methods are there. So
7:29
whenever the place is changed we will
7:32
put the center at that location and we
7:34
will put a marker. So in order to put a
7:36
marker we will get the loca position put
7:39
animation put the icon like this. This
7:43
is a rectangle.
7:47
So I have given all the source code guys
7:49
in the video description. So please hit
7:51
the like button, subscribe the channel
7:53
and I will be seeing you in the next
7:54
video.