Up next in 10

Get the full source code of application here:
Show More Show Less View Video Transcript
0:00
Uh hello guys, welcome to this video. So
0:02
in this video, I'll show you how to
0:03
integrate the claude code extension
0:06
inside VS code. So if you go to
0:08
extensions tab in VS code, simply type
0:10
here claude code. There will be two
0:13
extensions will come right here. One is
0:15
the official extension which is offered
0:17
by anropic and this will be the second
0:20
extension which is actually a chat
0:22
window.
0:24
So this is the official extension. So if
0:26
you click this install button using this
0:29
you first of all need to have plot code
0:32
installed separately for this extension
0:34
to work. So if you haven't installed
0:37
this you need to first of all install
0:38
this. So once you do this
0:41
uh this interface
0:44
claude
0:46
you can access claude here by going to
0:48
command pallet. Simply type clot
0:54
and you can have these three options
0:56
right here. You can fix the code with
0:57
cloud code or run cloud code. So now you
1:01
will see the you first of all need to
1:04
have cloud installed inside your system.
1:07
So cloud is not directly available in
1:10
windows. Instead you need to open
1:12
windows subset for Linux. So if you
1:14
having Abuntu system in in Windows as
1:18
you can see I've installed cloud right
1:20
here.
1:26
So right here.
1:38
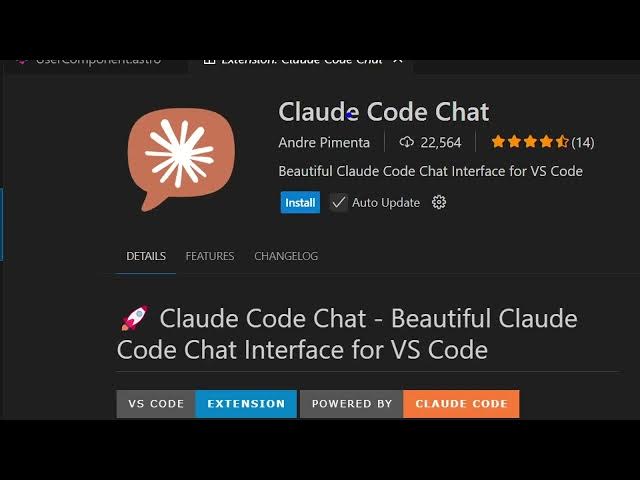
So you need to install claude here and
1:40
this is the official one but there is
1:43
also the second extension which comes
1:45
with a chat interface. So this is claude
1:48
code chat and for this also you should
1:51
have first of all installed claude
1:54
inside your machine and if claud is
1:57
installed you can install this extension
2:00
and what this extension does it actually
2:02
add this option right here inside your
2:04
sidebar section claude code chat. So
2:08
simply activate this and now this will
2:11
actually integrate this chat window
2:13
where you can actually type the message
2:15
or whatever you want to do right here
2:20
and basically send out to clot
2:24
similar to any other AI prompt you
2:27
simply have a chatbot so this extension
2:29
it's a custom extension it's not the
2:31
official one simply activate this this
2:34
will add this chat window and here you
2:36
can actually send out the chat and then
2:38
chat with the cloud official clot. For
2:41
this to work, you do need to basically
2:43
provide the location of your cloud in
2:46
WSL integration. Just provide the full
2:48
path
2:49
and also you need to paste the API key
2:52
as well. So
2:54
that you need to do by yourself. You
2:57
will see this tokens appearing right
2:59
here. And here you can select whichever
3:02
model you want to use. Cloud sonet cloud
3:05
opus like this you can configure it.
3:12
So definitely check out this