live_tv
Livestream Starting Soon
00
Hours
:
00
Minutes
:
00
Seconds
Up next in 10


https://www.proshaper.com
Our Amazon Storefront: https://www.amazon.com/shop/proshaper
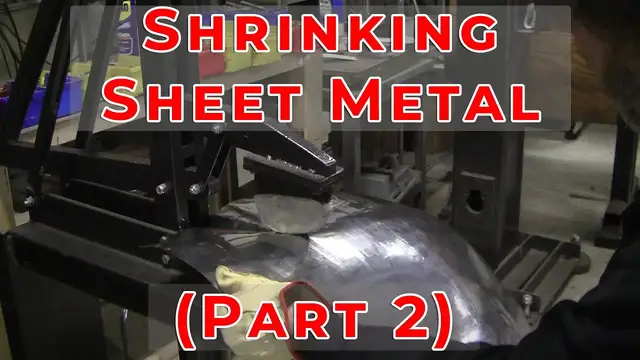
Metal Shaping for Beginners: Shrinking Sheet Metal (Part 2)
Wray is continuing to develop the panel by shrinking the edges, planishing it out on the English Wheel and constantly checking the progress on the wire form buck. He talks about the reasons behind shrinking and stretching instead of stretching the entire panel.
Email: [email protected]
Website: https://www.proshaper.com
Facebook: https://www.facebook.com/ProShaper/
Instagram: https://www.instagram.com/proshaper/
Twitter: https://twitter.com/ProshaperM
Linkedin: https://www.linkedin.com/company/proshaper
Show More Show Less View Video Transcript
0:00
Hi, it's Ray from ProShape-It Workshop in Charlton, Massachusetts. We're back on this steel panel. Everybody wants to see steel. I thought there'd be a lot of aluminum lovers out there, but boy, there's more steel lovers than there are aluminum lovers
0:18
Now I've been using 20 gauge on this I have 18 gauge 18 gauges a lot harder to work
0:26
Generally, I prefer to work in steel with 19 gauge Which used to be very easy to get but like the last year or so
0:34
it seems like it's becoming more and more difficult and the last time I tried to buy some is impossible
0:40
But today I found a new source and I might be getting some 19 gauge in so yeah
0:46
Maybe we'll try to break it up 50% steel 50% aluminum. I prefer aluminum
0:51
I think anybody to really gave it an honest try would prefer it also. So here we are
0:57
We're at this panel here. This is just a an educational panel just to show the different methods
1:04
I'm not going to use this panel because I'm going to make these fenders out of aluminum
1:08
We've already started that with one of the classes out of 060 aluminum, which gives you a great dent resistance and
1:14
And even this will 20 gauge will give you a pretty good dent resistance. So this one
1:23
we're doing all the shrinks on this side and As you can see here, there's a little bit of curve to it, but here is a lot more curve
1:33
so that's where most of the shrinks have to happen and you know, there's been some really active commenting going on in my YouTube forum section and and
1:43
Some people said boy. It's taking you a long time to do that. Well
1:48
I'm not so sure that's a long time because we'll go through the process again
1:52
We're going to put some more shrinks right in this area right in here and to put the gathers in
1:58
Usually it's like a minute per so it might be five or six minutes to put the gathers in then we put it in the shrinking
2:06
Facilitator knock each one of the gathers down. It could be a couple minutes per those and then oftentimes
2:15
Reactivate them and hammer it again by doing a little stretching over here and
2:20
That might be another couple more a couple minutes. So I think we did three rounds of
2:25
Shrinks and and knocking them down and then wheeling it out and so far
2:31
I believe we actual time on this panel has been about an hour
2:35
Maybe our 15 at the most some people said oh, they're doing that all off-camera
2:40
No, they're not doing it all off-camera. You're seeing everything pretty much
2:46
Some of the stuff that's really repetitious. Yeah, we speed it up or whatever, but let's go back to the gathering tool
2:53
We'll put some gathers in there and then we'll knock them down. Alright, so here we are back at the gathering tool
2:59
People have been asking when you're gonna get the plans up for this. We're trying to do it. I have classes every
3:05
twice a month and You know, I've got a full agenda and a lot of other stuff doing the videos the answering emails that eats my time up
3:13
So I'd love to have the plans available for these. I don't have them yet
3:17
I'm I've got a second machine that is all ready to go
3:22
And and we're gonna have two machines for the classes But it's definitely on the agenda for this month
3:31
So the Go over this one more time when you do this you do it on the top side of the panel and
3:40
You enter the panel right at the very edge you don't go in like this if you go in like that
3:45
You'll you'll get into trouble you want to go in a little bit a little bit a little bit a little bit
3:52
A little bit and you go as far as the throat is it's about I don't know eight or ten nine inch throat or something like that
3:58
And that's generally all you need to To get the results you want
4:03
Then you can go deepen it a little bit if you want so you end up with a gather that looks like that
4:11
Now that's a deep one. You can do shallows also if you want it you want to always get a little more
4:18
shrinking happening on the edge, so We'll do a shallow one here
4:23
Maybe half that distance deepen it up And a lot of people say well it'd be great if you had a foot pedal for this
4:45
Well a foot pedal It often times these panels droop and you're not going to be able to get your foot
4:51
I I made one with a foot pedal before it didn't work too. Well, that's why I go with the
4:56
the Upper lever here works a lot better There we are we got three shrinks in and that should be enough for now we maybe do
5:13
Generally, I do another question was do you do a round of planishing out the shrinks
5:20
Every time you do a shrink. Well now I like to do the shrinks knock them down
5:27
another round of shrinks Knock them down and then smooth it out. Why
5:32
because the You want to have enough room to you want to clean up all that residue of the shrinks and as you wheel
5:42
There's usually a lot of unsettled metal there and as you're wheeling you're actually still shrinking
5:48
Until you get to the point where it starts to get smooth and then you start stretching again
5:53
So you're undoing what you just did if you go too much so the idea is to get or all get the metal all settled in and
6:02
That will be smoothing it, but don't go any further than that because then you release in that shrink
6:08
So here we go. We'll go back into the Shrinking facilitator. I have been using this one. I made this one for large panels
6:18
This clamshell here is a little smaller And it should facilitate the shrinking process a little bit better
6:25
Now I'm going to need my muffs because this megaphone's back at you. Now you remember
6:30
When you do this the gathers here and you put it on the shrinking facilitator
6:35
You want to always? Bring that like that now a lot of times in the class
6:42
I'll show that to the students But then they what they'll do is they'll go like this why I don't know
6:49
But a lot of them seem to turn it and want to turn it around. It's super important
6:54
That you are in the middle at the deepest point And you want this to be right on that edge
7:02
And if there's air underneath the air gap, that's the ideal condition
7:08
So let's knock that one down Where every hammer blow we're watching this if that starts to open up we got to close it back up again
7:32
I I That's the most important result that you want right there you want that hard spine
7:52
That shows you that the metal is colliding with itself pushing itself into it
8:14
And I'm not really swinging the hammer remember I'm just Tapping it down
8:20
All right now I can swing the hammer because I want to stretch right in here
8:25
And when I stretch in here, it might reactivate some of this stuff
8:37
And I want to hit square I don't want to hit with the heel of
8:42
that hammer like that because that is going to have too much of a pointed impact with the metal and
8:50
Can cause a little bit of a stretching damage People often ask why do you have the heads out so far you need them out there because you need room for the handle
9:04
Otherwise, it'll hit you could even have a hammer with the head a little longer and for doing like this hammering right here
9:11
Would actually be better So now I got a good shrink protector right there
9:41
Got to watch that you don't let that get so steep that it starts to tip over on you
9:49
Oh It's giving another little blast there
10:11
See that was a heel hit I don't like that You
10:53
You see how those just reactivate nice now you can see How that's really starting to take the corner now
11:01
Start to come around So let's knock these down on the hot stump over there and then we'll wheel that out
11:11
And we'll see where we're at. So we'll pre-planish this by crunching them down with a steel hammer
11:17
You can use the plastic hammer, but this is a little more effective That's really stiff right there
11:33
Okay All right now we'll wheel that up all right, so now we're going to planish it out in the wheel and we'll do another couple rounds of
11:49
Shrinking after we get this all smoothed out Takes a few minutes just to smooth it out
11:55
Now this effectively is still shrinking until it gets smooth And if you I don't know if mark and pick it up, but
12:06
You can see right there the discoloration you'll get that in aluminum steel copper or whatever
12:12
That's where the the shrinks are really just pushing against each other and all that discoloration comes out in the planishing process
12:19
eventually so we're going to have to over shrink it a little bit or Or
12:26
We'll lose some of the shrink and then make it up by stretching more over in here
12:42
So knocking these down is I call it a no-brainer it's no big deal you just kind of navigate through and knock them down
12:53
One thing is try not to Let the tail of the panel bite into your English wheel paint job
13:02
I've already got a few flaws and it's What you can do is if it if it hits and you just move around to the other side and leave this let the side
13:11
That's going to be hitting the outboard where it's not going to cause any damage
13:16
And these wheels also turn 90 degrees you can easily loosen the
13:25
Screw and turn and lock them and you can go this way if you want
13:30
Or you can go at a 45 It's a nice feature Your class starting Friday go Friday Saturday Sunday and Monday
14:01
And we're toying with the idea of starting a
14:18
Patreon channel a lot of youtubers have patreon channels and it's a way of
14:25
supporting the whole process So if you're familiar with patreon and you considered maybe becoming a
14:35
Patron of the pro shaper channel through patreon We'd like to hear from you and
14:44
We'd also like to know what what you would want That would be different from my youtube channel. There's a ton of possibility
14:53
so Love to hear from you a
15:45
common comment on the YouTube forum on my comment section is why do you have the wide wheels
15:55
I just really don't understand that I probably answered that about five or six times now
16:01
So address it a little bit in here the wide wheels Allow you to
16:10
Go in a panel like this and I really don't have to worry about having that panel dead flat
16:16
When you have a narrower wheel and you go off dead flat like that
16:21
The edge of that wheel will bite like crazy make a big big mark in your panel
16:26
So that was the first Impetus for me to Say boy, I think a wide wheel would work better
16:38
And of course when I made my first wide wheel It verified that my theory of
16:44
The wider wheels working better actually worked. So that's one of it the reasons why the wide wheels I prefer and
16:54
It holds the panel level and the other is if you have it
17:00
Coupled with wider anvils and this would take could take a four inch anvil easily and we do have plans for adding
17:11
to the same frame a A bigger top wheel and wider anvil says an accessory
17:18
When you have bigger anvils and top wheels you can have larger
17:25
Working contact working surfaces are contact areas which makes it a little bit more efficient and
17:32
the other thing is that If you have a little low Say right here when I go over that area
17:43
You get a fulcrum lever effect Because it's wider it'll it'll bridge a low much easier and smooth those areas out
17:54
so there's at least three reasons that are very valid for the
18:00
better performance of white wheels And why is it that a lot of the wheels are the same on a lot of these
18:09
Old English wheels and whatever it's because of traditionalism a lot of those guys have never tried a wide wheel and
18:18
They'll stick you can do beautiful work with that What narrow wheel but if they tried
18:27
They would like it Now there are some times when a A narrow wheel has it advantage. I've got three harbor freight wheels in here
18:40
Which are only two inches wide on the top wheel and sometimes that that little two inch wide wheel
18:45
Comes in really handy. So I do use them not that frequently, but it's nice to have them available
18:53
These are a quick change you can pull the pin out real easy and put a narrow wheel if you wanted to
18:59
All you do is put a couple spaces on it and you have that ability
19:04
So We're doing a little smoothing here plus with a little bit of stretching pulling this backside over
19:18
That's the top of the Of the panel here now. We'll try to straighten this out a little bit more
19:34
This end doesn't have as much curl and it is a curve in it as this this end has more this is less
19:55
Now you see this edge is a little loose like that and
20:00
You know, I've shown this probably half a dozen times now, but I'll show it again A lot of people will run over to a kick shrinker and kick shrink that up
20:08
But let's make that disappear by just doing a little 45 action on it
20:14
You saw what it is there it is right there now a couple minutes of 45 and
20:24
45 means going into 45 degree angle or something close to it
20:29
Now let's see yeah like it should be all this way Now this way I'll do the 45 this way
20:52
And that phenomenon of that wavy edge then now you can see it's all settled down
20:57
This one's a little wavy here. We'll settle that one down. That is a common phenomenon
21:03
Happens on every single panel that you make if you go over to the kick shrinker and you end up
21:10
What happens is you kick shrink that it'll settle that in but it pushes in board a little bump now
21:16
So now you have a little bump right here But your edge is settled and it's just I think it
21:23
It mars the edge to with the kick shrinker marks even if you have a stipple shrinker
21:28
It still leaves a mark and I just really don't see any reason to use a kick shrinker at all to do any shaping
21:37
You can do it a lot of people do So So there's those edges settled down we got a little bit up here will settle that one down
21:59
And then the top edge will settle This just becomes second nature you don't even think about it
22:08
You just see that wavy edge and you go in there and 45
22:31
Thank you I The idea for my patreon channel which we haven't we've just kind of toying with the idea trying to put it together instead
22:55
There's a lot of people around the world that really don't have the the means or the time to come to a class with me
23:04
So and I really don't want to do Structured online classes. I just feel that that would be something I didn't really want to do but
23:14
with patreon we can get real creative and it allow Those people that can never make it here to the US
23:25
For some reason they'll be able to Have some input as to what they're really want to learn and we can address all those different issues
23:37
We'll do quite a bit of it on YouTube too, but We're going to have two channels basically the YouTube channel and the patreon channel
23:55
So that's smoothing up pretty nice Now what I'll do is we'll take it out of arrangement and we'll smooth the whole panel
24:05
Bring it like this into the curl arrangement And then we'll put that in there
24:56
Comment section which is almost becoming a forum which is great is
25:04
Boy it's taking a lot of time well All of these panels if you're doing them to a super high precision meaning
25:12
All you're gonna have to do is prime of this by the time you're done it takes time to do them
25:19
so Fender like this fender we're doing the whole job is dependent on your skill sets and the tools that you use
25:28
Can be a 30 hour to a 50 hour job and you end up with a brand new perfect fender
25:37
dependent on your skill sets and how You have advanced your perfection level of your skills are
25:44
But it takes time you can't do it in ten hours the whole fender it just takes time
26:12
It's done when it's done You're restoring a car. It's a minimum of
26:19
generally 1500 to 2000 hours and that that starting with a really nice car. It's a nice shape. It's not a rust bucket
26:29
there are cars I call those cars and Basically you have to rebuild or remake every single
26:36
component of the car and some of those can take up to four thousand five thousand hours
26:44
Again depending on the level of finish it you're going to give it I Posted something on my Facebook page today apparently is it was I shared it
26:55
And it was a Bentley blower Bentley, and I believe it's a reproduction
27:01
And I think it might be being built or was built by Bentley and it said that
27:09
40,000 hours went into the construction of that car so That was probably half a dozen people or more working 40 hours a week for years on that project
27:24
so it can take a long time the reward is the Is the result after you spend all that time you end up with this
27:36
Magnificent creation That has your DNA throughout it. It's It's your car
27:46
What I try to do with my classes and even my YouTube channel here is to show that
27:53
You can do it to empower you and inspire you that you can actually do this work
27:59
It's not some Black magic. It just takes time to do it
28:05
You got to learn the basic skill sets and then move up so that you can master just about any problem you encounter and
28:15
As you do it you get better and better and better Lot of people think it's the tools and the tools certainly help out, but that's not the
28:29
the difference between somebody who does a really really good job and And
28:36
Because they have better tools now You if you've got tools that are tuned properly, they might not be super accurate
28:45
as far as they're or Beautiful or whatever, but they can do the job you can weld up a bunch of I beams and plate them and strengthen them and
28:57
As long as you have a good wheel. It's sort of like A
29:02
Car if you don't have good tires on it, I don't care how many horsepower you have it's not you're not going to get the
29:11
performance that you expect the most important component of English wheel or a power hammer or whatever is that the actual working tools
29:21
Which is the anvil and the top wheel or the dies in the case of a power hammer or planishing hammer
29:31
All right, so we got that smoothed out Obviously it doesn't fit
29:36
We got a problem So we set it back in arrangement That's just I call the belly bend
29:48
You lean into it the belly is the lever your hands are the fulcrum
29:55
Most of this work is fulcrum and lever lever Fulcrum A curve on the edge
30:22
Now we're probably gonna have to do a bunch more here, but let's see what kind of progress and now
30:33
All right, so we got clamped up obviously we need more and but we got a lot of curve going into it
30:39
The panels really shined up really nice. It's settled down. So let's put some more shrinks in it
30:45
There's a second round This is the second round or third round that's the second one time second one today
31:10
If you don't talk this actually goes a lot faster All right, so we put four long ones in there and
32:05
Let's knock those down. You see that's with the shrinks in there or the gathers in there. It's really coming around so
32:12
And the panel is looking really good all that shrinking action pretty much disappeared
33:25
All right now we're gonna take a couple more shrinks in between there
34:22
Oh Now we'll knock those down you can see that's coming around pretty good
35:24
If you do the gathers correctly Each gather will reduce the edge about a sixteenth of an inch
35:38
If you're not a hundred percent on your gather the sixteenth of an inch of the sixty two thousandths
35:44
If you're not a hundred percent, maybe you're only getting fifty percent efficiency from your gather
35:49
Then you're only gaining or losing thirty percent thirty thousandths of an inch
35:55
We might have to take out an inch and a half or two inches in this area right here
36:01
Shrink that up. What's going to be interesting here is When we eventually get to the point where we're going to cut this panel
36:09
Right in here. We'll be able to measure it and see What happened to that
36:15
thickness Now we can also do this experiment experiment To compare the different methods we can do it a couple of different ways
36:29
we can wheel just this outer edge as a simple panel and
36:35
Then do the the well joint right here that might do that next step
36:40
We get this one finished and then we can do the same panel again using a small two-inch thumbnail die and
36:47
Thumbnail shrink this whole thing and see what that result looks like
36:52
And then I have my four inch thumbnail die in my power hammer
36:56
And we can try that so you can get the big wide spectrum picture of how these panels can be expected to progress
37:04
The different ways I love you know And it exactly right I trying to pull that edge over by wheeling it so now I doing a little bit of wheel stretching here
37:44
Settle that edge in a little I
38:29
Alright now put that on there. I didn't planish it out as much as I did before but
38:35
Let's put that on there and see what we're at now Obviously we still have a bunch to go
38:42
We're making some pretty good progress so you can see that curve is getting in there pretty strong
38:46
We're gonna have to just keep shrinking shrinking shrinking shrinking until that lays down
38:53
Like I said, don't despair. This is I think the fifth round the shrinking total
38:59
each round the shrinking is say 10-15 minutes Dependent you know if you're talking or not so
39:07
We probably got two hours maximum in this panel right now and
39:14
I think another couple shrinks there Probably another two or three rounds of shrinks is going to bring it in really close
39:24
so I Think that's what we'll leave it right now for today and tomorrow. We'll pick it up again
39:31
it's Ray from Pro Shaper keep the comments coming in and Like I said, we're going to try this all different ways. So don't make any
39:42
Judgment calls on it yet because we're just showing the whole wide spectrum of methods
39:48
So it's Ray from Pro Shaper in Charlton, Massachusetts Thanks for watching
#Manufacturing
#Metals & Mining