0:00
in this video i'm going to show you how
0:01
to create your own iris folding patterns
0:04
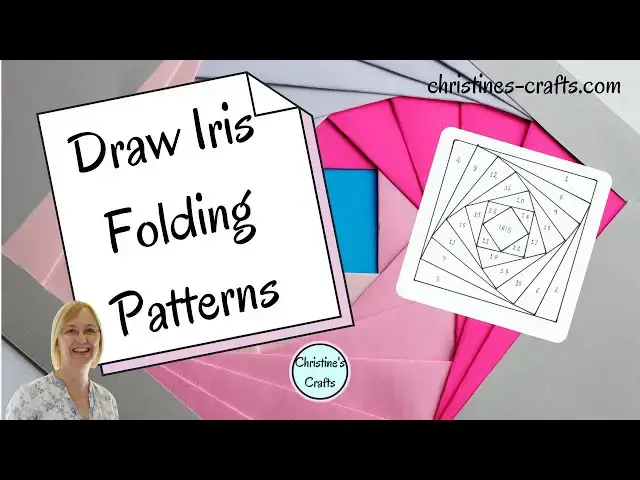
so you can see here we've got a triangle
0:06
circle and a square one so you can see
0:09
these are nice pictures that have been
0:11
and they're all based on the patterns
0:14
and i'm going to show you in this video
0:16
today how to make your own
0:18
you can download them off the internet
0:19
and you can indeed get mine if you click
0:21
on the links below this video you will
0:23
find you can access these
0:24
but i want to show you how to make your
0:26
own then you can make whatever
0:28
iris folding patterns you like so this
0:31
is the one i'm going to show you me
0:33
making which produced this picture
0:36
so let's get started i'm christine of
0:40
and this channel is dedicated to
0:44
so all you're going to need is your
0:47
pen and a ruler now i've drawn the
0:52
so we're off and running whatever shape
0:55
you need to decide how wide you want
0:59
each of your sections of your iris to be
1:02
now i'm going to use a big thick marker
1:05
just so you can see clearly you could
1:07
use a pencil a narrow pen
1:09
or indeed a great big marker pen so it's
1:13
i'm going to use one inch so on one side
1:18
measure one inch then move around to the
1:21
next side and measure an inch from the
1:24
and then go to the third side and do the
1:28
and then round to the final side and
1:32
so as you can see i've measured an inch
1:36
now join up those marks that you've made
1:39
and what you should create is another
1:43
but smaller than the original
1:46
so you can see i'm just going to join
1:54
and you can see it is still a square
2:00
and there's triangles along the edge
2:02
those are your first layers for your
2:06
so one thing i would say is as you go
2:08
along it's a good idea
2:10
to me to mark up your triangles so that
2:12
you know what you're doing later on
2:15
so i'm going to mark mine in the
2:16
simplest way possible and i'm going to
2:18
work from the outside in
2:20
measure marking them up one
2:23
two three and four and then on the next
2:28
we'll be starting at five and so on
2:32
so once you've completed that square
2:34
we're going to repeat the whole process
2:36
again so wherever you measured an inch
2:39
we're now going to carry on and measure
2:41
an inch in on the new square
2:44
so just mark your inch take your rule
2:48
and repeat so you're doing exactly what
2:51
you did on the first square
2:53
but you're doing it again on the smaller
2:58
you'll not be surprised to learn that
3:00
the next thing you do is join those
3:04
which is going to give you another
3:06
square which is smaller again
3:13
so take your time join them up carefully
3:17
keep those accurate squares
3:20
and you can really start to see on this
3:22
second layer that that iris pattern
3:25
is starting to appear
3:33
so once you've got the complete square
3:36
you need to label up those triangles
3:38
so the one that's directly underneath
3:43
that's your first one again so that's
3:44
going to be labeled up
3:46
five and label your others
3:50
now you will see patterns on the
3:51
internet where they're labeled up 1a
3:53
1b 1 c 1 d 2 a 2 b 2 c
3:57
2 d and that's where people are going to
3:59
use exactly the same color as they work
4:01
and it just makes it clear you can label
4:03
yours like that but i've chosen not to
4:05
in this case so that the pattern's as
4:09
so i've just sped the film up a little
4:12
so that you can see exactly how it grows
4:17
and make sure you can follow along
4:21
again make sure you label those
4:26
and then it's time for another square
4:47
again label up those triangles
4:52
and you could at this point decide that
4:53
that's small enough for you
4:57
and leave your iris at that with making
4:59
your own patterns it's clearly your
5:00
decision as you go along
5:09
and then label it up and you could at
5:13
decide that that was small enough
5:16
especially if you're thinking of putting
5:17
a photograph in there
5:18
or a piece of art because i'm just going
5:21
to put a blank color in there
5:23
go for a smaller one again and you can
5:25
go as small as you like
5:27
it just gets a little bit more fiddly
5:31
but especially if you're using a smaller
5:33
measurement than an inch you could
5:34
probably get a much smaller square in
5:36
there if that was what you wanted
5:39
i'm just going to label up those
5:43
and then i always label the center iris
5:47
i don't think i'm likely to forget but
5:50
and there you have it your pattern is
5:52
complete so i hope you enjoy making your
5:55
and then using them to create your own
5:57
iris folding pictures
5:59
or cards so i hope you've enjoyed this
6:01
the video on the screen right now is the
6:03
one that shows you how to do your iris
6:05
folding once you've got your pattern so
6:07
please take a look at that
6:08
remember to subscribe to the channel and
6:10
leave me some comments
6:12
and thank you for watching