Up next in 10


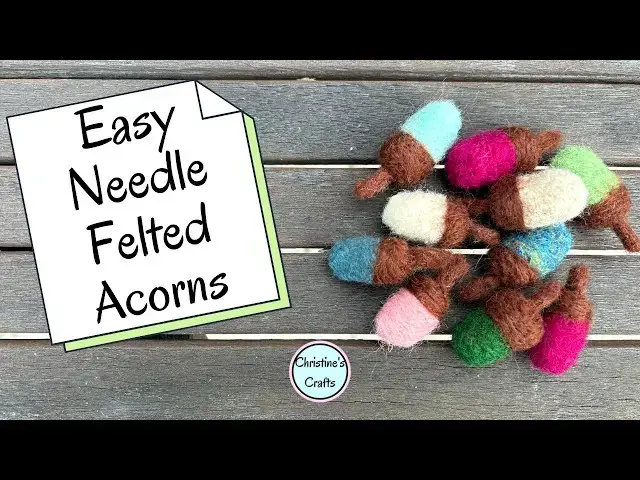
Learn how to make these adorable needle felted acorns with this easy DIY crafts tutorial! This video demonstrates the art of crafting with wool and shows you how to create beautiful, handmade felted wool acorns. This needle felting project is perfect for beginners!
As an Amazon Associate I earn from qualifying purchases
---------------------------------------------
FURTHER V I D E O S:
Autumn Leaf Bowl - https://youtu.be/2NtL_hYD-gU
Needle Felting Halloween Kit - https://youtu.be/mHUMELZ-QBQ
--------------------------------------------
Supplies:
Needle felting wool selection - https://amzlink.to/az06gPVA7LY08
Needle felting starter kit - https://amzlink.to/az01RkAY7UAjZ
Needle felting needles - https://amzlink.to/az0AToEnpMdTY
--------------------------------------------
Show More Show Less View Video Transcript
0:00
So, I'm going to show you just how easy
0:02
it is to make these needlefelted acorns.
0:05
Really quick, really easy. And if you
0:06
like the bowl they're in, I've also got
0:08
a video showing you how to make that.
0:09
So, let's get started.
0:12
I'm going to show you the basic items
0:13
they need. You need some wool that you
0:16
can felt. And I'm going to say a colored
0:17
one and a brown one. Now, these are
0:19
finger protectors, which are a good
0:21
idea, but you don't have to have them.
0:23
And you're definitely going to need a
0:25
needle felting needle. Now, you'll see
0:27
mine's in a handle, and I will talk to
0:28
you about about those as we go along,
0:31
but all that matters is you've got a
0:32
needle, felting needle. It's a special
0:34
needle with barbs on it, and then
0:36
something underneath to go into. Now,
0:38
you can see I've got a proper felting
0:39
block, but you can just use a piece of
0:41
thick foam if you want to when you're
0:42
getting started. And you're going to
0:45
take some of that colored wool and roll
0:47
it. And you're just basically making a
0:50
cylinder. Now, I'm making these about
0:52
the size of real acorns. There's nothing
0:54
to stop you making them any size you
0:56
like. So, whatever size you're thinking
0:59
you want, go a bit bigger and roll up a
1:02
cylinder.
1:03
And then push your needle in and out and
1:07
in and out. And that's it. That's needle
1:11
felting. And just keep going. Keep
1:14
pushing that needle in and out and in
1:16
and out. And you'll notice I just keep
1:18
moving the cylinder. Just keep rolling
1:21
it over. And that's because I'm going
1:22
for that round shape around the acorn.
1:25
So, I don't want to end up with a flat
1:27
side.
1:29
And just keep going. And also, you'll
1:32
notice I keep going in the ends just to
1:34
get those ends felted in. And what
1:36
should be happening is it should be
1:38
getting more and more solid. your barbs
1:41
on your needle felting needle are
1:43
tangling those fibers together, which is
1:46
compressing the wool down and sculpting
1:48
it basically into a more solid object.
1:51
And that's what needle felting is.
1:54
You're sculpting with the wool. And
1:58
obviously, I've sped this up. Take your
2:00
time, especially if you haven't got
2:02
needle protectors. I have done needle
2:04
felting without them, and you have to be
2:06
very careful. The needles are incredibly
2:09
sharp. They're also very easy to break.
2:11
So, make sure you go in and out
2:14
straight. Don't try and bend the needle
2:16
while it's in the wool. You will snap
2:17
it. If you think you're there, pause.
2:22
Try it against what size you want. So,
2:23
I'm just trying it against an acorn and
2:25
we're doing all right. But it's quite
2:27
soft. Now, if there's one mistake you
2:29
might make with needle felting, it's not
2:32
needle felting enough. You have to keep
2:34
going and going and going. You really
2:36
want it firm. So, I'm back to carrying
2:39
on. I'm just making it into the shape I
2:42
want by just repeatedly pushing that
2:45
needle in and out. And as I've said,
2:47
making sure you don't bend it. Doesn't
2:49
matter if you're going up and down, side
2:50
to side, so long as it's straight.
2:54
And once you're happy you've got your
2:55
acorn shape, you want some of the brown
2:57
wool, and you don't need a lot. You'll
3:00
see I've just twisted it a little bit so
3:02
it holds together.
3:04
place it around the top of your acorn
3:07
and needlefelt it in place. Now, you'll
3:09
notice I've started in the middle and
3:11
I'm just making sure that's secure.
3:14
And then just work your way round. It
3:16
doesn't matter which way you go. And
3:18
secure it. And as you keep going round,
3:22
you're forming that edge of the cap on
3:24
your acorn.
3:26
And you'll notice that it's forming a
3:29
nice edge. And that's really the bit
3:30
that matters. Just making sure you get
3:32
that nice edge and that it matches up
3:33
when you get back round. If it doesn't,
3:36
force it to match up. You've got the
3:37
flexibility to move the wool. And when
3:40
you get back around, choose one that
3:42
you're going to overlap and just keep
3:44
going round. And the other one is just
3:46
sticking out the top of the acorn. And
3:48
that's fine because then you're going to
3:51
just needlefelt that into the top of the
3:53
acorn. So, the whole point now is to get
3:56
that brown wool nice and tight and
3:59
needlefelted onto the top of the acorn
4:01
to form the cap.
4:03
How much you put there is up to you. The
4:05
more you put, the thicker your cap will
4:08
be. I've not put too much. Just want a
4:10
nice thin cap just so you can see
4:12
there's a cap on the acorn. But you
4:14
could, of course, put a really nice
4:15
thick one if that's what you wanted.
4:18
Now, I hope you're enjoying this and
4:20
you're starting on needle felting. And
4:22
if you are, could you give me a thumbs
4:23
up so it spreads to more people, please?
4:26
Don't worry, I haven't forgotten the
4:27
leaf basket. I will tell you about that
4:29
at the end. And in fact, there'll be a
4:30
link to it to the video. So, don't
4:32
worry, that's coming up. So, you can see
4:36
I've now got a cap on my acorn.
4:41
And I'm just standing it up to get into
4:43
the top there.
4:45
And just keep needle felting until
4:46
you're happy with it. The end of the
4:49
day, this is your acorn.
4:51
And then once you are, we need to think
4:53
about a stem.
4:55
So you really do need just a tiny bit of
4:58
wool. And you're going to form a
5:00
cylinder again, but this time it's a
5:02
tiny cylinder. And I've got to confess
5:05
that without needle needle, we don't
5:07
need to protect the needle. Without
5:09
finger protectors, this is going to be a
5:11
challenge.
5:13
So you're just going to do exactly what
5:15
you did for the acorn, but obviously on
5:17
a much smaller scale. So, it's a little
5:19
bit more fiddly and intricate. And just
5:21
keep rolling that cylinder and it will
5:24
try to cling to your mat. Just keep
5:26
picking it up. Now, you've noticed that
5:29
I've got a handle on my um needle and I
5:33
do recommend that. It's so much easier
5:35
and so much more enjoyable, and they are
5:37
so inexpensive. I'll put some links down
5:40
below for some various bits of needle
5:42
felting equipment on Amazon if you want
5:44
to have a look and it'll just give you
5:46
an idea for prices and give you an idea
5:49
of the sort of things you might want.
5:50
You can buy kits or you can just have
5:53
supplies and make all sorts of different
5:55
things. Indeed, once you've done a kit,
5:58
you might have some spare and decide to
5:59
make something else out of it. But you
6:02
can see my stem is getting more and more
6:04
solid.
6:06
How solid should you go?
6:09
It really is up to you. But again, the
6:11
only mistake you'll make is not making
6:12
it solid enough. So, do keep going until
6:15
it's really quite sturdy. You don't want
6:17
it to be able to rip. And if you wanted
6:20
to make a garland with these or
6:21
something similar, you really do want it
6:24
quite sturdy. Now, I'm just placing mine
6:26
in a bowl, but just think of what you're
6:28
going to use it for. Now to attach it to
6:31
the end, just place it so that one end
6:34
is in the middle of the top of your
6:36
acorn and push your needle through a
6:39
little bit of the stem and the top of
6:41
the acorn. And then just keep doing
6:44
that. Now obviously you need to rotate
6:47
the acorn
6:49
and secure it on all sides.
6:53
And just keep carefully going round. Now
6:56
obviously your stem's trying to wander
6:58
around and be awkward. It is a tiny
7:00
little thing, but if you just keep going
7:03
round, you'll notice it get more and
7:05
more secure.
7:08
And if you just keep going, it'll become
7:11
secure. Again, decide what you're using
7:13
it for for how secure that needs to be.
7:15
And if you keep going long enough,
7:17
you'll make your stem quite a bit
7:18
shorter. But just keep going until
7:20
you're happy with it.
7:23
And then you've got an acorn
7:26
with a stem.
7:28
Now, you'll notice, look, my needle is
7:30
slipped inside the handle. So, we'll
7:32
just have to sort that out to carry on.
7:36
And then once you've got one acorn, why
7:37
stop there? So, you could make lots of
7:40
these and put them in a bowl, hang them
7:41
on garlands, just place them on your
7:43
mantle piece.
7:46
They just add a bit of a nice autuminal
7:48
vibe, I think. So anyway,
7:51
so the bowl I talked about is just made
7:54
using autumn leaves, artificial ones.
7:58
There's a video on the screen that it's
7:59
linking to so you can make yours. And
8:02
they really are super easy. I do
8:04
recommend having a go to keep going with
8:06
that autumn vibe.
#Crafts
#Fiber & Textile Arts
#Fiber & Textile Arts
#Art & Craft Supplies