Up next in 10


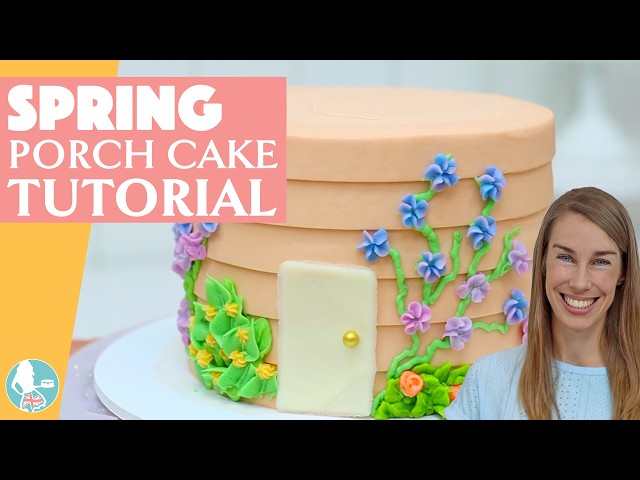
In this cake decorating tutorial I'll show you how to make a spring porch cake with buttercream flowers, textured frosting, and a chocolate door. This would be perfect as a housewarming gift or any celebration in spring!
⭐Join my channel for members-only perks!
https://www.youtube.com/channel/UC1k3PDqnjUG8wMH1vY3yojA/join
🥣My Recommended Cake Decorating Tools: https://www.britishgirlbakes.com/my-recommended-tools-for-cake-decorating
💫Start your FREE 7 day trial on my cake school: https://britishgirlbakes.teachable.com/p/all-you-can-cake
🎂Take my FREE course on 10 Frosting Techniques: http://britishgirlbakes.com/free-course
👩🏼🍳My 4 Minute Buttercream recipe
https://www.britishgirlbakes.com/recipes/buttercream-frosting/
📄READ a written version of this tutorial (with photos!)
https://www.britishgirlbakes.com/spring-porch-cake-tutorial/
👍Please LIKE and SUBSCRIBE to my channel for a new cake decorating tutorial every week!
💬 SAY HI!
Website: https://www.britishgirlbakes.com
Instagram: https://www.instagram.com/britishgirlbakes
Show More Show Less View Video Transcript
0:00
This spring porch cake is so colourful and fun but it's secretly really easy to make!
0:06
I'm using my Very Vanilla cake recipe for this, baked in 6 inch pans. And I'm using my 4 Minute
0:12
Buttercream for the filling and the frosting. Start with a crumb coat, which if you're new
0:17
to cake decorating is just a very thin layer of frosting to trap any crumbs that come off the
0:21
cake so they don't get into your final layer of frosting. And then, while that sets in the fridge,
0:26
which takes about 30 minutes, make the door of your cake. I'm using white chocolate chips and to
0:31
melt these put them in the microwave at 50% power for 30 seconds. Stir and repeat. And that way, you
0:37
won't burn the chocolate. Spoon the chocolate onto some parchment paper or wax paper and smooth it
0:42
out. And then use the edge of your offset spatula or angled palette knife to create a rectangle for
0:49
a door. I'm adding a big gold sprinkle for the doorknob. Put this into the fridge or the freezer
0:53
to chill while you frost your cake. Now tint the buttercream or whatever frosting you're using to
0:59
be whatever colour you want your house or porch to be. I'm using a drop of brown food coloring to
1:04
make this peachy shade. I thought about grey, but I don't think I'd want to eat a grey cake. Smooth
1:10
the buttercream on top of the cake and spread it all over the sides but instead of smoothing this,
1:15
use a textured cake comb. I love the shape of this one because it makes it look like wood siding on
1:20
the house. You use a textured cake comb in exactly the same way as you use a regular cake scraper,
1:26
reaching all the way around the cake, pressing the base of the cake comb down on the cakeboard,
1:30
and spinning the cake to imprint the grooves of the textured cake comb. Scrape around a
1:35
few times and then use your offset spatula or palette knife to spread more buttercream over
1:40
any areas that are shallower, where the pattern or texture is missing. And then scrape around again
1:45
and again until you're happy with the texture. If you're using a metal cake comb, to get the texture
1:50
really neat you can heat up the edge of the metal cake comb using a hair dryer or hot water
1:55
or a blowtorch. And then when you scrape, you'll leave a super smooth surface on the texture. To
2:00
tidy up the top edge, swipe sideways with your offset spatula, or you can use a cake scraper,
2:05
all the way around the cake. And now, while the frosting is still soft and sticky, attach the
2:10
door. Take it out of the fridge or freezer, peel it off the parchment paper, and press it gently
2:14
into the frosting. Then put your cake back into the fridge while you prepare your flowers. I like
2:19
to mix my colours in a cupcake pan so that there's only one thing to wash at the end instead of lots
2:24
of little bowls. I'm going to show you how to make a few flowers. The first one uses layered piping
2:29
or lazy piping by layering colours in a piping bag and using a drop flower tip, piping down onto
2:36
parchment paper that's wrapped around a cutting board, which is much easier than piping straight
2:40
onto the cake. Twist your wrist so that your thumb is as close to your forearm as possible. Rest the
2:45
tip of the piping bag down on the parchment paper. Squeeze the piping bag to push the buttercream out
2:50
and then twist your wrist slowly away from yourself and that will let the petals of the
2:55
flower fan out. You'll notice as you pipe that the colours that are layered higher up will gradually
3:00
push through the bottom colour, creating a really pretty ombre effect. This is one of my favourite
3:05
cake decorating techniques. Lift the cutting board up and put it into the freezer for these to set.
3:09
Another really easy flower piping technique is to use a flower nail with a little square of
3:15
parchment paper or wax paper attached to it with a dot of buttercream. You'll need a petal-shaped
3:20
piping tip and hold it with the wide end of the teardrop shape pressed against the middle of
3:26
the flower with the narrow end pointing away from you. Squeeze the bag to push the buttercream out
3:31
as you twist the flower nail and move the piping tip slightly away from the middle of the flower
3:36
towards the edge of the nail, and this will create a petal shape. Do five of these to make each
3:40
flower and then lift up the square of parchment or wax paper and put it down on a tray or a cutting
3:46
board. And then put these into the freezer as well. Okay, buttercream roses! For these
3:50
you'll also need a flower nail with a square of parchment or wax paper on top. And to pipe these,
3:55
start by squeezing a blob of buttercream into the middle of the nail, which is going to give
4:00
your rose some height. And now to turn this into a rose bud, hold your petal tip with the narrow end
4:05
pointing upwards and angled inwards and squeeze the buttercream, spinning the nail to create a
4:10
spiral of buttercream around your rose bud. Then pipe arcs around this, starting with three or four
4:16
and then increasing for each ring of petals. As you pipe each one, lift the piping tip up
4:21
for the middle of the arc and then down again, so you're making little arc shapes or rainbow shapes
4:26
around the rose. And overlap the previous arc or petal by about halfway so that all of the petals
4:32
overlap. The more rings of petals you create, the fuller the rose is going to be. But I want little
4:37
flowers for my spring porch cake so I'm going to stop here. Put your flowers onto a cutting board
4:41
and put it into the freezer. Okay, now it's time to pipe onto the cake. Start with a small round
4:46
piping tip with green buttercream to pipe some vines onto your cake. And because this buttercream
4:51
is soft and sticky, it's going to act as glue so that you can press your frozen flowers onto the
4:56
cake and they'll stick. When you take your flowers out of the freezer, they'll be cold and hard, but
5:01
they will warm up within a few minutes and start to soften so use these quickly! And if you notice
5:06
them starting to soften, just put them back into the freezer for a few more minutes. This is a leaf
5:10
piping tip, a number 352 by Wilton. When you hold it sideways, it looks like Pac-Man jaws. Squeeze
5:16
the buttercream out and release your pressure as you pull away to leave a peak or a point on each
5:21
leaf. I'm pressing the little rose buds into these leaves. If you want to make different shades of
5:26
green for each part of your cake you can add a bit of orange gel to make the green duller or yellow
5:31
gel to make the green brighter. More leaves over here. And now I'm using a really tiny star tip,
5:37
a number 18 to pipe on some tiny little flowers onto the bush. More vines over here, the same
5:43
style as before with some more of my frozen drop flowers. And I'm finishing with a few more leaves
5:48
over here and I'm attaching the little pansies, which were the second kind of flower that I piped.
5:53
This is such a fun way to make a seasonal cake or to celebrate someone moving into a new home. And
5:59
of course, I'm going to show you how to slice it! This is my favourite technique for cutting into a
6:03
cake, the cutting board method, where you start cutting about an inch from the edge of the cake
6:08
and you cut all the way across the cake down to the bottom. And flip this slice over onto
6:12
a cutting board and cut it there into long narrow slices. Then repeat about an inch along from the
6:18
previous cut. Flip this over and divide it into four slices. I love this method of serving cakes
6:24
because the slices you get are a really reasonable portion. I find that when you cut the big wedge
6:29
style slices there are always leftovers. And another benefit of this method is that everyone
6:34
can choose whether they want - a middle piece if they want a dessert that's not too sweet or the
6:38
edge pieces if they absolutely love frosting. Tell me in the comments which style you would pick! I
6:43
hope this was helpful. Ask me any questions in the comments and join my YouTube membership for access
6:47
to my course on Perfectly Smooth Frosting and visit my cake school on www.britishgirlbakes.com
6:51
to learn hundreds more cake decorating techniques and designs. See you there!
#Desserts
#Hobbies & Leisure
#Crafts