Up next in 10

React.js MySQL Project to Build Material CRUD MERN Stack App in Browser Using Express.js in Axios
Dec 22, 2025
Buy the full source code of application here:
https://procodestore.com/index.php/product/react-js-mysql-project-to-build-material-crud-mern-stack-app-in-browser-using-express-js-in-axios/
Show More Show Less View Video Transcript
0:07
Uh hello friends today in this tutorial
0:09
we will be building a monstike kind of
0:13
application inside reactjs and for this
0:16
application we will be using the
0:17
database called as my SQL. So in the
0:19
last tutorial we have used a database
0:21
MongoDB. So this is again it's a current
0:24
kind of an application you can perform
0:26
four operations. You can create records.
0:28
You can read the records here. If I load
0:30
the page, you will see that all the
0:32
records are loaded from the database.
0:34
You can even update the records as well
0:36
using this material dialogue box window
0:38
which is appearing right here. The there
0:40
are three feeds out there. Name, cost
0:42
and category.
0:44
And there are these buttons available.
0:47
And also you can delete the record as
0:49
well. So basically if I click the delete
0:50
button, the record will be deleted. So
0:53
you can see we are using the MySQL
0:55
database here which comes inside Apache
0:58
server. So we are using exam control
1:00
panel. So there is a software which
1:02
comes
1:04
preloaded with this MySQL database. So
1:07
this is available for Windows as well
1:09
and for Linux and Mac as well. So
1:12
download this software on your computer.
1:14
So after you
1:17
start your Apache and MySQL server just
1:20
go to the admin section and here you
1:21
need to create a database. So after that
1:24
all these data will be stored inside
1:26
this. So we have a simple table which is
1:28
holding four fields out there. ID will
1:31
be the primary key. Then name of the
1:34
cost and category. So basically it's a
1:37
game cran application. If I delete all
1:40
the records here,
1:43
you can now see I I have deleted all the
1:46
records. So if I see here, nothing is
1:49
present. So basically if I refresh the
1:51
database,
1:54
so no record will be present here. You
1:55
can see all the records are been
1:57
successfully deleted. So if you're
1:59
watching it for the very first time
2:00
guys, please hit the like button,
2:01
subscribe the channel. So now we need to
2:05
create a record. So it's a game card. So
2:07
let me say need for speed cost I will
2:11
say 500 category it is for racing
2:17
insert game. So now you can see one
2:19
record is inserted. So if I see now
2:22
inside the database you will see one
2:24
record is inserted successfully.
2:27
And uh let me insert some more records
2:30
here which is WW Raw game.
2:40
So now you can see two records are
2:42
there.
2:43
So basically now if I need to update any
2:46
of the individual records out there how
2:48
what we can do is that so we can hover
2:51
onto the record here. You can see the
2:54
background color changes. So basically
2:56
if I hit this a new pop-up window will
2:58
appear here. So basically it's a
3:00
material window for building this UI. We
3:03
are also using material UI for react
3:06
chase. So now this is editable. You can
3:08
change the cost as well. So if I change
3:11
it to 600 you can also change the
3:13
category and name as well. So let me
3:15
change the name to
3:18
WW versus Smackdown. So click on update.
3:21
So now you can see that guys all the
3:24
details have been successfully updated
3:26
here. You will see that if I check the
3:29
database. So now you can see that the
3:32
name has been updated successfully and
3:35
the cost is also updated it. So now we
3:38
have the delete operation. You can also
3:41
delete the record. You can now see the
3:43
record has been successfully removed.
3:46
So in this way guys you can build out
3:48
this CRUD kind of an application in in
3:50
ReactJS
3:52
express and MySQL database. So let's
3:55
start building this application. So as I
3:57
already told you we are using some
3:59
dependencies which will be material UI
4:02
which is a react component-based library
4:05
for uh building some awesome interfaces.
4:08
So let's start doing this. So I have
4:11
given all the source code in the live
4:13
chat. So if you want the full source
4:15
code you can click this pin comment here
4:18
and uh if you click it you will land on
4:21
my blog post here which I have written.
4:23
So it contains all the source code that
4:25
is required for this all the source
4:27
code. So you can follow along with the
4:29
videos. So let's start building this
4:30
project. So,
4:33
so here I will go to my projects
4:35
directory
4:37
and here I I will just make a new
4:40
directory which is react MySQL CRUD.
4:57
So first of all I will open this inside
4:59
visual studio code text editor. [snorts]
5:01
So here guys you can now see this is
5:03
empty. So now we will make two
5:05
directories here. First will be the
5:07
front end
5:09
and next will be the back end. So now we
5:13
have made two directories two folders.
5:14
So we will now move to first of all the
5:17
front end.
5:22
And here guys we will first of all
5:23
initialize a new ReactJS project which
5:25
is npx create react app and this will be
5:32
react.
5:35
So basically now this will create a new
5:37
reacts application inside this folder.
5:42
So just wait as it installs all the
5:44
dependencies.
5:48
So if you're watching it for the very
5:50
first time guys, please hit the like
5:51
button, subscribe the channel as well.
5:53
So
5:59
so inside the back end folder, we will
6:00
make our uh NodeJS project. So after
6:03
this.
6:14
So if you have any sort of doubt related
6:17
to this, you can ask in the comment
6:19
section. So please hit the like button
6:21
as well if you're watching it for the
6:23
very first time.
6:43
>> [snorts]
6:43
>> So now you can see our reacts
6:46
app is successfully configured here. So
6:49
now we need to install these
6:50
dependencies here which is required for
6:52
this. So we will move to the folder here
6:55
which is react grit
6:57
and here first of all guys as I already
7:00
told you we will need add the rate
7:02
material- ui/core.
7:05
This is a material ui library which is
7:07
needed for this application. So if I
7:09
execute this command npmi add the rate
7:11
material- ui/core.
7:15
So
7:16
you just need to write here d-force. So
7:21
this will remove the compatibility
7:23
issues. So simply write uh write this
7:25
d-force.
7:27
So now you can see uh it will install
7:29
this.
7:32
[snorts] So you can now see material- ui
7:35
core is successfully installed. And also
7:38
guys we will also need uh the dependency
7:40
which will be aios to make the http
7:42
request. Aios as you all know it's a
7:45
very famous library in order to make uh
7:47
http request. So it's a promise based
7:50
HTTP client for browser and nodejs. So
7:53
you will also need the formic library
7:55
guys as you all know it's a form
7:57
validation library
8:00
formic.
8:04
So it's a reactjs library for building
8:07
forms without the tiers. So we will also
8:11
need this. So, npmi form and uh
8:17
what force aios. So, install these two
8:20
dependencies as well. So,
8:25
so now guys, it is successfully
8:26
installed it. So, now we can start our
8:28
react application npm start.
8:33
So, you can see that
8:36
now we will move to the app.js folder
8:38
guys. We will remove all that stuff here
8:40
that is previously there. we will don't
8:42
need the logo.
8:44
So right here what we need to do is that
8:46
inside app dot js basically
8:51
here we will have a simple form. So here
8:54
we will be giving a class name which
8:57
will be app container
8:59
and again here we will be having another
9:02
div tag. So here we will be giving a
9:05
class name of register
9:09
register container
9:16
and here we'll be giving a class name of
9:18
register
9:21
title and here we will say game cred
9:24
app.
9:27
So here we will have a input field guys
9:30
input type text.
9:32
So name is equal to name and the
9:35
placeholder will be simply
9:38
uh name of the game that needs to be
9:40
inserted and then we will have a class
9:42
name which is register input
9:46
and uh that's it.
9:50
So [snorts] if you refresh it guys your
9:52
application uh I think let me start this
9:55
application. So it will run on localhost
9:58
3001 [snorts] 30002 you can see that. So
10:02
just wait the application is still
10:03
starting.
10:10
So now you can see that guys our field
10:12
has one input field out there. Similarly
10:16
we will have the next field out there
10:18
for
10:20
this time again it will be type text.
10:22
Placeholder will be simply cost.
10:29
Cost will be a number. So we will type
10:31
change it to number
10:33
and the name will be equal to category
10:37
sorry this is cost
10:41
and also we'll be giving a class name of
10:45
register input
10:50
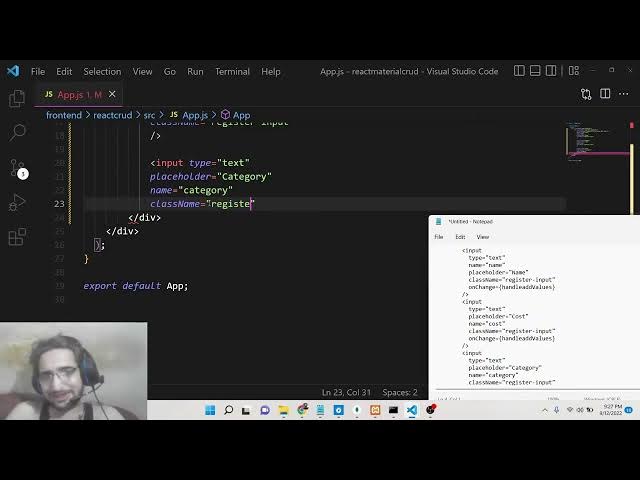
and then again we will have the next one
10:53
input type text
10:56
placeholder will be category
11:01
name will be again category.
11:05
So class name we will simply give it as
11:08
uh register input.
11:16
So just close this guys. So now we have
11:19
three input fields out there as you see
11:21
here. Three input fields name, cost,
11:23
category. So now we need to style this
11:25
guys. After this we will have a simple
11:27
button.
11:28
Simply we will say insert game.
11:32
That's it. And also here we need to give
11:34
it a class name of
11:38
register button.
11:41
So all these classes we need to style
11:43
guys. So basically now basically we will
11:47
move to the app dot CSS that we are
11:50
importing here. So just go to app dot
11:51
css and here what we need to say is that
11:57
let me
12:00
inside app dot css you will see all
12:02
these classes. So let me paste the
12:04
styles here.
12:06
Uh I don't want to waste time in writing
12:08
CSS guide but still I will make sure
12:11
that uh I
12:14
write this step by step so that you can
12:16
fully understand what we are talking
12:17
about. So it's a very simple CSS. So I
12:20
will just write it. So if I remove all
12:22
this, you will now see nothing will be
12:24
present here. All the styling default
12:26
styling is removed. So now basically we
12:28
will style it step by step. So if you're
12:30
watching it for the very first time
12:32
guys, please hit the like button,
12:33
subscribe the channel as well. Yeah, I
12:35
will definitely make Angular projects as
12:37
well in the future guys. Don't worry
12:38
about it. Just subscribe the channel and
12:40
hit the like button. So here we will
12:42
target all the elements. We will remove
12:44
the margin and the padding guys. can now
12:46
see and here we will target the app
12:49
container class guys. So basically we
12:52
will change the display property to
12:53
flex. So as you change the display
12:56
property to flex here you will see here
12:59
we will align the items in the center
13:01
position and flex direction will be
13:04
column. So if you make this change guys
13:07
you will now see it will stay like this.
13:12
So after this guys we will target the
13:14
register container class. Here all the
13:16
input items are there. So here we will
13:19
give a padding of 10 pixel
13:23
20 pixel and also we will be giving a m
13:26
width of max content
13:29
and uh
13:32
height of also max content.
13:36
We will giving a margin from the top
13:38
position which is 20 pixel and we will
13:41
be giving a border which is 3 pixel
13:43
solid black color. So if you now see
13:46
guys you will have a simple border here
13:48
which is of black color which is
13:50
surrounded these input fields. So after
13:53
this we will also give it a border
13:55
radius to simply have a round border 5
13:58
pixel. That's it.
14:01
So after this guys we will have a to
14:03
register title we need to style the
14:06
title here. So make the alignment to the
14:09
center position we will give it a margin
14:11
from the bottom position which is 20
14:13
pixel and font family we will change it
14:16
to fantasy.
14:18
So now you can see that our font is also
14:22
changed. It is appearing right here in
14:23
the center position. Now we need to
14:25
style our input fields out there guys.
14:28
So we will simply say that register
14:31
input we will simply say that uh display
14:34
to block and we will give it a margin
14:37
which is 10 pixel auto and padding we
14:40
will simply say 7 pixel zero.
14:44
So if you see guys now this is padding.
14:50
So now you can see our uh beautiful it
14:52
is looking so beautiful guys. Now you
14:54
can see that
14:59
if I just zoom in, zoom out.
15:04
[snorts] So our uh this is input field
15:06
is looking so great. Now we simply need
15:08
to also style this button. Just give it
15:13
some padding which is register
15:16
button.
15:17
Give it a padding 2 pixel 5 pixel.
15:20
That's it.
15:22
So now this is complete guys basically
15:25
here you will give the name cost
15:27
category and uh insert it. So now the
15:30
form is completed guys. So basically now
15:32
we need to go to our uh basically bind
15:37
on click. So whenever we click the on
15:39
insert game button we need to make a aio
15:42
http post request. So for this we will
15:45
simply say that we will assign a on
15:49
click. You will say that whenever we
15:51
click this button, so we will need to
15:53
put a on click here. So this function
15:56
will be executed which is handle
15:59
register game. So this function will be
16:02
executed guys. And also we need to uh
16:05
put on change as well here. So when the
16:09
value changes this function will
16:11
automatically execute which is handle
16:16
add values. This is a function we need
16:19
to execute also. Here also on change
16:25
handle add values and here also
16:30
handle add values. That's it. So now we
16:33
need to make these functions guys at the
16:35
very top here we will simply say that uh
16:39
const handle add values. So basically
16:42
here the value will be coming here
16:44
whatever user has written.
16:48
So now basically we need to declare uh
16:51
in the very top of the application we
16:53
need to declare some variables. So this
16:55
will be for the values dot comma set
16:59
values and here we will be using the
17:01
ustate hook guys. U state it will be
17:03
imported from [snorts]
17:05
uh react I think.
17:09
Sorry, this needs to be imported from
17:11
React.
17:13
Use state from React. And the initial
17:16
value for this set values guys, it will
17:18
be empty by default.
17:21
And also you will have uh list card
17:26
and set list card. So all the u games
17:31
will be printed inside these cards like
17:33
structure. So basically this card will
17:34
be an empty array like this.
17:40
So now you can see that. So inside this
17:42
uh handle add values guys what we need
17:44
to say is that
17:53
if you see here handle add values what
17:56
we need to say is that basically we will
17:57
use the hook hook function which is set
18:00
values and basically we will take the
18:02
previous values here previous values
18:06
and what we will say is that
18:13
inside this function uh sorry let me see
18:19
previous values previous values this
18:23
will be an array so
18:28
so here what we will say is that guys so
18:30
we will put the previous values array
18:33
and uh and then basically we will say
18:36
value dot
18:38
target dot name
18:43
colon value dot target dot value.
18:48
So for this to work guys for this
18:50
function to work you need to give the
18:52
name properties. So name property is
18:53
very much important. So name
18:57
name also here cost name is also
19:00
category. So name attribute should be
19:02
present. So if you don't provide the
19:03
name attribute then this function will
19:05
not work. So after we uh assign the
19:09
values guys we need to simply write this
19:11
function which is when we click the
19:12
button we need to write this function
19:15
which is uh
19:18
con
19:20
handle register game. Basically when
19:23
whenever we clicking this button we are
19:25
making this function guys. So basically
19:27
this will be an arrow function
19:31
like this. So now basically we need to
19:35
make uh a post request using axios. So
19:38
axios.post
19:40
this is the request we need to make
19:42
guys. So inside this we need to put the
19:44
URL http
19:47
localhost
19:49
uh 3 4,000
19:52
/ register. So basically this request we
19:55
will make inside the backend folder
19:57
guys. Whenever we create the back end
19:59
folder, we will make this request which
20:01
will handle this. So now we need to put
20:04
the data that needs to be inserted into
20:06
the database. So name property we will
20:08
be coming using values dot name
20:14
and then we will get the cost which will
20:18
be names values dot cost and the
20:22
category will be equal to
20:26
values dot category that's it. So all
20:29
these three values will be there inside
20:31
this there you can see that.
20:37
So if you see here inside set values
20:44
we have set these set these values in
20:46
this handle add values whenever the
20:48
values changed. So now we are getting
20:50
the values by values dot name values dot
20:52
cost values doc category. Basically it's
20:54
an object inside the it's a array of
20:57
objects you can see basically it's a
21:00
empty array whenever we uh
21:04
uh execute the application for the very
21:05
first time basically we will insert
21:07
these objects inside this array. So we
21:10
are getting this
21:13
uh values inside an object by using dot
21:16
syntax.
21:18
So after doing this guys as you all know
21:20
it's a promise based client so it will
21:22
return a promise. So we can handle the
21:23
promise using dot then and basically
21:26
inside this we will have this data arrow
21:30
like structure. So here
21:34
we can simply
21:39
uh
21:40
if any sort of data is returned to us we
21:43
can simply console log
21:46
data that's it. So now basically up till
21:49
now we have constructed this front end
21:51
guys. So now basically it is saying that
21:53
Xios is not defined. So we need to
21:54
import XIOS at the very top. We need to
21:57
import XOOS from XIOS.
22:02
So
22:05
so now guys what we need to say is that
22:07
we need to uh construct the back end
22:13
the NodeJS application. We need to
22:15
construct the back end. So for
22:17
constructing the back end guys first of
22:19
all hit the like button guys. I'm seeing
22:21
people are not liking the content. Only
22:22
three likes are there. So the target
22:25
live stream will be 50 likes. So please
22:27
increase it to 50 likes. All the people
22:29
watching please hit the like button. So
22:30
basically now we will go to the uh
22:35
this folder which is backend folder
22:38
which is present right here. So let me
22:39
open this here inside.
22:44
Now we basically will go to the backend
22:46
folder guys. So we will open this inside
22:49
visual studio code text editor. So you
22:51
can see currently it is empty right now.
22:53
We will make a package dojson file npm
22:57
init-y. So this will create the
22:59
package.json file. So right here we will
23:02
install express and also my SQL and cos
23:08
library. So these three libraries are
23:10
needed here for this application. Simply
23:13
install this. After this we will make
23:15
the index.js. js file. So inside this
23:18
you can see coarse express and myql is
23:21
installed.
23:24
So MySQL is a package guys as you if you
23:27
don't know in order to connect to MySQL
23:29
database from our NodeJS application. So
23:33
if you see here it's a package which is
23:37
available. So MySQL
23:39
it has got almost 881,000 weekly
23:43
downloads. It's a very popular module.
23:47
So right here inside your index.js file,
23:49
what we need to do is that guys, we will
23:50
need to simply make that post request in
23:53
order to insert the data. [snorts] So
23:57
right here we will first of all start
23:59
our express application. So con express
24:02
we need to require express
24:05
and we need to make a simple express
24:07
application and this will start on port
24:11
number 4,000 and we can simply say that
24:15
uh app is listening on
24:19
port 4,000.
24:21
So right here guys uh basically we also
24:24
need to have our MySQL module as well.
24:27
So we need to require MySQL and also the
24:31
course module
24:33
which is needed course here like this.
24:37
So now basically guys we need to make
24:39
the connection to the database.
24:42
This is the most important step in this
24:44
application. We need to conver uh
24:46
connect to this database that is there
24:48
inside MySQL. So what we will say is
24:50
that we will say con DB and MySQL dot
24:54
create connection. So this is a method
24:56
which is required guys or you can also
24:59
use this method which is create pool.
25:01
This is also in second method which also
25:04
does the same thing. So here you will
25:05
pass your object. First property is
25:08
host. So basically it will be local host
25:11
and uh user name will be root by default
25:15
and the password will be guys empty.
25:17
This is a default password for my SQL
25:19
database and then the database name. So
25:22
database I will put here. Let's suppose
25:24
uh
25:26
current application.
25:30
So this database I need to create. So I
25:32
will simply go to my admin section local
25:35
host PHP myadmin. So we will create a
25:37
new database which is uh current
25:40
application that we have.
25:43
So after this we will create this
25:45
database. So here we will say table name
25:48
will be games. We will click on go and
25:51
basically
25:53
you can see we have created this
25:55
database cred application inside this we
25:57
have the table called as uh
26:04
we haven't created the table so we just
26:06
need to say games click on go
26:10
and here guys we will have ID this will
26:14
be integer length will be 11 then we
26:17
will have the name of the game this will
26:18
be a Arch the length will be 256. Then
26:22
we will have cost of the game this will
26:24
be integer length again will be 11. And
26:27
lastly we will have the category of the
26:29
game. Category
26:32
this will be again var 256 the length
26:36
and we need to make this ID the primary
26:38
key guys. Auto increment to off. Here
26:40
you can see auto increment. And then we
26:42
need to save this table here. So now our
26:45
table is created. It has four fields.
26:47
ID, name, cost, category. So this table
26:50
you need to create like this beforehand.
26:52
So now basically our connection will be
26:56
successful.
26:57
After this we can simply say that app
27:00
dot use
27:02
express dot JSON
27:07
and also we will use this course
27:09
middleware like this.
27:14
And uh now our application has started.
27:16
If I go to this node more index js. So
27:21
now you can see app is listening on port
27:23
4,000. Our application has started on
27:26
port number 4,000. So now we need to
27:28
make that route to insert game in
27:32
database. So what we can say is that
27:35
app.post and simply we will write this
27:38
route which is register. And here guys
27:41
we will simply say request response
27:44
and here we will simply fetch all the
27:47
information which could be there which
27:48
is name cost category. This is
27:51
dstructuring in JavaScript if you know
27:54
and we will get this using request or
27:56
body. That's it. All this information we
27:58
are passing if if you closely look here
28:01
inside our ReactJS application we have
28:04
passed this information inside our
28:08
you can see we have passed name cost
28:10
category
28:12
in the second argument you can see this
28:14
is an object. So we are just uh
28:17
importing this dstructuring it name cost
28:19
category from request or body. So after
28:22
this we will construct the query guys
28:24
which is simply insert into the table
28:26
name in this case the table name is
28:28
games and then this is a simple SQL
28:31
query if you don't know about SQL then
28:34
the column name will be name cost
28:36
category
28:38
and then the values
28:41
so values will be simply here
28:47
uh name.
28:52
Uh
28:55
okay, we'll put question mark here.
29:00
So it's it's good that good practice to
29:02
follow MySQL injection guys if you want
29:04
to prevent it. So we will write like
29:07
this. So question mark
29:09
question mark and question mark
29:12
put a semicolon.
29:17
So I think you need to put in the same
29:19
line like this. So values.
29:22
So now basically we will write the query
29:24
actual
29:26
query
29:28
db dot query this is a method. So db is
29:32
coming from this uh db connection
29:34
object. It contains this query
29:36
parameter. We will pass the MySQL actual
29:39
query that needs to be inserted and then
29:41
we will placeholders. We will give the
29:42
placeholders on this question mark. You
29:44
can now see name cost category inside
29:47
this object. Name cost category.
29:51
So this is a very secure way by by which
29:54
you can prevent the SQL injection. So
29:58
that's why this is an approach that we
29:59
follow. And then this error result
30:02
basically we can check if any sort of
30:04
error take place.
30:06
We can say response dot send or response
30:10
do.json
30:14
error is equal to
30:16
error.
30:20
In the else scenario basically we will
30:22
return a JSON object
30:24
response.json and here we will return
30:27
the data
30:31
which is result. That's it.
30:38
Or we can simply also say that uh the
30:40
records have been inserted.
30:45
So now this we have written this post
30:47
route guys. So basically now we can
30:49
manipulate our uh reactjs route. So
30:52
instead of console logging it, we can
30:54
alert it to the user alert data.
31:03
So alert data do data that's it. This is
31:07
a data property.
31:09
So if you now refresh your application
31:11
guys, if you go to it, you can now see
31:13
our NodeJS application is still running
31:15
on port 4,000. If I put the name cost is
31:19
this one category.
31:23
So if I see uh console menu here,
31:29
access to uh XML HTTP request at
31:32
localhost 4,000 register from origin
31:36
has been blocked by course block policy
31:41
uh
31:44
I think this is coming through course
31:47
error is coming. I have set this header
31:49
which is if you see here
31:52
oh I think we haven't set this. So this
31:56
needs to be set beforehand guys. So you
31:58
can now see this these middleware
32:00
functions need to be set before you make
32:02
any sort of request. So right here just
32:04
paste it here app dot use express.json
32:08
and app dot use course. So this is very
32:10
much important time in order to prevent
32:12
the course related issues. So again, if
32:15
you refresh it, put the game name here,
32:18
which is uh
32:20
uh cricket
32:22
18. Uh this is cost is $1,500.
32:26
$1,500.
32:28
Category is sports.
32:31
Insert game. So basically if you now see
32:34
here
32:48
so object is returned to us. It is
32:50
saying that.
33:05
So let me start this application once
33:07
again. Note more index.js guys. If I put
33:11
the category.
33:14
So here object is returned to us guys.
33:16
You can now see our data is successfully
33:18
inserted. Basically if I check my MySQL
33:22
database
33:25
this is the let me check this is if I
33:28
browse here
33:32
uh here's nothing is inserted
33:35
category name cause category
33:43
uh let me check guys database name is
33:46
correct which is current application
33:48
and this is insert into games name cost
33:51
category.
34:07
So basically guys if I
34:13
console log request do body let me check
34:16
if it is
34:20
console
34:23
name cost category.
34:31
Let me troubleshoot this. If all the
34:33
values are returned here, console doc
34:35
category
34:39
and also let me console error.
35:12
Uh you have an error in your SQL syntax.
35:17
Okay, you can now see all the data is
35:19
coming here in the console name, cost,
35:21
category. But I think you have an error
35:24
in in your SQL syntax. So I think this
35:26
is a problem.
35:29
So and in this case guys you can
35:32
troubleshoot at any point of time if you
35:34
have uh problems going on.
35:38
So name call.
35:46
Now this is a statement guys. Let me
35:53
paste it.
35:58
Basically this is the
36:03
insert into games and then name cause
36:07
category values question mark comma
36:10
question mark comma question mark.
36:16
Let me insert this my SQL is equal to.
36:21
[snorts] So again let me run this if let
36:24
me see if it is now working or not.
36:50
>> [clears throat]
37:01
>> So it is again saying that you have an
37:03
error in your SQL syntax.
37:08
So [snorts] if you're watching it for
37:10
the very first time guys then please hit
37:12
the like button subscribe the channel as
37:13
well. Let me see what error is uh
37:18
in the previous this one uh if you see
37:21
here
37:29
uh this one here. If you see here,
37:33
let me just copy this whole route here
37:35
which is /register.
37:50
So now hopefully it should work which is
37:52
my SQL name cost category.
38:14
So now you can see that guys nothing no
38:16
error has taken place. If I refresh it.
38:19
So you can see one record is
38:20
successfully inserted here which is name
38:22
cost category. So I think there is just
38:25
a typing typo mistake out there. So you
38:27
can see that this is the SQL query
38:29
insert into games name cause category
38:32
DB query MySQL.
38:38
Oh, I think we have written uh inside
38:42
this uh square brackets we have written
38:44
this object like that was the error was
38:47
taking place. So this needs to be an
38:49
array.
38:51
So that was the error guys that was
38:52
happening. If you closely look, yeah,
38:54
this is an array. I have putting here
38:57
curly bracket. So that was the error
38:59
which was taking place.
39:02
So let me revert back it to the previous
39:05
that I have written. So you can now see
39:08
we have put this curly brackets here. So
39:10
this needs to be an array here. So put
39:12
these square brackets here. So [snorts]
39:15
if you now see if I refresh the
39:17
application here.
39:21
So put the category. So now basically
39:26
this is an object here which is
39:27
returned.
39:29
And if you browse it you will see the
39:32
record is inserted. So
39:36
so now we have successfully inserting
39:39
the records in the database guys. So b
39:41
basically when we whenever we load the
39:43
application we need to show all the
39:45
records which are present inside this
39:47
database.
39:48
So for this
39:51
we need to write a method basically
39:54
inside this back end here which is
39:59
to fetch all the records.
40:04
So for this we will simply
40:07
make a route here which is app dot get
40:13
cards.
40:15
So this simply means that fetch
40:22
all the games which are present.
40:28
So here request response here.
40:34
So inside this there would be simple
40:36
MySQL query. If you see select star
40:40
from the table name which is games
40:48
and now we have this DB query method we
40:53
pass the SQL query and then
41:00
if any sort of error take place
41:07
we and console log the error
41:11
in the else scenario we can send out the
41:13
result that's it
41:16
so this is all the route guys in order
41:19
to select all the games so now basically
41:21
we need to move to our uh ReactJS
41:25
so basically whenever we are uh we need
41:28
to show all the records so for doing
41:31
this it's very Z.
41:40
If you see here,
41:53
let me see.
41:58
So right here after you do this
42:02
after this button here if you see after
42:04
this button basically here we will show
42:06
all the list cards but before this we
42:10
also need to so here we basically guys
42:14
whenever this component renders it for
42:16
the very first time we will use this use
42:18
effect hook use effect hook here
42:23
which is available inside ReactJS
42:26
You can see it is imported from react
42:28
library.
42:30
So here
42:32
this function will execute. So here we
42:34
will fetch all the records
42:38
from database.
42:41
So here we will make a simple get
42:43
request. Xios get
42:46
http
42:47
localhost
42:49
4,000 and then get cards. So this is a
42:53
request that we have written right now.
42:55
If you see inside our back end, this is
42:59
a get request get cards.
43:02
So we are now calling this. So
43:06
this returns a promise again. So now our
43:08
data will be coming inside this
43:10
response.
43:12
So here we will set this by using this
43:14
hook method which is set list card.
43:22
You can now see this is the set list
43:26
card method here which is
43:30
here we will put the response dot data.
43:36
So now we simply need to show this data
43:38
inside this browser. So for doing this
43:41
we need to go to the bottom section here
43:43
and simply put curly brackets here and
43:45
here we will simply say list card dot
43:49
and basically this is an array. So we
43:51
will use this map method here and inside
43:54
this for each card
43:57
we will simply use here
44:03
if you see here
44:08
inside this we will put a card component
44:11
guys basically you will make this
44:13
component don't worry about it so this
44:16
card component
44:24
So inside this card component basically
44:26
we will pass some things out there.
44:27
Basically first is the list card which
44:30
will be equal to the list card here like
44:32
this. This is an array that we are
44:35
passing and set list card is equal to
44:38
set list card
44:41
and also we will be passing a key
44:43
parameter which will be value do ID
44:47
the name will be equal to value dot name
44:51
and the cost will be equal to value dot
44:55
cost and the category will be equal to
44:58
value dot category.
45:02
So now we need to make a simple
45:05
components folder guys inside our
45:11
so here basically we will make this card
45:13
dot js. So it's a functional component.
45:18
So,
45:22
so basically here guys uh we will have
45:24
uh a simple
45:28
uh we will have const open
45:32
comma set open. Basically here we will
45:35
use the use state hookup once again of
45:38
react
45:40
and basically this will be a boolean
45:42
variable
45:44
and uh this will be currently set to
45:46
false and [snorts] basically here we
45:48
will uh first of all show here
45:53
inside this return statement
45:57
the cards here. So,
46:01
so right here we will show this
46:03
information.
46:07
So we [snorts] will give it a class name
46:09
of card container and uh basically also
46:13
inside this we will show the information
46:16
which is so we will be getting the
46:19
properties which we are passing here
46:20
inside app.t shares. You can see we are
46:22
passing some properties which is list
46:24
card, set list card all this which will
46:26
be available inside props can now see.
46:30
So just make it card here like this.
46:35
So now we can simply include this
46:40
at the very top like this import card
46:43
from components card.
46:46
So right here inside our uh H1 basically
46:50
we will be giving a class name to it of
46:52
card title
46:54
and uh this will be props dot name.
47:00
So you can see we are passing the name
47:01
here. Similarly we will print out cost
47:03
category.
47:07
So inside our paragraph tag here
47:12
we will have the card id as well which
47:16
is props do id.
47:21
You can see we are also passing the
47:26
id as well. You can see inside the key
47:29
par key parameter here.
47:40
So you can see that
47:45
if I see here let me see.
47:50
Oh sorry we haven't passed the ID. So
47:52
just give pass ID which is val ID.
47:56
[snorts]
47:56
So here we are getting this props do id.
48:06
So after this we will also print out
48:12
which is cart category
48:18
props dot category. We will write it
48:31
and then we will also print out the card
48:33
dot cost. So here we will simply write
48:35
here
48:39
props dot cost.
48:43
So
48:45
basically now guys we can cross check
48:47
here
48:50
if I refresh it.
48:56
So it is saying that uh local host 4,000
49:00
get cards.
49:15
Uh let me see why it is having this
49:18
problem. Uh
49:23
oh sorry here we have put https it needs
49:26
to be http that's the problem and if I
49:30
again refresh it so now you can see that
49:32
guys all the records I have been
49:34
successfully inserted you can see two
49:36
records are there which is first this is
49:38
a name which is
49:42
ID you can now see this is a category
49:44
and this is a cost if you now see we
49:47
have two records out there inside our
49:49
database. So it is successfully printed
49:51
out. If I add the third one.
49:55
So
49:59
insert it. Now you can see that the
50:00
third one is also inserted. If I insert
50:03
the fourth one
50:05
now you can see that. So in this way
50:08
guys if you again refresh it your data
50:10
will be pulled it from the database. So
50:12
this is all doing it using inside this
50:15
use effect hook. Here we are calling
50:17
this a get request which using Xios
50:20
and printing it out. So now we need to
50:23
style this. So right here inside your
50:26
component just make card dot CSS
50:29
and include this file.
50:34
import
50:38
card dot CSS.
50:47
So basically here guys we will put card
50:51
container we will target it. We will
50:54
give it the width of 250 pixel and
50:57
border we will give it as 3 pixel solid
51:01
black
51:03
and border radius we will give it as 3
51:05
pixel sorry 5 pixel
51:09
margin we will say 10 pixel padding we
51:12
will say is 5 pixel
51:17
and cursor we will change it to pointer.
51:21
So if you now refresh it now you will
51:23
see a simple border here or black color
51:26
and now you can see a fixed width is
51:27
there.
51:29
So after this guys we will now target
51:32
the card id which is card ID. So here we
51:37
will say display to inline block and the
51:40
float at the right position.
51:43
So margin right we will give it as 10
51:45
pixel.
51:50
So it is saying that float right
51:56
margin from the top we will also say 5
51:59
pixel.
52:01
Background color will be black.
52:05
Border radius will be
52:09
uh 5 pixel.
52:12
Color will be white.
52:14
Font weight will be 700.
52:17
Padding will be 3 pixel. and phone
52:21
family will be more space. So first of
52:24
all hit the like button subscribe the
52:26
channel as well guys.
52:28
So this is the ID which is tiled here
52:30
guys. 1 2 3 4 can now see it is floating
52:34
in the right direction.
52:38
And then basically we will now target
52:40
this
52:47
title here which is display inline
52:54
and for the cost we will also say margin
52:58
top to 15 pixel.
53:04
So when we hover onto this guys, we need
53:06
to change its background color to aqua
53:09
like this.
53:11
So if you now see when we hover onto
53:13
this, this background color changes to
53:15
like this.
53:19
[snorts]
53:21
So that's all that we need for this CSS
53:23
guys. So this is completed. So now
53:26
basically two operations are done. We
53:28
are inserting we are able to insert
53:30
data. So inside the database and also we
53:32
are fetching all the data which is
53:34
present inside the database. So now the
53:36
two operations are remaining whenever we
53:38
need to update the data and also delete
53:40
it. For doing this
53:44
we need to first of all
53:50
so here whenever we click it we need to
53:52
show a dialog box material pop-up
53:54
window. For doing this we need to attach
53:56
a on click to it.
53:59
So right here inside this here we will
54:02
attach a on click here. So on click.
54:08
So here this function will execute as a
54:10
inline function. And basically we will
54:14
put this property which is set open to
54:16
true from false to true. So now whenever
54:20
this property is set to true basically
54:22
this window will appear which is
54:26
form dialogue.
54:29
Basically this is a component we will
54:31
make which is form dialogue.
54:35
So here we need to pass some properties.
54:37
Open will be passed here to open.
54:40
Whatever is a property set open we will
54:42
also pass it as a function. set open.
54:48
You will also pass the title which is
54:50
props dot name
54:53
cost as props dot cost category as props
54:59
dot
55:01
category and uh list card
55:06
to be props dot
55:09
list card
55:11
and set list card
55:16
to be props dot set list card
55:20
also we will pass the id as well which
55:23
is props do id. So this is the second
55:26
component we need to make guys inside
55:29
the same
55:37
if I see here uh yeah we need to make a
55:40
dialogue.
55:47
So inside this we need to make a
55:51
dialogue folder and inside this we will
55:54
have a file which is dialog form.js.
55:58
So it's a functional component and
56:00
basically
56:07
just rename this to form dialogue.
56:15
We will have the properties which will
56:17
be coming as props here similar to this.
56:19
You can now see we will have a hook
56:21
function guys which is hook which will
56:23
be constedit
56:25
values
56:27
set edit values
56:31
and basically the initial value of this
56:33
we will use again use state and this
56:35
will be we will pass the ID which is
56:38
coming props do ID we will pass the name
56:43
which will be props dot name and uh cost
56:48
props dot cost
56:50
and category we will say props dot
56:53
category.
56:58
So we have initialized this
57:01
basically it contains this object this
57:04
hook here
57:07
and inside this guys basically we will
57:09
have
57:13
a dialogue
57:20
a dialogue box.
57:25
So this dialogue box guys it is
57:26
available inside material UI if you
57:29
clearly know what I'm talking about.
57:35
So we can import this using material. So
57:38
import dialogue
57:43
from
57:44
add the rate material UI core slash
57:48
dialogue.
57:54
So basically it will show you a dialogue
57:57
box pop-up window.
58:02
So we also need to import these
58:05
also which is dialogue actions, dialog
58:07
content and dialog title these also and
58:11
also we in order to show a text field we
58:14
also need to import it from material UI.
58:17
This is a component text field and also
58:19
for showing the material button we also
58:22
need to import the material button like
58:25
this.
58:26
Also we need to import the exios
58:28
libraries as well. Xios from Xios.
58:32
So these are the libraries that we need
58:33
to import. So after this
58:37
we will simply now show this dialogue
58:40
box which is
58:43
inside this
58:45
open will set to props dot open
58:51
and there's also a on close as well. So
58:53
whenever the dialog box closes what will
58:56
happen? So we'll make this function
58:58
handle close.
59:03
So after [snorts] this guys just put
59:07
so here we inside this we will have a
59:10
component which is dialogue title.
59:14
So here it will be the title of this
59:17
dialog window which is form dialogue
59:20
title.
59:23
So this will be this edit.
59:30
So this is the title and then we have
59:33
the content which is available here.
59:36
What will be the content? So
59:40
we have
59:42
to show a text field here
59:44
and
59:47
inside this we need to pass some
59:48
parameters. It will be disabled by
59:50
default.
59:52
Margin will be
59:54
is equal to dense.
59:57
ID will be equal to ID and label is
1:00:00
equal to ID
1:00:03
and the default value will be equal to
1:00:06
props dot id.
1:00:10
So here the type will be equal to text
1:00:13
and it will be full width.
1:00:16
So this ID parameter guys it will be
1:00:19
default as you can see here if I show
1:00:22
you
1:00:24
if you see this is the ID parameter that
1:00:27
we are constructing by default it will
1:00:28
be disabled by default you cannot change
1:00:30
it because it's a primary key of the
1:00:32
table so that's why it is disabled
1:00:41
so now if I refresh it if I form
1:00:44
dialogue is not defined. So we need to
1:00:46
import this component. So inside card
1:00:48
dot js.
1:00:53
So it will be imported from dialog
1:00:54
dialog form. So if you now hit this.
1:01:03
So it is saying that handle close is not
1:01:05
defined. So we need to define this
1:01:06
function guys. First of all,
1:01:10
all the functions that we have put here.
1:01:15
So right here we need to define this
1:01:17
function.
1:01:19
This is the arrow function.
1:01:23
Just refresh it and just tell you. Now
1:01:26
you can see this window will be
1:01:27
appearing here which is a material
1:01:29
window and this would be default by
1:01:31
disabled. this ID field it will hold the
1:01:34
current ID of the
1:01:37
so now we cannot close this so that's
1:01:39
the problem so we need to make this
1:01:46
so we need to make this function which
1:01:48
is handle close
1:01:51
so what we will simply say inside this
1:01:53
function oneliner function is there so
1:01:55
we will say props dot set open
1:01:59
to false so basically whenever you close
1:02:02
it, it will be closed.
1:02:04
So now you can see that
1:02:08
if you clear, if you click outside this
1:02:10
window, it will be closed. So here the
1:02:14
ID will be two, here the ID will be
1:02:17
three and here the ID will be four. So
1:02:20
this is a primary key of the table guys,
1:02:22
that's why we are disabled it. So if
1:02:25
you're watching it for the very first
1:02:26
time, please hit the like button,
1:02:28
subscribe the channel as well.
1:02:33
So here [snorts] guys what we need to do
1:02:35
is here
1:02:41
now
1:02:42
in similar way we will have
1:02:47
the text field here one other text field
1:02:53
and again here this will be autofocus by
1:02:56
default
1:02:59
and margin will equal to dense
1:03:02
id will be name and uh label will also
1:03:05
be name.
1:03:09
So default value will be props dot title
1:03:14
type will be equal to text and on change
1:03:18
will be handle
1:03:21
change
1:03:24
values
1:03:26
and it will be again a full width.
1:03:28
That's it.
1:03:34
And similarly guys, we will have another
1:03:36
text field which will be for
1:03:41
again this will be autofocus.
1:03:44
[clears throat]
1:03:48
Margin will be dense.
1:03:51
ID will be category.
1:03:56
Label will also be category.
1:04:00
Default value
1:04:05
uh props dot category
1:04:10
type will be text
1:04:12
and also on change.
1:04:16
This will be handle change
1:04:21
values.
1:04:23
Again this will be a full width.
1:04:27
And lastly guys for cost you can simply
1:04:30
say
1:04:34
this will be cost.
1:04:50
So this will be the number guys because
1:04:52
cost is a number. So here we will change
1:04:54
the type to number.
1:04:57
So now we need to define this handle
1:04:59
changed values guys function.
1:05:04
If you see we need to define this
1:05:06
function which is handle changed
1:05:13
uh con handle changed values.
1:05:17
So we will have the values like this.
1:05:19
We'll call this method which is set edit
1:05:22
values function.
1:05:28
Just move it at the very top guys like
1:05:31
this.
1:05:35
So here what we need to do is that we
1:05:38
again need to do the same thing which is
1:05:40
what is the previous values
1:05:43
and uh
1:05:45
so here we will simply say dot dot dot
1:05:48
previous values. Basically
1:05:50
this is a spread operator. Whenever you
1:05:52
need to insert on top of an array, we
1:05:55
use the spread operator. Values dot
1:05:58
target id is equal to values do.target
1:06:02
value.
1:06:05
So here in this case we need to give the
1:06:07
id parameter. So this ID parameter we
1:06:10
are given here which is name, category
1:06:13
uh and also here also
1:06:16
I think we haven't given this. So name
1:06:18
is equal to cost.
1:06:23
So
1:06:25
after this guys we will have two buttons
1:06:28
out there inside this material box. If
1:06:30
you see inside our dialogue actions
1:06:33
now we have a different component which
1:06:35
is dialogue actions.
1:06:38
So inside this we will have two buttons.
1:06:41
material button which is for either
1:06:44
cancel.
1:06:48
Then we have
1:06:50
the delete button
1:06:55
and then we will have
1:06:58
the added button
1:07:03
or you can say update.
1:07:08
So we will be giving a on click
1:07:10
attribute to here guys. Basically when
1:07:12
we click the cancel we just need to
1:07:14
close out the material window handle
1:07:16
close.
1:07:18
And when we click this button on delete
1:07:21
what we need to do is that we need to
1:07:25
call this function which is
1:07:29
handle delete game. Handle delete game.
1:07:35
It will call this function. And
1:07:37
similarly when we click the update
1:07:39
button
1:07:41
we need to call this uh handle update
1:07:44
game.
1:07:48
So also guys we need to attach some
1:07:50
classes to it which is
1:07:53
here the color will be primary.
1:07:58
Here the color will be again
1:08:02
primary.
1:08:11
All three buttons have this color guys
1:08:13
which is primary.
1:08:16
So now we need to define all these
1:08:17
functions that we defined here. Handle
1:08:19
delete game and handle update game.
1:08:23
You may say that handle edit game.
1:08:30
So right here we will define this handle
1:08:33
delete game
1:08:37
and the handle
1:08:39
sorry addit game.
1:08:47
So if you now refresh it guys handle
1:08:50
changed values is not defined. Handle
1:08:52
changed. Sorry, this needs to be handle
1:08:55
changed.
1:09:03
So now you can see we have this material
1:09:05
window. It contains two or four fields
1:09:08
out there. The ID field is disabled. We
1:09:10
have this name. So we can now edit this.
1:09:13
[snorts]
1:09:14
So
1:09:15
we can change the cost as well. So if I
1:09:18
now click update, I need to update these
1:09:20
values. So if I click cancel the window
1:09:22
will disappear. So for this we need to
1:09:25
click the delete button. I need to
1:09:26
delete this record. So for this guys if
1:09:30
you're now watching it for the very
1:09:31
first time please hit the like button
1:09:33
subscribe the channel as well.
1:09:36
So here we will need to make
1:09:39
backend request guys inside this we will
1:09:44
need to go to
1:09:47
uh inside our backend server. So here
1:09:50
first of all we will tackle the delete
1:09:52
request. So here we will simply say app
1:09:54
dot delete this is the back end route
1:09:58
/de and we will have the id whichever
1:10:02
record we need to delete it. So we will
1:10:04
have request response
1:10:06
and basically we will get the id of the
1:10:09
record we need to delete by request.p
1:10:11
params
1:10:14
and then we will construct a query which
1:10:16
is delete
1:10:18
from table name which is games where
1:10:22
id is equal to question mark
1:10:26
and then db.query query we will simply
1:10:28
say my SQL
1:10:31
and we'll pass the ID and
1:10:35
error result
1:10:38
and if any sort of error take place you
1:10:40
can console log it.
1:10:43
If no error take place you can simply
1:10:45
say that response dot send result.
1:10:51
So that's it. This is the delete query
1:10:53
guys. We have written this delete query.
1:10:55
You can see delete we are passing the
1:10:57
id. So now we need to move to the delete
1:11:01
function here. So inside this delete
1:11:04
function we need to write the code.
1:11:12
So basically here we will make the axios
1:11:14
dot delete request.
1:11:17
So here we will say http localhost
1:11:22
4,000 / delete slash and here we will
1:11:26
pass the id. So now to pass the id guys
1:11:30
we will simply say that edit values
1:11:33
dot id.
1:11:38
So basically it's an object. You will
1:11:40
now see edit values is an object.
1:11:45
edit values
1:11:47
dot id. So we have getting this id here.
1:11:53
So here we are passing it. So this will
1:11:55
return a promise. So we can simply say
1:11:57
dot them
1:12:00
and uh after this we need to simply
1:12:02
props dot set list card
1:12:07
set
1:12:10
list card.
1:12:14
So here guys we will simply say props
1:12:16
dot list card
1:12:19
filter and we need to remove that value
1:12:22
which we have removed. So now to remove
1:12:25
that value we will simply return value
1:12:28
do id and basically we will say if it is
1:12:30
not equal to the id that we have
1:12:33
deleted.
1:12:34
So this simply means that we are
1:12:36
filtering out all the values which is
1:12:38
not equal to that ID that we have
1:12:40
removed. So [snorts] this will return
1:12:42
all the values except the value which
1:12:44
has its id.
1:12:47
That's it. And after this we also need
1:12:51
to call handle close. to close the
1:12:54
window. Handle close. That's it. So now
1:12:57
if you see guys uh
1:13:02
uh if I refresh it,
1:13:05
if I now hover onto this, click on
1:13:07
delete.
1:13:10
So let me see what is the problem going
1:13:12
on.
1:13:18
If I click delete.
1:13:23
So now that
1:13:34
you just
1:13:50
So now basically if you see here four
1:13:53
records are there inside the database.
1:13:55
If you clearly see here
1:13:57
[snorts]
1:13:59
let me check here four records are
1:14:02
there. Now if I need to delete any of
1:14:03
the individual record by you have if I
1:14:06
press the delete button
1:14:10
you can now see the delete operation is
1:14:13
not done.
1:14:24
So it is saying that xiosdelete is not a
1:14:27
function.
1:14:36
>> [laughter]
1:14:50
>> So local host 4,000 get cards. So why it
1:14:53
is showing me the ser
1:14:58
[snorts]
1:15:12
>> [clears throat]
1:15:23
>> localhost 4,000
1:15:26
/delete.
1:15:36
Now let me write this once again guys
1:15:37
which is handle delete K function
1:15:42
http localhost 3000 /de
1:15:46
then
1:15:54
[clears throat]
1:15:55
so again if I refresh it guys uh
1:16:02
sorry I need to start this So
1:16:07
fine
1:16:11
we need to start this. So npm start.
1:16:18
[snorts] So this will start this ReactJS
1:16:20
application at port number 302.
1:16:31
So please hit the like button guys if
1:16:33
you're watching it for the very first
1:16:34
time. I am seeing people are not liking
1:16:37
the content. Please subscribe the
1:16:38
channel as well.
1:16:41
So now if I click delete
1:16:49
[snorts]
1:16:52
uh I think guys it is related to Axios.
1:16:58
If you see the AIOS version here which I
1:17:00
am using in this project.
1:17:10
If I check the Xio's version here
1:17:14
0.27
1:17:15
and 0.21
1:17:22
so let me update it to the same version
1:17:25
guys. I think there is creating this
1:17:26
conflict issues that's why it is not
1:17:30
if I paste it to the same version which
1:17:32
is
1:17:35
so just update this 0.21 21 and now try
1:17:39
to
1:17:47
so [snorts] npmi so just update it to
1:17:50
the previous version of axios so I don't
1:17:54
know why it is saying that xios dot
1:17:58
is not a function and just start here
1:18:00
npm What?
1:18:44
So just wait it is opening this
1:18:46
application. So
1:19:16
I don't know guys why it is giving me
1:19:18
this error which is
1:19:24
on 24th line
1:19:37
uh dialog form.
1:19:42
Uh let me see dialogue form here. It's
1:19:45
oh sorry this needs to be 4,000.
1:19:48
Sorry, the port number was different
1:19:50
guys. I was writing the
1:19:53
wrong port number. So, refresh it now
1:19:58
and click on delete.
1:20:09
Axiodelete is not a function.
1:20:22
Let me search this error. Axios.de
1:20:25
is not a function.
1:20:28
[snorts]
1:20:44
I think you need to uh [snorts] pass the
1:20:48
headers as well.
1:21:03
So just pass the headers as well guys.
1:21:05
So content type application JSON
1:21:12
Just do it. And if you now refresh it,
1:21:55
So I have given that
1:23:13
Uh I think guys we haven't imported
1:23:15
this.
1:23:19
Oh I think this is the problem. You can
1:23:21
now see we haven't imported this
1:23:24
library.
1:23:26
So right here at the very top we need to
1:23:28
import this library. So
1:23:33
here you need to import
1:23:35
Xios from Xios.
1:23:39
So you need to import like this. So just
1:23:41
write this statement which is import
1:23:43
Xios from Xios.
1:23:45
So now if you do this like this then
1:23:48
obviously it will work now. So [snorts]
1:23:52
change it.
1:24:05
If I change it to the previous value
1:24:07
here.
1:24:22
Let me import x use for xus.
1:24:32
So we import x use from xus.
1:24:35
A should be capital here. So
1:24:38
if you now refresh it.
1:24:44
So now you can see that guys the delete
1:24:47
request is working perfectly. Now this
1:24:49
was just a import problem right here at
1:24:51
the very top. You need to import like
1:24:53
this. Import Xios A should be capital
1:24:55
here.
1:24:57
So click on delete.
1:25:01
So you can see all the records have been
1:25:03
successfully deleted guys. You can now
1:25:05
see in the database as well. If I click
1:25:07
the browse section no record is there.
1:25:09
So
1:25:11
if I insert a record,
1:25:17
you can now see
1:25:22
if I want to delete this. Click on
1:25:24
delete button. Now you can see the
1:25:25
delete operation is also working.
1:25:28
So now we will handle the update option
1:25:31
guys. If I update the entries I need to
1:25:33
update this. So for doing this first of
1:25:36
all we will write the backend request
1:25:37
for this. So similar to delete we will
1:25:40
write update as well. So simply we will
1:25:42
say that app.put
1:25:45
and / update and we will pass the id.
1:26:00
So this will be /edit.
1:26:06
So then we will have request response
1:26:08
and the second argument here and simply
1:26:11
here we need to first of all get all the
1:26:14
elements which is id name cost category
1:26:18
and this needs to be fetched from
1:26:21
request body and we need to now
1:26:24
construct the MySQL query guys which is
1:26:26
update table name and here we need to
1:26:29
set the name to question mark comma post
1:26:34
cost question mark category to question
1:26:37
mark. So where id is equal to
1:26:42
question mark. So this is a syntax guys
1:26:45
which is required here. And uh now we
1:26:48
will have db.query
1:26:51
and basically we will pass the myql and
1:26:53
also inside this array which is name
1:26:56
cost category
1:27:00
and id. So this will have error result.
1:27:06
If you can console log error if any sort
1:27:09
of error take place if no error take
1:27:11
place then we can inside the else
1:27:12
statement we can simply say that
1:27:14
response dot send result that's it. So
1:27:18
this is the very important statement
1:27:19
guys in order to update the data update
1:27:22
followed by table name and then set the
1:27:24
columns name is equal to the modified
1:27:27
name cost is equal to modified cost
1:27:29
category is equal to modified category
1:27:32
and where the ID which is the primary
1:27:34
key is equal to the ID that we have
1:27:35
given here.
1:27:38
So this is the update operation is also
1:27:40
complete. Now we need to go to the front
1:27:42
front end here inside ReactJS and inside
1:27:45
this handle edit we need to write this
1:27:48
code.
1:27:51
So
1:27:54
we will now use Xios.put method in order
1:27:57
to make a put request. And here we will
1:27:59
say HTTP localhost
1:28:02
4,000 /edit.
1:28:05
And here we need to pass the data which
1:28:07
needs to be updated guys. So we will
1:28:09
pass the id which will get props dot id
1:28:13
sorry edit values
1:28:16
dot id name is equal to edit values dot
1:28:20
name
1:28:21
uh cost is equal to edit values dot cost
1:28:27
category is equal to edit values dot
1:28:31
category
1:28:33
and uh then we need to this will return
1:28:36
a promise. So we need to handle using
1:28:38
dot then and inside this we need to set
1:28:41
the props dot setlist card
1:28:46
and here we will have props dot list
1:28:49
card
1:28:51
again we'll use the map method
1:28:54
for each value
1:28:57
we will return the value
1:29:01
which id is not equal to addit values do
1:29:04
ID
1:29:10
>> and also we will use the turnary
1:29:12
operator.
1:29:13
>> I don't know.
1:29:14
>> If the value the the record is same then
1:29:18
we will simply
1:29:20
have the edit values do ID
1:29:24
name is equal to edit values
1:29:27
dot name.
1:29:33
cost is equal to edit values.
1:29:44
If it is not equal to the
1:29:48
ID that is passed here, then we will
1:29:50
simply render out the value. So value
1:29:52
that's it.
1:29:55
At last, we also need to close out this
1:29:58
window. So we can simply call handle
1:30:00
close. That's it.
1:30:03
So now the application is complete. Now
1:30:05
let me test it. So if I want to change
1:30:08
the name here, let's suppose also the
1:30:11
category and the
1:30:13
and if I click the update button and now
1:30:15
you can see the name is changed.
1:30:17
Category is also changed. We can add a
1:30:20
record.
1:30:25
We can delete the record. We can update
1:30:27
the record. We can do anything here with
1:30:29
this CRUD application. So, so now we
1:30:32
have constructed a 4D cred application
1:30:34
guys inside ReactJS express and uh MySQL
1:30:38
database. So, if you have any sort of
1:30:40
problem you can ask in the comment
1:30:41
section
1:30:45
and you can also hit the like button
1:30:47
subscribe the channel as well
1:30:51
and all the source code of this
1:30:53
application I have given in the pinned
1:30:54
comment. So, you can go to that blog
1:30:56
post and copy paste all the source code.
1:31:14
Never