Up next in 10

Build a Vue.js Full Stack Youtube Clone + JWT Auth in Node.js Express Using MongoDB in Browser
Mar 5, 2026
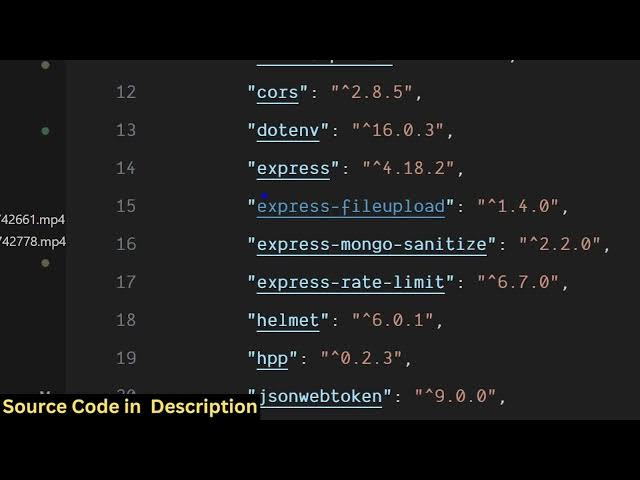
Buy the full source code of application here:
https://procodestore.com/index.php/product/build-a-vue-js-full-stack-youtube-clone-jwt-auth-in-node-js-express-using-mongodb-in-browser/
Show More Show Less View Video Transcript
0:00
Uh hello guys, in this video I'll show
0:02
you I built out a complete full stack
0:05
Vue.js YouTube clone uh in NodeJS
0:08
Express and MongoDB. So it has two
0:11
sections. First is the front end which
0:12
is coded inside Vue.js. So this is the
0:15
front end here. All the components you
0:17
will see it's divided into its
0:20
appropriate Vue.js files. It's fully
0:22
customizable. So this is using the
0:24
latest version of Vue Vue routery
0:28
AIOS and this is actually the back end
0:30
of the application which is coded inside
0:33
NodeJS express and we also have the
0:35
authentication as well which is
0:39
so this is also using MongoDB mongus
0:42
library. So all the source code is given
0:45
you can directly purchase the source
0:46
code. So once you purchase it you will
0:48
automatically get the source code from
0:50
Google drive. So we are running both the
0:53
front end here. You can see it's a full
0:54
stack YouTube clone. So this is the
0:56
Vue.js application running on HTTP
0:58
localhost 80080. And this is actually
1:01
the back end which is running on port
1:04
number 30001. So let me show you the
1:07
demo of the application. So the demo
1:10
looks something like this. I've already
1:11
created one account here. You will see
1:14
it's actually a fullyfledged YouTube
1:16
clone. So you also get this is your
1:19
channel page here.
1:21
zero subscribers and then you can go to
1:23
YouTube studio as well. So right here
1:26
you have this option to actually upload
1:28
a video here. So all these things are
1:31
stored inside MongoDB database. So we
1:34
are running this on MongoDB compass
1:35
here. So this is the database
1:39
automatically create whenever you run
1:41
the back end. So all these tables are
1:43
automatically created here. The users
1:46
table, subscriptions, comments,
1:48
categories everything. So then you have
1:50
this option to actually upload a video.
1:53
So we have the same interface of
1:55
YouTube. Here you will see that I coded
1:58
this from scratch and then you need to
2:01
simply go to the uh video. So wherever
2:05
you
2:07
you select the video here and this
2:09
processing will start here. So once it
2:10
reaches 100% you will basically give it
2:13
a title.
2:19
and then give it a description,
2:21
visibility, public and category you can
2:23
choose. And then same goes with
2:26
thumbnail as well.
2:33
You can basically select
2:39
the thumbnail here. Simply click save
2:41
and automatically the thumbnail will be
2:43
there. You click on submit and the video
2:45
is successfully inserted
2:48
inside the videos table. You'll see that
2:51
it's automatically saved and once you
2:54
click this automatically this video is
2:56
successfully uploaded
2:58
that we uploaded right here. So it's
3:00
stored inside this public/uploads
3:02
directory in back inside the back end.
3:05
This is actually the video successfully
3:07
uploaded and then you can simply play
3:10
the video. The video will play.
3:14
inside the video player. You will see
3:16
how easy it is. And this is the
3:18
suggested video section right here.
3:22
And similarly uh you can just see how
3:24
easy it is. This is all your videos, the
3:28
number of views, comments, everything.
3:32
This is the video page. You can do all
3:35
sort of things here. You can like the
3:37
video or dislike it. Uh you also have
3:40
this download button which will actually
3:44
>> open the video in the new tab. Then we
3:46
also have the section to comment.
3:50
Comment will be inserted and here you
3:52
can create a new account as well. So
3:54
somebody creates a new account.
3:58
So we are also the authentication
4:00
section as well. So you do need to sign
4:02
in in this application. And here you
4:05
have this option to first of all create
4:07
account.
4:09
So here you will put your email address
4:15
and you basically provide a channel name
4:17
and then the password.
4:20
So I've already created this from
4:22
scratch guys. It's very easy for you to
4:24
purchase it and simply run this
4:25
application and also very easy for you
4:27
to deploy this as well. If you still
4:29
face any issues I will there for you.
4:31
You can email me after payment if you
4:33
face any issues. It's easy for you to
4:35
deploy this as well and run this. All
4:38
these things are customizable. You can
4:40
basically change anything and add
4:42
additional features as well. So this
4:44
will save you a lot of time after you
4:47
sign up automatically the channel will
4:50
be created here. This as you can see
4:54
and automatically that entry will be
4:56
created inside the users directory. Now
4:58
we have two users as you will see this
5:01
is a first user this is a second user
5:04
and uh in this easy way you can even
5:06
search
5:08
the channels as well different in the
5:10
search bar. So automatically this
5:13
channel will come. So here you can click
5:15
the subscribe button as well. So as you
5:17
click the subscribe button you are
5:18
subscribed to this channel. So you can
5:21
just see how easy it is. So
5:25
if you go to now we have one subscriber
5:27
because we subscribed to this channel.
5:32
So this is another channel here that we
5:34
created. And now if you want to upload a
5:37
video once again you go to upload video.
5:43
So you just select the video and then
5:46
again the processing will start and then
5:49
automatically you visibility public. You
5:52
can even do this as private as well. You
5:55
also have this option category. You can
5:57
just select here. And once again the
6:00
thumbnail
6:10
and just click submit. And now you can
6:12
see the videos are successfully
6:14
uploaded. As this is a private video,
6:16
you can change the visibility at any
6:18
moment of time here. So
6:24
the video will not play because it's a
6:26
private video. So you can change the
6:28
visibility. Just edit the visibility
6:31
from change to private to public. And
6:33
now you will be able to play this video
6:37
and it will come right here in the
6:38
sidebar section. You will see that.
6:45
So all these functionalities are there.
6:47
like, dislike, comment, everything you
6:49
can do. So all the functionalities are
6:52
present right here. So definitely
6:54
purchase it if you're looking forward
6:55
for this video streaming video sharing
6:58
script. So the front end is coded
7:01
directly in node uh Vue.js. You can see
7:04
we are using the latest version of
7:05
Vueify
7:08
and in the back end we are using MongoDB
7:10
and uh it's a fully functional project.
7:15
So we are using mongus for actually
7:17
validating and inserting the data into
7:20
MongoDB database. We are also using JSON
7:23
web token for actually authentication
7:26
purpose and we are using express NodeJS
7:30
express in the back end.
7:32
So it's
7:34
very easy for you to actually get
7:36
started using this project.
7:39
So we have this ENV file. So once you
7:41
purchase it, you just need to fill out
7:43
your entries and you just need to
7:45
provide the MongoDB address wherever
7:48
your database is hosted. So I already
7:51
have this MongoDB compass desktop
7:53
software. So which lets you directly use
7:56
MongoDB as a desktop software. You just
8:00
need to give it the give the name of the
8:02
database right here and rest of the
8:05
things will be constant. This is your
8:07
secret key for JWT
8:10
and file upload path is where the files
8:13
will be there. So it's stored inside the
8:15
public uploads. So it will create all
8:18
these folders for you. Thumbnails which
8:21
will be stored, the thumbnails of the
8:22
videos and these are all the videos
8:24
which are stored.
8:26
And these are all the things in the back
8:30
end. And now coming to the front end,
8:32
you just need this URL where your app
8:34
will be hosted. your back end will be
8:36
hosted. So just put this address
8:39
wherever you are running. So our back
8:41
end is running at port 30001 and this is
8:44
a front end which is running.
8:47
So you can just see here. So it's a
8:50
fullyfledged full stack YouTube clone
8:53
project and if you're interested in this
8:55
definitely purchase it and it has all
8:58
the functionalities I've shown you from
9:00
scratch.
9:02
This is actually the channel page. Here
9:06
all your liked videos will come
9:10
and the history will come. You will see
9:12
whatever you watch, search. If you want
9:15
to clear out, you can clear out as well
9:17
everything.
9:25
So the search functionality is also
9:27
working. So I only have a single video.
9:30
So that's why
9:33
you basically search and based upon the
9:35
the videos will come and here you can
9:37
play the video in the video player. So
9:40
you have full screen all these
9:42
functionalities are there. You can
9:44
download playback speed you can even
9:46
control as well. So
9:49
if you still face any issues in running
9:51
the application you can email me. I will
9:52
definitely help you and uh the link is
9:55
given in the description.
9:57
After that you will automatically get
9:59
the source code from Google drive after
10:02
the payment. So you will see each and
10:05
every this is the o component categories
10:08
comments.
10:09
So each and every component is
10:11
customizable. It's coded inside
10:13
JavaScript and uh
10:17
so it's also very easy for you to
10:20
actually see how I coded this from
10:22
scratch and you can actually edit any of
10:25
the files to add additional
10:27
functionalities as well. So,
10:33
so you can just see here. So, each and
10:35
every component is customizable.
10:47
So, this will be the watch URL. So, you
10:51
can just see automatically it
10:52
constructed whenever you upload a video
10:54
as YouTube does it automatically
10:56
construct a URL. So
11:00
this is the YouTube studio and
11:04
the videos will come right here. As you
11:06
upload more videos the videos will come
11:08
the pagination
11:10
you can adjust the pagination
11:12
everything.
11:16
So these are the settings of the
11:18
channel. So you can change the channel
11:20
name, email address, you can even change
11:22
the password as well. Just write the
11:24
current password, new password, submit.
11:26
Here you can change the channel image as
11:28
well. So everything is there guys. If
11:31
you're interested in this uh the link is
11:34
given in the description.