Up next in 10

Build React.js Material-UI Multiple Tabs Layout Component Using Array of Objects in JSX & Javascript
Dec 22, 2025
Get the full source code of application here:
Show More Show Less View Video Transcript
0:08
Uh hello friends, today in this tutorial
0:09
I'll be showing you that how to build uh
0:11
multiple tabs layout inside uh ReactJS.
0:16
So basically this will be the demo of
0:18
the application. So there will be
0:20
multiple tabs out there. So basically
0:22
this is a layout you have seen in many
0:24
applications inside in the internet. So
0:28
there's this is the first tab and it has
0:30
its own title and this is a content the
0:34
second tab. So once again there is has
0:37
its own title and the content. This is
0:40
the third tab. You can see that this has
0:43
its own title and the content. And this
0:46
is the fourth tab. You can see that it
0:49
has its own title and the content. So
0:52
this is multiple tabs out there. So each
0:54
and every tab there is dynamic content
0:57
out there. So this is built using pure
1:01
ReactJS. So we are not using any sort of
1:04
third party library. So we have styled
1:08
it using pure CSS. So this is giving the
1:13
look of a material uh tab layout. So it
1:16
has multiple tab layouts and uh which
1:20
has its own title and content. So
1:24
basically we are making use of uh JSON
1:27
objects and uh there are four objects
1:31
out there. So each and every object has
1:33
its own property such as title and the
1:36
content. And this is a second tab which
1:40
has its own title and the content. This
1:42
is a third tab. This is a fourth tab. So
1:46
we will try to build this from scratch
1:48
inside ReactJS. So all the source code
1:52
will be there inside video description.
1:54
So I have written a complete blog post
1:56
here on my website. So if you want the
1:59
source code regarding this video, you
2:01
can go to the video description link to
2:03
download all the source code. So inside
2:07
this video description, I have given
2:08
this. So
2:10
let's start building this layout from
2:13
scratch guys. So first of all, you need
2:15
to create a blank ReactJS projects. Let
2:19
me delete all this stuff and start from
2:22
scratch.
2:25
Let me delete this folder.
2:33
So now if you just write here hello
2:36
world.
2:40
So now you can see that guys this is a
2:42
brand new ReactJS project. It doesn't
2:45
have anything inside this. So first of
2:47
all we need to
2:50
include a separate component for this.
2:53
So we will simply give it a heading H1
2:55
heading.
2:58
So here we will simply say that react
3:01
simple tabs
3:04
component.
3:06
So after this we need to include that
3:08
component. So we will make a separate
3:11
component which is called as tabs. So
3:13
just include this. So now at the very
3:16
top
3:18
we need to make a components folder here
3:20
in the source directory.
3:22
So just make a components folder here
3:24
and inside this you need to make a file
3:27
called as tabs dot jsx. So jsx is a
3:32
format of reactjs.
3:35
So
3:37
inside this you just need to import the
3:40
uh react library. So we will import
3:43
react
3:45
and we will make use
3:47
first of all we will import react from
3:49
react like this.
3:52
So this will be a functional component.
3:55
So basically const tabs.
3:58
So this is the arrow function and here
4:01
first of all what we need to do is that
4:03
we need to simply return a simple
4:05
component here and uh inside this we
4:09
will simply say this is the tabs
4:11
component.
4:13
So here we need to export it so that we
4:15
can include it inside uh the main file.
4:20
So we will simply say export default
4:22
tabs.
4:24
So now this is the custom component
4:27
guys. So now we can include this inside
4:30
our uh
4:32
uh app.js file. So we can simply say
4:34
that at the very top we can import this
4:38
component by importing it import tabs
4:42
from
4:44
and here we can say dot /
4:47
component/tabs.
4:50
So now if you refresh the application
4:52
you will see that guys this uh react
4:54
simple tabs component will be showing
4:56
here. So this is the H1 heading here
4:59
because we are surrounded this you will
5:01
see that tabs component.
5:05
So you can see that.
5:09
So now guys we need to uh define this
5:13
functionality inside this individual
5:15
component which is tabs. So here we will
5:17
make array of objects. So each objects
5:21
has its own property. So here we will
5:23
simply say const current tab
5:29
and uh set current tab. So for this we
5:32
will be using the u state hook.
5:36
So use state. So this will be
5:38
automatically imported from reactjs
5:40
library. You will see that use state. So
5:43
here we will pass the first tab as the
5:46
active tab which will be selected by the
5:48
user when you load the application for
5:50
the very first time. So then we will uh
5:53
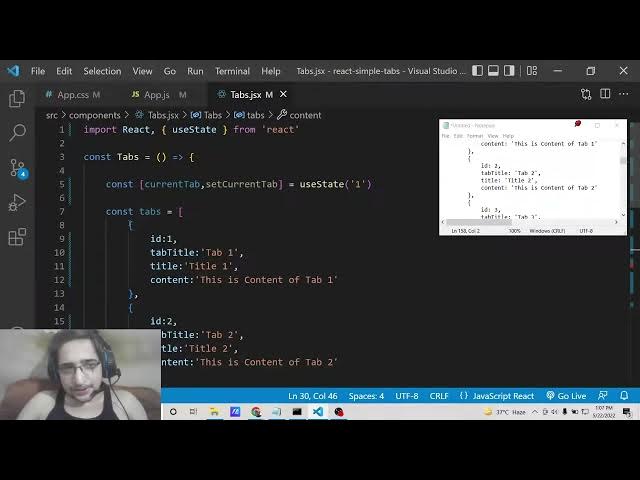
in initialize the array of tabs here. So
5:57
this will be a array of objects. So each
6:00
object has its four properties. First is
6:03
the id which is unique identifier which
6:07
is one. Then we can give it a title to
6:10
the tab tab title.
6:13
So this will be simply tab one.
6:18
And inside this we will can give it a
6:20
title that this is title one
6:24
and put a comma and content. So here we
6:28
can simply say that this is content of
6:31
tab one.
6:35
So this we can repeat it three more
6:36
times guys because uh there will be four
6:39
tabs. So you can put a comma and repeat
6:42
it for the second tab. We can give it a
6:46
ID of two.
6:49
Tab title will become tab two.
6:55
Title will become title three.
7:00
And the content will become uh this is
7:02
content of
7:06
tab 2.
7:09
Just to save some time, I can copy this.
7:11
So put a comma.
7:15
So here we can just change these values
7:18
to three and three.
7:26
Uh
7:35
so now we have four objects guys. You
7:37
can see that this is this is a array and
7:40
it contains four objects. Each object
7:42
has its four properties. ID, tab, title,
7:45
title and content. So four objects are
7:48
there.
7:49
So just change this to four here.
7:53
So now we can uh use this inside our
7:57
component and simply what we can do is
7:59
that here we can use a class which we
8:03
will define it inside app dot CSS. So we
8:06
will initialize this class which is
8:08
container
8:11
and uh inside this we will again have a
8:14
different class which will be called as
8:18
class name tabs.
8:21
So inside this tabs class guys we will
8:23
be having
8:27
we will loop through this uh array. You
8:30
can see this is the array here. So we
8:32
need to loop through each object which
8:33
contains inside this array. So for
8:36
looping through we will use the map
8:37
method which is very much useful in
8:40
react.
8:43
So for each object we will have the tab
8:46
property and the index property. So this
8:48
will be a array uh arrow function.
8:53
So just do this. So,
8:59
so here what we need to do is guys uh
9:02
you need to initialize a simple button
9:04
at the very top.
9:06
So this button have will be having the
9:09
key parameter. So whenever you loop
9:11
through you need to just provide the key
9:13
parameter which is the index. Then you
9:15
need to provide the id of the tab which
9:19
is selected. So this is coming through
9:21
tab dot id
9:25
and then
9:27
we will have uh a special attribute to
9:31
it which we will define it as disabled
9:34
which will be whenever you select that
9:38
uh tab this will be highlighted. So for
9:41
highlighting it we need to compare it.
9:44
If the current tab is equal to
9:48
we will compare it like this dynamically
9:52
we'll pass it.
9:57
So basically it is saying that it will
9:59
disable whatever the tab is clicked. So
10:02
if you click the third tab that tab will
10:05
be disabled and it it will be having
10:08
different CSS class. So it is just
10:10
comparing it current app
10:14
property.
10:16
So after this we will attach is on click
10:19
property. So whenever you click what
10:22
happens?
10:24
So on click so on click is a event
10:27
handler. So when we click the button
10:29
what happens? So we need to attach a
10:32
different function for this. So which
10:34
will be handle tap click. So this is a
10:39
custom function which we will define and
10:42
the label of this button will be simply
10:44
the title of the tab which is tab dot
10:48
tab title.
10:50
That's it.
10:52
So now guys we need to define this
10:54
function which is handle tab click. So
10:56
whenever you click the tab what happens?
10:59
So right here you need to define this
11:02
function at the very top.
11:05
So here we will simply say that const
11:09
handle tap click we will pass the e
11:12
parameter. So here we will simply set
11:15
the current app to whatever the id which
11:19
is passed to it. E.target do ID that's
11:22
it. So basically we are using this
11:25
method of the hooks here and uh whatever
11:28
ID is passed here. So we have attached
11:30
the ID to each and every tab. This is 1
11:33
2 3 4. So whichever the button is
11:36
clicked that id will be passed inside
11:39
this e parameter. So we are initializing
11:41
it e.target do ID. So that current tab
11:45
will be equal to that. So here we will
11:48
compare it inside the disabled condition
11:52
like this. So it is all interconnected.
11:55
Uh that's it. So now basically if you
11:58
just refresh your application you will
11:59
see these four tabs. So now basically
12:03
because this tab one is disabled by
12:05
default because we have passed it inside
12:08
our hook function. So if I change this
12:10
value to two. So this second tab will be
12:13
disabled. If I refresh it you will see
12:15
that the second tab is disabled. So if
12:18
you click any individual tab here that
12:20
tab will be disabled. You can see that.
12:23
So this is a effect that we have uh
12:27
uh made here. You can see that using
12:30
pure uh JavaScript, JSX and ReactJS.
12:35
And now we need to individually show the
12:37
content of each and every tab which is
12:40
very easy. We will have another div for
12:44
this for the content. So right here at
12:47
this bottom we will say content.
12:52
We will initialize the class name to
12:54
content.
12:56
So again we will use the map method to
13:00
uh loop through the array which is we
13:03
will pass the individual tab and the
13:04
index which is stored inside I. So this
13:08
will be a arrow function.
13:13
So here we will compare if the current
13:15
app
13:17
is equal to
13:22
the tab id which is passed.
13:27
So if the current uh tab if you clicked
13:30
the tab let's suppose if you have
13:32
clicked the first tab if it is equal to
13:34
the
13:36
tab id to that and also the second
13:39
condition is that
13:43
we need to show that div. So close this
13:46
div.
13:49
So inside this we need to show the
13:53
par
13:55
the content of that.
13:58
So we will attach these classes which we
14:00
will style it inside uh JavaScript. So
14:04
don't worry. So inside this paragraph we
14:06
will simply show the tab title
14:12
and
14:14
inside another paragraph we will show
14:16
the actual
14:18
tab content. So here we will simply say
14:21
tab dot content. That's it.
14:25
This is all that you need to do. So
14:26
basically in inside this condition what
14:29
we are telling here is that so whichever
14:32
tab you click
14:34
let's suppose you click the first tab
14:36
you need to show its title and the
14:38
content. So it is just saying this
14:40
inside this condition. So now if you see
14:44
here what happens. So if you now click
14:47
the first tab
14:51
uh for this uh I think
14:57
uh I think you need to close this as
14:59
well
15:03
uh let me paste this once again.
15:07
condition
15:13
you do need to provide the key parameter
15:14
as I was uh
15:17
uh
15:19
I was forgetting if you just see here
15:22
when I written this code here I was
15:24
forgetting this uh div. I need to
15:28
initialize this div.
15:30
So I need to surround this. So whenever
15:33
I I forget this div.
15:36
So
15:38
we need to put the key parameter. So
15:40
this will be equal to the index number.
15:42
That's it. That I was forgetting. So if
15:46
you just see here
15:55
uh let
15:57
copy this once again.
16:02
So you need to provide this key
16:04
parameter which is the actual index. So
16:06
inside this we are comparing it. So
16:08
whichever tab is clicked you need to
16:10
show its title and the content. You will
16:13
see that tab.title and tab.content.
16:16
So this is all that you need to do. If
16:18
you see here now it is completed this
16:21
functionality. So this is multiple tabs
16:24
layout inside ReactJS. So when you click
16:26
the first tab this will show its title
16:29
and the content. When you click the
16:31
second tab, it will show its title and
16:32
the content. So now we just need to
16:35
style this using CSS. It's very easy. So
16:39
first of all, hit the like button.
16:40
Subscribe the channel as well guys. So
16:43
in order to style this, we will make use
16:45
of app dot CSS.
16:50
So here what we need to do is that first
16:52
of all we need to remove the margin and
16:55
the padding.
17:06
So this needs to be applied to all the
17:08
elements. So we will put star here.
17:12
And we will make the box sizing to
17:14
border box.
17:16
So here we will style the body which we
17:18
will provide a background color to it of
17:20
black.
17:24
So if you see here now it is styling
17:26
here. So just wait. So it is not style
17:29
because we haven't included this file.
17:31
So we need to include this file. import
17:37
dot
17:44
app dot CSS. If you include this, you
17:46
will see that now these styles are
17:48
applying here.
17:50
Uh after this what we need to do is that
17:54
we need to change the font family
17:59
to
18:00
Roboto.
18:03
If that font is not available then we
18:05
will
18:07
use sans serif and we will provide a
18:10
margin of 20 pixel.
18:14
So we will style the h1 heading here. We
18:17
will change the color to white. We will
18:21
provide the font weight property to
18:25
500.
18:27
Text align we will change to center.
18:32
So you will see that it is styling here.
18:38
So margin we will change to 60 pixel 0.
18:46
So now basically we will target the
18:48
container class here.
18:53
So we will change the width to 960 pixel
18:58
margin to zero auto
19:02
and then we will target the dot tabs
19:04
class which is uh we will change the
19:06
display property to flex
19:08
justify content to space between.
19:13
So basically this will provide some
19:16
spaces inside the individual tabs here.
19:23
So after this we will target the
19:26
individual buttons inside the tabs
19:28
class.
19:30
We can change the background color to
19:33
light gray.
19:36
We can remove the border
19:38
color. We can change to
19:41
this color which is 888
19:47
this gray color and cursor we can change
19:49
to pointer.
19:51
Padding we can give to 25 pixel. Width
19:55
we can change to 100%.
20:02
Background color you can change this to
20:05
this color RGBA which is red, green,
20:07
blue alpha 255,
20:10
255
20:14
and also we can provide a transition
20:17
effect animation effect.
20:23
So this will be all 0.5 delay second and
20:28
uh animation type will be ease out.
20:33
So if you see here u this has some kind
20:36
of animation to it.
20:40
If you see here, you will see that
20:43
we need to define this animation which
20:46
is when you hover onto this what fell
20:48
happen
20:53
the color will change to white.
20:58
Background color will change to RGBA.
21:12
You can see that this is the animation
21:14
effect. When you hover onto the buttons,
21:17
the color will change to white. You will
21:19
see that. So now we need to have that
21:22
disabled effect. So whenever you click
21:24
individual tab, you need to highlight
21:26
that tab. So for doing this, it is very
21:29
easy. We will target this disabled class
21:32
which is by using disabled attribute.
21:39
And here what we need to do is that we
21:41
need to just change its background color
21:44
just to highlight it. We will use linear
21:47
gradient for this
21:53
function. And here we will provide this
21:56
245.39°
22:02
this hexa decimal. So this is just a
22:05
little more complicated. So I need to
22:07
paste it here.
22:14
So color I will change to white text
22:17
color. So now if you see whenever we
22:20
click individual tab this will have this
22:23
linear gradient effect animation
22:26
background color. So this is exactly
22:28
what we want and then we can change the
22:32
title by using the title class
22:37
color we can change to black phone size
22:40
to medium.
22:43
Margin bottom
22:47
20 pixel.
22:49
Font size we can change to 20 pixel.
22:52
Font weight we can change to 600.
22:59
So this will have this title here. You
23:01
will see that
23:08
similarly this will have for the content
23:10
as well. So if you see here,
23:16
let me paste it for the content as well.
23:20
So this CSS is not really important for
23:22
this application. So you can just copy
23:24
paste from the website. So that's it.
23:26
You will see that this is an effect.
23:29
So I just wanted to convey the
23:31
functionality, the logic which is
23:34
JavaScript code. The CSS you can just
23:36
copy it from the website. The link will
23:38
be there inside video description. So
23:40
this is the multiple tab layout inside
23:42
ReactJS which you can build from scratch
23:45
without using to any use third party
23:48
library.
23:51
So I hope that you like this video.
23:53
Please hit the like button, subscribe
23:54
the channel and I will be seeing you in
23:56
the next video.