Up next in 10

Build a PHP PDF Invoice Editor Using HTML5 Form to Create PDF Documents in Browser Using DOMPDF
Dec 13, 2025
Buy the full source code of the application here:
https://procodestore.com/index.php/product/build-a-php-pdf-invoice-editor-using-html5-form-to-create-pdf-documents-in-browser-using-dompdf/
Show More Show Less View Video Transcript
0:04
Uh hello guys, welcome to this uh live
0:06
stream. So in this live stream I will
0:08
basically talk about uh how I build this
0:11
PDF invoice editor with the live preview
0:14
and you will be able to generate invoice
0:17
PDF documents inside this PHP
0:21
uh editor that I developed inside the
0:23
browser and you can actually see the
0:25
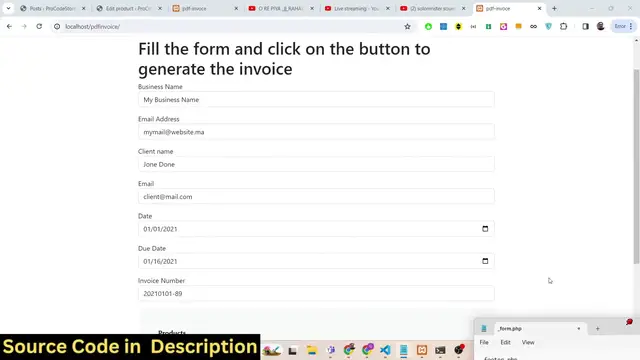
live preview live demo of this. We have
0:28
a simple HTML form. Here you will
0:30
basically fill out your business
0:31
details. Business name, email address,
0:33
client name, whichever you are basically
0:36
generating the invoice for the email of
0:38
the client, date, due date, invoice
0:40
number. So let me fill out the details
0:42
and show you a very short demo. So let
0:45
me fill out my business name and fill
0:49
out my email ID and
0:53
client name. Let's suppose my client
0:55
name is John
1:00
Williamson and the client email ID is
1:03
John Williamson at the rategmail.com.
1:06
So then you can basically select the
1:10
from date and the due date of the
1:12
invoice. You can basically select any
1:14
date.
1:17
So after you selecting the dates from
1:18
the date picker as you click the date
1:20
picker will show up and you will be able
1:22
to select the date and you can basically
1:25
pick your invoice number. So let me pick
1:27
here uh 10 0. This is the invoice number
1:31
and that's all. And after that you can
1:32
basically add some products in the
1:34
invoice. And let's suppose the user has
1:36
purchased some things from you. So let's
1:39
suppose I can say JavaScript course.
1:46
A user has purchased one quantity and
1:48
the price of that course is $100. So I
1:51
will say 100. I can basically add some
1:53
more invoice product. Let's suppose the
1:56
user has also purchased uh PHP course as
2:00
well. So I will simply say PHP course.
2:04
Quantity will be one. Let's suppose they
2:06
have purchased two courses. So I will
2:08
say two. So the price of this will be
2:12
each course is 100. So, so there is two
2:17
things in the invoice and as I click the
2:19
generate PDF button guys, you will
2:21
basically see this invoice will be
2:23
generated as a PDF document. And if I
2:25
open this, you will basically see that
2:28
this invoice document is generated. This
2:30
is the business name that you selected.
2:32
This is the email address of yours and
2:34
basically bill two. This is your client
2:36
name, client email address, invoice
2:38
number, invoice date, due date and this
2:42
is a table description, number of
2:44
quantity, the price is in United States
2:47
dollar. You can basically change the
2:48
currency according to your own country.
2:50
So if you are from Europe, you can
2:53
change to euro. If you are from England,
2:56
you can change to uh
2:59
all the currencies are supported. And
3:01
basically you will basically see total
3:03
amount is set to so they have purchased
3:05
one quantity. So each quantity is 100.
3:07
So total price comes out to be 100. So
3:10
this is quantity is two. So 2 multiplied
3:12
by 100 comes out to be $200. The total
3:15
invoice is 300. So automatically
3:18
calculated and you can basically see uh
3:21
the invoice document has been
3:23
automatically generated. You can see
3:25
that this is your email address. This is
3:28
your this one.
3:31
And uh basically guys, you can add some
3:33
more products if you want to.
3:45
So you can just add add many products.
3:49
You can even delete them as as well by
3:51
clicking this cross button. As you click
3:53
the cross button, the product will be
3:55
deleted. You can add more products like
3:57
this very simple interface in PHP. I'm
4:00
guiding you this uh and click on create
4:03
PDF and now your you will see that. So
4:07
this is five quantity. It is multiplied
4:09
by 25. So it comes out to be 125. The
4:13
total invoice is $625. And this is your
4:17
invoice coding six. And here you can
4:19
replace your company name, email
4:21
address. This is your client name,
4:23
client email address. This is the total
4:25
quantity what is the
4:28
uh client has basically purchased this
4:31
is the invoice date due date and you can
4:33
basically automate this process. This is
4:35
a complete web editor that I'm giving
4:38
you guys in PHP. I basically built this
4:40
using a library called as DOM PDF which
4:43
is actually a open-source library in PHP
4:46
to actually convert HTML templates to
4:49
PDF. So we are actually using a simple
4:51
HTML template and converting it to a PDF
4:53
document using this library which is DOM
4:56
PDF which is a open-source library in
4:58
PHP in order to basically convert the
5:00
HTML to PDF and generate PDF document.
5:03
So we are actually using this library in
5:06
PHP. This is the overall project guys.
5:08
If you need the full source code guys
5:10
the link is given in the description of
5:12
the video. You can directly purchase it
5:14
from PayPal or Stripe. Both the payment
5:17
links are given in the description of
5:18
the video. So you can check out and uh
5:21
basically this will be the source code
5:22
you will get after you make the payment.
5:24
You will be able to download the zip
5:26
file from Google drive and then you can
5:28
extract the content of the zip file and
5:30
you will actually get this folder
5:32
structure. This will contain the PHP
5:34
code. This will be the index.php file
5:36
that you just need to load right here as
5:38
you start your exam control panel or you
5:41
can purchase a domain name directly
5:43
upload these files to your hosting plan
5:45
and then you can basically deploy this
5:47
application as well.
5:49
I'm currently on Windows. So basically
5:51
I'm using exam control panel which is
5:53
actually a Apache open-source server to
5:56
actually uh it builds in Apache server
6:00
MySQL. It is also available if you're
6:03
testing it locally. You just need to
6:05
install it for PHP applications exam
6:08
control panel. So just download this.
6:11
It's the crossplatform software. It's
6:13
also available for Linux and Mac
6:15
operating system. So simply download and
6:17
install it and simply as you it will
6:20
actually create the C directory. It
6:23
basically installs in the C directory.
6:25
It will create a folder called as uh
6:28
exam. If you see basically it will
6:30
create this folder exam and then go to
6:32
your HD docs folder
6:35
this folder and just paste that zip file
6:38
extract the content of the zip file
6:40
inside this and now you can directly
6:42
access that by local host PDF invoice.
6:46
So as you open this this application
6:49
will open by default and now you can
6:51
fill out the details and basically uh
6:54
generate your PDF document. It's very
6:55
easy as you will click the button your
6:58
PDF document will be generated. So I
7:00
will now basically walk you through the
7:01
code guys how I actually build this. So
7:05
I will basically write the code here. So
7:11
so first of all I will show you the
7:13
number of fields that I added.
7:16
So this is the actual form that I'm
7:18
using. So if you just refresh now all
7:20
the things will be go away. You will see
7:22
nothing is present. So we basically
7:25
deleted all the fields. So here inside
7:27
this file you can control uh which
7:30
fields you can need to have in the
7:32
invoice document. So inside form.tphtp
7:35
you can actually control which fields
7:37
that you need. So in this we will
7:40
actually put this code here which is use
7:44
app
7:46
controller and then form put a semicolon
7:51
and then we will actually have the form
7:54
new form
7:56
and uh dot php. So we have written the
7:59
code for this in a separate file dot
8:01
php. So we can basically have uh
8:07
basically generate a form. This actually
8:09
is a method. We can basically pass some
8:12
options here. So in order to generate a
8:13
method sorry form.
8:16
So the there are some properties that we
8:18
can have. First is a name property. So
8:23
this name property will have a label
8:26
attached to it.
8:29
This will be predefined values.
8:31
Basically, if you want to predefine fill
8:33
out the fields by some default value,
8:36
then you can do this like this. This
8:38
type will be of text field. This is a
8:41
text field
8:43
and the value will be basically if you
8:46
want to predefine the value. So, we can
8:48
simply say my business name. So, this is
8:52
a placeholder value. Basically, it will
8:54
actually tell you which thing you you
8:56
need to fill out here.
9:02
So it is saying that uh echo uh form
9:07
generate form
9:17
uh just wait. So basically uh here
9:20
actually you can control which things
9:22
you need to do. I will simply paste this
9:25
code here. Right? Just show you. Just
9:26
wait.
9:35
So if you just reload now there will
9:37
only be a single field out there. If you
9:39
just refresh you will see there is only
9:41
a single field my business name. So you
9:44
can see that.
9:45
So there is only a single name and this
9:48
is predefined filled out here because
9:50
you can even change this as well. uh if
9:53
you want to do it
9:56
just change it to predefined value let's
9:59
suppose coding seure so if you just
10:01
reload the application this will be fill
10:03
out coding section so you just need to
10:06
edit this so totally depends upon you so
10:10
so I'm just telling you how I build this
10:12
so you should have know before
10:14
purchasing it how it typically works so
10:17
that you can modify it according to your
10:19
own needs as well and then if you want
10:21
to add addition fields you can even add
10:23
that let's suppose for email address you
10:26
can give out a label three things is
10:28
supported you can basically give out a
10:30
label to the user so here we are filling
10:33
out the email address of the company so
10:37
of your own email address this will be a
10:40
type of email field
10:43
and you can basically fill out the value
10:46
here which is uh
10:49
my mail at the west
10:52
gmail.com that's all.
10:56
So if you just refresh now there will be
10:58
two fields email address business name.
11:00
So in this way you can add guys
11:04
according to your own business you can
11:05
add some more additional fields in this
11:08
way the process will remain the same. I
11:10
showed you the structure which file to
11:12
edit and uh here you need give your
11:15
client name. So whatever client name
11:18
that you are basically generating the
11:20
invoice for
11:25
the type here will be text field once
11:27
again and uh
11:31
you can give any
11:34
John do let's suppose
11:39
you can see one more field are added uh
11:42
there there can also be a number field
11:44
as well let's suppose you want to take
11:46
the age of the client which is actually
11:48
I think a number field. So what you will
11:52
say that
11:56
client age. So the type parameter here
12:00
will be a number.
12:10
So by default uh 15 will be filled out.
12:13
If you refresh now, you can see it's a
12:15
number field. You can't enter
12:18
basically string characters right here.
12:21
It it is on only supported numbers here.
12:24
So you can also do this as well. If you
12:26
want the number fields, if you want to
12:29
take numeric input, you can even do that
12:31
as well. So totally depends upon. So we
12:34
will change this to invoice date.
12:39
So this will be label will be of date.
12:46
This type will be of date because we are
12:49
taking date input and you can fill out
12:51
the date. So today's date is uh 2024.
12:57
I will fill out uh 03
13:01
21st March 2024. And then we will say
13:06
invoice due date
13:16
and then we can basically say due date.
13:24
This is again a date field.
13:32
Sorry, this you can change this to uh
13:34
sorry this is a date field sorry date
13:37
field and uh you can basically fill out
13:40
the value in future date. So whatever
13:43
date that you have entered right here in
13:45
the invoice date. So this can be a
13:46
future date. So I can say the invoice
13:48
date is uh 29th March 2020
13:53
24. So incoming date the invoice.
13:56
So put a comma and then the invoice ID.
13:59
So this will be automatically generated
14:01
if you have a database but you can even
14:03
hardcode as well. So this will be a
14:06
invoice number.
14:15
So it will be a text and uh this value
14:19
can be anything. So you can say that uh
14:22
10 03 this is the invoice number and uh
14:27
the user can edit the invoice number
14:29
accordingly. This is a due date. If you
14:31
you can see calendar will open. You can
14:33
just fill out these details based upon
14:36
that and then you can add the products
14:37
as well. So this is actual form that we
14:41
can make. It will automatically generate
14:43
this HTML form. We have we have
14:45
different files here for form dot PHP.
14:47
You will see this is actual form.php.
14:50
We are actually using DOM PDF. If you
14:52
see we are using these DOM PDF actual
14:55
base library. We are using load HTML
14:57
which we are basically passing the
14:59
template which is HTML template to
15:01
actually render out HTML to PDF. And
15:04
then we are setting this A4 size
15:06
portrait. All this you can modify after
15:08
you purchase it. You can according to
15:12
your application you can do this. And
15:14
then we are converting the HTML to PDF
15:16
by passing the HTML right here and
15:18
constant instantiating a new instance of
15:21
DOM PDF and loading this HTML again
15:24
setting the paper to A4 size rendering
15:26
it and streaming it to the browser. So
15:28
we are actually using DOM PDF. This is
15:31
our JavaScript code. These are different
15:34
images
15:35
and uh this is a footer file form.php
15:38
and this is a simple header menu that we
15:41
have.
15:43
And this is a full project guys I'm
15:45
giving you. Uh the link is given. You
15:47
can directly purchase it. And uh I think
15:51
you will definitely enjoy it.
15:54
You can basically
15:57
in the currency side let's suppose you
15:59
are from a different country. If you
16:01
don't want USD, you can even change that
16:03
as well. Let's suppose uh
16:08
you don't want uh USD to show right
16:10
here. If I just wait,
16:19
just fill out these details.
16:33
This is form.php.
16:35
You can see.
16:38
So I will basically show you one thing
16:40
guys. If you don't want to use the
16:43
currency USD United States dollar then
16:46
how you can basically change that to
16:48
your own native currency which is very
16:50
important ask because in an invoice
16:52
document you don't need to
17:09
So let's suppose you don't want this USD
17:12
this uh if you want to change to your
17:16
native currency how you can do that
17:18
there is a trick right here uh you can
17:20
go to your code right here wherever you
17:23
are basically you can basically go to
17:26
this one this template I
17:38
This is the HTML template that we are
17:40
using.
17:50
Uh just wait. I'm just telling you how
17:53
you can basically
18:06
Yes, I think I was having this. So
18:12
you can find out basically guys the code
18:14
is written for the currency as well. If
18:16
you just yeah in this this file you need
18:19
to basically go to this file modify this
18:20
file do.php. If you are from a different
18:23
country, you can modify the currency
18:25
right here. If you just see right here,
18:31
just search for dollar
18:38
USD. You can see price in USD. Let's
18:41
suppose you are from a different
18:42
country. You don't want in USD. Let's
18:44
suppose you are want to in Euro if
18:47
you're from Europe. So Europe in Europe
18:49
countries uh euro basically is the
18:52
currency. So right here you can uh
18:56
this is a template here.
19:16
uh right here.
19:19
Yeah, this is actually the thing that
19:21
you need to replace guys. This is the
19:24
dollar symbol. Instead of dollar symbol,
19:26
you need to basically
19:30
you can basically go to Google
19:35
euro to USD. Just type in this and then
19:39
you will
19:42
euro symbol.
19:46
Just copy this symbol and paste it right
19:49
here. So all the currencies are
19:51
supported. Simply paste it right here.
19:58
You can see now it simply changes to
20:01
euro.
20:07
So if you basically uh now
20:12
refresh
20:15
fill out this.
20:26
So now you can see that guys it now
20:29
changes to euro.
20:31
You can basically change to any currency
20:33
guys in total also you can change that.
20:36
It is very easy.
21:00
So right here also you can replace it
21:03
your own native currency. So
21:12
So now you can see total is $240
21:17
€240.
21:19
So you can see guys it's very easy. I am
21:22
giving you this three. If you are
21:23
interested, you can go to the
21:25
description and purchase the full source
21:26
code. Uh it's a complete project. And uh
21:30
thank you very much. Please hit that
21:31
like button, subscribe the channel and I
21:34
will be seeing you guys in the next live
21:37
stream. Until then, thank you very much.