Up next in 10

Buy the full source code of the application at Paypal in USD Currency here:
https://procodestore.com/index.php/product/login-with-google-account-using-react-integrate-google-login-button-in-react/
Show More Show Less View Video Transcript
0:00
Uh hello friends today in this tutorial
0:02
we will be looking at uh the Google
0:04
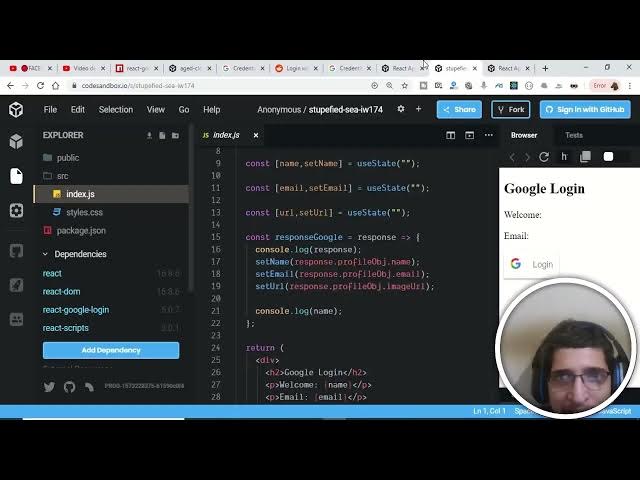
login using react. So basically this is
0:06
the interface of the application. You
0:07
can see that Google login. If I press
0:09
the login button it will be displaying
0:12
my name here which is coding and the
0:14
email address geeky goam 19987gmail.com
0:18
and this is a profile picture of my
0:19
Google account. So this is a short
0:21
little application that we'll be making
0:23
here. So first of all you just need to
0:25
create a new react application. So just
0:29
go to Google here and search for code
0:32
sandbox. So basically it is a online IDE
0:36
for react here. So just select this and
0:38
the first result result which comes in
0:40
just click this result and uh after that
0:44
create sandbox here
0:47
and then you select your application
0:49
which is react here. So it will be
0:53
making a boilerplate uh code for you for
0:56
react here. You can see that this is a
0:58
react application and for this specific
1:00
purpose we will be using this library
1:02
which is react Google login. So this is
1:05
the library that we will be using here.
1:08
This is there on npm node package
1:10
manager. If you search here react log
1:13
Google login. So in order to install it
1:16
just execute the simple command which is
1:18
npm install react Google login. But I'm
1:21
making in this platform here. So in
1:23
order to add a dependency it is very
1:25
easy. There is a button out there given
1:28
here of add dependency. Just click this
1:30
button and then you can just uh name
1:32
your dependency which is react Google
1:34
login. So just uh type this and you will
1:38
see this result coming in. So just click
1:40
this result and it will install your
1:41
library in the background. You can see
1:44
that it is installing here. So just wait
1:46
as it installs here. So it has
1:49
successfully installed it. So now we
1:51
just need to include it. So right here
1:52
at the top here you just want to write
1:54
here import Google login
1:59
uh from react Google login. So you can
2:02
see that it is available here. So just
2:04
click it and now we have successfully uh
2:07
imported it. So you can see that I have
2:09
just copy pasted this line here written
2:11
this line import Google login and uh or
2:14
you can just put a brace and then
2:16
include this. This is means the same
2:19
thing. Now we just need to copy paste
2:21
this tag here of Google login inside our
2:24
render method. So just copy this here
2:28
and I will paste it here. Just let me
2:30
just change this to let's suppose login
2:34
with Google
2:37
and uh I don't need this H2. So just
2:40
delete this H2 and copy paste your
2:42
Google login tag. Here you can see that.
2:45
And now we just need to replace our
2:48
client ID. So basically in order to get
2:50
the client ids it is very easy guys uh
2:52
we just need to go to a website which is
2:55
Google developer console where you can
2:57
just create your app and get the app ID
2:59
and uh API key all that stuff. Just go
3:02
to Google developer console here. Go to
3:04
this site and uh first of all you must
3:08
create a Google account in order to use
3:10
this and then you just create a project
3:12
from which you can just retrieve the API
3:15
key. So I have already created one
3:17
project here. So go to credentials here
3:20
and then you will be able to get your
3:23
client ID. So just wait it is loading
3:26
here.
3:27
Here just create credentials. Select
3:29
this and create oath client ID. So just
3:32
select this and after that it will be
3:35
asking that application type. It is a
3:37
web application. So select this and uh
3:39
here you just need to provide your
3:41
website URL on which website you are
3:43
making your application. Uh it is very
3:46
easy for this. I it provides your uh app
3:50
URL. So this is my app URL. If you copy
3:52
paste it, you can just see it online.
3:54
This is the online app here. You can see
3:56
that. So this is my full URL. So I will
4:00
just Ctrl A Ctrl C and then I will paste
4:03
it here. Paste this URL
4:06
and uh just delete this slash here. It
4:09
will not be allowing the S slash and
4:11
press enter. So just add this and uh in
4:14
the authorize redirect URI you don't
4:16
want to enter anything if you are
4:17
following me. So just press uh press the
4:20
create button and it will give you a
4:23
oath client ID. So just wait you you can
4:26
see that guys it has given me two
4:28
things. This is client secret but uh in
4:31
this case I only need the client ID. So
4:33
just press the copy button and your
4:36
client ID has been successfully copied.
4:38
Now you just make to sure that just
4:41
delete this client ID from here and copy
4:44
paste your newly generated client ID
4:46
here.
4:48
So copy paste it here. And now we just
4:50
need to we will be writing our this on
4:53
success which is response Google. So we
4:55
will just write const and then followed
4:57
by the name of the function that is
4:59
response Google. So this will be a arrow
5:01
function. So basically it uh it will be
5:04
getting the response which is sent by
5:05
the API. So I will just write response
5:07
here. And then I will be just be console
5:10
logging the response. Console log
5:12
response here. That's it. If you just uh
5:16
save this and now you will see that guys
5:18
a login button is there of Google here.
5:21
So now if I copy paste this URL and look
5:24
it in my browser
5:26
and press this button
5:30
and go to inspect element and go to
5:32
console here. I will see a response
5:34
which is coming back from the API. So
5:36
just wait here. Uh if I press the login
5:38
button, you will see that a window is
5:40
appearing here. And now we are getting a
5:42
response back from the API. So it
5:44
contains various things guys. You can
5:45
see that the Google ID, access token,
5:48
profile object. So inside this profile
5:50
object, we have the email address uh
5:53
given name which is coding sea image URL
5:56
that is profile pick name also. Now we
5:58
are we'll be displaying these values
6:00
here. So for that guys we need to first
6:02
of all declare some state variables. So
6:05
let me just create some space here and
6:08
uh write here in the function here just
6:13
before it we will be declaring some
6:15
state variables. We will be using hooks
6:17
for that react hooks. So first of all we
6:20
will be declaring a
6:23
name,
6:24
set name. So basically this is react
6:26
hooks. This is a name variable and this
6:29
is a function in order to update this
6:31
and we will be using the use state hook
6:33
of react.
6:35
I am assuming that you you know this
6:37
concept of react here in this I will be
6:40
providing the default value which will
6:41
be null here. That's it. And after that
6:44
I will be doing the same thing for the
6:47
email also. Email set email
6:51
and the init the initial value of email
6:53
will be null. That's it.
6:56
The third thing will be required for uh
6:58
that is profile picture URL. So we will
7:01
be typing URL set URL. That's it. This
7:04
is just a convention for the methods and
7:08
the initial value for the URL also will
7:10
be null. So that's it. So this is my
7:13
state variables guys. Now we just need
7:15
to initialize them. Uh U state is not
7:18
defined. Uh let me just see why it is
7:21
showing me this message.
7:24
uh u state is not defined.
7:29
Oh sorry guys we need to just import
7:30
this u state. So inside this you will
7:33
see that put a comma here and uh in the
7:37
curly brackets you just need to state
7:40
use use just press uh write this use
7:42
state and now you can just uh use this
7:45
hook here of use state. So just make
7:46
this change guys. And now after this
7:49
variables now we can just set the name,
7:52
email and URL by calling this set name
7:56
method and accessing response dotp
7:59
profofile object. So inside profile
8:02
object we have the name property. That's
8:04
it. Similarly we will be setting the
8:06
email which will be response dot uh
8:09
profile object dot email.
8:12
And uh last but not least we have the
8:16
uh URL profile URL profile picture. This
8:20
will be response
8:22
dot profile object dot
8:26
and for the picture guys let me just
8:28
show you the response here real quick.
8:30
Uh you can see that profile object and
8:34
inside this we have this image URL. You
8:36
can see that. So now I will be just be
8:39
writing image URL here. image URL.
8:42
That's it guys. So we have successfully
8:45
set it our name, email and URL. Now we
8:48
can just uh paste this uh inside this
8:52
let me have this uh after
8:56
I think that inside this I can just
8:58
print out inside H2X this is welcome
9:03
colon and then I will be concatenating
9:05
my variable which is name. That's it.
9:08
Similarly, I will be concatenating the
9:10
email address also. Email colon followed
9:13
by email.
9:16
And uh last but not least, we have the
9:19
profile picture. So for that, we will be
9:21
having the image tag. Source will be
9:23
equal to the uh URL. That's it. And
9:26
additional alt attribute I also need to
9:28
provide which is which will be equal to
9:30
the name of the person. That's it. Just
9:32
close the image tag. Now the application
9:35
is complete guys. So this is all the
9:38
code required for your Google login. Now
9:40
if if I save all this code and now if I
9:43
look back to the application if I
9:46
refresh this application you will see
9:48
that guys if I hit the login button I
9:50
will be seeing my name email address and
9:54
uh the profile picture. You will see
9:56
that guys coding geeky goam
9:59
1987gmail.com
10:01
and this is my profile picture. So this
10:04
is a short little tutorial guys. I just
10:06
wanted to share with you how to
10:07
authenticate with Google using React
10:10
using the simple library. So thanks in
10:12
much guys for watching this video. If
10:13
you like this video then please hit the
10:15
like button and please subscribe the
10:16
channel by hitting the red subscribe
10:18
button near the bottom of the video and
10:19
also tapping notification bell icon and
10:22
I will be seeing you in the next video.
10:24
Until then, thank you very