Up next in 10

PHP 7 MySQL Database Script to Build Comment System For Website Visitors in Browser Using Javascript
Dec 21, 2025
Buy the full source code of application here:
https://procodestore.com/index.php/product/php-7-mysql-database-script-to-build-comment-system-for-website-visitors-in-browser-using-javascript/
Show More Show Less View Video Transcript
0:06
Uh hello friends. Today in this tutorial
0:08
I'll be showing you that how to uh build
0:11
a comment system for your website
0:14
visitors inside PHP and MySQL database.
0:17
So basically it's a very simple comment
0:20
system and uh you can build out for
0:24
production level website as well. So
0:26
this is the concept which is used here.
0:27
So you have three fields out there name,
0:30
email and comment. So whenever someone
0:32
comes to your website they want to
0:34
comment on your blog post or some other
0:36
tool website they can comment using the
0:39
system. You can have three fields out
0:40
there name, email and comment and then
0:43
there is a post comment button. So you
0:45
will see that the previous comments will
0:47
also be shown to the user which is
0:49
coming. So when you load the application
0:52
so all three comments will be p uh
0:55
retrieved from the database. So all
0:57
these comments are stored inside this
0:59
database. You will see that name, email
1:01
and comment and also the date and the
1:04
time on which the comment has been made.
1:06
Here you will see that uh this is the
1:09
time stamp. If I show you the structure.
1:12
So basically it is using the timestamp
1:14
variable type of the MySQL database. So
1:18
basically it is holding the date in this
1:20
format which is uh 2022
1:24
month is 6 and uh the date is 21 and
1:28
this is the time here which is in 24
1:30
hours format which is uh 836 49 second.
1:34
So this is a now you want to add a new
1:37
comment. So simply you will write the
1:39
name. Let me change this name to
1:46
martinthegmail.com
1:48
and if you just write this hello this is
1:51
new comment and just publish here and uh
1:55
this will happen instantly without any
1:58
uh page refresh. If you simply click it,
2:01
you will see that this comment is added
2:03
here and uh the way it is published
2:06
here. These comments, the newly
2:08
published comment will be published
2:09
first will be shown to the user first.
2:11
Here now you will see that this is in
2:13
descending order. So the time you will
2:15
see that
2:17
the latest comments will be shown first.
2:19
You can see that this is the latest
2:21
comment which is showing first here. The
2:24
date you can just see here date and
2:25
time. This is a comment actual comment
2:28
and this is also styled using custom
2:29
CSS. You will see this this is having
2:31
some material design feel to it. So you
2:34
can see it is responsive as well. If you
2:37
just responsive it is completely
2:39
responsive. So it can be there inside
2:42
mobile devices, tablet devices and
2:45
desktop devices as well. You can add as
2:47
many comments as you want like this.
2:51
So this is a very simple comment system.
2:54
I haven't included the authentication
2:56
part or how to delete comments. It's
2:58
just the how to publish comments inside
3:01
your machine. So let's start building
3:03
this comment system from scratch guys.
3:06
So I have attached all the source code
3:08
in the video description. If you want to
3:10
get all the source code, you can go to
3:12
the edit option and uh in the video
3:14
description, I have written a complete
3:16
blog post. This is my coding sika blog
3:18
post here. So if you want to get all the
3:21
source code you can go to the video
3:23
description link here. This is
3:26
simply go it if you go to it you will
3:29
find all the source code. This is a code
3:31
which I have written here. Simply copy
3:32
it. So now let's start this. So for
3:36
building this guys I have used exam
3:38
control panel. So this is a
3:40
crossplatform software used to build out
3:42
PHP applications. So make sure that you
3:45
install it inside your machine. This is
3:47
for Windows.
3:49
It is also available for Linux and uh
3:53
Apple operating system. So make sure
3:55
that you start this PHP and MySQL. And
3:58
uh for creating databases go to admin
4:00
section and here you can create your
4:02
database. So we will create a new
4:04
database which will I will call this as
4:07
comment
4:09
system and just create the database. So
4:13
now the database is created. Inside this
4:15
we will create our table which is
4:17
comments. So for this we will have to
4:20
have uh five columns. So simply click on
4:23
go. So the first column will be the ID
4:26
which will be the primary key of the
4:28
table which will auto increment by
4:30
default. So if I drag down you will see
4:33
AI. Simply click it. So this will make
4:35
it as the primary key. The second column
4:37
will be the name of the person which is
4:39
publishing the content or comment. Just
4:42
change the vchar and the length will be
4:44
256. Email we will also take the email
4:47
as well. Just change to vchar 256. And
4:51
the actual comment. So this will be uh
4:55
medium text. You can also take varchar
4:58
but uh the comment will be large. So
5:00
that's why I'm taking medium text. So
5:02
for this you don't need to provide the
5:04
length uh length of the medium text. And
5:07
lastly the date. So basically for this
5:10
date we are you can also take uh if you
5:14
select you you can also take date and
5:17
date time but time st time makes it very
5:19
much easy you don't need to insert
5:22
inside this uh column it will in insert
5:25
it automatically for you the current
5:27
date and the time. So that's the
5:29
advantage of using timestamp
5:32
uh data type. So now this is the five
5:35
columns guys. You can see that now we
5:37
simply need to save this table. Simply
5:39
save this. Now your table is ready. ID
5:42
is the primary key of the table. Then
5:44
name is the person who is publishing the
5:46
comment. Email, comment and the date. So
5:50
now our uh table is ready. Now we need
5:52
to simply write our files. Let me delete
5:55
all these files guys and start from
5:57
scratch so that you can
6:00
start from the clean slate. So this is
6:02
my root folder. So here we will create
6:04
uh index dot php and also we need to
6:07
create uh db.php.
6:09
This is a connection file which here we
6:11
will connect to our database. So simply
6:13
here we will connect to the database.
6:19
So here we will use the MySQL connect
6:22
method and pass the local host which is
6:25
the host name. Root is the username
6:28
default username. Password is nothing.
6:31
And here you need to provide the
6:32
database name which is uh comment system
6:36
put a semicolon and here you need to
6:39
just store this inside the connection
6:41
variable so that we can use it inside
6:43
another files. That's it. This is all
6:46
that you need to write inside this file.
6:47
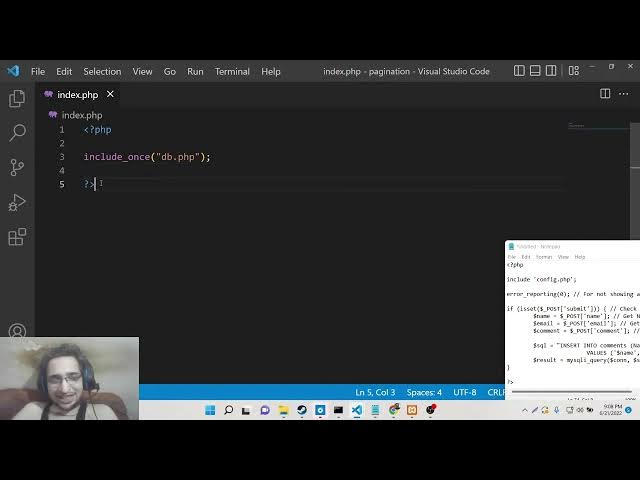
So simply close it and write inside this
6:51
uh index dot php. We need to include
6:53
this file. So we will say include once
6:56
and db dot php.
7:00
So now we have the connection file. So
7:02
right here we simply need to what we
7:06
need to do is that we need to now create
7:09
a simple HTML form here by which we will
7:12
have we will collect all this
7:14
information from the user. So we will
7:16
have the title that uh PH comment system
7:23
in PHP and MySQL.
7:27
Close the title
7:29
and uh
7:32
close the head and inside the body guys
7:36
we will have these three fields which
7:39
will be name, email and the actual
7:41
comment. So for this guys we will we are
7:43
using custom CSS. I already mentioned
7:46
you for this styling purpose. So there
7:48
is a specific file that I have given
7:49
inside my blog post. So this is style
7:52
dot CSS. Simply what we need to do is
7:54
that simply go to the blog post which is
7:56
there inside video description. Copy the
7:58
source code to clipboard and just make a
8:00
file style dot css and simply copy paste
8:03
this code. That's it. Simply close it.
8:06
Now you just need to include this file
8:08
right here. So as this tutorial is not
8:10
about CSS so I don't want to discuss
8:12
CSS. It is totally up to you how you
8:15
design it. So just include this file
8:24
uh stylesheet and we will include this
8:26
file like this style dot css
8:30
that's it. So now if you refresh it,
8:34
if you go to your application, uh if I
8:38
go to it, local host paging, this is the
8:41
folder. So you will see uncaught
8:43
variable function name must be a string
8:46
on line number five.
8:52
Oh, sorry. This needs to be stylesheet
8:56
include once db.tphp PHP
9:00
MySQL connect
9:03
comment system.
9:06
If we once again refresh it,
9:10
function name must be a string. MySQL
9:13
connect.
9:17
Uh I think I have made a mistake here
9:19
inside the connection part.
9:25
uh
9:30
if I cross check the database name but I
9:32
have given here comment system this is
9:35
correct
9:37
so why it is saying that let me compare
9:39
it the connection if the connection is
9:42
right then we will echo out connection
9:44
successful
9:48
semicolon so if I execute this file here
9:52
which is db dot PHP.
9:57
So it [snorts] is saying that undefined
9:58
variable MySQL connect.
10:06
Uh let me see guys why it is creating
10:09
this problem. Uh
10:15
so if you're watching it for the very
10:17
first time guys then please hit the like
10:18
button, subscribe the channel as well.
10:20
So I think I have made uh oh sorry this
10:24
this don't need to be dollar sign here
10:27
because this is a function. So that's
10:29
the mistake. So now it will be correct
10:33
connection successful. You can see that
10:35
that can happen when you are doing live
10:37
programming. Some mistakes can happen.
10:40
So
10:41
now
10:45
if I go to the index file you will see
10:47
that now the styling is applied here
10:49
automatically connection successful. So
10:51
let me delete this line here. We don't
10:53
need this.
10:55
So now guys inside this what we need to
10:57
do is that we need to uh collect this
11:01
information from the user which is
11:02
coming to the website.
11:05
So we will have this div which will have
11:09
the class wrapper. So all these classes
11:11
are styled here because we have included
11:13
the stylesheet. So inside this we will
11:16
have the simple form
11:19
and the action will go to the same page.
11:22
So that's why we haven't written
11:24
anything here. The method will be post
11:26
because we are submitting the data
11:28
through this post method. and we will
11:30
give it a class of form to this form
11:34
tag. So inside this we will have a div
11:38
which will have uh the class of row
11:41
attached to it. Close the div.
11:47
So inside this guys what we have we will
11:50
have
11:52
a class which is input group.
11:57
So here we we will get the name of the
12:00
person. We will give it the label name.
12:04
So simply we will say close the label
12:07
tag.
12:09
So this will be input type text
12:12
and we will give it a name attribute of
12:14
name to it. We will target it inside
12:16
PHP. That's why it is very much
12:18
necessary to give this name attribute
12:20
and ID as well. ID of name.
12:24
So placeholder
12:27
we will give a placeholder to it.
12:31
Enter name. That's it.
12:37
So also just for the validation it is
12:40
required. So you can't submit the form
12:42
without entering it this field. Simply
12:45
we will repeat it uh two more times.
12:49
This will be for email.
12:53
This will be input type email. Now
12:55
because we are entering email, name will
12:58
be email and uh ID will be email. So
13:01
here we will say enter email.
13:04
And lastly we will have for the
13:09
text area. So basically this will be we
13:12
will attach a class of input group text
13:15
area.
13:18
Close the div. So inside this guides we
13:21
will again have a label for the comment.
13:25
So here the user will write the comment.
13:29
Close the label and we will now have a
13:32
text area. We will attach a ID to it of
13:36
comment and also a name parameter as
13:38
well.
13:41
And we will give it a placeholder simply
13:44
telling the user what to write inside
13:46
this. So we will say that enter your
13:48
comment.
13:52
So this will also be required. So simply
13:54
close this the text area.
14:02
So lastly guys, we will have a simple
14:04
button to submit the form. So this will
14:07
also have
14:10
a class of input group to attach
14:13
attached to it. input group.
14:19
So just it will be having button
14:23
and the name attribute submit and we
14:27
will give it a class of btn. So this
14:30
will be simply post comment. That's it.
14:32
Close the button tag. So now if you see
14:35
inside the browser guys, you will now
14:37
see this thing here which is name,
14:40
email, comment. This is post comment
14:43
button here. So
14:50
text area uh
14:54
input group.
14:57
Uh I think guys I have uh missed some
15:01
classes here which is necessary. Let me
15:04
write it once again. Uh
15:18
let me write this portion.
15:21
So this is there inside the blog post in
15:24
the description. So make sure that you
15:25
copy it correctly so that all the
15:27
classes are applied correctly. So now if
15:29
you refresh it now you can see now it is
15:31
in correct order. This is name, email
15:33
and comment. And this is your button. So
15:36
simply now we will look at the insertion
15:38
path guys. We will get the name and the
15:40
email and the comment which is uh
15:42
registered uh which is entered by the
15:44
user. So now to get this all these
15:46
things we will uh write the PHP code
15:49
here at the very top. So we will now
15:52
first of all disable the errors. You can
15:56
do this inside PHP using this function
15:58
which is error reporting and passing a
16:01
numeric value here which is zero. So
16:03
this this simply means that uh we don't
16:06
want the errors to appear inside the
16:08
browser and then we will check for uh if
16:11
the submit button is clicked. So here we
16:14
will simply check the submit name submit
16:18
button. So here we have attached a name
16:20
attribute to it. You can see submit. So
16:22
we are just cross-checking if the button
16:24
is pressed or not. So if the button is
16:26
pressed then we will get all this
16:28
information which is through this post
16:31
which is the name attribute which we
16:33
have given we have given you can see we
16:35
are back here in the live stream just
16:37
the connection problem was there. So now
16:39
guys we are getting the retrieving the
16:41
name, email and comment because we are
16:43
given the name attribute here. You can
16:45
see that name, email and comment. You
16:49
will see that
16:53
email dollar post
16:57
email
17:00
comment.
17:06
So after getting all these three things
17:09
guys, name, email, comment, now we need
17:10
to simply insert this into the MySQL
17:12
database. It is damn easy. We will write
17:16
a SQL query for this which is simply you
17:19
have know this very much pretty well.
17:22
Insert into the table name which is
17:24
comments and then we will say the column
17:27
names which are uh ID for primary key.
17:31
We don't need to write it. It will
17:32
insert it automatically. We'll now write
17:35
name, email, comment and then the values
17:40
which are there.
17:42
The values are present inside name,
17:45
email and uh comment. That's it. Put a
17:50
semicolon.
17:52
And also for the date parameter guys
17:54
also date will also get uh inserted
17:56
automatically because it is of the datab
17:59
date timestamp. So we don't need to
18:01
insert it.
18:03
And now we need to simply execute this
18:05
query guys. So this will be stored
18:08
inside result. So MySQL I query we will
18:11
pass the connection object and then pass
18:13
the SQL query which is SQL. That's it.
18:16
So now hopefully the if I check it now
18:20
inside the browser if I write the name,
18:22
email and the comment and click the post
18:25
button
18:27
hopefully the comment will be inserted.
18:29
Let me check. So let me click browse.
18:35
Uh
18:38
uh let me see. My SQL returned empty
18:41
result. Let me see why it hasn't
18:45
uh name email comment.
18:50
Uh table name is comments
18:58
connection object. Let me check it which
19:01
is gone here. We have passed it.
19:08
Let me echo out it. Let me echo out this
19:12
statement.
19:13
Why it is creating this problem?
19:21
Uh let me echo out name as well.
19:34
So name is printed out.
19:37
So we are [snorts] successfully getting
19:39
this data. But now it is not inserting
19:42
it.
19:52
I refresh it.
19:57
Uh let me check guys why it is not doing
19:59
it. Oh sorry I have made a mistake guys.
20:03
So uh this is very [laughter]
20:06
basic mistakes I'm doing inside this
20:08
live stream. So you just need to
20:10
surround this inside the single quotes
20:12
which these variables whenever you are
20:15
publishing the inserting the data inside
20:17
the database. So just make sure that you
20:20
surround this inside single quotes. Just
20:22
make sure
20:25
So now if you do this guys hopefully now
20:28
it will insert this data.
20:33
So if I refresh it now
20:40
post comment and now if you check here
20:43
now you can see that guys the entries
20:45
are inserted automatically the date is
20:47
also inserted automatically. You can see
20:50
that today's date and time, current date
20:53
and time. So we haven't need to insert
20:56
the date parameter. It will get inserted
20:58
automatically. This is a name, email and
21:01
comment. So now the insertion is uh
21:03
happening automatically.
21:07
So now we simply need to display the
21:09
comments
21:10
at below. So now to display those
21:13
comments
21:16
it is very easy. Let me go to after the
21:20
form we will display it. So we will have
21:23
a simple div which will have this class
21:26
which is previous comments.
21:31
So inside this div
21:34
we will write some PHP code here. So,
21:37
PHP
21:39
so we will write a SQL query and here we
21:42
will say select
21:45
star
21:47
from the table name which is comments
21:50
and we will order it by descending order
21:53
by the ID parameter which is ID column
21:56
descend in the descending order. So, D C
21:59
if you want to uh order in the
22:01
increasing order you will simply say
22:04
increasing like this. So I think that's
22:06
it. So decreasing order put a semicolon
22:11
and now you will get you to need to just
22:14
simply execute this. So MySQL I query
22:17
pass the connection object and pass the
22:20
SQL query. That's it.
22:23
So here we will check if the number of
22:26
rows which is returned from this query
22:28
is greater than zero. In that case only
22:31
we will execute the code. So it is if it
22:34
is greater than zero then only we will
22:37
display the comments. So for displaying
22:39
it we will use the while loop. So for
22:42
each row
22:45
we will get this data in the associative
22:48
array. So MySQL I fetch associative we
22:51
will pass the
22:53
result
22:57
like this.
23:08
So [snorts] here we just need to close
23:10
this.
23:18
So inside this
23:29
just wrap it let me wrap it inside PHP
23:32
tag like this.
23:35
So inside this while loop guys what we
23:37
need to do is that
23:41
we will have a div with a class of
23:44
single item.
23:46
So inside this single item we will
23:48
display our comment which is damn easy.
23:51
So we will get the values which is first
23:53
of all the name of the person which has
23:55
written the comment. We will display it
23:57
in H4 H4 tag. So simply here we will
24:00
echo out which is dollar row followed by
24:05
the column name which is name.
24:09
Close the PHP tags. So now if you
24:12
refresh it you will now see the name of
24:15
the person which is it is saying
24:17
unexpected end of file on line 75.
24:38
Let me put a semicolon here.
24:52
Let me see here.
24:56
This is a if this is a while.
25:31
Let me paste it here.
25:43
If I refresh it, uh, just change this
25:47
name email comment
25:53
unexpected line 62.
26:11
Let me close this. So
26:15
this is a problem when you write HTML
26:17
and PHP together. Some problems may
26:19
occur. Let me fix this. Oh,
26:37
line number 73. It will not tell me the
26:41
exact problem.
27:00
So now it is correct here. You will see
27:01
that.
27:03
So what we need to do is that
28:18
Let me paste it guys like this.
28:27
Let me paste the full script here like
28:29
this.
28:30
and just make the slight adjustment
28:32
here. So this is
28:36
this will be email this will be comment
28:40
name.
28:54
If you refresh it,
29:00
so this will be db.tphp.
29:05
So now you can see that all these uh
29:07
data will be
29:10
uh retrieved from the database which is
29:12
name, comment and email address and also
29:14
the date as well. So if you write
29:17
comment here once again.
29:23
So now you can see the comments are
29:25
being inserted successfully. Three
29:27
comments are there.
29:32
So all these comments are stored inside
29:34
this table. So in this way guys you can
29:37
design a comment system inside PHP and
29:39
MySQL.
29:41
All the source code will be there inside
29:43
video description. So just make sure
29:45
that you go to the blog post.
29:48
This is a blog post and copy all the
29:50
source code as I shown you in this
29:52
video. So, thanks so much for watching
29:54
this video and I will be seeing you in
29:56
the next live stream.