Up next in 10

Build Angular Google OAuth2 Login Using the angular-oauth2-oidc Library in Browser Using TypeScript
Jan 9, 2025
Buy the full source code of application here:
https://procodestore.com/index.php/product/build-angular-google-oauth2-login-using-the-angular-oauth2-oidc-library-in-browser-using-typescript/
Show More Show Less View Video Transcript
0:00
uh hello guys welcome to this video so in this video we will be looking at how to integrate Google authentication
0:07
Google login inside angular application so this is actually the demo of the
0:12
application we will be building right here if you open the homepage it will look something like this Google or or2
0:18
it will show you the login page login with Google and if you just click this button you will be redirected to the
0:25
consent screen where you can actually select your Google account so just select a Google account and it will need
0:32
to Grant permission you simply click on continue and then it will actually show you the actual details of your account
0:40
which is actually the profile picture display name email address and a log out button as well so we are developing it
0:46
in the latest version of angular which is I think 17 or 18 so this is actually the directory structure we have a login
0:53
component and we have this routing also done right here it is developed inside
1:00
typescript you can see that we also have a log out button if you click the log out button you will be redirected to the
1:06
homepage you will see that very simple so now you will stay on the login page because you are love out once again if
1:12
you do it the same process it will repeat this time it will automatically
1:17
do it for you as it already know that you are already uh granted the access so
1:24
no longer you need to repeat the process so it will show you this profile picture
1:31
this is the display name this is the email address like this you can do it for any Google account let's suppose I
1:37
do for a different account so by default the angular applications runs on uh
1:44
Local Host 4200 Port number you will see that so again we have this login you
1:51
just click this so you will see that
2:00
it is actually showing this all this information so we are actually getting this access
2:06
token we from the Google Au API to actually get the profile details of the
2:11
user I will show you step by step process how I implemented this and we are actually using a special package
2:18
which is uh specifically designed for angular applications which is angular O2
2:25
oidc so if you search this package on npmjs
2:31
it's a very popular package so the name of the package is
2:36
angular o or2 oidc this is the name of the package the
2:42
very first link which comes right here this is
2:47
the command to actually install this open ID certified you will see that so
2:53
it's supports various social networks specifically in this example we will be looking at Google how to integrate
2:59
Google Google login inside angular so 166,000 weekly downloads are there so
3:05
and we will at the time of recording the video we will be using the latest version of
3:10
angular so it is out think angular 16 is a stable version and angular 18 is also
3:17
is released so it will be compatible with all the versions of angular so this will be the directory structure if you
3:23
want to purchase the full source code with full documentation the link is given in the description you can go to
3:29
my website Pro Cod store.com and you can directly purchase it you will be redirected to Google Drive after you
3:36
make the payment and where you can actually get the zip file which will actually contain all this directory structure with full documentation and if
3:43
you face any sort of issues I will also help you so the link is given you can directly purchase it so now let's get
3:48
started by building this application so what I will do I will stop this development server and I will simply go
3:55
to my project directory right here so YT projects so I will simply create a new
4:02
project of angular which is NG new command so I will simply say Google o or
4:08
to Google angular project so this is the command
4:14
NG new NG as you all know it's a CLI tool for angular for creating projects
4:20
this is the name of the project enter it and it will ask you some questions
4:26
regarding if you want to use CSS or SAS or would you like to add angular routing
4:31
so we need to add angular routing so I will simply say yes and we will be using
4:36
the CSS so just press enter CSS so it will just in 1 minute it will take and
4:44
it will actually create your angular project it is installing all the packages and dependencies so once it's
4:50
installed I will be back and we will be continue from there so now you can see that guys it
4:57
has created the project I just need to navigate to the project
5:03
directory so I think it is named as Google angular
5:11
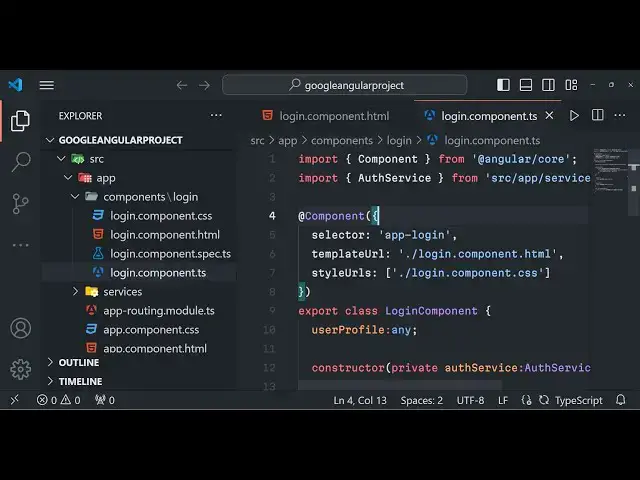
project so I just need to open it inside vs code so it will actually open this
5:16
will be the directory structure of a basic angular app right here we have the app folder we have the routing folder
5:22
which will actually have routes here app. module. TS file we will have
5:28
right here where you can actually add third party modules that we have installed so first of all we just need
5:33
to install a third party module that I showed you earlier which will help us to
5:38
integrate the O2 Google login so angular D
5:44
O2 oidc this is actually the module that we need to install package angular D O2
5:51
oidc simply enter it and install this package so it has pre-made methods for
5:58
integrating the Google login so once it is installed you just need to see the
6:04
package.json file it has installed this package if you see angular O2 oidc the
6:09
latest version which is 17.0.2 now you just need to navigate to this file which is app. module. TS file
6:17
so here in this file you just need to register this module so in angular you
6:23
need to register modules in this file app. module. TS file so first of all we
6:29
just need to import the HTTP module as well HTTP
6:37
client module because we will be making request as well to the Google API so
6:43
that's why we need this HTTP module HTTP client module so this is available in
6:48
the built-in HT angular framework so in the HTTP module so also we need to
6:56
import this uh o module from this package that we
7:04
installed so now we just need to add both this in the Imports array HTTP
7:10
client module and the O module for root simply add these lines in the Imports
7:16
array and that's all we have successfully registered both these modules in the angular app now you can
7:23
close this file and uh now we just need to create a brand new file in our app
7:31
directory O.C config dots you can just call this name anything but I will be
7:37
calling this one .c config dods so inside this
7:45
file you will be writing the configuration code so there will be just this object all config so here you will
7:53
be providing all this client ID details redirect URI everything export
8:07
con so this is typescript supert of
8:14
JavaScript so here you need to provide uh issuer name which will be
8:21
constant https accounts.
8:26
google.com put a comma and then we need to provide the redirect URI which will
8:32
be window. location. origin which is essentially the homepage
8:37
of the URL which is Local Host 4200 and then we need to provide this client ID
8:42
which will be coming we need to get this client ID from Google Cloud console so I will show you how you can get
8:49
this and then there is a second uh this option which is strict
8:55
Discovery document validation and this you need to set it
9:01
to a Boolean parameter which is false and scope so what s what sort of information you are requesting so here
9:08
you need to provide multiple Scopes open ID space profile of the user and the email of the user so we will be
9:14
requesting three information basic Scopes so here you need to put a
9:20
semicolon so it is saying to us that cannot find name so here you need to add the import
9:28
right here so now it will be finding this Au config it is available from this package that
9:34
we installed right here so it is using this method on Au config and it is
9:40
creating this object which is passing five properties issue redirect URI client ID and the scope information as
9:47
well so we need to strict Discovery document validation as well so now we just need to go to
9:55
the Google Cloud console and just type here on Google Google Cloud
10:02
console and you should have a basic account right here go to your console
10:07
account and just create some basic information which is the API
10:18
services and here you need to go to credentials and right here you just need
10:23
to click on create credentials or or client ID and select your application
10:29
typ type web application authorize redirect URI and here you need to paste
10:35
your homepage URL in both the fields HTTP Local Host 4200 if you see in the
10:41
authorized redirect URI as well the same URL HTTP Local Host
10:49
4200 and then click on Create and it will give you your own client ID so don't copy my client ID you don't need
10:56
the client secret simply paste the client ID
11:01
here that's all so we have pasted the client ID now we can also close this file as well so
11:09
after this we just need to create a basic component for our login button so we can go to the command line and there
11:16
is a command which is available NG command NG generate generate component
11:23
so this is actually a shorthand command NG G for Generate C for component and then we need to create components folder
11:31
and inside this we will create a login component so you will basically see in the app component in the app directory
11:38
there will be this directory created components directory and it will actually create this login component
11:44
directly it will have some boilerplate code automatically created by this command so you will see it will create
11:50
this components folder and we have these four files created this is your typescript CSS comp for your component
11:58
file this is the HTML this is the typescript you can see that so this is
12:05
automatically created and one more thing we need to create we need to also create a service file as well so this is also
12:12
required so you can just see NG generate service short end and then we need to
12:18
create a Services folder and inside this we need to create the O service so you can give any name of your choice this is
12:25
important NG generate service Services folder it will create an inside this it will create the O folder so you will see
12:32
that so this service has also been created au service.ts so this is automatically generated by
12:39
angular CLI now we just need to go to angular app routing folder right here
12:47
and here you need to specify the route inside your application so we will be specifying the Home Route and it will be
12:54
handled by the login component so we can import the login component from the component folder it will automatically
13:00
import it for me which is vs code so we have specified the homepage URL so it's
13:05
a single page app and we have specified this route R in the routing file and now
13:11
in the next section guys we will be writing the login component inside this uh typescript file so I will be seeing
13:18
you in the next section so now guys in this section we will be writing our service file that we created in the
13:24
earlier step this is located in the services folder Au service dots so
13:30
specifically in angular services are typically the code which will actually interact with the outside world such as
13:37
the apis or if you have any sort of third party object that you want to
13:42
interact with so this service will interacted and you will see that it has
13:47
a name right here all service and uh now we just need to import that module that
13:53
we installed here which is o right
14:01
here so it will be automatically imported from this package angular O2
14:08
oidc and also we need to import this file or config that we
14:16
written earlier on which is so it will also be imported from
14:23
automatically do do slash so it is present in the root directory file which is all configs so we just need to
14:29
require this file also in this service and also we just need to import
14:35
the HTTP client as well because we will be making uh rest API request to the
14:41
Google API so that's why we also need this so it will be again be imported
14:47
from angular SL common SL
14:53
HTTP so after you do this you just need to inside your Constructor here we will
14:58
be passing pass ing all these
15:05
values so this is required we just need to pass everything in the Constructor
15:10
because if you don't pass it these methods will not be available to the service so Constructor is the place
15:17
where you need to pass them so you're passing both the Au
15:23
service and the HTTP object to these Constructors so inside this Constructor
15:28
we just need to write a line right here this do we need to call a method this do
15:57
configure so now we just just need to Define this method that's why it is saying this red color right here so it
16:03
is saying that it is not defined this method doesn't exist we just need to Define this privately so private config
16:11
configure and here you need to add uh or call this configure method that
16:17
you defined inside so this is part of the package right here so here if you
16:22
see it is this service is coming from the base package and it contains this configure method and here we need to
16:29
pass the O config that we defined early on so this whole object that we defined
16:35
which contains five properties right here we are directly passing to this function which is
16:41
configure and secondly we also need to call this method load Discovery
16:48
document and try login and here we just just need to call this method so what this method will do
16:55
it will using these authentication options that you pass in the previous step it will try to open or it will try
17:03
to communicate with Google and it will go to that uh consent URL where you
17:10
will actually select your Google account so after doing
17:16
this now we just need to define the login method and the log out
17:21
method as well so we are just writing the service right here we are just defining these methods so in the HTML we
17:28
will be calling these methods so for logging it there is a this uh built-in function which is
17:36
available in it login flow so when you call this it will actually do all the
17:43
heavy lifting it will communicate to Google it will open that URL so you just need to call this
17:49
function one line of code and similarly for the log out functionality as
17:55
well we will have this log out function and right here there is a built-in
18:01
function inside this package which is log out Simply you need
18:06
to call this that's
18:14
all and two more three more methods we have to write here which is getter
18:20
methods in order to get information first one is uh get identity claims
18:28
so this function will be responsible for getting the user information once you are authenticated so it will return this
18:37
information get identity claims again this is a built-in
18:42
function so it will return user information such as display name email address and profile picture and once
18:50
again we have another function for getting the access token so
18:56
again this Library contains a pre-built function available to get the access token get access
19:05
token and lastly we will also have a function which will
19:10
be user profile so here in this function from
19:16
the name itself we will be getting the user profile directly by going to this URL
19:22
https wwwg googleapis.com /2 /v to user info so it will make a
19:31
simple HTTP request to this URL by using the HTTP client module so
19:36
we'll say this. HTT doget we will pass the URL as a first argument and in the
19:42
second argument we'll pass an object and here we'll pass a headers object
19:52
authorization so this is actually the format that you see
19:57
beor and Then followed by your access token so this. access
20:05
token so we are actually calling this method right here this do access token this will return the access token and we
20:11
will pass it to actually get the profile information of the
20:19
user so that's all that we need to do inside the service guys so this is now
20:24
ready so this will interact with the Google so now we just need to write our
20:30
login component right here which is located in the components folder so we will be looking it in the next
20:37
section so now guys we will be writing this login component right here which is
20:42
located in the components folder if you see right here if you run the application right here just run your
20:50
application you will just see the we need to run it by using NG Ser
20:56
this is the command in angular this will start your development server at Local Host 4200 by default you will actually
21:03
see this file app. component. HTML if you try
21:10
to see the so by default
21:16
angular just search for this file which is app. component. HTML this is a
21:21
starting point so it has a pre-built boilerplate
21:28
template right here ready for us so we just need to edit this file and just
21:34
include the login component that we created so it is just compiling the
21:39
application so just
21:48
wait so it as you can see it is compiled this and it is listening on Local Host 4200 if I just refresh you will see this
21:55
homepage of angular so if I make any sort of change inside
22:00
this file if I just write here H1
22:10
tag so you will see that so it will reflect the changes now what we need to do right here uh we need to show this
22:17
login component so if you see it has a tag right here which is this is a
22:24
selector app login so we will use this selector in this to actually include
22:31
this so what we can do right here we have this custom selector app
22:38
login that's all we will include this like this and now you can see this login works it is saying to
22:46
us so now we can close this file and addit directly our login component so
22:53
for using the UI guys styling the UI we are actually using Tailwind
22:58
CSS CDM so simply go to this website and include the
23:04
CDM copy the script tag and uh paste
23:11
it so just go to the index. HTML file and write here paste
23:19
it and now you can go to your uh this file right
23:27
here so we'll be having the container MX Autos these are all Tailwind
23:41
classes so we'll have a simple heading which will Google or or to login
23:48
[Music] example if you just refresh now there you will be
23:55
this we'll see that this heading is showing to us so here we will have a conditional so
24:04
we have NG if star NG if we can use it based upon a condition so we will be
24:11
having is logged in so we need to Define it in the component type script is
24:16
logged in so it will return return either true or false depending upon whether the user is logged in or not so
24:22
if the user is logged in we will be showing the information of the user such
24:28
as profile picture the name and the email address
24:34
so you just need to define or actually go to the typescript file and here we
24:40
need to define a property so just write here so first of all you will Define the user profile variable which is of type
24:47
any and then we will have a simple Constructor and here we'll be passing the Au
24:55
service which is of the type Au service so this all service that we defined in
25:01
the services folder will get imported automatically in this uh component and uh just have empty
25:09
Constructor and we will be having this NG on in it which is a life cycle method
25:15
for every angular component this executes at the starting of every component and here we will make
25:21
basically have this this. service. identity claims so this function we have
25:28
different find in the service identity claims so if the user is authenticated
25:34
then in that case we will get the user profile and you will simply subscribe to
25:39
the profile information you will say this do user profile is equal to profile so now this
25:47
user profile will be equal to the profile if the user is authenticated so this will run every time when the use uh
25:53
component is mounted or opened by the user in the browser
25:59
now we just need to Define that method is logged
26:05
in so this will return this uh dot not
26:10
not sign this will uh just return a Boolean parameter so this will interact
26:16
with the service and we have actually have a function right here which is identity claims so again I told you this
26:24
returns a Boolean parameter whether the user is logged in or not so if you now
26:31
open you will actually
26:37
see so here you will be showing the user information if the user is logged in if
26:43
the user is not logged in in that case this MGF will
26:50
be not symbol so this simply means that the user is not logged in so the value
26:56
is false so in that that case you'll be showing a login button to the user login with
27:04
Google so you'll be giving a Tailwind classes PG blue 500
27:15
hover so text will be white
27:30
py 2 PX4 and it will be rounded so if you
27:37
just open the browser what will it will
27:44
show so nothing it is showing right here let me see is logged in is
27:50
uh NG if
28:04
this is a
28:10
d uh let me paste the code right here just to saved some time the full source
28:16
code is given guys in the description you can directly purchase it so it is saying that all these methods are not
28:24
defined so what I will do delete this
28:41
so now you can see that the user is logged in that's why it is showing the log out
28:46
button
28:57
so if I take another example let suppose if I go to a different
29:05
account again it is logged in so now the user is logged in we can simply show the
29:12
profile information so the profile information which which will be simply
29:18
be present
29:23
inside first of all we can show the profile picture like this user
29:31
profile do picture so if you see this object we have defined user profile is
29:37
coming from the service you will see it's a object which contains three properties the
29:44
picture email address and the display name so you'll be first of all be displaying the profile
29:53
picture then we will be displaying the
30:02
display name so user profile.
30:12
name so here you'll be defining the email
30:18
address so you will see that now all this information is displaying right here the user is logged
30:25
in so we also need to bind a onclick listener
30:31
to this log out button as well so just have a on click so that when we click
30:36
this we will be log out and simply here also when we
30:43
click this button we need to executing the function which is
30:50
login so this is Click sorry in angular we do like this
30:58
so now we just need to Define these functions in the typescript file so right here it is just showing
31:05
error so this is one line of code so for
31:14
login log out and for doing this we already have
31:19
made methods in the service so we can simply call the service method
31:25
login and this do Au service
31:30
log out so this completes the application guys if you now test it if you click the
31:37
log out button you will be redirected to the homepage you will stay right here because you're log out if you click once
31:42
again you will be redirected to the home screen where you can select your account consent screen you just need to allow
31:48
the permission after that uh you will actually see your profile information you can just do it for any account let's
31:56
suppose I do this for this
32:05
account so it will exchange access token and it then it will show you
32:12
the this is a display name this is the email
32:18
address for this account I don't have a profile picture so it is not showing here so if you click log out you will be
32:24
redirected to the homepage once again if you do it the same process will repeat and uh this time it will automatically
32:31
log you in so in this way guys you can Implement
32:38
Google or login inside your angular application so it is compatible with all
32:45
the latest version uh for the full source code if you want the link is given with full documentation and
32:50
support you you can directly purchase it after if you face any issues you can contact me at my email address as well
32:57
so you can purchase it from procore.com please hit that like button subscribe the channel and I will be seeing you in
33:04
the next video