Up next in 10

Build a Laravel 11 Google OAuth2 Login and Logout System With Sessions and MySQL in Browser
Jan 9, 2025
Buy the full source code of application here:
https://procodestore.com/index.php/product/build-a-laravel-11-google-oauth2-login-and-logout-system-with-sessions-and-mysql-in-browser/
Show More Show Less View Video Transcript
0:00
uh hello guys welcome to this video so in this video we will talk about that how to integrate Google o to logins and
0:07
logout system inside laral 11 uh framework so we'll be looking at step
0:12
byep instruction to actually build this application and show user profile information in a card likee structure
0:18
you will see we are using Tailwind CSS for the UI and you can see it is running on Local Host 80 port number which is
0:26
the current default port number for laral application so we have also a log out button if you
0:32
click the log out button we'll be redirected back to the login page so now if I actually close the browser and
0:39
reopen the browser then it automatically detects that I'm already logged out so when I open the home page it will
0:46
redirect me to the login page now you can see that so we are actually using
0:51
guys uh exam control panel which comes with Apache server and PHP my admin so where
0:59
we are actually storing in all the data so if you see basically here we are
1:04
storing uh inside uh this is our table which is database users DB currently
1:11
there is a single user out there this is actually all the tables which are there
1:16
migrations sessions users so we are also using sessions as well to actually store
1:21
session information about the user so there is a single user out there which is a display name coding s gy Gotham
1:27
1987 it is storing Google ID Avatar token as well so all this
1:34
information is stored if you login with this user so it is saying that missing client
1:39
ID so I think I removed the client ID so let me uh
1:46
just refresh here click login with Google so you will see that you will be
1:52
automatically logged here you will see a currently this user is present here let me log in with a different user so now I
2:00
logging it for the very first time if I open the application so if you're logging for the very first time then you
2:05
will need to select the consent screen you will see now it is successfully a second account if I
2:12
refresh now a second entry will be added you will see that har Chopra choa
2:18
[email protected] this is their Avatar pick so it is showing here so in the similar
2:25
way we can try out for a different account so if you're doing it for the
2:31
very first time guys you will need to actually see this consent screen here you need to select your Google account
2:36
allow the permission and after that the login will be successful you will see
2:42
that the profile picture display name and the email address if I refresh the table you will see that three USS are
2:49
there you will see in the sessions table as well there is a sessions table also created so we are also using sessions as
2:56
well for every sessions that user create or logged in a newly session ID is
3:01
generated in the table if you see a newly generated session ID is there so
3:06
we are actually storing all this information in the MySQL table whenever you log in log out every sort of
3:12
information is session ID is being inserted so this is actually the application guys we'll be doing it step
3:19
by step we are actually using the latest version of laral at the time of recording this video it is laral 11 so
3:26
we are using the latest version of PHP which is 8.2 laral which is 11 so laral
3:34
11 requires you to have 8.2 minimum PHP
3:39
version so make sure uh just PHP Dash version you should have PHP 11 install
3:47
PHP 8.2 so at the time of recording this video this is the latest version
3:52
8.2.4 so I already have the latest version and laral 11 I'm using so let's
3:57
start this tutorial guys if you need the full source code of this uh application
4:03
I have given the link in the description you can directly purchase the full source code from my website Pro cod.com
4:08
it will actually contain a zip file which will contain all this directory structure of the code uh the link is
4:15
given procore.com where you can purchase it after that uh purchasing you will be
4:20
redirected to Google Drive where you can download the zip file and uh so the link is given you can directly
4:28
purchase it so now guys what what I will do I will go into the directory where I
4:33
will develop this project so first of all as I already told you you should have this software installed which is
4:39
exam control panel which is actually a software which comes with the Apache
4:44
server which will actually run on Local Host 0 port number and the my SQL database so it is required for this
4:52
laral you should have a p exam control panel because we are using my SQL PHP my
4:59
ad so it's a free software open open source Windows it available for Windows Linux
5:06
and Mac depending upon your internet operating system install it and start this Apache server and my SQL so now I
5:14
will what I will do I will go into my HD docs directory so by default examp is located
5:22
in C directory exam HD dos this is the HD docs folder and right here we will
5:29
actually create a new laral 11 project we'll use the composer command guys
5:35
composer is a dependency manager we will write composer create
5:41
project-- prefer dasd l/ laral followed by the project name so
5:50
I will simply give laral Google login project let me zoom in to the
5:58
command just pause the the video and write it composer create project D-
6:03
prefer disc l/ larable and Then followed by your project name so this is the
6:10
project name that I'm giving right here so simply write this command pause the video after this it will actually create
6:18
a laral project so it is saying that laral Google login project is not empty
6:24
so let me just create just change the project name so
6:30
it is actually creating a new laral project guys it is installing the packages it will take some time so just
6:35
wait for 15 to 20 seconds and then it will install these dependencies so just
6:40
wait for the process to
6:46
finish so once it is installed guys it will give you a notification where you
6:51
can actually start building the project so just wait
7:04
so laral guys it's a pretty famous framework among developers PHP
7:09
developers it's a really good if you can learn laral it's a good practice to it
7:15
will actually gives you jobs as well we will see that guys it has by default it works with the sqi
7:23
database but we will not be using sqlite we using the mySQL database I will show you how to do this so I will CD into
7:31
the project directory and open it inside VSS code so you will see this is
7:37
actually the directory structure of the laral 11 framework the latest version of
7:43
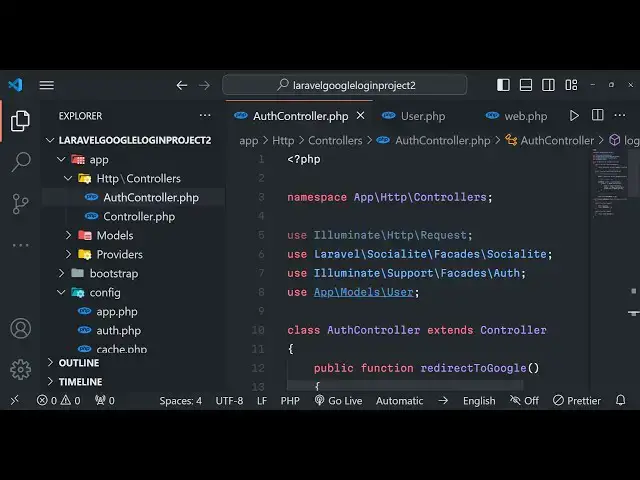
laral so many things are simplified right here in the app folder we have the
7:49
HTTP folder which contains the controllers folder then we have the models folder and this is actually the
7:55
provider folder so as you all know LEL is a MVC based framework model view controller so we have model which is
8:02
having data view is our HTML files and C controller is the business logic it
8:07
controls what VI USS to show so this is the MVC framework so the first thing guys here
8:14
we need to do we need to uh basically uh install the package which we will be
8:20
using for integrating the Google o login so we need to require this package which
8:26
is laral SL socialite this is the name of the
8:32
package guys composer require laral SL socialite this is the name of the
8:37
package simply install this package so it will hardly Take 5 to 10 seconds and
8:44
it will install all the dependencies so once it is installed we will actually
8:52
be so now it is installed so all these packages will go into this file which is
8:58
composer. Json if you open this file you can see we have successfully installed this l/
9:05
socialite this is the latest version 11.9 113.0 Lal version and the PHP version is
9:13
8.2 you will see that so this is the thing and now we need to go to this file
9:19
EMV file here we will need to uh just right at the bottom we will be
9:26
having some constants first is Google client ID so all these things will be
9:33
coming from Google Cloud console and then we need to also get uh Google
9:39
client secret and then we need to also get
9:44
Google redirect URL so these three things we need to get guys so so this will be constant the
9:51
redirect URL so by default it the laral application works on Local Host 88,000
9:58
sl/ Google /all back so this is actually the redirect URI guys this thing will be
10:06
constant because larl works on Local Host 8,000 and then this is a redirect
10:11
URI sl/ gooogle callback this is actually the full redirect URI so now
10:19
these two things in order to get this we just need to go to Google Cloud console and
10:24
actually create a project right here I've already created one project let me
10:30
just uh go to this one so here we need to Simply go to apis and services and go
10:37
to credentials and then you need to create oo client
10:42
ID select web application and then we need to paste authorize JavaScript
10:49
origin which is actually the homepage of the application so we running it on HTTP Local Host 8,000 and then the redirect
10:57
URI is actually this is a redirect URI that you write here simply copy this and
11:04
paste it so just paste it click on create so
11:11
then it will give you your client ID and client secret so don't copy my client ID and client secret it will be different
11:17
for you so just copy this and paste it
11:22
client secret as well so so we have copy pasted these
11:29
variables and next we also need to set some database connection variables so DB
11:35
connection is uh my SQL these variables needs to be same
11:41
guys so just copy what I'm writing right here don't make any mistake because you
11:47
will get error the variable name needs to be the same DB Port by default it
11:52
runs on 3306 and whatever is your database name so let me create a database
12:02
Lal login system so you don't need to create
12:07
this database lar will automatically create it whenever we run migrations so we don't need to create this database
12:14
manually then we need to just type the username by default username is root and
12:20
the password if you haven't changed the password default password is nothing that's all this is all the variables
12:27
that we need to declare guys in EnV simply close this file now we just need
12:32
to make a controller so this is actually the command in laral so larl has its own
12:39
PHP RTC CLI this RT CLI has some
12:44
commands out there which is one command is make colon controller and followed by
12:50
the name of the controller which is O controller you can give any name of your choice but I'm giving this PHP artisan
12:57
make undor controller o controller so what it will do it will actually create
13:03
this in the controllers folder it will actually create a new controller in the
13:08
left hand side if you see it has created this o controller file and by default it
13:13
comes with some code right here if you see so after we create this controller
13:19
file we will have some methods in this first method will be to redirect
13:30
so this method names can be anything but I'm just uh defining it like this the
13:36
second method will be to handle the Google callback
13:42
URL this is will be the second function in the controller function the third one
13:48
will be responsible for logging out the user so public function log out this
13:53
function will be responsible for logging out the user and uh lastly now to
13:59
actually go index function as well so right here these are four functions
14:04
which are there in the Au controller now we just need to go to our uh routes file
14:11
if you see we have a routes file in the app
14:17
folder uh not in the app folder sorry we have in the routes folder sorry routes
14:24
we have this file called as web.php so inside this file you will see already a
14:30
single controller or route is there whenever someone goes to the homepage we are loading this view so views are
14:37
located in the views folder if you see if you see right
14:43
here the views folder this is the storage folder and
14:51
the views folder uh let me see yeah it is located in the resources folder and
14:57
then this is a single welcome. blade. PHP so we actually use blade in blel so
15:04
this is the actual welcome page that you will see now to run the vable application it's very easy PHP artian
15:11
serve this is actually the command PHP Artisan serve this will actually start your laral development server on Local
15:18
Host 8,000 so if you try to open this now you will see the welcome page
15:34
so it is saying to us that unnown database lar loging system so okay uh
15:42
for the time being I just remove this name from here because EnV I just remove the name
15:49
from here or I create this users TB
15:56
just for the time being I will change name so if you just see it will show you
16:02
this larable welcome page that you will see guys for you will see this is a welcome page you can edit this page by
16:10
going to this file which is located in the resources folder you use welcome and
16:16
just change it to like this we will say Google login and log
16:23
out system
16:32
so if you just make changes it will automatically reload you don't need to restart your server you will see that
16:38
and now whenever you someone goes to the homepage of the application this view is loaded so this is actually happening
16:45
because in the controller function we are actually uh if you see by default we
16:51
are actually loading this uh if you see in the routes folder if I go to the rout
17:00
directory web.php so we are directly loading this view view we are loading
17:06
this welcome blade. PHP file if you see so that's why it is loading this view so
17:13
now what we need to do right here we need to actually do this to the controller instead of writing directly
17:20
we will say route get so when whenever someone goes to the homepage we now need to assign
17:27
this job to the control this is way much uh cleaner or
17:33
controller class and uh we will call it the index function which is present in
17:39
the controller so now we just need to actually import this controller right at
17:45
the top so what we will say use uh app
17:50
and HTTP controllers and inside that we have the OD
17:57
controller so what it will do it will now call this index function and now
18:02
inside this index function what we can do we can actually load the view the same view we
18:12
can say return view welcome so this will again do the same thing but it is way
18:18
more cleaner because we are using the controller instead of uh directly doing this if you refresh it nothing will
18:25
change it will still remain the same but uh we are Act following a good programming practice we are actually
18:31
allowing the controller to actually load the view so then what we need to do guys inside this we just need to uh create
18:39
migrations so if you don't know about migrations guys it is actually created to create the database
18:47
and tables for that we need to first of all go to models folder right here inside models folder there will be
18:54
already be a model file which will be available which is user.php so so right
18:59
here we just need to add some Fields right here so we just
19:06
don't need the just delete everything from here and just write the name field we want we need the email of the person
19:13
we need the Google underscore ID we need the Avatar pick Avatar so these are the
19:19
four fields we will need guys inside this and right here we don't need the
19:24
password we only need the remember token so delete the password from here and uh this will password also
19:33
remove it from here and we will say email verified at it will remove and that's all I think that we
19:42
have for
19:49
this also one more function you need to write for this just add this function public
19:57
function set Avatar attri we are actually setting the Avatar attribute to be the actual value or
20:03
default value we are providing which is default avatar.png so this is actually the model file which
20:11
is ready
20:17
guys so after we do
20:23
this we now need to go to the we need now need to create the migration so
20:31
migration we have this command which is PHP
20:38
Artis make colon migration and followed by the name of the migration so I will say add Google fields to users
20:48
table if you just uh zoom in PHP Artis make colon migration followed by the
20:54
name of the migration so we are adding the Google fields to users table so this
21:00
actually will create the table for us and here we need to
21:05
mention table is table name is equal to users so this is actually the full
21:12
command if you see so what I will do is that I will go to the EnV file and I will change the
21:20
database name to once again Lal login so this database will
21:25
automatically get created whenever I run this mic migration so so you will see
21:31
the migration is created successfully so it is located in the database folder migrations so if you
21:38
open the database folder if you see uh database then we have got
21:44
migrations this is actually the latest migration it is created by this command
21:49
so now we need to actually set the schema here in the tables of users we
21:55
just need to set what we need so we need a Google ID
22:01
field which can be nullable so we can use nullable
22:06
here and then we can say after password
22:16
field and then we also need table string
22:24
Avatar nullable so just write this code guys I'm writing it after Google
22:33
ID so it is required for creating the tables guys and also in the migration we
22:39
have the up function to actually create the table and down function to actually delete the columns so now inside the
22:45
down function if you actually want to delete the table then this columns will be deleted which is drop column Google
22:54
uncore ID if you want to delete the table this migration will be available
23:01
table drop column in most cases we don't use this
23:06
method down function but it is better practice to write the down function as
23:12
well that's all but this is all that we need to do guys here and now to run the migration it's very simple we just write
23:19
PHP artian migrate so it will what it will do guys it will actually actually
23:25
first of all it will ask you that the database is not created so you can see the database lar logging
23:31
doesn't exist on the my SQL connection would you like to create it so I will say yes so it will first of all create
23:38
the database and then it will run the migrations and it will create all these tables so if I check my PHP my admin I
23:46
go to that and if I check that table the database it will be created which is l
23:53
login and inside this a set of tables are created and uh we only need the user
24:01
table right here and we don't need this password email verified act so now to
24:08
delete this simply click on the drop option to delete this email verified act and password as well we don't need
24:17
this so after this guys what we need to
24:26
do we just need to after we created all these tables so
24:33
now the job is pretty much simple guys we now need to write
24:39
our simple go to the welcome. blade. PHP so right here we will simply be
24:46
importing uh Tailwind CSS so just import the CDN for Tailwind
24:54
CSS just write Tailwind CSS CDM so just import the
25:01
CDM just after the title so right here guys we will give it a body a class BG
25:08
gray of 100 Flex item Center justify
25:15
Center minimum height screen so if you just apply this and go
25:21
to your local host 8,000 port number you will see some classes will be applied
25:29
right you first of all need to run the server for this so PHP artian
25:37
serf so now you can see it will come right at the center and the background color is gray so all these things are
25:44
coming using these pre-made classes so we will actually have a condition guys
25:50
here if you don't have experiences in Blade there is actually a guest
26:00
actually conditional operator in Blade so guest simply means that if the user is not logged in then in that case we
26:07
need to show the login page so if the guest condition is true in that case we
26:14
will be storing showing a login page to the
26:23
user so right here
26:28
this will be login with Google so similarly uh we also have the
26:35
else block as well right here so if the user is authenticated if
26:41
the user is not a guest also we can end this guest right
26:47
here so if the user is not uh a guest then we can simply show a message user
26:53
is authenticated so so now by default this
27:00
condition will evalu to true so you will see login with Google button will be showing right here
27:06
so so now inside this we will give it a class to it of text Gray 600
27:17
mb4 so this is I think uh a different class we need to give BG
27:24
R 500 so when we hover onto this this we need to change the color to
27:32
700 text will be white font bold py2
27:39
PX4 and it will be rounded so these are all the Tailwind classes guys so if you
27:44
just style it it will look something like this so Tailwind is very easy to learn guys it's a very good framework we
27:50
don't need to write custom CSS and uh
28:00
this is uh these are I think this one
28:08
for the login with
28:16
Google so this is I think login with Google this you can see that so now it's
28:22
a blue color and uh whenever you go to this page hrf attribute will be equal to
28:30
uh we need to go Double C bracket and
28:35
URL we need to set the URL to in single code o/g
28:45
Google so we now need to actually if you just
28:51
uh click this button nothing will happen it will say not found 404 not found so
28:57
this route we need to make //g gooogle so what we need to do we simply need to
29:02
go to the routes file so it is located in the uh I think it is located in the
29:09
routes web.php so here we just need to make this route which will be
29:15
responsible for actually be for the routing so there will be a
29:24
route here we need to write which is route
29:30
get au/ gooogle and then here we will simply say
29:35
Au controller and then it's a class and it here will be calling this function which
29:41
is redirect to Google semicolon so we again need to go
29:47
to Au controller and we actually have defined this method in this which is redirect to Google we simply calling
29:55
this method so right inside this method method guys what we need to do we simply
30:00
need to redirect the user we say return and we use this package socialite
30:07
it will be imported here you will see that right at the top and it contains this driver function and here we need to
30:15
go specify Google here and then redirect it to the so we have actually in the EMV
30:22
file we are actually having the Google client ID secret redirect URI so now
30:28
this will work if I simply navigate to it is saying trying to access array
30:34
offset value on type value so just login with
30:42
Google so again it is saying the same value uh container make request config
30:48
client
30:54
ID uh let me check guys what is actually it's a
31:00
problem I think redirect to
31:05
Google EnV Google unor client ID just wait so guys I figured out the
31:15
error it was a very silly mistake and I forgot to tell you if you want to actually load the
31:23
variables inside the environment variables if I just click it those those uh variables that we defined in the EnV
31:31
file if you see for Google client ID secret key and redirect URL we need to
31:37
load these variables first of all for loading this we just need to go to the in the larable folder structure we have
31:44
this config folder right here the top directory you will see that you need to open this folder and then go to this
31:50
file which is services. PHP so if you want to register any third party service inside of a larable application we need
31:56
to go to this file and simply right here all these third party Services you need to register it
32:03
so if you're using it inside your application so we are actually using our Google application so we just need to
32:10
register it like this so we are using this three client ID like this we will
32:19
be loading this from the environment function and whatever value that you
32:24
have given Google client ID put a comma and the second one will be for the
32:29
client secret here also load this as well environment and Google client
32:38
secret and similarly we will actually be using the redirect this value will also be we'll
32:45
be getting from the environment function Google redirect URL so just make sure
32:53
that you have defined this to be same Google client ID secret and redirect your sping needs to be the same right
33:00
here so now if you do just
33:10
refresh click on that button and if you now see you'll be redirected to the Google account screen consent screen
33:17
where you need to select your Google account if I select it you need to click continue and you will actually see 404
33:23
not found so it's quite natural because we haven't configured this so it's a callback URL Local Host 8000 sl/ gooogle
33:32
SL callback and this is actually the authorization code that we will get we
33:37
now need to exchange this authorization code for the access token so actually use the Google API to actually get the
33:44
user informations we need to get the access token from this authorization code that you see right here so now to
33:51
do this we just need to go to the routes file which is web.php and here we just need to write a simple r rout for the
33:58
call back URL so we'll say route get
34:04
au/ go/ callback and right here we will
34:10
again assign this job to the controller or controller and it basically contains a
34:17
function right here which will be handle uh
34:25
Google call back
34:30
that's all so actually we if you open the controller file we have defined this
34:36
function app HTTP controller so this function is handle
34:42
call Google call back so this function is now responsible for fetching the
34:48
access token so now to fetch the access token
34:54
we do need that authorization code we'll sa so
34:59
socialite and driver and you will say Google you will basically fetch here
35:05
fetch the user so you can see all these methods
35:11
are pre-built inside this library and you will find and create the user in the database if the user is not present
35:18
we'll say Au user and we'll say user first
35:25
or create this is a function we will
35:32
call so here if the user is already present or if the user is a first user
35:38
so if the user is not present in that case we will be inserting it in the database the table this email address
35:46
you will be getting it using user get
35:53
email like this
35:59
and uh this is actually the thing that we
36:05
need to write here let me just tell
36:16
you so here if you see uh it is saying to us that the user is not defined
36:29
we now need to actually import this model file that we are using so app
36:35
model files that we defined and we have defined this user model so here we are using this user
36:42
model that we defined if you see in the models folder we have defined this file which is user.php so we are just simply
36:50
inserting it inside all controller we are importing it and creating the name
36:55
Avatar Google ID and the email address as well so just
37:01
format this code so after we do this it's very easy
37:07
now we can basically login the user by using Au login
37:14
function which is present we can basically pass the authenticated user as the first argument
37:21
as the true as second and then we'll be redirecting the user back to the homepage
37:27
that's all so here this o we just need to import this
37:35
class from uh varable so this is actually this class is there
37:51
eluminate I support
38:00
facets SL
38:09
o so that's all so we in redirecting user back to the homepage that's all so
38:16
if you just uh reload your application click on continue so it will actually redirect you to the hom page and now you
38:22
will see this message that user is authenticated so now the your having on
38:28
the homepage here on the screen so now the user is authenticated and instead of
38:34
this message we just need to print out the details so go to the welcome plate. PHP file and right here in this user is
38:41
authenticated this condition evolutes to false the user is not a guest so the user is authenticated so in this case we
38:49
just need to show the profile details of the user which will be
38:54
coming so now we show the profile details it is very
39:00
easy so right here let me delete everything from here
39:07
and give it a class BG white shadow MD it will be
39:14
rounded on large devices padding will be six text
39:19
Center and uh we will be showing the profile picture of the
39:25
user like this or
39:30
user [Music]
39:35
Avatar like this giving a class to it of WID
39:42
24 height is also 24 and it will be rounded MX Auto and
39:51
mb4 so if you just refresh now there will be this image which will be shown to you of the logged in user and
39:58
similarly we will be displaying the display name email address and the log out button as well so H2 tab giving a
40:06
class text Excel font bold and
40:14
mb2 and this will be having double Cod brackets once again Au
40:23
user name
40:29
and then we will also be displaying the email address as
40:38
well so this time this will
40:45
be email so if you just refresh Now display
40:51
name email address and uh it is displayed now lastly we will also be showing a out button to the user just
41:00
to login out so URL and it will actually go
41:08
to log out route that's
41:16
all so you'll actually be giving a class to it of BG R
41:21
500 we hover on to this will change to bg. 700 text will be white font volt py2
41:31
PX padding from the X direction for rounded and it will actually say to the
41:38
user log out so just refresh now you will see a
41:46
log out button as well so you'll see that and if I show you the table as well guys in the users table currently there
41:54
is you will actually see where is is my table uh
42:00
laral uh
42:05
larable just refresh it so you can see that so lar login is our database if I
42:11
open this there will be this users table and currently there is a single user out there which is logged in and it also has
42:19
a session table currently there is a single session out there it also supports storing the browser information
42:25
IP address everything load user ID as well so everything is stored and uh if I
42:32
click log out nothing will happen we 404 not found because we need to make this route so just go to your uh
42:42
route file which is stored inside I think I almost
42:48
forgot it is stored inside your routes web.php so now to actually uh write our uh
42:58
log out route it's very easy we will actually be writing
43:06
this route get and uh we'll say log out and then
43:12
again Au controller and we'll be calling the log
43:18
out function right here that's all so we'll be calling the
43:25
log out function when we click the log out route so just go to your uh controller file and just make this
43:31
function as well so in the log out function what we need to do we just need to redirect the
43:39
user to the homepage so first of all we'll call this log out function and
43:45
then redirect to the homepage that's all that's all that we
43:52
need to do guys in this application if you just do you'll see log out again
43:58
login so if you close the browser again open it it will automatically detect that you're already logged in so it will
44:05
automatically redirect to the profile page if I click log out and close the browser and again open it it will detect
44:12
that you logged out so that's the advantage of storing information in
44:17
sessions so you can do it for any Google browser if you're doing it for the very
44:23
first time then it will ask for the information to be
44:30
it will just see select your account continue and uh you'll see that so now
44:38
if I go to PHP admin there will be two database two users coding s and goam
44:45
Sh you will see that so everything is stored in the table as well so thank you very much guys for watching this video
44:50
all the source code with full documentation and support is given in the description you can directly purchase it and I will be seeing you in
44:57
the next video and thank you very much for watching this video