Up next in 10

Angular 13 ngx-image-compress Example to Compress Size of Multiple Images in TypeScript
Dec 22, 2025
Buy the full source code of application here:
https://buy.stripe.com/6oE7vM1kReFa8jC2E2
Show More Show Less View Video Transcript
0:08
Uh hello friends, today in this tutorial
0:10
I will be showing you that how to
0:11
compress images inside uh angular 13
0:15
application
0:16
and for this application we will be
0:18
using a very special library called as
0:21
ngxfx-ashimage-
0:24
compress and we will be doing this
0:26
inside typescript.
0:29
So basically this is the library guys we
0:31
will be using inside this. So this is
0:33
ngx- image- compress.
0:37
So if I show you the simplest of example
0:40
right here you will see it is a very
0:42
popular library. It has got almost
0:45
11,000 weekly downloads
0:48
and you can see this is a simple command
0:50
which is required to run this module and
0:54
basically it's a angular utility kind of
0:56
a library for compressing the images.
0:58
angular images to a smaller size. So
1:02
this is ngx- image.compress. This is the
1:05
angular library to compress images. So
1:07
we will be looking at a very basic
1:09
example to compress image, upload image
1:12
and compress it using angular.
1:15
So for this application we will not be
1:18
requiring any sort of back end. We will
1:20
be all be doing it inside our angular 13
1:22
application. And all the source code
1:24
regarding this application guys I have
1:26
given in the video description. So this
1:29
is my blog post and you can see this is
1:31
all the source code which will be there.
1:33
So you can go to the video description
1:35
link inside this live stream. I have
1:37
given this link inside the description.
1:40
So you can just click this link and go
1:42
to this blog post and you can download
1:43
all the source code. This is the source
1:45
code which is there. And let's start
1:48
building this application guys. So first
1:49
of all you need to open a new directory
1:51
here. Inside your uh projects directory
1:54
I will make a new directory here.
2:01
So inside the projects directory I will
2:03
make a new directory. So simply I will
2:05
call this directory as
2:10
compress image.
2:13
I will cd into this directory
2:17
and I will open this inside visual
2:20
studio code text writer.
2:22
So you will see that guys currently this
2:25
directory is empty right now. So now we
2:28
will initialize the new angular project
2:31
angular 13 project. So
2:35
in order to write this we will just
2:38
write ng new and then followed by the
2:40
project name. In this case we will
2:42
compress image project. So if I execute
2:46
this command guys so it will create a
2:48
brand new project inside our directory.
2:51
So it is saying that would you like to
2:53
add angular routing. So I will say no.
2:56
So I don't want the angular routing. So
2:58
we will only use the CSS. And now
3:01
basically you can see it is installing
3:02
these packages.
3:04
So you just need to give some time for
3:07
this project to
3:09
create. So it is simply creating the
3:12
project. So in this project we will be
3:14
compressing the size of a image. So from
3:18
a larger size image to a smaller size
3:20
image. So we will be doing it inside uh
3:24
ngx image compress library.
3:29
So you just need to give some time for
3:31
this project to fully build. And once it
3:34
is built we can write the code here. So
3:37
you can see it is currently building
3:39
out. So in the meantime you can check
3:41
out the library. This is the actual
3:43
library which does this task for you
3:46
which compresses the images.
3:50
So the documentation is good. You can
3:52
read more about it. The example code is
3:54
given here. So you can just simply read
3:57
the documentation.
3:59
So it is a very popular module which is
4:02
11,000 weekly downloads are there. So
4:05
now guys you can see that it is
4:07
installed. This is our project. It
4:10
contains all these files which is
4:12
app.component.ts
4:14
file. This is actual file. App dot
4:16
component.
4:18
So here we will delete all this and we
4:21
will just be saying a simple heading
4:23
that to compress image in angular.
4:28
So now to run this project it is very
4:30
easy guys. First of all, we need to go
4:32
to the projects directory
4:36
and then we will simply say that uh ng
4:40
serve. So just execute this command
4:44
guys. ngs serve. So it will start this
4:47
angular 13 application at a port number
4:50
which is I think it will be 5050.
4:54
So
4:56
it is just starting this application.
4:58
For the very first time it will take
5:00
some time and after that it will auto
5:02
refresh whenever you make any sort of
5:04
changes.
5:06
So you can see it is compiling it.
5:19
So now it is compiled successfully. You
5:21
will see that now it is running on local
5:23
host 4200. So we can open this
5:26
application.
5:30
So now you will see compress image
5:33
angular. So now guys we need to simply
5:35
install this module which is there. So
5:39
this is a actual module which is ngx-
5:42
image compress. So we need to install
5:44
this module. So I will stop the server
5:47
and I will install it ngx image
5:49
compress. So execute this command guys.
5:52
So it will install this module.
5:56
So
5:58
you just need to write the force command
6:00
as well because it can be
6:04
just write it dash force if your angular
6:06
version is not compatible. So this will
6:09
make sure that this dependency will be
6:11
installed irrespective of your angular
6:14
version. So now after this you can start
6:17
your application ngserve.
6:19
So now once it is installed guys you
6:21
need to add this service.
6:27
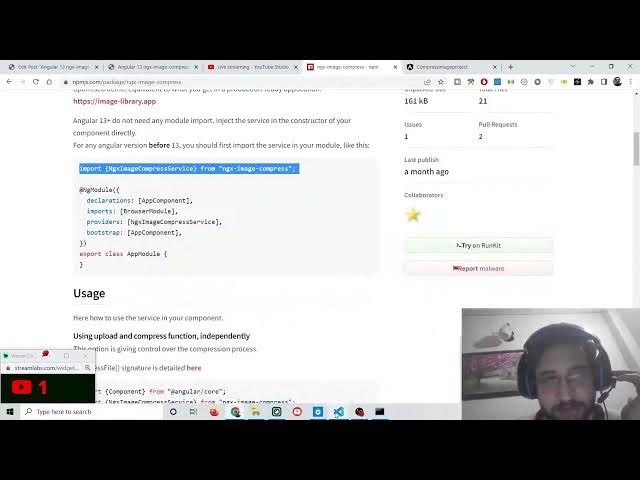
So it is saying that angular 13 plus do
6:30
not need any module import. But if you
6:33
are using a angular version before 13
6:36
because this is particularly for the
6:37
angular 13. But if you are using it
6:39
before 13 you need to go to your angular
6:43
dot uh this app.module.ts
6:45
file and you need to add this module
6:47
like this. But for angular 13 it is not
6:50
required. So we will simply write the
6:53
HTML code which is required for this.
6:56
So I will delete this. So instead of
6:59
having H1 we will have a header tag.
7:02
Inside this we will have a H1 tag. We
7:04
will say ngx image compress
7:09
demo.
7:13
So after this guys we will have a simple
7:16
button with the help of which we will be
7:19
saying upload and compress image.
7:24
So both the things will be happening at
7:26
the same time. So we will bind a onclick
7:29
listener to it.
7:33
So when we click this button what will
7:35
happen? We will execute this method
7:36
which is compress file.
7:41
And uh we need to make this method
7:43
inside our app.component.ts
7:45
file. But before that we also need to
7:47
make the image tag. So whenever the
7:50
image is compressed we will display it
7:52
with this ng if.
7:56
So here we will initialize a simple
7:58
condition. So basically we will
8:00
initialize it to the method which is
8:03
image result
8:05
before compress
8:10
and we will bind a source property to
8:12
it.
8:15
So this will be image result before
8:17
compress once again.
8:25
So close the image tag
8:31
and similarly we will once again have
8:34
once again this ng if
8:38
this will be image result after
8:41
compress.
8:48
So here the source property will be
8:50
simply image result
8:54
after compress. So close the property,
8:58
close the image tag.
9:01
So that's all that you need to do guys.
9:03
So basically if you now refresh your
9:05
application you will see a simple button
9:07
which will be there. So it will say you
9:10
haven't made these methods which we have
9:12
declared. So once again you need to make
9:15
go to your app.component.ts ts file and
9:18
first of all we will
9:21
import the library. So right here if you
9:24
see
9:27
we will import the actual library which
9:29
is ng
9:32
image compress. So from this library
9:36
there are some things that we need to
9:38
import. First thing is data URL
9:42
put a comma. Then we have to have doc
9:46
dot orientation
9:47
put a comma and then we need to import
9:50
ngx
9:52
image compression service and put a
9:56
comma and then upload response.
10:01
So these are the four things that we
10:03
need to import guys. So we have imported
10:06
it successfully. So right here what we
10:08
need to do is that we need to make that
10:10
function which is compress file.
10:16
So basically when we click this button
10:17
we are calling this function here. So
10:19
simply we are writing this function. So
10:21
right here we will return
10:23
a new instance of image compress.
10:27
So for this we need to first of all
10:30
declare the variables. So right here
10:33
inside our project.
10:35
So first will be image result before
10:39
compress
10:45
before compress. And this will be of the
10:47
type data URL that we have imported
10:50
guys. Data URL
10:53
data URL. So this library we have
10:56
imported here. You will see that data
10:57
URL
11:00
and this will be currently empty.
11:04
And next we will have image result after
11:07
compress. And this will be of the type
11:09
as well data URL. And this also will be
11:12
empty by default.
11:15
And then we will have image result
11:19
upload. And this will be of the type uh
11:22
again data URL. And this will be also by
11:24
default BMT.
11:27
And we will declare a constructor guys.
11:29
Inside this angular component, we will
11:32
provide a property which will be private
11:35
image compress
11:39
and this will be of the type ngx image
11:42
compress service and this will be a
11:45
empty constructor. So we are just
11:47
initializing our compress service which
11:49
will actually compress the image for us.
11:52
So after this constructor guys we can
11:54
simply call this method which is inside
11:57
our compress file method. this dot
11:59
compress file and first of all guys we
12:02
will upload this. So we will call the
12:05
upload
12:07
file method upload file. So this method
12:11
we need to create guys. So
12:14
right after this we will create this
12:16
method to simp this will simply upload
12:18
the image
12:20
not to a database but to temporary
12:23
location so that we can compress it. So
12:26
we will simply make this method upload
12:29
file. So we are just calling it.
12:34
So
12:36
here guys we will simply write this dot
12:38
image compress.
12:48
Uh sorry I think we have made a mistake
12:51
here.
12:56
Once again here we need to call this
12:58
upload file method once again
13:03
upload file
13:06
and uh this returns a promise. So
13:13
inside this we have missed here. So dot
13:16
then let me just write it once again.
13:22
So this will have the image actual image
13:24
which is uploaded and then we will have
13:27
the orientation.
13:37
So this will be of the type
13:41
upload response.
13:54
So inside this guys we will simply say
13:56
this dot image
13:59
result
14:01
upload and this will be equal to image
14:04
actual image which is uploaded. That's
14:06
it. So after this guys
14:12
we will simply change we will compress
14:15
the image by using doc_ientation
14:19
and this will be equal this is actual
14:22
array and here we will pass the
14:24
orientation of the image.
14:35
So doc orientation if you check the
14:37
source code I have given this source
14:39
code in the video description
14:44
if you see here
14:55
these are just a console log messages
14:57
which are there. So it is not doing
14:59
anything. So inside this method only
15:02
guys we are just uh uploading the file
15:05
that's all. So inside our compressed
15:08
file we need to do the logic. So once
15:10
again this returns a promise. So we will
15:12
say dot then
15:15
and here we will have the image and the
15:18
orientation.
15:20
So basically this will be of the type
15:22
upload response
15:25
and this is the arrow function. So right
15:28
here guys we will say this dot image
15:31
before
15:33
compress. So this will be equal to the
15:35
actual image which is uploaded.
15:38
And then
15:40
we will compress the image.
15:50
So it is saying that upload file doesn't
15:53
exist on type.
15:59
Uh let me see guys what is the problem
16:01
here. So inside this upload file
16:08
this dot image compress. Oh sorry this
16:10
needs to be this dot image compress
16:12
sorry and here we need to compress the
16:15
image guys. So for compressing the image
16:18
we will say that this dot image compress
16:21
dot byte count and inside this guys we
16:25
will simply pass our image.
16:29
So this will actually compress the
16:31
image.
16:33
And after this
16:45
let me check the source code. So after
16:47
this step you will see that uh this dot
16:50
image compress uh sorry this dot
16:56
compress byte count.
17:04
So after this we need to execute this
17:06
code. This is come this is uh let me
17:09
delete this. Now to compress the code
17:12
compress the image we will copy paste
17:14
this code here. So basically it is
17:16
calling the this dot image compress
17:18
compress file. We are passing the image
17:20
and the orientation 50/50. This is width
17:22
and height and then the data URL will
17:26
come and then we will display the
17:28
compressed image which is this dot image
17:30
result after compress. So you can delete
17:32
the console log message. That's all the
17:35
logic is required guys to compress the
17:38
image. Now we can launch the
17:39
application. Let me check in the
17:41
browser. You will see a button. If I
17:44
select upload compress. So now you will
17:46
see this is our original image
17:50
and this is the compressed image. So
17:57
basically let me take one other example.
18:00
Let me uh go to a image hosting website
18:04
where very high resolution pictures are
18:07
there. So let me take a high resolution
18:10
picture. Let me go to pixel.com.
18:15
So here we can search for a stock photos
18:18
programming. So
18:22
So these are very high resolution
18:24
pictures. So let me take example of
18:26
this.
18:33
Let me save this image. So now basically
18:35
you will see that guys if I show you the
18:38
size of this image.
18:40
So it is approximately 59 kilobytes.
18:44
This is not a large image.
18:51
Let me take
18:53
example of
18:59
a larger image.
19:12
Let me say large size images.
19:19
So let me take a large size image
19:21
example. I'll show to you.
19:27
So basically you will see now this is
19:29
the size of this image which is 293
19:33
kiloby. Still it is small. So let me
19:36
take
19:47
so if you see the size of this image
19:53
I have this image processtore.com. I
19:56
have my profile picture. I think this is
20:00
quite a large size image.
20:09
So it is round about 142 uh kilobytes.
20:12
So this is quite large image size. Here
20:15
you will see that. Now we I need to
20:17
compress this image. So basically
20:22
I will rename this to profile 2223.
20:29
So I will now upload this image inside
20:31
this application and I will select this
20:33
image. So now you will see this is the
20:36
original image and this is the
20:38
compressed image.
21:02
It is saying that can't bind to ng if
21:08
I think I have made a mistake here. Oh
21:11
sorry this needs to be capital if sorry
21:14
just make the slight adjustment guys. So
21:16
now hopefully this will work.
21:21
So now you will see this is the original
21:24
image and this is the compressed image.
21:27
So if I check the size of this
21:29
compressed image you will see that it it
21:32
has compressed the size
21:34
to
21:39
if I see this. So why
21:44
this is an image. uh
21:54
download 10. So it is compressed from
21:57
142 kilob. This is was the original
21:59
image and this has compressed to 34
22:02
kilobytes. This is a compressed image.
22:04
So you can see slight differences in
22:07
quality. I think no difference you can
22:10
make out from out from way around. The
22:14
image still looks good but the size is
22:16
reduced to 142 kilobytes to 34
22:19
kilobytes. So this is the simple angular
22:21
13 application guys where we have looked
22:23
on how to compress images on the client
22:26
side without using any sort of
22:28
serverside library. So we have just used
22:30
the angular library which is ng image
22:34
compress. All the source code regarding
22:36
this application will be there inside
22:37
video description. I have given this
22:39
source code. So just go to this link and
22:41
download all the source code. Please hit
22:43
the like button, subscribe the channel
22:45
and I will be seeing you in the next
22:46
stream.
#Jobs & Education