Up next in 10



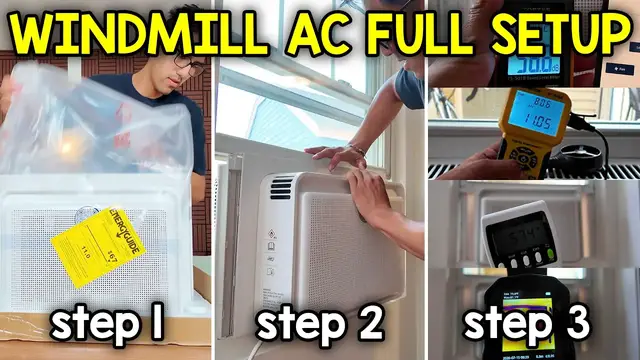
The Windmill Window Air Conditioner Full Setup and Testing
Show More Show Less View Video Transcript
0:00
This is the 6000 BTU window windmill air conditioner and in this video I'm going to do a quick unboxing and installation and test a few things out
0:07
So let's start with the unboxing. It's going to have these straps right on top which can just be cut with some scissors
0:18
And then a knife to open up the box. Alright, and this is actually one of the biggest box for window AC so far that I'm looking at
0:26
Up top, the first thing I see is going to be this part here, which actually, you know what
0:30
This is just a piece of cardboard, so I'll get rid of that. And then here's some more cardboard, although I do think there is something in here
0:41
And that's correct. We're going to have a few things in here, which is going to include some instruction booklet
0:45
This part looks to be a carbon air filter, the window sash, the adhesive strip
0:50
Oh, that's cool. It even comes with some scissors. Here's some hardware and batteries and this other foam piece
0:55
the other part of this and the remote control and also this box just lifts right out
1:01
this makes it easier to actually move the ac itself i might as well just get all these strips out too
1:25
and there it is and so far this is actually the cleanest unboxing of an AC I've done so far
1:33
I do like the fact that this part for the window is actually automatically installed so I don't
1:38
have to do anything now there's some tape around here so I will remove all this out
1:44
and yeah there it is so these shutters just come right out and again I do like the fact that they are installed so this is going to make
1:57
actually installing the fan on the window a whole lot easier just like that all right let's get this mounted now and I'll be putting it right over here all
2:08
right so before bringing the AC over here we want to attach the window sash and we're going to start
2:13
with the foam piece so this should be cut to the length over here and installed right inside the
2:19
right and the left channel. And then the adhesive foam can be placed
2:23
right on the top over here. But for now, let me just put the unit inside here
2:29
Ooh, now this is pretty heavy, but I could slowly get it in
2:36
There, that looks about centered. And there. and then the shutters can be moved across just like so
2:51
put as down as possible yeah so here's what we have so far and with these shutters yeah these are
3:02
the most convenient ones i've tested out so far because it's automatically installed the only
3:06
thing that i'm seeing here is there's like a little bit of a gap about it's okay because what
3:11
we do is screw this in in a later step but we'll figure this out later since there's not really room
3:16
for this to go in here and same thing over here but there is a hole for the top the other top and
3:24
then right in the center too so let's move on with the next steps so now it's time to secure
3:28
everything into place and there's going to be four screw holes right over here and these are pretty
3:33
easy to go by so you just have to adjust it raise it if you need to and then screw it right in and
3:38
then same thing at the bottom. The issue for this is that there's not a lot of space to screw in here
3:44
This doesn't have enough thickness, so I'm not really going to do that now. So an alternative
3:48
that I found would be using these brackets. Now, they're meant for something like this
3:56
but the same issue arises too. So something I was thinking is, what if we actually use these in here
4:01
like so and then screw it in? Now, this isn't really the function of this
4:05
but that'll be kind of like an idea and then there's also this right here and this is going
4:12
to be the gap cover so after screwing it in here this can just go be placed just like so
4:17
and then the rest of the foam piece can be placed right on top over here just to seal it up and
4:25
then there's also this l bracket so this can be screwed in on the top right over here either
4:29
against here or like against over here but with that out of the way let's move on to the next step
4:36
and that's going to be the panels and this is pretty unique because I've never had this before
4:41
in a window AC these are basically just cosmetic panels and this is to make this part look prettier
4:46
so you don't see the window shutters and you see these clips these would attach over here that's
4:52
why I was saying these have like an actual different function so you'd measure it out cut it
4:56
and then insert it on the side over here a little bit
5:00
There's also these clips to keep it in place and then just clip that
5:05
I'm not gonna do that for now. I'm actually gonna go straight to testing the unit out
5:09
and downloading the app. All right so I downloaded the windmill app and now it time to get started and connected So we can start by turning the fan on turning the AC on And then there going to be multiple buttons over here But for now we just have to hold the Wi button until it starts blinking like this
5:27
And then I'll press add new device. And there, Windmill Air wants to join the Wi-Fi network, so join
5:37
right now connected to Wi-Fi now let me just put the password for this real quick all right that's
5:45
all set so I can join continue now it's configuring device reconnecting back to cloud and then waiting
5:54
for device online all right all set and that's the name of the device I'm going to name it
5:59
something a little bit easier to remember and I'll just say I'll just say like AC and that's it
6:06
and then finish all right so now it's all set and this page pops up it says you're all set now get
6:12
the most out of your windmill experience start earning rewards and helping the environment by signing up for windmill eco rewards and then here's the description of it and now in this case
6:21
i'm just going to ignore this i'm not going to enroll now so i'll click the x button right there
6:26
and then here's the control we have on the ac tells me the name ac online at the upper left
6:32
corner current room temperature is 82 and oh by the way the screen looks like it disappeared
6:38
so let me just press something all right 82 it says the room temperature is 82 and then yep that
6:45
correlates with that uh set temperature is 79 oh okay so this is this is how you could change it
6:54
oops went back to this you could change that there i could change the fan speed from auto low medium high
7:04
i could put fan cool or eco mode and yeah that's basically it for that so once i press
7:11
let's see how long it takes for this to register okay so let me go back to fan and so you can see okay so that was actually pretty quick on the
7:21
screen and then it does take a few seconds for the ac to actually do that and that's basically
7:26
it for the screen on here it's a save the environment and earn cash in three minutes
7:30
really wants me to get started with that up to sixty dollars per year per ac and rewards
7:34
i'll ignore that for now and let's see what else we can find here so here's the rest of the app
7:39
windmill we can see my profile home settings about log out let's go to my profile and actually
7:46
let me not show you this this shows some other information uh home tells me my home my time zone
7:52
my actual address so let me not show that either and then members shows my email and then settings
7:58
settings gives me my language and if I want to keep the screen always on so if I always want
8:03
that to be on which I actually do so I'll keep it like that and then about
8:09
that's basically much it for that part and now in the upper right corner we have a few things so
8:15
let's see what this is this is automations oh that's cool in Korean automation so it says
8:21
some recommended scenarios a basic timer or favorite setting let's see what basic timer is
8:30
you can swipe okay so power switch so wait two hours power switch okay so in other words it turns
8:37
off after two hours i'll just discard that and then let me let me just create one to see what
8:43
it lets me do all right schedule automation will start a specific time of date yeah just to turn
8:48
it on and off at a certain time sunrise sunset automation will start based on the position of
8:52
the sun oh that's kind of interesting device state trigger automation by certain state of the device
8:58
ah okay let's say if like this gets hotter than 80 degrees i want it to turn on
9:06
or between something or something has changed let's see has changed oh if the room temperature has changed like x amount of degrees okay
9:18
okay so there's some customization to do here but now back here we have the notification bell
9:23
which there's nothing that eye screen which again shows me my information here and then the plus
9:29
button if i want to add for another device i guess if i have yeah like there's also a fan that has
9:36
because it says for the fan make sure the lights of the fan are blinking and that's basically much
9:40
it for the controls on this and then time for the controls on the remote control again the same
9:47
things. I could switch the mode. Yeah, the mode, you see fan right there, cool, and then one more
9:54
time, eco, and then that's basically it, and then fan, fan two, three, yeah, there's three different
10:02
settings, and then we go to cool, and then I can go as low as, yep, 60 degrees, and let's see how
10:08
high, and I can't hold it, by the way, it does not keep going. I do have to manually keep pressing it
10:12
And this goes as high as 86. But for now, let me turn this off and then just start with the actual test
10:24
So the first test is going to be with this decibel reader to see how noisy and how quiet it is So let start with the ambient reading And now let turn this on
10:38
And by the way, keep in mind, I'm going to keep it right over here. But where the fan noise is actually coming out of is going to be up here towards the top side
10:47
So we'll do two tests of this. So I'll start with turning it on
10:53
I know I'm going to use my phone to turn it on. Okay, I guess 79 is the lowest it could be. and that's going to be just for the fan and we'll keep it on low for now
11:01
and now let's go to medium
11:18
and now let's go to high and let's start over and this time we're just going to go to low and start with cool
11:33
then also you can see how the settings change right over there and the temperature for this one is going to be 66 with the coldest being yeah coldest being 60
11:43
so i'll leave it there and let's start now again this is going to be low
11:47
now medium and now high
12:01
and we're going to start this all over again this time just with the AC to cool on and I'm going to
12:14
go from the top. So let's just raise this up a bit and I'll go like right over there
12:20
So this isn't, this is kind of directly above it a little bit. Yeah. And this is low
12:33
and now medium and now high
12:44
and let's turn it off all right and we're actually going to stay in this position again because we're going to test
13:00
another thing out now and that's going to be fan speed so actually this might be pretty easy I
13:08
could actually just leave this right over here. Turn it on and I'm going to start with low
13:19
and this is going to be for the cool. Oh yeah, let me actually put different units. So
13:31
there, miles per hour. So for the low setting, it's going to be roughly a little under eight
13:37
miles per hour. Now let's head over to medium. This is going to about...oh it keeps going up
13:56
Yeah so it looked to freeze at about ten and a half. Oh, still going more
14:00
Actually I have to hold this here. Yeah. So the difference is actually changing a lot
14:08
but it looks like yeah, around 11 miles per hour. And now let's go to high
14:21
Oh, we shot up to over 13 and now we're back to 12 and a half ish
14:26
Yeah. So around 12 and a half miles per hour now. All right
14:30
Turn that off. And now it's time for the next test. and that's going to be with some temperature readings
14:36
and also seeing what the wattage is. So actually with the fan fully turned off
14:42
here's what it looks like. We're going to be at 0.7 watts
14:46
Here, you can get a better view right there. And then let me also turn on
14:53
Also, let me back up a little bit so you can get a different view of it. And now keep in mind
14:58
since this has been on during the other tests, probably is going to be colder than we'd expect it to
15:03
uh yeah like look right over here yeah actually everything is blue whoa
15:07
it's kind of hard to differentiate what is what so here let me go up
15:14
yeah and you can see my skin for example i'm around 90 and a half degrees fahrenheit
15:23
so actually uh let me let this warm up a little bit so it can be a bit more of an accurate reading
15:29
and I'll be back in about five minutes. All right, so it's been over 10 minutes
15:33
and here's what we still have. So there's like a little bit better of an outline now
15:37
Oh yeah, you could see. Up top, actually let me see where the top would be
15:44
Right over here okay So it referring to this part right here Yeah this part right over here that going to be the hottest which is going to be at 87 degrees And the rest of the unit
15:58
of the body is about 82.6 degrees Fahrenheit. You can see that right at the top. Let's check
16:03
the window shutters, which would be right there. Okay. Let me point to it. Also it's morning time
16:12
right now, so it's not gonna be the hottest, the sun isn't hitting my porch
16:16
yet here. It's 82.4 degrees Fahrenheit. Alright, so now it's time to turn this on
16:20
and I'm gonna start at low fan speed and we're gonna go to the highest
16:26
temperature possible, which is gonna be 86 and actually the room temperature is 84
16:33
but that's fine I'll leave it at 86 and I'll see what this comes down to. It's
16:38
It's currently 807, so I'll be back in 10 minutes, and then we'll read the temperature
16:42
and then do that again a few times. So I'll be right back. Also, one more thing
16:46
Currently at low mode, it's going to be 439 watts. Now I'll be back in 10 minutes
16:51
All right, so over 10 minutes passed, and now let's check the wattage. It's going to be at 61.4 watts
17:00
61.8 now. And now let's check the temperature. And okay, let's go to that hottest part again
17:04
How this part is at 85.4. And then now back to the body
17:12
Body is at 81.5. And also, let me actually check on the top where the vent is actually coming from
17:20
And that would be at 82.8. And here, so you can get a better view of this
17:27
So here's the top of the vent. 81.9 degrees Fahrenheit. All right, so now let's do this again. Let's get over to, yeah, let's decrease this to about
17:41
76 degrees. I'm also going to keep that in that low fan speed again, and I'll be back in another
17:48
10 minutes. All right, so another 10-ish minutes passed, and now it's currently at 573 watts
17:57
575 now. And let's see what the temperature reading looks like. Oh, so we can actually get
18:03
much clearer picture of everything there's a huge separation so let's go
18:08
with right over here this looks to be the cool this part and this is 72.9
18:14
degrees Fahrenheit let's go all the way to that hottest part here and that would
18:20
be 70 or 80 81 and a half degrees Fahrenheit and now let's look at the
18:28
top so I will have to move this camera over like this so you can get better
18:33
readout and yeah this is where the cold air is coming from in there yeah you can clearly see it's a lot colder let's go right there and then you could see this
18:41
is about 50 about 50 degrees Fahrenheit okay now let's wait another 10 minutes
18:49
but let me also change the settings for this and instead of 76 let's go down to
18:57
actually you know what let's go down to the coldest setting which is going to be 61 degrees fahrenheit
19:01
and i'll be back in another 10 minutes all right so it's been over 10 minutes and let's check out
19:05
the wattage and this is going to be 571 watts and now let's look at the temperature
19:13
now at the coldest setting here this looks to be 72 72 73 degrees
19:21
let's go up over here on the top of the frame and this is going to be
19:27
77 degrees fahrenheit and now once again let's go all the way to the top
19:32
where the coldest part is right over there and this one's going to be 46
19:41
oops moved a little bit at the coldest setting it'll be about 49.6 degrees Fahrenheit. So that's pretty much it with the windmill air conditioner. Again
19:56
this is 6000 BTUs. He's a little remote, very easy to use, very easy to control. And this is
20:02
one of the most cleanest, minimalist looking ACs that I've tested so far. If you're looking for
20:07
something beautiful, something that doesn't stand out or stick out too much, this is the way to go
20:12
It also does have those shutter covers that I didn't install, but I'm sure installing them would make it even look more low-key
20:19
On top of that, also protect it more so not a lot of heat escapes through here
20:23
which actually doesn't seem to as much compared to other ones I've checked out
20:28
Now there's a few downsides. First of all, it's going to be this over here
20:33
Usually the vents are here so you are able to control it. So if you want it to shoot a certain direction, you can
20:38
In this case, it's always going to shoot up. You can think of it as a good or bad thing
20:42
Bad because you can't control where it goes. Good because it'll basically cool the room upwards
20:49
But the other thing too that I noticed is here, a little loose over here
20:54
And I guess because of my window, I can't really screw this in very well
20:58
But yeah, that's basically it for the downsides. Again, if you're looking for something beautiful, something very minimalistic looking
21:04
definitely check out this windmill
#Computers & Electronics