Up next in 10



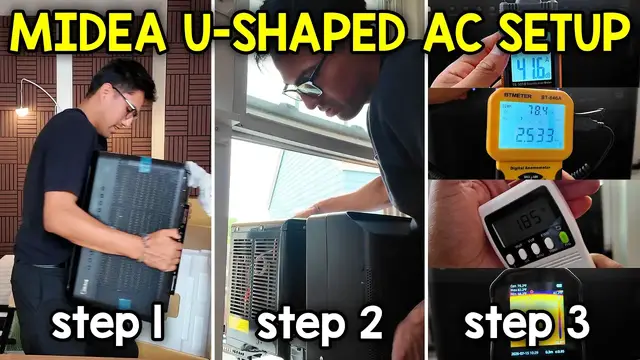
Midea U Shaped Window Air Conditioner Full Setup and Testing
Show More Show Less View Video Transcript
0:00
This is the Medea 6000 BTU window air conditioner
0:02
and in this video I'm gonna do a quick unboxing installation and go over some tests
0:07
So let's start with the box itself. This is a pretty hefty looking box
0:11
This is 21 inches by 17 and a quarter inches by 24 inches
0:17
Now I could just grab a knife, just to slice it on the sides. And ooh, there's a bunch of stuff up top over here
0:28
Let me actually show you a different angle So you can see too. And this is what I'm talking about
0:32
Everything is neatly packed here. And the first thing I see is going to be instruction booklet
0:37
Also with some other things attached. We're also going to have these two foam pieces
0:41
A large bracket with some hardware attached here. Some other brackets and an L-shaped one
0:48
The remote control which feels pretty hefty. There's also a screen on it as well as two AAA batteries
0:55
And then this foam piece can just slide right up. more foam and in here there's going to be some other things too
1:11
which includes the window sash the adhesive strips and these other foam pieces with an
1:17
adhesive on the back and actually there's some more foam pieces here too with an adhesive
1:21
Alright so getting this out looks to be kind of difficult but let's see what I can do
1:30
I think it will be easier if I put this down first
1:35
Alright this might not be the best idea but because it's just me I just turn this sideways
1:42
and I can kind of pull it out a little bit. oh there just like that yeah and this is one big hefty window air conditioner it's going to be very
1:59
wide but for now let me just remove some of the tape around here and i want to go over a few
2:05
measurements for you. So this is going to be a 19 and an eighth inch by about 13 and a half inches
2:17
by 22 inches. And let's take a look at the front of the face. So this looks to be, yeah
2:25
where I could open and close this. And then we can also control this. Oh, oops, looks like this
2:30
part popped out. So let me put it back in there. And yeah, I could just kind of move this around
2:35
And there's going to be these two different sections, left and right. And now there's one, two, three, four, five, six, seven, eight, nine, ten different buttons around here
2:44
And one thing worth noting is that I do have to be very careful with this because as I move it, this does get squished
2:50
So when I install it to the window, I am going to be pretty careful about it. There's this white thing here
2:56
I guess that's going to be to attach to the window. And right here, oh, there's these rockers
3:01
I guess you can move them there or tilt them out of the way and I'll figure out what I have to do
3:05
when I install it and here's the back side so now time to install this all right so the first step
3:12
is to install this main bracket in the window so let me just open it up and here's what it looks
3:18
like and there's going to be one arm missing on the right side and this does come with two arms
3:23
you're going to have a short arm that looks like this and alarm arm like this so depending on the
3:29
size of your window you might want to use the long one but in my case I'm going to use the short one
3:33
since this is a pretty small window and installing this is pretty simple you just line it up like
3:38
this there's going to be like these divots put it in there pull the pin outward and it can go all
3:45
the way and there and now it's time to line this up over here so these legs come off pretty easily
3:51
here when it's closed they look like this and when open they can just like droop downwards
3:56
like so and then there's going to be these two pins right over here you just hold both of them
4:04
and then push it depending on how far back or how far forward you want it to be
4:08
and so let me just put this right here and the first thing I want to do is to line up the feet
4:15
on the outside so I will bring these closer inside this is going to go against the wall and
4:24
this is just to make it easier so I can go hands-free and actually adjust this part so this is
4:29
this is roughly centered. Actually you know let me move this more here and that looks about centered
4:40
and here's what we have so far so before moving on to next step we have to check the level
4:44
and this is completely off. We want the bubble to be more towards the front so it has to be
4:52
like this oops like this and this is so it's tilted correctly so what I'm going to do is move
4:59
these brackets a little bit more back so right now it's yeah it's about at four actually it's
5:04
not even clicked into place yet so let me move it back a little by holding these two buttons
5:08
and moving it I'll move it to about six just like that and same thing for this one
5:15
there so they're clicked onto place and here's what we have now this is more towards the front
5:27
yeah that's good okay that's good so now it's time to secure this in place with some screws
5:37
and i'm going to start with the half inch screws these are going to be the smallest one in the
5:41
baggie and they can be right here and then the one and a half inch screws can just go down here
5:45
and as you see this is really not going to be enough space so I'm not going to be installing
5:51
these I'll just be installing the ones on the side. All right so this is as secure as possible
5:55
this is good. So it's almost time to move the media to the window but first we got to unscrew
6:00
this over here just to make our job easier when we actually install it and in the meantime there's
6:05
also going to be some tape in here so I'll just remove that too. Now that makes way for the anti-tip
6:11
arms to be able to move. So here you can get a closer look at what I'm talking about. So
6:16
for starters these can be moved upwards like so And then this piece can be slid out
6:30
Just like that. And same thing for the other side. I'm just going to slide it a little bit
6:34
And again, this is just to make my job easier once I place this in the window
6:38
But yeah, that's basically it for that. So now time to move this to the window. So if you have two people
6:43
use two people. Otherwise, be very careful. So I'm just going to put this here
6:48
I'll open this back up again and just slowly move this into place and by the
7:00
way if you look at the bottom there's gonna be these brackets right here right
7:04
there so they have to slide into place so I actually have to move this back a little bit more right around there then there hopefully you can see what I'm
7:14
talking about this right over here these so they slid into the slits over there now it's time to
7:21
install these side foam pieces and depending on the type of window you have you can either just use this or you'll have to install the other piece on the bottom as well too in my case i will use i
7:30
will need to use this and one thing i noticed too is i actually can't push it all the way back because
7:35
if i do the window is not going to close so i actually have to pull it a little bit more forward
7:39
towards me. So this might affect how this is but I'll figure it out. So time to
7:45
measure it. And I'm gonna measure it from here, from the back of this to about this
7:54
So this is about four and a half inches on this side and four and three-fourths
7:57
on the other. So actually I have enough just to use one foam piece which is good
8:02
all right that's one now time for the other one actually you know what I cut it wrong
8:12
this is the longer one but that's fine still end up working out and then we'll do it for the other side too right there
8:19
this one can be at the bottom of this this right over here
8:30
So this one is for this side, this is the shorter side
8:38
And now it's time to grab some of this, here, some of this adhesive
8:44
And the way we want to do it is face it towards the inside. So this is going to be the bracket
8:49
We want it to be right about here and just go like this towards the bottom
8:54
It looks about right. And I can cut right here, there. And then same thing for this other side
9:05
All right, now time to install these pieces up here. So let's see how easy or how hard it is
9:10
And I'm gonna start by lifting this upwards. So let me push that in
9:15
And put this right in here. So this way when I push it down, it'll squeeze into place
9:26
Also, let me make sure the window closes. Yep, kind of closes with a little bit of pressure, but that's fine
9:36
And then yep, this still does come out. So I can push this in like this
9:41
And now same thing on the other side. Alright that's nice and secure
9:55
Oh and actually I'm going to push this down even more. I think I pushed it enough
10:02
Now this piece does come off. Now it's secure. And now we want to get back to those screws that we took off and then screw them in
10:09
Alright so if you can see right over here is where I got to screw it in
10:13
So I'm going to be using the screwdriver. probably be a little bit easier. Wow. I said easier, but it's still actually kind of hard
10:24
to fit my hand through here. All right, there. All right, perfect. Good on that side. Now
10:31
let's move over to the other side here. And for this one, okay, right over there. So I actually
10:35
have to move it a little bit less. And now it's working. All right, that looks to be tight enough
10:40
Now let's see if this actually closes. So here it is. So the lip just catches there so I do have to give it a little bit of a tug
10:55
That's how it is. So hopefully that's still okay. Hopefully that's not a lot of pressure on it but that looks to be alright
11:03
Now one more thing that I forgot to do is actually put the window sash right over here
11:07
and we're going to be using that same adhesive strip. So thankfully we do have enough stuff
11:11
I'll just put this kind of like right around here. That looks good so far
11:18
Going back to closing it. Tilt this towards me a little bit to make it easier. There
11:29
Actually there still is a little bit of a gap in here
11:33
Yeah so what we can do is put some other foam pieces. And so I'm talking about right over here
11:38
So there literally is like a pretty big gap. So we could just put like a little bit of this foam or it does also come with this
11:45
But I'll leave it like there for now. Now it's time to add the window sash and this is going to go to the top part over here
11:52
And so this is about here all the way to there so I'll cut it right over here
12:01
And then you can also install this sash bracket over here whether it be there or over there
12:06
I'm just going to leave it as is. That looks good for now. Alright, so everything's installed and now it's time to go over some of the buttons and
12:12
also the app. So there's a total of 10 buttons. I'll start by turning it on
12:17
And it's pretty cool. This automatically starts lifting up. Hopefully you can get a good view of that
12:23
And now the app I downloaded, the old app was called Medea Air and it's now M Smart Home
12:30
which looks like this. Let's go over some of the buttons. We have the connect, which I'll probably have to press
12:35
in order to connect to wifi. We got a timer eco mode different modes Change the temperature with these buttons If we want fan cooling swing and then on off but yeah we go over that a little bit later for now let turn
12:52
this on so I'll press also there's doesn't seem to be like a vibration going
12:57
on right now so when I hold this it stops making a noise but when I let go
13:01
this vibration and I'm not sure exactly where that is coming from
13:08
alright it stopped I'll leave it like that for now but now let's just connect
13:13
the device so I'll click on it's back again alright we're just gonna ignore this for now I'm gonna click add device it said before you start make sure your
13:21
device is powered on so powered on hello while using app searching device is ranked so air conditioner right there
13:29
so I'll click add then let me just add my password alright so device is
13:34
connecting now. Alright, sweet. Air conditioner's on. And I'll put this room as the living room
13:41
Click done. Alright, so here's a look at the app so I can control it from my phone
13:47
manually or from the remote control. And this thing is pretty hefty too. I already added the
13:53
batteries and this is the longest and heaviest remotes that I've checked out so far
13:57
I think this also has a screen yeah it's actually pretty cool uh but before this let's go back
14:04
to this instead and so oh this is cool I can just slide it this goes all the way down to 60
14:11
as high as 86 or I can just do it increments of one with this whoops or I can do it with
14:17
increments of one like this now it's currently set to auto mode but we can also change that
14:22
We have cool, we have dry, and then we just have fan. Up and down
14:33
So I don't know what that means, up and down. Yeah, I don't really think that's changing anything
14:37
My favorites. All right, so skip. So I can add some things to my favorites, but
14:42
I'm not going to mess with that for now. And then there's also eco mode. It proves efficiency while
14:47
maintaining comfort. All right, there's energy monitor. So monitor your energy usage by compare historical data
14:57
So it says 19 watts now. Smart guard. Smart reminders protect your home and prevent energy waste while you're away
15:05
Okay, so I can get some reminders for my AC runtime or if my AC is left on
15:11
Heat guard. Here's some other stuff as well too. So if the temperature reaches like a certain threshold
15:18
I can automatically, I can basically set something to happen. so I can turn on the AC and it'll cool to whatever temperature I desire and then turn it off after
15:25
so-and-so and then we can also have a push notification let's go back we have flash cool
15:32
so reach set point temperature faster while in cooling mode okay so it'll turn off when the room
15:39
temperature reaches a set point temperature or the running time reaches the remaining set temp
15:43
if neither set flash cool will remain on okay so I'll cancel that back to eco mode leds turn on
15:50
or turn the AC LED's display on or off. So let's see, it's currently on and let's see if this all shuts off
15:56
Yep, it shuts off. This is pretty instant. Sound, turn the AC sound on or off
16:01
Okay. So this time when I change something like this, there's not going to be a beep
16:05
And I think I'd rather not have the beep. It's kind of loud and annoying. And we're back to the vibration again
16:12
Yeah, if I lift this up, it stops. Yeah, so testing this out might be a little bit hard
16:17
because the readings are going to be skewed for the sound because of this so I have to figure out a way on how to fix this but for now let's
16:24
continue with the app yeah that's basically it for down at the bottom left hand corner
16:29
okay so this gives me a time and schedule if I wanted to start at a certain time
16:33
or stop or just the timer yep that's the schedule there and then bottom right operation monitor
16:42
okay so this will tell me oh this will give me some data based on like I guess usage
16:47
and what modes are used. And I could check. Okay, check to see if my fan is working fine
16:58
And I could reorder the way these are set on the main menu. Now that's basically it
17:05
Here's the other menu. Here's some other stuff it shows. And if I go on the back button
17:11
this is just more into the app, so if I want to put more things here, I can
17:15
For now, let's go back to my AC. and that's basically it. So now what I want to do is check, this is very loud and annoying actually
17:29
Yeah, even if I push it upwards, it's still loud. And by the way, right here the fan is currently
17:33
set to auto, but it looks like we can change it to different amounts. So let me go to
17:39
I'm going to check different amounts. I'll check 25, 50, 75, and 100. But for now, let me turn the
17:45
whole unit off and we're going to see what the noise is without anything on
17:50
Oops, so here's the decibel reader and we can see what the ambient noise is like
17:55
starting now. Now let's turn it on. Fan speed low 1%
18:12
Let's let that kick in a little bit first. Okay air is shooting out
18:28
Let's go to 25% now
18:45
Let's head over to 50. Now 75 And finally 100
19:34
All right, so this is very interesting because the AC is not acting up now. It's actually fairly
19:39
quiet. And either way, I probably wouldn't crank it up all the way. I'd probably just leave it
19:43
lower so it doesn't make as much noise. But even right now, it doesn't seem too noisy
19:48
surprisingly. But let's move on to the next test and see how fast this actually ends up blowing
19:54
depending on speed. And we're going to start all the way back to 1%. About 2.5 miles per hour
20:01
almost 2.6 oh now it's over 2.6 now let's change fan speed to 25
20:18
it went upwards of four miles per hour kind of maintaining at 3.7 3.8 now let's change to 50
20:31
Oh, and there's that noise again. This is around 4.7. Reached 4.8 before
20:45
Yep, there was 4.8 miles per hour. Now let's try 75%. About 7.5 miles per hour, 7.6
21:01
Now let's go all the way to 100%. Alright, it's about 8.9 miles per hour
21:10
Alright, let me turn this off. Alright, so now it's time to check the wattage and the temperature
21:17
And when it's currently turned off, this is going to be 2.4 watts
21:21
Let's also check this. Now this is going to be skewed at the moment
21:27
That's because I currently turned it on. Yeah, we could see this is like very bright blue
21:31
It means it's going to be cold there. Yeah, 67, 68 degrees Fahrenheit
21:36
And then towards the bottom of the body. Actually, right there, this is the hottest part
21:41
That would be 81 and a half. But I'm actually going to do, I'm going to wait about 10 minutes
21:48
I'll come back so then I can check the temperature again. And then we're going to be doing the test in different increments
21:53
All right, so it's been more than 10 minutes. It's actually been 15. So let's see how the temperature changed here now
21:58
So this is the top, and actually let me open this vent up so you can see a little bit more. There, that looks to be about 76.1 degrees
22:05
Let's go on to the body. Here's the coldest part in the body. That's around 78.6
22:12
And now towards the sides. Oh, the foam piece, actually towards the foam piece
22:18
Actually, let's see. It's kind of hard to see where the foam piece is. I think it's like right down here
22:23
Yeah, let me put my finger there. Yep, that's the foam piece. And actually, surprisingly, that kept it pretty cool
22:28
didn't go too much that's 81.9 degrees all right but now i want to turn this on again
22:37
so low fan speed is 40 medium fan speed is actually yeah medium is 60 and then high fan speed let me let it update a little bit
22:50
high fan speed is 40 so we're going to just do the medium fan speed here
22:58
which is going to be that 40 and i will be right back in 10 minutes to see the difference
23:07
all right so it's been 10 minutes and this ac got noticeably quieter that's probably because
23:13
it already reached the desired temperature so let's check this out yeah we're at 63 degrees
23:19
Fahrenheit. And then over here on the side, we're at 75, 76 and a half degrees Fahrenheit. All right
23:27
so that's time to change it up. And I actually did this a little bit backwards because I wanted
23:31
to test out fan speed at 50%, but it's okay. We'll leave it at 40% and I want to change
23:36
the temperatures. So it was at 77. Now let's go to, let's go all the way to 60 now and let's give
23:45
it another 10 minutes and then be right back. All right, so it's been 10 more minutes, so now let's
23:50
check this out. And we are at 185 watts. And now let's go for this all the way at the coolest
24:01
setting in the center. That's at 61.2 degrees Fahrenheit. And now back to the body. That's
24:10
75.9 right over here. This is where that foam piece is and that would be at 81
24:17
80.8 degrees Fahrenheit. So this started getting quiet and now it's actually clicking again too
24:23
Which would probably be the most annoying thing, but that's basically it for the tests and when I turn it off
24:28
Here's what it looks like the vents actually begin to close as well too right now. That's pretty cool
24:35
But yeah, again one of the most annoying things that I found with this madea u-shaped one was just that like constant
24:40
clicking noise pretty sure that's user error because I didn't install it right and also I
24:45
wasn't even able to install it that properly because of how this window is but still did what
24:51
I could added some more foam pieces so I'm glad they came what's a lot or it came with enough for
24:56
me to actually be able to do it installation was harder than all the other window air conditioners
25:02
I tested out but this does look pretty cool it does work I do like the fact that it also does
25:07
have an app and also it comes with one of the beefiest looking remotes so far yeah this feels
25:14
quality and one more thing actually I forgot to let you know is about the air filter we can just
25:20
pull this right off just like this and then here's the filter itself
25:23
and this is what it looks like but yeah that's a quick look at the Medea U-shaped window air conditioner
#Computers & Electronics