Up next in 10

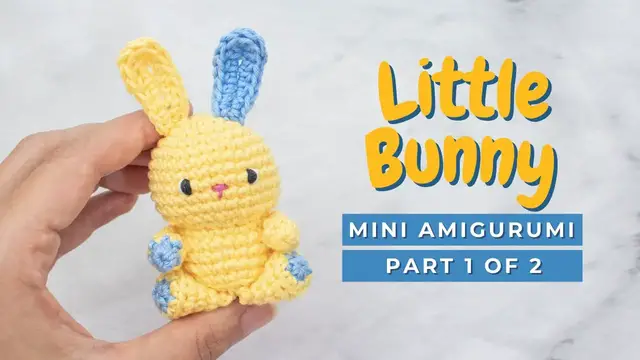
How to crochet a bunny! QUICK Little Easter Bunny amigurumi tutorial pattern PART 1
Nov 4, 2022
How to crochet an amigurumi bunny! A complete bunny crochet tutorial for a quick crochet project!
Chapters:
00:00 Amigurumi Bunny materials
00:51 Bunny head
07:02 Bunny body
11:52 Bunny ears
You can find the complete mini bunny crochet pattern free on my website here:
https://littlecrochetfarm.com/quick-bunny-amigurumi-free-pattern/
For a low cost (3 USD) and printable pattern, you can find it here:
Ravelry: https://www.ravelry.com/patterns/library/little-bunny-amigurumi-6
Etsy: https://www.etsy.com/listing/1200845798/mini-bunny-amigurumi-pattern-quick-bunny
If this video was helpful to you, consider supporting my channel by doing one of these little actions below:
★ You can like this video, or
★ You can share it with your friends on social media, or
★ You can purchase a low-cost printable version of this Little Bunny crochet Amigurumi pattern to follow along here:
https://www.ravelry.com/designers/ana-carolina-figueiredo
Show More Show Less View Video Transcript
0:00
Hello there, it's Anna here and welcome to Little Crochet Farm. Today I will show you how to make
0:05
this tiny little cute bunny. Look at this, how pretty this is. It's a fast crochet project that
0:13
I made. It's a last minute one so I really hope you enjoy. Look at this tiny bun in his butt. Super
0:20
good. I worked with different colors so it can inspire you with your creativity to explore your
0:27
creativity and use different colors, make your combinations. For this I use a cotton
0:34
yarn again and, as always, a 2mm squirt hook. All the information is in the description
0:40
below, to the link to the written pattern, but for now let's start working this cutie
0:46
Okay, great. So here we'll start with the magic ring or a magic circle. If you don't
0:57
know how to make a magic ring, there is a link in the description below with the complete
1:02
tutorial, alright? Or if this is too fast for you, the tutorial dedicated only for the
1:08
magic ring, it's a slowlier, alright? So here I work 6 single crochet in the magic ring
1:16
just remember for every stitch and technique I used here there is a link in
1:21
the description 1 2 3 4 5 6 with the technique I used okay in more slow more
1:28
in-depth alright so here I close the circle and we'll move on for round number
1:34
two here we will work the increases so for the second round you will work six
1:40
increases alright and when I say increase that means you will crochet two
1:45
single crochet inside one stitch. So here is my first and here is the increase. So here two
1:52
single crochet inside one stitch. So this is the next one single crochet, another one. So
2:00
two single crochet inside one stitch, that's one increase. So I will work all the way around
2:08
And here once you're done, this is what I like to do. It's optional to you, but I like to double
2:14
check the beginning of my tail. So I insert the needle in the first round of the toy. Okay, so I
2:21
pull it tight so it makes sure that this round will always be very nice and closed and nothing
2:28
will unravel. Okay, so this is what I want to show it to you because we will repeat this couple of
2:33
times in this video. Okay, so now we move on for the third round and here I will add my stitch
2:41
marker. In my case I like to use a piece of a different color yarn. And for the
2:48
third round we will work one single crochet, one increase and repeat six times
2:53
You will have 18 stitches at the end of this round. So this is my increase. Okay
2:59
so two single crochet inside here and you're gonna repeat this around. So one
3:04
single crochet here, one increase, one single crochet here, one increase, all the
3:09
until the end and I will catch you up here. So moving on now for round number
3:14
four, you will work two single crochet, one increase, repeat six times and you
3:19
should have 24 stitches at the end of the round. Always count how many stitches
3:24
you have, okay, at the end of the round. This is a very nice tip. Okay, so here we
3:30
have one, two single crochet and here is the increase. Repeat all the way around
3:36
increase and I catch up here Super good This is how it should be looking like Now we go for the round number five and this is the last round with the increases for now So you will work three single crochet
3:50
one increase, repeat six times, and you should have 30 stitches at the end of the round
3:55
Remember, count how many stitches you have. Okay, it's very nice to keep it on track and know that
4:01
you have the correct amount of stitches, so you don't have surprises at the end of your round
4:05
So here we have 1, 2, 3 stitches and increase it here. 1, 2, 3, increase here and repeat all the way until the end
4:14
Alright, so here we achieve the size of the head we want. Now we will work on the length
4:21
So for round 6 to 11 you will work 30 single crochet. Okay? So this means you will work round 6, 7, 8, 9, 10 and 11 only with 30 single crochet
4:33
All right, so six rounds here only with 30 single crochet and I will catch you up
4:40
Super good. You see so we have it here the size Let me show you this. This is the last round with increases. You see this stitch here
4:49
This is one increase one stitch here other here. You see there it's a V
4:55
Okay, now this is one round second round third or four, fifth, and sixth round here. Okay, so we have six rounds with 30 single crochet. I like to show
5:07
you this so we can know where we are here. All right, so for round 12, you will work one single
5:16
crochet, one decrease, following by another decrease. Okay, so we'll work here slow. This way
5:23
when you repeat six times, you will have 18 stitches at the end. So here I'm working the first
5:28
decrease. So I'm using here the invisible decrease. There is a link in the
5:32
description below and in the top right corner here of this video. So just the
5:38
front loop of the stitches for the invisible decrease. So this is the second one
5:42
Alright, so this is the pattern for this row. One single crochet, one decrease, one
5:48
decrease and then you repeat all the way around. So here is my second repetition
5:51
one single crochet, one decrease here, following up by another decrease here
6:00
All right, so I leave you here, work all the round and I will catch you up for round 13, okay
6:08
Super good. So here we have now the, this is the head that we are working on it
6:13
so for round 13 you will work 18 back loop slip stitch so you grab only the
6:21
back loop of the stitch and you make a slip stitch alright if you don't know
6:27
how to make the back loop slip stitch or what is the back and front loop of the
6:31
stitch just check in the box below or leave me a comment I will happy to
6:36
clarify for you so what we want to achieve here is this line and you see
6:41
here the remaining front loop of the stitch. Great! So once you've finished the round number 13
6:48
this is how it should be looking like and we will stop here a little bit for adding stuffing material
6:54
Okay, so I'll move fast forward here, it's just adding the stuffing material, add as much as you
7:00
want and now let's move on. Let me show you one thing here. You see this line here is the remaining
7:08
front loop, okay? This is the slip stitch that you work on the previous round, round
7:14
on number 13. This is the remaining front loop of the round 12, alright? And it's on
7:20
this loop that we will work for the next round So here for round number 14 you will work 2 single crochet 1 increase repeat 6 times and you should have 24 stitches at the end of this round So this will be the body of our tiny bunny okay So here is second single crochet
7:42
and my increase here so one and one more inside this same
7:53
stitch Repeat all the way around and I will catch you up at the end
7:58
Super good. So this is how it should be looking like. You see this is stitches here
8:03
This is the slip stitch that you work for the round 13
8:07
Now we will work here the size of the body of our bunny
8:11
So you will work round 15, 16, 17 and 18 just with 24 single crochet
8:18
So you will work here four rounds only with 24 single crochet. Okay, so you can stop the video here and I will catch you up at
8:29
the end of round 18. Great, so this is what we have. Look at this very nice. So
8:37
this is the round with increases here. You see this is the increase. So 1, 2, 3 and
8:42
4 rounds. Alright, now let's move on and continue working for round number 19
8:48
you will work only in the back loop of the stitch, okay? So on the back loop you
8:54
will work two single crochet, one decrease, repeat all the way around six times, and
8:59
you will have 18 stitches. So here I will go slow with you, so this is my two
9:05
single crochet, and now you will do the invisible decrease on the back loop, okay
9:11
So grab the two back loops here, hold it, you see this little loop here? Hold it
9:18
here so you can pass through here easily okay and finish your single crochet your
9:26
decrease alright so let me work here one more repetition with you so one and two
9:31
back loop single crochet and now the back loop invisible decrease just the
9:37
back loop that's great alright yarn over inside the two loops hold it here so
9:45
easier for you. This is just a little tip if you don't want to do it to hold it
9:50
that loop. So we have this line this is what we want. Super good, once you finish
9:56
this is how it should be looking like. You see why we work with the creases on
9:59
the back loop? So we have this effect of turning to the inside so our bunning
10:05
will be nice and steady. So add here a little bit of stuffing material because
10:10
we're finishing the body and now let's work our round number 20 and this is the
10:16
last round of the bunny body, okay? So here you work normally in the all the
10:22
loops of the stitch you work one single crochet one decrease repeat six times and
10:27
you'll have 12 stitches at the end of this round which is when we will stop
10:32
okay here so repeat and I will catch you up at the end of the round super good so
10:43
now here you cut this thread insert in your sewing needle or in your tapestry
10:51
needle whichever needle you're working with and now here for fastening this off
10:56
you will grab just the front loop of the stitch, okay? So here I introduce here my
11:03
embroidering needle, just grabbing the front loop of the stitch. So this is one
11:09
front loop only front loop again you take all the front loop of all these 12 stitches I will move fast forward here and I will catch you up now here at the end You pull
11:25
it tight so it will close you see this last round and we will repeat as we did
11:35
in the beginning of the video. Here we will double check that this is close and
11:39
and nice tight, inserting the needle here in the last round, okay
11:46
Now you can fasten this off and hide the remaining tail inside of the toy
11:52
There is a link in the description of this video also showing you how I fastening off all the toys, okay
11:59
So let's move on, now we'll start working the bunny ears. So this is a very nice and fast ears to work. You will chain seven here
12:09
so I'm still working with the yellow color and you chain seven or five six and seven okay one two
12:22
three four five six seven you will skip the first chain and you'll start working the second chain
12:28
of the hook and this is the pattern that it's showing up on the screen so we will go slow here
12:34
Okay, so first you work two single crochet here in the first two chains, and then you work
12:42
three half double crochet. So this is one half double crochet, yarn over inside the chain
12:53
this is the second half double crochet, and the third. So now we arrive here at the last
13:01
chain of the foundation round, roll, and you will work here five double crochet, okay
13:09
So this is one, and you will start turning clockwise your work because we will work
13:15
in the other side of the foundation chain, okay? So this is the second one
13:23
now the third double crochet here, okay one two three working on the fourth and we should have five here at the end so this is my
13:38
last double crochet super good you see here we turn clockwise over detail one two three four five
13:52
Now we work again three half double crochet. So here this is one. Okay, now second half double
14:07
crochet here. This is two. And the third one here. Now we'll have two remaining chains here at the end
14:20
and you work two single crochet. So this is one and two. Great look at this, this is
14:34
your little bunny ears. So let me just cut this remaining tail here and now you
14:40
cut this yarn and you leave a little bit for sewing later. All right and now you
14:47
you should make another one. In my case, because I want a colorful bunny, I make
14:52
one year in each color, so the contrast color I'm using here is the blue, okay
#Crafts
#Fiber & Textile Arts