Up next in 10

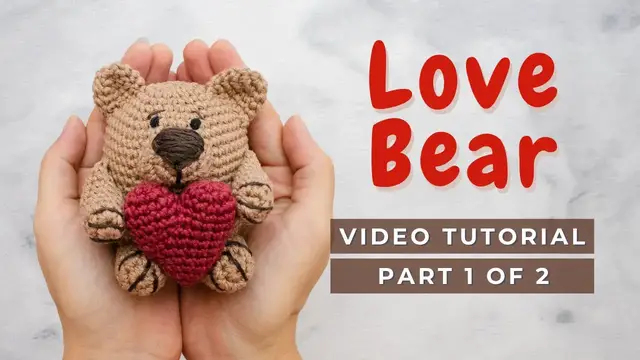
Complete tutorial for this loving Chubby Bear crochet toy! The Teddy Bear crochet pattern is super easy and fast to make! Great stuffed animal DIY project for Valentine's day!
For part 2: https://youtu.be/vCA72Arg_30
Chapters:
0:00 Love bear materials
0:35 Body
13:34 Ears
14:24 Back paws
17:06 Snout
17:16 Front paws
You can find the complete Love Bear crochet pattern free on my website here:
https://littlecrochetfarm.com/chubby-valentine-bear-free-amigurumi-pattern/
For a low cost (3 USD) and printable pattern, you can find it here:
Ravelry: https://www.ravelry.com/patterns/library/love-teddy-bear-amigurumi
Etsy: https://www.etsy.com/listing/1162504205/love-bear-amigurumi-pattern-valentines
If this video was helpful to you, consider supporting my channel by doing one of these little actions below:
Show More Show Less View Video Transcript
0:00
Hello there, it's Anna here and welcome to Little Crochet Farm
0:04
Today I share this chubby bear. If you have following me here already, you knew that this pattern was coming on
0:13
This is the version for the valentines I make. I use 2 mm crochet hook for this bear and it's the first of 4 patterns that it's about
0:23
to come here for the valentines, alright? So we'll start first with this very easy to do chubby bear
0:31
Let's move on to the pattern. Great, we start here with the magic ring
0:40
If you don't know how to make a magic ring, there is a complete tutorial with the link
0:44
in the description below. But here you can pretty much see how it's done
0:50
Alright and now you will crochet 6 single crochet inside the magic ring
0:56
Okay, so here I will go through all the six single crochet inside this magic ring
1:05
If this video is too fast for you, check the complete tutorial for the magic ring
1:11
There I show you how I hold the yarn, how my fingers are positioned so the magic ring is easy to work with
1:20
Alright, so here 1, 2, 3, 4, 5, 6 single crochet. I will pull this yarn to close my magic ring
1:29
And we'll move on for the round number 2. For the second round here you will start with increases
1:37
So you'll work 6 increase. Having a total of 12 stitches at the end of this round
1:44
So here what you do is you crochet 2 single crochet inside 1 stitch
1:48
stitch that is a increase alright so here one single crochet and another one
1:54
inside the same stitch right one single crochet and another one inside the same
2:02
stitch and you do this repetition all the way until the end and it should have
2:08
12 stitches here I wanted to show you how I fastened the beginning of my yarn I
2:15
I like to do this at the beginning of every project of mine, so I guarantee that the center
2:23
is very nice, neat and closed, tight closed. Alright, so here I insert the yarn inside the first stitches of the round
2:39
Ok, this is super good. Now I will add my stitch marker here in the last stitch of the round
2:51
In my case I just use a different color piece of yarn
2:57
And for round number 3 you will crochet 1 single crochet, 1 increase, repeat 6 times
3:03
and you should have a total of 18 stitches at the end
3:08
I always suggest you to count how many stitches you have at the end of every round so you make
3:15
sure that you are on the right track. Okay, so here 1 sc and 1 increase, repeat this all the
3:22
way until the end and this is how it should be looking like. Alright, so now we move on for round
3:29
number 4 and here you will crochet 2 sc, 1 increase, repeat 6 times and here you should
3:36
have 24 stitches at the end of this round. So just work 2 sc here and now my increase
3:45
Alright, 1, 2 sc and here is the increase inside the same stitch. Super good! This is how it should
3:53
be looking like. Now you're growing our chubby body. Round number 5, you will have 3 sc, 1
4:01
increase, repeat six times and you should have a total of 30 stitches at the end of this round
4:08
So here three single crochet and now here it's my increase. Very well, one, two, three and the increase here repeat all the way until the end
4:24
And this is how it should be looking like by the end of round number five. and for the next round you will crochet four single crochet, one increase, repeat
4:33
six times and you should have a total of 36 stitches at the end of this round
4:39
Always count how many stitches you have at the end of every round just to make
4:45
sure that you're right on track because if you need to unravel it's just one
4:49
round, right? Better now than later. Alright, so 1, 2, 3, 4 and then increase, okay
5:01
Repeat all the rounds and I will catch you up here. Super good! Now let's move
5:08
on for our next round. Here you'll work 5 single crochet, 1 increase, repeat 6
5:14
times and you should have a total of 42 stitches here at the end of this round Okay
5:27
Alright, now my increase. Here this is my increase. So here you see 1, 2, 3, 4, 5, 1
5:42
increase. Repeat all the way until the end and I'll catch you up here. I want to show you here
5:47
where are the stitches. You see here one V, another V, another one. Those are one stitches
5:54
another one here, and then you arrive here you have four lines here coming forming these two
6:00
stitches. You see this one is a straight, straight, straight again, straight again
6:06
And here you have this combine these two together. And you can see this in any pattern even if it's done the finished toy
6:16
For example, here is the increase. You see these two V's together
6:22
This is the increase. And here you see all the stitches alone
6:27
And then here one more increase. Okay? Let me know if you want a video about this
6:33
Alright, so this is at the end of the round. Now for round number eight, you will crochet six, single
6:41
crochet, one increase, repeat six times and you should have a total of 48 stitches here at the
6:47
end of this round and here is our last round with increases alright six here and
7:01
now my increase all right super good I will catch you up at the end of this
7:11
round. Very nice, so here we have already the beginning of our chubby body and I
7:22
will grow the height here of this body. So for round 9 to 21 you will work only
7:29
48 single crochet. So you have it here 13 rounds only with single crochet. You can
7:36
stop the video here, work your rounds and I will catch you up at the end of round
7:41
21 and this is how it should be looking like. Very good, we have this shape, now
7:48
you will start working with the decreases. Ok, so for round 22 you will start
7:55
decreasing. 6 single crochet, 1 decrease, repeat 6 times and you should have here
8:01
42 stitches at the end of the round. Here for crochet toys I like to work with
8:07
the invisible decrease which is when you grab only the front loop of the stitches
8:12
I will show you here how it's done but of course there are a complete YouTube
8:19
tutorial about this. So here you grab only the front loop you see and finish
8:27
your single crochet normally as you would. Alright there you go invisible
8:35
decrease in Namigurum is 1, 2, 3, 4, 5, 6 and this is the decrease. Okay work all the way around and
8:42
I will catch you up at the end. That's very nice, now we were moving on for round number 23. You will
8:50
work five single crochet, one decrease, repeat six times and you should have a total of 36 stitches
8:56
at the end of this round. Okay remember to count how many stitches you have at the end of every
9:02
round so you are sure that everything is right what it should be. Okay here my
9:13
decrease, only the front loop of the next two stitches and finish the single
9:19
crochet. Very nice invisible decrease here. Alright, repeat all the way around
9:25
and I will catch you up for the next round. So here we are seeing very nice
9:30
shape of the decreases. So now for round number 24 you will work 4 single crochet
9:36
1 decrease, repeat 6 times and here 30 stitches at the end of the round
9:42
Alright, we are almost done with the chubby body. Okay, this is great. Now first
9:53
decrease. Great! Now you repeat this all the way until the end and I will catch
10:01
you up for the next round. Alright? Super good! We're almost there. Now for round
10:10
number 25 you work three single crochets one decrease repeat six times and you
10:14
should have a total of 24 stitches here at the end of this round, alright? So one
10:21
1, 2, and 3. Now you work the decrease only grabbing the front loop of the
10:32
stitch and finish your single crochet Alright this is great 1 2 3 decrease and this is how it should be looking like once you finish all the 6 repetitions
10:49
So now let's move on for round number 6, 2 single crochet, 1 decrease, repeat 6 times
10:54
and you should have a total of 18 stitches at the end of this round
11:01
Here's my decrease, we are almost done, we have just one more round after this one
11:08
Alright, super good. Okay, here now at the end of this round, number 28, we will stop a little bit to add the stuffing
11:19
material before we move on for our last round, okay? So here you add as much stuffing material you want
11:30
I like to add a lot, like a good amount of stuffing materials because I like my toys very
11:37
firm, that's optional to you. So I add here my stitch marker and let's move on for our last round, round number 27
11:49
Okay, so here you will work one single crochet, one decrease, repeat 6 times and here you should
11:56
have only 12 stitches at the end of the round. This is where we will stop the crochet toy
12:05
Okay, so here. Finish here and now we will continue all the way until the end until you have like this, 12 stitches only
12:20
Now you cut the yarn, you leave a small tail here for fastening off
12:27
I will show you here how I fasten off my toys but there is also a video tutorial about that
12:33
So basically you only take the first loop of every stitch. So you just start passing the yarn through this front loop
12:45
You don't need to pull it tight for closing right now. We will do this at the end
12:51
Just make sure you're not grabbing the yarn in between the plies, okay
12:56
Okay, this can complicate things here when you need to close it completely
13:03
So pull it very tight. And now here, here's what you're going to do
13:09
You will insert your needle in the last stitches of this round here to help to close very firm
13:17
And I also make this hole in between the first round to make as small as possible
13:23
okay fast enough and this is the chubby body very nice super pretty all right this is good
13:34
now we'll start working the chubby ears all right so you'll repeat rounds one and two and here you
13:41
will just grow the length of this ear so you repeat the rounds one and two from the beginning
13:48
of this video and you move for around 3 to 5, 12 single crochet okay so here you
13:57
don't have more increases this is the size of our chubby ears I will leave you
14:07
here and I will catch you up at the end alright so this is how it should be
14:12
looking like once you're done with the round number 5 you cut the
14:17
yarn leave a tail for sewing later. Okay, pull this thread here through, hide the
14:25
beginning of your tail. Super good. And you now send this tail that you will use
14:32
later for sewing. You pull it back to inside of your toy like this. This will
14:39
make it look nicer when you are sewing it. Now you flatten here the ears. You see
14:44
folded nicely and your ear is done now you make another one
14:49
super good moving on again here now we're working with the back paws okay so
14:57
here you will work again rounds one to two and work the length of the paws here
15:03
so this is the back paw and you will work here round three to eight twelve
15:10
single crochet. So for these next six rounds you just work with 12 single
15:17
crochet and you'll have a long paw and I will catch you up here to show you what
15:22
you need to do for round number nine which is a little bit different. Okay so
15:28
this is done. Now you add a little bit of stuffing material just a little bit
15:33
just on the tip of the paw because we want the paw to be able to move a little
15:39
bit, all right? Okay, now what's you going, what you're going to do here is you will
15:46
crochet together one side to another. So, for round number nine, you will crochet
15:50
six single crochet. So, here you have 12 stitches in the round, right? When you
15:56
fold it like this you have six in one side and six to another side The first one here it a bit more complicated to catch but once you done with it all the rest is much nicer to work So here my first single crochet and I will work
16:16
the following here. You see this is much better. Just the first one you need to put a little bit
16:23
more effort to find it, the first two stitches, and that's it. Okay, this is my
16:32
fourth. Working on the stitch number five and the last one is this one. You see
16:40
it's in between the posts of the last two stitches. Super good! That's it, this is
16:47
one paw is ready here. So again, we will cut this tail, we'd leave a little bit to
16:52
sew it later and you pull the thread out. Ta-da! Very nice and you make another one
17:01
just one more of this following the same instructions. Okay and here now we will
17:08
work the snout. Here you will repeat round 1, 2, 3, okay from the beginning of
17:17
this video so you should have now 18 stitches and you will work just one more round, round
17:23
number four with 18 single crochet so no increases here and this will be ours now, it's super
17:32
fast to do, okay? I'll go a little bit faster here and I will catch you up once
17:45
this is done. Super good! You see this is the snout ready. Now you just cut the
17:52
yarn here and do the same thing. You pull the thread and you hide... and you not hide..
17:59
you send this yarn to the back of the detail. This little thing makes a
18:05
difference when you were sewing it. Super good! Okay, and now we'll work the front
18:16
paw which is remaining, right? So here you will start again with the magic ring
18:20
and you will work five single crochet in the magic ring okay so I'll go with you
18:34
on this one it's a small detail two three and four one two three four five
18:53
great super good now you pull the yarn here very tight and let's start working
19:02
the second round. Here you will work five increases. Okay, so you should have ten
19:10
stitches at the end of this round and it's with these stitches that we will
19:14
work. We will stop the increases here. So the back paw, the paw that it's under, has
19:21
12 stitches. This one that it's upper is the one hugging the heart. It has ten
19:27
stitches on its size. Here you secure the beginning of your yarn, always remember
19:33
to do that, it makes more neat. And now you will work here from round 3 to 9, you
19:41
will work 10 single crochet. So here that's it, very simple. You work these
19:47
rounds with just repetition, you will not increase anything and I will catch you
19:51
up here for the round number 10, which we will work with the same way that we did
19:57
for the back poles. Okay, we will crochet together the sides. Okay, moving fast
20:06
forward here, you need to add little bit of stuffing material just until halfway
20:11
of the arms and I will work round number 10. So here's the same thing, find the
20:18
first and the last stitch you work because you are crocheting together. You
20:25
fold the paws and you'll crochet together. The first stitch it's a little bit harder to find
20:32
but you see here, you just grab that and the rest is much easier
20:44
That's super good! So here now our fourth stitch and the last one. Right? So you have 10 stitches
20:57
you fold in half, you have five in one side, five in another one. So for round 10
21:01
that's why you are working with five single crochet. Okay? I'm a very smart mathematician
21:10
Okay, so this is the front paw ready and you make another one following the same instructions
21:20
Okay, I have my one here. Ta-da
#Crafts
#Fiber & Textile Arts
#Toys
#Stuffed Toys