Up next in 10

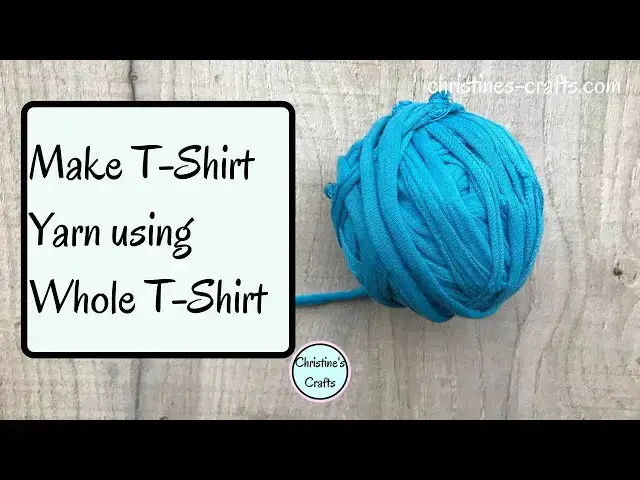
HOW TO MAKE CONTINUOUS T SHIRT YARN AT HOME - Use the whole T shirt to make loads of yarn
Jan 15, 2025

This video will show you how to make continuous t-shirt yarn without having to keep sewing. It can also be called T yarn! You cut your shirt carefully to make one long length. Then use the sleeves and round the neck to make some more!
T shirt yarn is fabulous to work with and great for crocheting, knitting, rug making, etc. Try it in any craft that calls for yarn! You can even use it as elastic on home made face masks.
This is a great upcycling project. Simply take an old t shirt and make yarn for any new project you have.
If you have fabric scraps that you would like to make yarn from then take a look at this video https://www.youtube.com/watch?v=v4fWUAA3Ceg
If you have some long lengths of fabric, for example an old sheet that you would like to make yarn out of then take a look at this video https://www.youtube.com/watch?v=vI54V91Kgok&t=2s
If you enjoy crafting my blog is full of great ideas and tutorials. Plus if you subscribe you gain access to my free resource library and get to hear about my latest projects first. Take a look at https://christines-crafts.com/
Enjoy watching and making your own t shirt yarn. Please leave me a 'thumbs up' if you enjoyed this video and subscribe so that you get to see all my videos as they are posted.
You can also find me across social media. To see all my tutorials and ideas find me at https://linktr.ee/Christines_Crafts.
Show More Show Less View Video Transcript
0:00
hi in this video today i'm going to show
0:02
you how to make t-shirt yarn
0:04
using the whole of the t-shirt let's get
0:06
our money's worth
0:07
so if you like my videos please
0:09
subscribe below give me a thumbs up if
0:11
you enjoy this one
0:12
and leave me any comments on your
0:14
successes with t-shirt yarn or maybe
0:16
what you've made with it
0:17
so i'm christine of christinescrafts.com
0:21
and this channel is dedicated to
0:22
crafting on a budget
0:25
so first of all you need your t-shirt
0:28
now any old t-shirt will do preferably
0:31
with no designs or prints on it and
0:32
transfers
0:34
but one thing i'm going to draw your
0:35
attention to here is my t-shirt has got
0:37
a seam down the side
0:39
when you're making t-shirt yarn it's
0:41
ideal if there is no seam down the side
0:43
but even if there is you can still make
0:45
t-shirt yarn it will just be a little
0:46
bit more bulky
0:48
so don't be put off so the first thing
0:51
you need to do is lie your t-shirt flat
0:53
get it nice and flat and get rid of the
0:55
creases
0:56
and in the bottom there we're going to
0:58
cut off that seam
1:00
there's always a nice tidy hem at the
1:02
bottom and we're just going to cut the
1:04
whole thing off
1:05
now you'll see i'm not exactly precise
1:08
so you just go along
1:10
and cut it cut through both layers
1:13
and get rid of that seam and you'll see
1:16
in a moment
1:17
you don't need to worry if you miss a
1:18
little bit or you've got a little bit up
1:20
on the t-shirt
1:22
just do the best you can and then see
1:25
how you've done
1:27
so once that's cut off check the bottom
1:29
of the t-shirt that's left
1:32
and i've missed a little bit there
1:34
there's a little bit of seam
1:36
so i'm just going to trim it off so
1:38
don't need to worry just trim off any
1:40
bits that you didn't
1:42
quite catch
1:46
once we've completed that it's time to
1:50
cut your t-shirt just below the sleeves
1:54
okay we're going to cut that whole top
1:56
section of the t-shirt off
1:58
so just cut below the sleeves this is
2:01
going to give you a nice tube to work
2:03
with
2:03
now i know i said we're going to use all
2:05
the t-shirts so don't worry we'll come
2:06
back to that top section
2:08
later but for the moment
2:11
just put it to one side and we're going
2:13
to work with the tube
2:16
you may find that you've got labels
2:19
inside your t-shirt
2:21
in the seam and you'll be able to feel
2:24
them
2:25
so have a look any labels you've got
2:29
just cut them out they're just going to
2:31
add to the bulk they're going to make a
2:32
mess they're going to get
2:33
cut we just want rid of them
2:36
so now we are literally left with a tube
2:38
of fabric
2:40
so once again lay it down flat
2:44
getting rid of as many creases as you
2:46
can
2:47
and then we're going to look to fold it
2:49
ready to cut our yarn
2:52
so you're going to fold one side seam
2:54
over to the other
2:56
but you need to make sure you don't line
2:58
them up we need a gap
3:00
between one side seam and the other
3:02
because we're only going to cut all the
3:03
way through
3:04
one so you need to decide
3:07
how wide you want to cut your fabric my
3:09
recommendation is somewhere between half
3:11
an inch
3:12
and an inch half an inch will make you
3:14
quite fine yarn
3:16
an inch quite chunky i'm going three
3:18
quarters of an inch
3:20
and it depends how accurate you want to
3:22
be but i recommend
3:24
just marking your fabric every three
3:26
quarters of an inch along that fold
3:28
it'll just help you to keep nice tidy
3:32
yarn
3:32
that's approximately the same size all
3:34
the way along it
3:37
and then go back to where you started
3:40
and
3:40
cut where you marked it you're just
3:42
going to cut a nice strip
3:44
along that edge so you're in your
3:47
three-quarters of an inch wide strip
3:50
cut through that first fold that you
3:52
come to but
3:53
not the second one i recommend leaving
3:57
i don't know about half an inch
3:58
three-quarters of an inch at the end
4:00
to make sure you've got plenty and you
4:02
don't cut through it accidentally
4:05
so then you go to the next one and
4:07
repeat
4:11
go to the next one and repeat
4:14
so you can see what you're doing here
4:15
you're just cutting these strips one
4:17
after the other
4:18
making sure you go through the top fold
4:21
and not
4:22
the bottom one just take your time
4:25
and be careful so
4:29
i'm going to speed the video up a little
4:31
bit just so you can see exactly what i
4:34
do
4:35
but you don't get too bored watching me
4:37
so you can see how it's growing how it's
4:39
working its way along
4:41
and you can see that you're going to end
4:42
up with quite a lot of yarn from this if
4:44
you think
4:45
how much fabric i'm cutting then how
4:47
many strips
4:49
just work your way all the way to the
4:51
bottom
4:52
now it might not work out perfectly at
4:54
the bottom mine certainly didn't
4:56
you can adjust the widths of your strips
4:58
a little bit or you can just cut the
5:00
extra bit off
5:01
and that's what i chose to do so you'll
5:04
see as i reach the bottom
5:06
there's a silly little thin bit and i'll
5:08
just cut it off
5:13
it's my last strip
5:17
cut off that little thin bit at the
5:18
bottom
5:21
okay now that top layer
5:24
just open those strips back like that
5:26
just pull them back out of the way
5:29
you don't need that top layer in your
5:30
way
5:33
and then we're going to look at what
5:34
we've left that we didn't cut through
5:37
what you're basically ending up with
5:39
here is a spine
5:41
with all your strips coming off it so
5:44
place it on my hand so that you can see
5:46
that you've got this spine and all the
5:48
strips coming off it
5:50
and now we need to cut that so that we
5:53
end up with yarn
5:55
so this is a bit we have to be really
5:56
careful i recommend putting it over an
5:59
ironing board
6:00
but so that you can see what i'm doing
6:02
i'm putting it over a little sleeve
6:04
board
6:05
but you just make sure you feed it over
6:08
your ironing board
6:09
and make sure all the strips are on the
6:11
correct side
6:13
so just take your time so that you get
6:15
that tube
6:16
over your ironing board you don't have
6:19
to use an ironing board but it does make
6:21
sure
6:22
that no accidents happen i find
6:26
so just work it get it on once you've
6:28
got it nice and smooth
6:30
with all the strips on the right sides
6:33
it's time to cut
6:35
so we're going to start by making the
6:37
end of our yarn
6:38
so just cut diagonally like that and
6:41
you've made the end of the yarn
6:43
go to the next one cut diagonally again
6:47
you must cut diagonally to keep a
6:49
continuous
6:50
length of yarn if you cut straight
6:52
across you're just going to make
6:54
rings so you're cutting diagonally
6:58
from one strip to the other diagonally
7:01
across
7:03
you can stop after the first couple and
7:05
check you've done it right which you'll
7:06
notice i did
7:08
and then you can just keep going
7:10
diagonally
7:11
all of them work your way along making
7:16
sure you keep diagonal
7:18
one after the other
7:21
when you get to the end you're just
7:23
gonna have that end cut to do that makes
7:26
the other end of your yarn
7:30
just like that so now you've got yarn
7:34
and all we need to do is ball it up
7:36
however
7:37
what happens with stretchy fabrics is if
7:39
you pull them tight
7:41
they roll slightly it gives you a proper
7:43
yarn a nice tidy yarn that's really
7:45
useful for loads of crafts
7:47
so as you're making it into a ball pull
7:50
it tight
7:51
i recommend you just pull each section
7:53
tight just do a little bit
7:54
pull a little bit wrap it on pull a
7:56
little bit wrap it on
7:58
you don't want to be pulling it so hard
8:00
you start ripping your yarn
8:02
so as you can see just work your way
8:04
through make that ball
8:07
just keep pulling it tight wrapping it
8:09
on
8:10
pulling it tight and wrapping it on and
8:12
there you go
8:13
you'll have a great ball of yarn for any
8:15
sort of crafts you want
8:16
knitting crocheting locker hooking
8:18
whatever
8:20
and that's it you can stop there if you
8:22
like
8:23
but what about the rest of the t-shirt
8:27
i said we were going to use it all so if
8:29
you want to get the most you can out of
8:31
your t-shirt
8:32
stick with me and keep watching
8:35
and we'll see what we can do with the
8:38
sleeves
8:39
and the top part of the t-shirt
8:43
okay so you're going to be left with
8:45
that section we had at the beginning
8:47
bring that in and let's work on that
8:52
first thing we're going to do is look at
8:54
the sleeves
8:56
so we're going to remove them from the
8:58
rest of the t-shirt
9:01
so lie your t-shirt i suppose it is
9:04
still a t-shirt that just not very much
9:06
of it
9:06
damn flat and again you're nice and
9:09
smooth
9:10
and we're going to cut one sleeve off
9:14
you can cut either side of the seam it
9:15
doesn't matter because we're going to
9:16
cut the seam off completely from both
9:18
sections
9:20
so i've cut it to try and cut the seam
9:22
off
9:23
but the same as other seams don't worry
9:26
you get to this point you've still got
9:27
some bits of seam there
9:29
just trim them off so we've now got a
9:32
sleeve
9:33
separate so we're going to repeat for
9:35
the other one so we've got two sleeves
9:38
and then we need to cut off anything
9:41
that got left on that seam
9:43
and then we need to look at the hem on
9:45
the end of the sleeve and cut that off
9:49
and then we're going to do a similar
9:52
approach to what we did with the other
9:54
the rest of the t-shirt you've got a
9:55
tube so
9:57
fold it and cut
10:00
you'll see i'm not measuring it's up to
10:03
you you can measure
10:04
and make sure you're accurate keep going
10:07
but you'll see we can only do a few cuts
10:09
this time
10:11
now once you get to the edge of the
10:12
lower section
10:14
just cut your strips by opening it up
10:20
and there you go so now the same as
10:23
before
10:24
you're going to need to open those
10:26
strips down
10:29
look at that little spine you've made
10:31
and you're going to cut diagonally
10:35
so let's cut diagonally
10:39
okay and cut
10:42
diagonally
10:45
now you can see the bit i've already cut
10:47
we've got some long bits on the turn of
10:49
the uh
10:50
fabric just trim it up and make it tidy
10:53
and you'll find there's a pattern for
10:54
that doing that now
10:56
you're going to do a lot of it on these
10:57
smaller sections because we end up with
11:00
bits that do need tidying up
11:03
again we're going diagonally
11:07
and you'll see we start to get to this
11:10
section
11:12
now when you get into the end section
11:13
you're just going to have to follow your
11:15
yarn
11:16
and cut okay so lay it out flat
11:20
work out which bits you need to cut
11:26
follow your yarn and cut
11:29
and you see those pointy bits it's just
11:32
because of the shape of the sleeve
11:33
just tidy them up a nice bit of rounding
11:36
off works brilliantly
11:37
if you just cut them square they'll be
11:39
okay but if you round them you get a
11:40
little bit less bulk
11:43
and so we've made some more t-shirt yarn
11:45
out of that sleeve
11:46
so again pull it
11:50
wind it up into a ball now as you're
11:52
winding if you come to any bits you
11:53
think well that is a bit bulky
11:55
just trim it as you go there's nothing
11:58
stopping you it's your yarn you make it
11:59
how you want it
12:01
so you can see i've got quite a length
12:03
out of that even though it's only a
12:04
little sleeve
12:06
so it is worthwhile if you're wanting
12:08
plenty of your yarn for your project
12:11
keep going and wind it up
12:16
now obviously we have two sleeves so you
12:19
repeat for the other one
12:22
so back to the main body we're going to
12:24
make sure we cut those seams off where
12:25
the sleeves were
12:27
they want nice tidy edges do the same at
12:30
the other side
12:40
now you need to fold it in half taking
12:43
those sleeve seams together
12:44
okay now last time we folded it like
12:47
this leaving a gap
12:48
this time you're going to fold it all
12:51
the way
12:52
so you want them to line up perfectly
12:55
okay so it's an important difference
12:58
because we're doing it slightly
12:59
differently
13:00
so this time i'm not going to mark it
13:03
i've just put my ruler there to give me
13:04
an idea
13:05
but you could mark it just the same as
13:07
you did before
13:08
you're going to snip along but you're
13:10
going to leave some at the end
13:12
so three quarters of an inch something
13:13
like that at the end
13:15
that you don't cut otherwise you're just
13:17
going to cut strips
13:19
so keep cutting until you get to the
13:22
neckline of your t-shirt
13:27
keep going
13:33
you start to feel that bulk of the
13:35
neckline either on the back or the front
13:36
of the t-shirt doesn't matter
13:38
then we're going to stop so you can see
13:40
that's the last one i'm going to cut
13:42
this way
13:47
so now we can open that back up and you
13:49
can see what we've done
13:52
we've done it through both layers
13:56
so now for the next thing we're going to
13:58
do we need to open it
14:00
up so it's single layer now take your
14:02
time open it up
14:04
lay it down and make it smooth and tidy
14:07
so that you can do the next bit
14:08
without getting in a pickle and cutting
14:10
anything you shouldn't
14:12
so to start with just cut
14:15
from one end just cut that first one
14:18
so that you cut all the way through to
14:20
make the end of your yarn
14:23
and then that goes to the side you can
14:25
work your way up
14:27
and when you get to the other end you
14:29
can see that you need to snake back with
14:31
your yarn so don't cut all the way
14:33
through on that not that one
14:34
go on the next one take the pattern
14:37
round
14:38
cut the next one and you keep
14:41
alternating either
14:42
end snake it round cut the next one
14:46
so you're cutting every other one at
14:49
each end
14:50
so that you end up with a continuous run
14:52
of yarn
14:58
so you can see that one
15:01
so come down to this end and i need to
15:05
snip that one
15:08
and then when i get back up to the other
15:09
end i've now got this wide bit
15:11
because it was the back of the t-shirt
15:14
so now all i'm going to do
15:15
is carry on that pattern of continuous
15:18
yarn
15:19
so i will cut from this end to make
15:21
another length
15:25
and i'll make sure i don't cut all the
15:27
way through the other end
15:28
i will stop at my three-quarter inch
15:31
again
15:35
and then to come back i will simply
15:38
start
15:39
from the edge three quarters of an inch
15:41
across
15:42
so so that i could still use my scissors
15:44
because i can't use them
15:45
backwards from the other side i'm just
15:48
turning mine
15:49
so that i can come not in there
15:52
but from the edge so
15:55
measure that three quarters again or do
15:57
it by eye
15:59
and then come back and you can see that
16:01
you're keeping a continuous length
16:07
and then when we get to the other end
16:08
keep that three-quarters of an inch
16:10
again
16:14
and come back the other way and you just
16:17
keep alternating keep
16:18
zigzagging your way until you get to the
16:22
top of the t-shirt till you get to that
16:23
neck
16:24
because we don't want any of that bulk
16:26
in our yarn
16:34
come back again you can see mine's
16:36
getting a little bit
16:38
roosted up just keep smoothing it down
16:40
make sure you don't cut anything you
16:42
shouldn't
16:49
and that's it i've decided that's enough
16:52
and now you're going to repeat that
16:54
with the front so spread it up a little
16:57
bit because you've got the idea now
17:00
so we'll keep going and do the same
17:06
and then i've just left those little
17:08
bits there i'm not chasing those
17:12
and you'll see that you've got quite
17:14
square ends
17:15
where the edge of the t-shirt was
17:20
just tidy them up i mean if you're happy
17:22
with them you can leave them there but
17:23
they can make your yarn a bit bulky
17:25
so just cut them down just with a curve
17:29
you've got the idea now you've seen me
17:30
do this enough times
17:33
and wind it up and that's it you've used
17:35
all your t-shirt to make t-shirt yarn
17:38
so i hope you find lots of great
17:39
projects to use it on
17:41
and i hope you've found this video
17:43
useful
17:44
t-shirt yarn is great to work with so
17:47
thank you for watching good luck with
17:48
your projects
17:49
please remember to give me a thumbs up
17:51
below and some nice comments if you have
17:53
any
17:53
and subscribe so that you can catch all
17:55
my videos
17:57
bye
#Textiles & Nonwovens
#Crafts
#Fiber & Textile Arts
#Fiber & Textile Arts
#Apparel
#Children's Clothing
#Clothing Accessories
#Shirts & Tops