Up next in 10


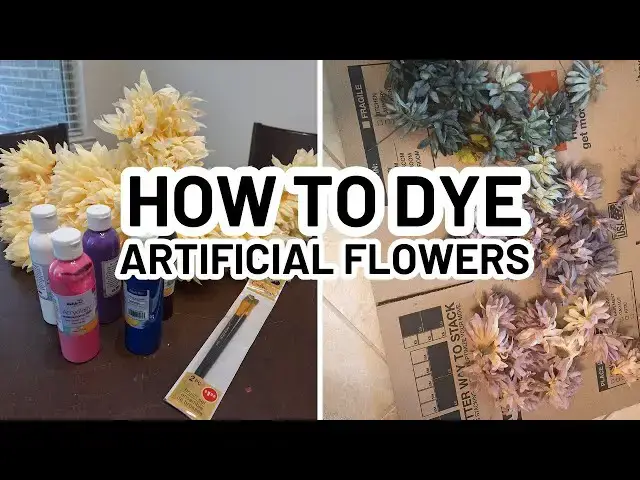
Want to upgrade cheap florals into something custom and beautiful? In this video, I’ll show you how to dye artificial flowers from Dollar Tree and turn them into high-end-looking arrangements. This easy DIY hack works for centerpieces, wreaths, or any seasonal decor — and it’s super budget-friendly!
| CHAPTERS |
00:00 Intro
01:07 Part 1 - Dyeing Artificial Flowers
15:08 Part 2 - DIY Fall Wreath
22:14 Outro
| LINKS |
Wreath Form - https://sovrn.co/1lq6hkr
Easy Cutter - https://sovrn.co/oeppub2
Inspiration Wreath from Amazon - https://amzn.to/4fWJfBr
✨| FREE DOWNLOAD |✨
The Big List - 101 Places To Shop Home Decor Online
https://diannedecor.com/the-big-list
| MY WEBSITE |
Show More Show Less View Video Transcript
0:03
Hi, it's Lindsay Diane from diancor.com.
0:07
In this video, I'm going to share with
0:08
you my method for dying Dollar Tree
0:11
flowers. Now, if you are an avid shopper
0:15
at the Dollar Tree, you know that
0:17
sometimes the floral section can be hit
0:20
or miss. They can have an amazing stock
0:23
and variety of colors there for you to
0:26
choose from, and then sometimes you
0:28
don't. And sometimes you end up having
0:29
to hop from store to store to store to
0:31
get enough florals to complete your
0:33
project. Now, this happened to me
0:35
recently when I was trying to create my
0:36
fall wreath and I decided that this year
0:39
I was just going to dye flowers to have
0:41
the exact colors and the exact amount
0:43
that I needed. And it was so simple.
0:46
Everything you need is from the Dollar
0:48
Tree. It's very inexpensive and it's
0:50
very easy. In part one of this video,
0:52
I'm going to share with you everything
0:54
that you need to dye the flowers and
0:56
I'll give you a quick tutorial on how to
0:58
do that. And then in part two, I'm going
1:00
to show you how I created my DIY fall
1:04
wreath. Let's get started. So, to start
1:08
off this dying project, you're going to
1:10
need a few things from the Dollar Tree.
1:13
You're going to need some paint brushes.
1:16
One or two is fine. You're going to need
1:20
some acrylic paint from their crafting
1:23
section. These are going to be the
1:25
colors that you need to mix to make
1:27
whatever
1:29
color you want. Right? So, for me and my
1:32
project, I was looking to make a wreath
1:35
that was like a deep dusty denim blue, a
1:39
lighter sort of pink mauve, and then a
1:42
deeper purple mauve. Those were the
1:44
three colors that I was going for. So to
1:47
cover my bases, I grabbed a white
1:50
acrylic paint, black, purple, pink, and
1:54
blue. And with those, I figured that I
1:56
could figure out a combination that was
1:59
going to get me to the color tones that
2:01
I wanted. So, choose whichever colors
2:03
you need in the acrylic paint. Grab
2:05
yourself at least one paint brush that's
2:08
like a medium size. And then you're
2:10
going to grab your florals. Now, the
2:13
important part, of course, about the
2:14
florals is that you need to have a light
2:17
base. So, in order for you to really see
2:20
the colors that you're going to mix
2:21
together, you need to start with either
2:23
a white floral or a cream floral. For my
2:27
project, I was looking for hydrangeas. I
2:31
wanted to make a fall hydrangeanger
2:33
wreath, but they did not have enough of
2:38
the white hydrangeas available for my
2:41
project. So, they had some deeper orange
2:44
tones and kind of reddy tones, but they
2:46
did not have enough of the cream colored
2:49
hydrangeas. So, I looked around at some
2:52
of the other florals. Don't be afraid to
2:54
just sort of compare and contrast some
2:57
of the options available to you. You can
2:59
usually get a very similar look with a
3:02
different floral. So, you'll see in this
3:04
next clip that I was comparing a few of
3:07
the different florals. They had the
3:10
hydrangeas, but they didn't have enough
3:12
for my project. They had merry golds,
3:15
which were a good option, and then they
3:18
had a ton of mums. And ultimately, this
3:21
is what I decided to go with for my
3:23
project. The mums were just a bigger
3:26
bang for your buck. They are just a much
3:29
larger floral head on them. And they're
3:31
still five to a stem just like all of
3:33
the other ones, but I knew that I would
3:35
need less mums than anything else um in
3:39
their selection. So, I went ahead and
3:41
went forward with the mums that had a
3:43
nice cream colored base to them. Now,
3:46
when I got home, the first thing that I
3:48
did to prep for the dying process was I
3:52
pulled all of the price tag stickers off
3:55
of the stems. And then I proceeded to
3:59
pull the leaves down the stem so that
4:02
those wouldn't get in the way when I was
4:04
dying the actual flower heads. So,
4:06
you're going to see me just kind of go
4:07
through each one of these, trim them,
4:10
and then I'm going to slide the actual
4:12
green leaf part down to the base of the
4:14
stem to get these ready to be able to be
4:17
dipped into an acrylic water solution.
4:21
The first color that I mixed was the
4:23
blue. Now, I wanted a deep kind of dark
4:27
blue so that it would turn into sort of
4:29
a denim color. And to do this, I mixed
4:33
one cup of water with a few teaspoons of
4:37
the blue acrylic dye and then mixed in
4:41
some black to deepen it up. Now, this is
4:45
again totally up to you depending upon
4:47
what color tone you're going for. What I
4:51
will say is that you don't need nearly
4:54
as much of this solution as I made. You
4:57
could probably get away with starting
4:58
with a half a cup of water because I had
5:01
a ton extra and I ended up just kind of
5:03
dumping it every time I wanted to switch
5:05
my colors. The most important part in
5:08
all of this is to remember that you need
5:11
to use hot water.
5:14
When I started out, I tried to mix it
5:17
with cold water and the blue chunks just
5:21
would not dissolve down. And once I
5:23
added the black to the water, I really
5:26
could not see the chunks floating
5:28
around. I did my best to mix them for
5:32
several minutes, but the solution just
5:34
did not break down all of that paint
5:37
chunks. So, when I went to dye my first
5:39
flower, I ended up with almost a polka
5:41
dot situation. To remedy that, I went
5:44
ahead and I took my little Tupperware
5:46
and I popped it in the microwave for a
5:48
minute and heated up that water until it
5:50
was hot. and then everything dissolved
5:52
and it was great. So, moving forward,
5:54
know that you want some like steaming
5:56
hot water. Just be careful when you're
5:59
dipping your flowers because the water's
6:00
still going to be hot. I also recommend
6:03
that you use some sort of hand
6:05
protection. Put on a pair of gloves just
6:07
to protect your your fingers and your
6:09
nails from getting dyed.
6:12
Now, with the first set of flowers, I'm
6:15
using my brush with the blue paint
6:18
solution to brush on that color so that
6:23
I can get more of a gradient effect. If
6:26
you want a full solid color, go ahead
6:29
and dip the entire flower head into the
6:32
colored water. Let it sit for about 30
6:35
seconds. And then you're gonna pull it
6:37
out and you're gonna put it onto like a
6:39
sheet pan that's lined with paper towels
6:42
to sort of soak up that excess water.
6:44
For me, I really wanted to have a nice
6:47
dimension to each of these flowers and
6:49
have a nice gradient effect going on.
6:51
So, I used the paintbrush. And then what
6:54
you're going to see me do is start to
6:56
massage in that paint so that I wasn't
7:01
sort of overusing it once I got a little
7:03
bit of it onto the, you know, the
7:06
polyester, uh, you know, little flower
7:09
petals. I started to massage it with my
7:12
gloves to help spread that paint. That's
7:16
what really helped to create a nice
7:18
faded out gradient effect on these
7:21
flowers. Because I had so many flowers
7:23
that I was dying for this project and
7:26
another one, I went ahead and lined them
7:29
up on a piece of cardboard that was on
7:32
the floor to help dry.
7:34
[Music]
7:43
[Music]
8:03
The next color that I'm going to mix is
8:06
the lighter mauve. So, a mauve that is a
8:08
little bit more pink than purple. This
8:11
is the next color that I'm going in
8:13
with. I used the hot pink and then I
8:16
went in with a little bit of purple and
8:17
then a little bit of black to kind of
8:19
deepen it up. I had a some trouble kind
8:22
of getting to the color that I wanted.
8:23
You're going to see me go back and forth
8:25
between the pink um and the black. And I
8:27
think at one point I decided it was too
8:29
dark and I added in white. Um but you
8:32
know, a trial and error may happen with
8:35
these paints. You're going to have much
8:37
more paint than you will ever need for
8:39
this project. So, it's okay if you don't
8:42
get that color um perfectly on the first
8:44
try. Just keep mixing. If you have to
8:46
start over, you can start over. You're
8:48
really not needing a lot of paint or a
8:50
lot of water to mix up this solution.
8:53
Once I got to the color that I was
8:55
really looking for, I kept kind of going
8:57
back and forth to my reference photo,
8:59
which was a wreath that I was trying to
9:01
kind of dupe. And I'll share that with
9:02
you in part two of this video. But once
9:05
I got to the color that I wanted, I
9:08
again decided to start painting on only
9:12
the outer petals of this flower. So I
9:17
wanted to have a nice gradient effect
9:19
just like with the blue. And I painted
9:22
on the outer petals and then massaged in
9:25
the rest of the color.
9:29
[Music]
9:45
[Music]
9:53
As I was working my way through these
9:55
flowers, I came to the conclusion that I
9:58
was absolutely going to need to do a
10:00
second coat. So, I worked my way through
10:03
the second sort of color of flowers
10:06
where I was painting on the out outer
10:09
petals and then massaging in. And then I
10:12
proceeded on to my last batch of flowers
10:16
which is intended to be my lightest
10:18
color. And instead of trying to uh use
10:22
the same method, I wanted to give it a
10:24
sort of inside to outside kind of light
10:27
gradient. So, what I did here was I
10:29
painted only the inner flowers and left
10:32
the outer ones light. So, I just kind of
10:35
swirled my brush around the center of
10:37
those flower buds and then massaged it
10:40
in so that I had a gradient that was
10:42
deep in the middle and light on the
10:44
outside as opposed to the previous one
10:47
which was deeper on the outside and then
10:49
faded to light on the inside.
10:54
Here's
10:59
[Music]
11:21
a look at the first pass of these
11:24
florals. You'll see that the purple is
11:28
very light and the last ones that are
11:32
meant to be the lighter mauve are almost
11:35
the same color except that they are dyed
11:38
on the inside of the flower buds. So,
11:42
I'm letting these sit here. I let them
11:44
sit for about an hour or so before I
11:47
went in with a second coat. So, you'll
11:50
see me here again. I am mixing the
11:55
deep blue color. And this time, instead
11:59
of using the paintbrush to paint all
12:01
around, I am collecting all of the
12:05
petals together with my hand and I am
12:08
dipping just the tips of these petals
12:12
into the blue water solution. Now,
12:16
what's going to happen is that that
12:18
color is going to automatically absorb
12:21
back up to the the base of the flower
12:25
bud. Now, this is only going to work if
12:28
you have properly dried your flowers,
12:30
right? It's water trying to seep its way
12:33
up into these dry areas. It's spreading.
12:36
If your flower buds are still wet,
12:40
you're not going to have this color
12:43
travel up sort of the shaft in the way
12:47
that you want it to if you are going for
12:49
a gradient. So, just keep that in mind.
12:51
Make sure that your flowers are all the
12:53
way dried out before you go in for a
12:54
second coat if you are looking to get
12:56
more of a gradient look. This allowed me
13:00
to have deeper tips on these blue
13:03
flowers and then it kind of gradient up.
13:06
it still deepened up everything and it
13:08
gave it a really pretty look. I just
13:10
laid them upside down to dry out and
13:13
eventually I transferred them back over
13:15
to the cardboard to dry for a longer
13:17
time. At some point in this process I
13:20
realized that it was easier for me to
13:21
just dye the little flower heads instead
13:24
of holding on to the stems. So you will
13:27
see that in these later clips you're
13:30
just seeing little flower heads. You
13:31
don't see me with the stems anymore
13:33
because I just went ahead and popped
13:34
those off. But whichever way is easiest
13:36
for you, do that. So once I get all of
13:39
the blue flowers done, it was time to do
13:41
the second round on the purple mauve
13:44
flowers. I mixed a very, very deep
13:48
purple color to help really darken up
13:51
those petals so that I would have a deep
13:53
sort of mauvey color. And I gathered the
13:57
petals just like I did with the blues
14:00
and I dipped the tips in there and then
14:03
I massaged them out. So instead of just
14:05
letting them drip dry like I did with
14:07
the blue, I massaged out that purple so
14:10
that I would maintain that gradient look
14:12
that I was looking for. Finally, I went
14:15
in with the final batch which is going
14:18
to be the lighter, you know, pink mauve
14:22
color. I'm using the same color mix as
14:25
the deep purple. And I am painting in
14:29
the center only and massaging it out.
14:32
Just painting on that purple to the
14:35
center and massaging it out. And this is
14:38
how they turned out. I'm really happy
14:40
with the gradient of the color. They
14:42
have a lot of great dimension and I
14:45
think they just look beautiful. So
14:47
that's how I was able to dye these
14:49
Dollar Tree flowers. It was a really
14:52
simple project. Here is another look at
14:55
the way these turned out in the end.
14:58
This was very, very easy to do. I just
15:02
let them dry for another couple of hours
15:04
before I proceeded onto my wreath. Okay,
15:07
so now that my flowers are ready to go,
15:10
I've set them to dry for a couple of
15:12
hours. I am going to proceed on to
15:15
making my beautiful fall wreath. Here's
15:18
a look at my inspiration for this
15:20
wreath. It is a beautiful deep denim
15:24
blue, purple mauve, and pinky mauve
15:27
combination of hydrangeas and some nice
15:31
deep green leaves on the outer rim and
15:33
the inner rim. I think it's really
15:35
really lovely. But as you know, I could
15:38
not find enough of the hydrangeanger
15:40
flowers to pull this off. So instead,
15:42
I'm going to do a substitute, and I'm
15:44
using the mums in the same colors to
15:47
create a dupe of this wreath. The items
15:50
that you'll need to create this wreath
15:53
are a foam wreath form. I got mine from
15:57
Michaels. Be sure to use their, you
16:00
know, coupon for the regular off
16:01
pricing. You can usually get, you know,
16:03
30 or 40% off. I paid about $7 for this
16:07
wreath form. It is a nice very dense
16:10
hard foam wreath form and it's 16 in. In
16:14
total, if you have a 16 in wreath form
16:17
like I do, you're going to end up using
16:20
a total of 20 flower heads. Now, each of
16:24
the stems from Dollar Tree come five
16:27
heads to a stem. So, that means you're
16:29
going to need four of the stems of the
16:32
mums from Dollar Tree. If you go with a
16:35
smaller floral, you may need more flower
16:37
heads to fill out this wreath. Again, I
16:40
got my wreath form from Michaels. And I
16:43
used some hot glue to help secure the um
16:48
flowerheads and the greenery. The
16:50
greenery I also purchased from the
16:52
Dollar Tree. And I used four stems of
16:55
the greenery. So, let's get started in
16:57
constructing this DIY fall wreath. So,
17:00
the first thing that you'll want to do
17:02
is to remove any of the stickers or tags
17:05
from your greenery stems. You can use,
17:08
you know, just a pair of scissors to
17:10
snip these off. I also used an easy
17:12
cutter to cut down the wires. You can
17:15
use scissors for this as well, but I
17:16
find the easy cutter is a little bit
17:18
quicker. And to start out, I used a
17:21
small screwdriver to bore a few sort of
17:24
pilot holes into my wreath form. I did
17:28
them all along the front or the face of
17:31
the wreath form and also along the top
17:34
where I knew I would be sort of uh
17:37
securing in the greenery. So, I used the
17:40
outer rim, the face of it, and the inner
17:44
rim is where you're going to see me
17:46
periodically poke some pilot holes to
17:49
help secure all of these florals. Now, I
17:52
will say this. If you have a wreath form
17:54
that is not as dense, like some of the
17:57
smaller ones from Dollar Tree, they're
17:59
much softer, you will not have to bore
18:02
these pilot holes in here. This wreath
18:05
form that I have is very, very firm,
18:08
very dense. In hindsight, I probably
18:11
would have gotten a different one in the
18:13
future. I initially went into this
18:15
project thinking that I was going to use
18:16
a wire wreath form and then I realized,
18:18
oh, it's kind of tricky uh securing
18:21
these buds to all the rings on the wire
18:24
wreath form. So, I went ahead and got
18:26
the the foam one. So, here's another
18:29
look at what I'm going for with this
18:31
wreath. This is my inspiration photo
18:33
that I found from a wreath on Amazon.
18:36
And I start out just kind of laying out
18:38
the flowers and getting an idea of where
18:41
everything needs to line up. So once all
18:44
of the little pilot holes are ready to
18:47
go, I start adding in my florals. And I
18:50
lost a little bit of a clip here, but
18:53
you're going to see me start to space
18:55
out my pink florals first. I add in
18:58
three of those just so I can start to
19:00
set up the spacing. In the end, what I
19:03
did was I used two pinks kind of bundled
19:06
together, two purples before that, and
19:09
then two blues before that. So that the
19:12
sequence starting at 12:00 is pink,
19:14
blue, purple, pink, blue, purple, pink,
19:17
blue, purple, etc. all the way around.
19:20
Again, I use two for each color. In
19:22
total, I ended up using 20 of the floral
19:25
buds. And then you're going to see me
19:27
here start to set up the greenery so
19:31
that I can make an outer rim around the
19:33
wreath and an inner rim of greenery to
19:36
really fill out this wreath and give it
19:38
some nice rich color.
19:41
So, I again am using my little
19:43
screwdriver to dig a few pilot holes. As
19:46
I said before, if you do not have a
19:49
super dense wreath form, you probably do
19:52
not need to do this. You will be able to
19:54
stick them in just fine. I've never
19:56
worked with a foam that's quite this
19:58
dense before. I usually prefer to go
20:00
with a wire wreath form, but I was
20:02
having some trouble with that, so I went
20:04
for the foam instead.
20:06
But if either way, whatever you need to
20:09
do to secure these on here, once you use
20:12
the pilot hole and you shove your either
20:15
your flower head in there or your leaves
20:17
in there and they're still loose, then
20:19
just dab them with a little bit of hot
20:20
glue to keep them secure. As I move my
20:23
way around the outer wreath, you're
20:24
going to see me snip down some of the
20:26
stems just a little bit. And I just make
20:28
my way little by little around the
20:31
wreath on the outside and then around
20:33
the inner wreath as well. Heat.
20:40
[Music]
20:54
Heat.
20:57
[Music]
20:59
Heat. Heat. N.
21:02
[Music]
21:34
And here's what it looks like when it's
21:36
all done. I really love the way this
21:39
wreath turns out. Here is a side by side
21:42
of my inspiration photo and how my
21:44
wreath turned out. I think the colors
21:46
are great. The fact that I was able to
21:48
dye them myself and it was an easy
21:50
process. I wasn't sure how hard this was
21:53
going to be. I saw a few methods online
21:55
and it seemed like the acrylic paint
21:57
method was the easiest one and I have to
21:59
agree it really was easy. So, if you
22:02
have a project that you are looking
22:04
forward to doing and you can't find the
22:06
colors that you really want, think about
22:09
dying your own florals from Dollar Tree.
22:11
They're inexpensive and it's easy to do.
22:14
That's it for this video. I hope you
22:16
found it helpful. If you liked it,
22:18
please give it a like and consider
22:20
subscribing to my channel. And don't
22:22
forget to visit me at diancor.com. I
22:25
post all about home decorating ideas and
22:27
DIY projects over there. I thank you so
22:30
much for watching and I'll see you in
22:31
the next one. Bye.
22:35
[Music]
#Hobbies & Leisure
#Crafts
#Home & Interior Decor
#Home & Interior Decor
#Home Improvement