Up next in 10

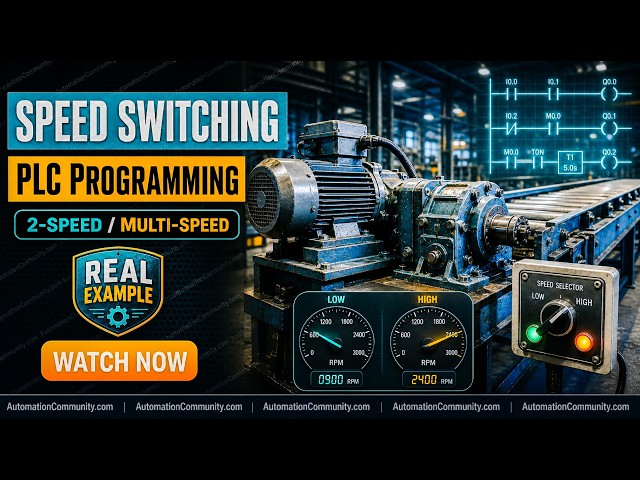
Learn the PLC programming for machine speed switching logic with real hardware kit.
✨ FOLLOW US ✨
👉WhatsApp: https://whatsapp.com/channel/0029VaAbUecLNSa4rDPOV31o
👉Telegram: https://t.me/+u3qORX5FKec1NjA1
👉LinkedIn: https://www.linkedin.com/company/instrumentationtools/
👉Facebook: https://www.facebook.com/instrumentationtoolss/
👉Instagram: https://www.instagram.com/instrumentationtools/
👉YouTube: https://youtube.com/instrumentationtools?sub_confirmation=1
👉JOIN Courses: https://automationcommunity.com/
#machine #speed #switching
Tags:
PLC programming for machine speed switching, PLC speed control logic, machine speed switching PLC, PLC motor speed control, ladder logic speed switching, PLC programming motor control, PLC speed selection logic, industrial automation PLC training, PLC ladder diagram speed control, PLC practical exercise motor speed, PLC digital input output control, automation speed control programming, PLC beginner motor control project, control systems PLC logic, PLC machine control tutorial
Show More Show Less View Video Transcript
0:07
hello everyone myself
0:10
badas in this video I will discuss one
0:14
simple interesting
0:17
example which is machine speeds
0:20
switching using PLC
0:23
logic here we have a machine and this
0:26
machine can operate in two speeds
0:31
they are motor speed 1 and motor speed 2
0:36
in simple terms low speed and high
0:41
speed when we press the push button then
0:45
the machine will select motor speed one
0:49
that means low
0:51
speed and it turns on output q1 after a
0:55
delay of 5 Seconds so when the machine
0:59
is in stop condition when we press the
1:02
push button then the output q1 will be
1:06
on after 5 Seconds the output q1 means
1:11
the machine selected low speed okay for
1:15
normal operation the low speed will be
1:21
used if higher speed is
1:25
required then we can select motor speed
1:29
two nothing but high speed by pressing
1:33
the same push button one more time then
1:37
what happens the q1 will be off then
1:41
after 5 Seconds the Q2 will be on low
1:46
speed will be off and after 5 Seconds
1:50
delay high speed output will be on q1 is
1:54
low speed Q2 is high speed okay
2:00
let's suppose if we press the push
2:02
button again
2:05
then the high speed Q2 output will be
2:11
off then after 5 Seconds the low speed
2:15
q1 output will be on if we press the
2:19
push button again then the low speed q1
2:25
output will be off then after 5 Seconds
2:28
highp speed Q two output will be
2:31
on simply means when we press the push
2:35
button the machine changes its state
2:38
from low speed to high speed or high
2:41
speed to low speed every time there is a
2:44
5 Seconds delay remember
2:48
that and we have one more output which
2:52
is indicator light Q3 when the machine
2:56
is running in high speed then this indic
2:59
indicator light Q3 must be
3:02
on here we have one stop push button
3:05
which is NC contact normally close
3:08
contact when the stop push button is
3:11
pressed then the machine will stop both
3:14
q1 and Q2 outputs are
3:17
off and remember the push button input
3:21
is n content normally open
3:24
Conta okay so try to solve this
3:28
program and now I will go to
3:31
the
3:33
software
3:35
okay now I will take one
3:40
input and this one is my push
3:44
button remember if you are
3:48
trying this logic in your PLC software
3:52
then in the simulation tab you have to
3:56
select the second option momentary push
3:59
button make contact for the push button
4:22
input I will take one more
4:25
input I2 so this is my stop
4:31
stop push button in simulation tab you
4:33
have to select the third one momentary
4:36
push button break content because stop
4:40
is NC content normally closed content
4:43
and push button or start is normally
4:47
open Conta okay
5:03
now we will do the program for the
5:06
output
5:08
q1 what is output
5:13
q1 motor or machine low
5:18
speed
5:20
output if you want to run the machine in
5:22
low speed this q1 must be non
5:25
state so there is a delay of 5 Seconds
5:28
right then we have to go for a timer
5:31
which is on delay timer and I'll give
5:34
the block name on delay and I will enter
5:38
5
5:40
Seconds
5:41
okay and I will connect the timer output
5:44
to
5:45
the
5:49
q1 now I will take one pulse
5:54
relay
5:55
okay this is pulse
5:58
relay you to the block name pulse
6:03
relay and connect the push button to
6:07
this trigger input of pulse relay and
6:09
the pulse relay output to the on delay
6:13
timer so the program for the q1 is
6:20
completed now we will do the same
6:22
program for Q2 high speed so what I will
6:27
do
6:30
I will take one more P
6:36
relay and uh give the block
6:38
name pulse
6:42
relay and take one more
6:45
timer because the 5 Seconds delay is
6:48
there for
6:49
both low speed and high speed right so
6:54
this is my on delay again and I will
6:57
enter 5 Seconds here click okay okay and
7:01
take one more output which is
7:05
Q2 and this is my motor or machine high
7:11
speed
7:14
output so I'll connect this on delay
7:17
timer to this Q2 and pulse relay to on
7:21
delay
7:24
timer now here it is
7:26
interesting here I need one and basic
7:30
function
7:31
block
7:33
okay this is my block name is
7:46
end see when this Q2 will be on first
7:50
the push button must be pressed right so
7:53
I connect with the push button one
7:56
input and what is the other criteria
8:02
the other criteria is this pulse relay
8:06
output must
8:11
be this puls output must be off then
8:15
only Q2 must be on right either only one
8:19
speed will be on either q1 is on or Q2
8:22
is on for that purpose I'm interlocking
8:25
the q1 status here and I will add one
8:30
not also not gate okay double click here
8:34
at the input one bubble will come this
8:36
is not
8:39
gate and I'll connect the end block
8:42
output to the pulse relay
8:46
trigger now we have to connect this
8:52
top okay when the pulse
8:55
relay one of the input is reset when the
8:58
reset is is on then the pulse Rel output
9:02
will be off okay when the pulse Rel
9:05
output is off the last bit which is q1
9:09
the motor low speed also will be off for
9:12
that purpose I will connect this top to
9:16
the reset
9:18
input okay reset input
9:22
is
9:24
connected remember our stop is normally
9:28
Clos contact the means by default the
9:31
this bit will be in on state that means
9:34
the reset input is on when the reset
9:36
input is on the pulse Rel output is
9:38
always off for that purpose to avoid
9:42
this we have to add one knot at the
9:45
input of R reset input of pulse relay
9:49
okay that is why I will double click
9:51
here so not will come bubble will come
9:54
see normally close contact is used for
9:57
this stop so
10:00
the one on status will become off with a
10:04
knot again we have to connect this same
10:06
stop signal to the second pulse relay
10:09
reset also for that I will take one R
10:13
Block so this is my R Block R logic
10:19
gate I will connect this top to the one
10:22
input of
10:24
R again we need to do
10:27
the not gate so double click here on the
10:31
input one bubble will
10:33
come now I will connect this R output to
10:36
the reset pulse relay reset second pulse
10:39
relay reset
10:41
signal okay now what I will
10:44
do I will connect the pulse relay output
10:48
to the R Block one
10:53
input okay
10:59
now the program for the motor low speed
11:02
and motor high speed machion low speed
11:05
and high speed is completed right and
11:08
one more thing is missing is output Q3
11:11
we have to connect one status light
11:13
indicator
11:15
light what is
11:17
Q3 it is
11:19
an
11:21
indicator light for high speed when the
11:26
machine is running in high speed we must
11:28
turn on a indicator light so this is the
11:31
Q3 is the indicator
11:34
light when the motor is running in high
11:37
speed then we have to turn on this light
11:41
for that purpose I will use the Q2
11:44
status
11:45
okay Q2 status just connect the output
11:48
to the
11:50
Q3 that's
11:54
it the Q2 is connected
12:09
program is
12:14
completed now we will download and we
12:16
will check
12:19
okay I'm just adjusting the elements
12:35
okay now open the PLC Hardware if you
12:39
don't have the hardware no problem just
12:42
do the
12:45
simulation sorry I selected simulation
12:49
go to transfer PC to logo I'm using the
12:54
hardware remember you must select the
12:56
push button properties the first one is
12:58
make Conta the second one stop is break
13:02
Conta otherwise this you will not get
13:05
the
13:15
result also try to solve the same
13:17
program with different blocks
13:25
also okay
13:39
now I will go to online mode
13:48
also if you like our videos subscribe to
13:51
our Channel follow our social media
13:53
networks and share with your
13:57
friends now I am in online I will press
14:00
the input i1 first we will verify the
14:03
program status so I will press the input
14:05
i1 one
14:07
time after 5 Seconds output q1 will be
14:12
on right after 5 Seconds only the output
14:17
q1 will be on again I'll press the input
14:20
i1 what happens the output q1 output one
14:25
which is low speed will be off then
14:28
after 5 seconds the high speed output
14:30
will be on when the high speed output is
14:34
on the status light output Q3 also will
14:37
be on so
14:39
observe output one is off timer is
14:42
started for second pulse relay then
14:45
after timer is 5 seconds then output Q2
14:48
is on and output Q3 is also
14:51
on now if I press the input i1 again
14:54
what happens first output Q2 Q3 will be
14:58
off then after 5 Seconds the the machine
15:02
will change its speed from high speed to
15:04
low speed
15:07
check output Q2 Q3 off timer is started
15:12
after 5 Seconds output q1 is on like
15:16
this we can use one single push
15:20
button to control the machine speeds
15:24
high speed and low speed we can change
15:26
the machine low speed to high speed and
15:29
high speed to low speed every time when
15:32
we press the push button with some time
15:34
delay
15:36
right now we will see how this
15:41
works I'll press it
15:44
again
15:47
okay if you
15:51
see when the push button is pressed then
15:54
the pulse relay trigger is trigger input
15:57
will be on when the pulse relay trigger
16:00
input is on then the pulse relay changes
16:03
its output state if the output is off it
16:07
will go to on if the output is in on
16:09
state then the output will go to off
16:12
like that right now what is the status
16:14
of this first pulse relay the output is
16:17
off the blue line is off so when I press
16:20
the push button right now what happens
16:22
the Trier input will receive then the
16:24
pulse Rel changes its output state which
16:27
is off to on
16:29
when the pulse relay output is on the on
16:32
delay timer will be
16:34
started the time is 5 seconds so after 5
16:37
Seconds the on Del output is on that is
16:41
why the output q1 is on I will do that
16:44
right now
16:46
observe
16:48
so I will press the input i1 so what
16:53
happens Q2 is off timer started after
16:57
timeing after the 5 Seconds the q1 is
16:59
started q1 is
17:01
on now what is the logic for the second
17:04
one how it is changing its state from
17:07
low speed to high speed
17:08
now
17:13
okay when I press the push button i1
17:16
what happens the pulse Relay first pulse
17:19
relay receives the trigger then right
17:23
now the output is on so what happens the
17:26
output will change its state from on to
17:28
off
17:29
when the on Tim receives zero signal
17:32
means off status then the output is off
17:36
that is where q1 is off so this is
17:40
clear then what happens how the second
17:42
pulse relay receives the trigger when
17:45
the input push button is pressed then
17:48
the end
17:50
gate the last input is on
17:53
right the pulse relay output is
17:56
off that off will go to to this first
17:59
end gate and because of this not it will
18:04
receive on that means the endgate all
18:07
output all inputs are on then the output
18:11
is
18:12
on that is why the pulse relay will be
18:15
on the second pulse relay trigger is on
18:18
when the trigger is on again pulse Rel
18:21
changes its state right now it is off it
18:23
will go to
18:25
on whenever it is on the timer will be
18:28
started
18:29
after 5 Seconds the Q2 will be on when
18:33
Q2 is on Q3 also will on because same
18:36
thing is
18:37
connected
18:39
okay the end gate is an interlock
18:42
remember that okay it will only give the
18:46
trigger to the second pulse relay when
18:49
the when the push button is pressed and
18:53
the pulse relay must be
18:55
off okay remember that after pressing
18:59
the push button then the pulse relay
19:01
changes its state that state is
19:03
considered not the right now case so
19:07
what I will do I will press the input i1
19:10
then I will hold okay I will not release
19:13
so observe the
19:17
status push button is pressed right now
19:20
what happened this pulse Relay first pul
19:24
output is off that is connected to the
19:27
end input and because of not this is on
19:32
and push button is already on so what
19:35
happens all inputs of this end is on
19:39
that is why end output is on pul
19:42
receives the trigger whenever the pulse
19:45
delay Rees is trigger automatically
19:48
after some delay output will be
19:50
on so this is the importance of this one
19:54
and how this stop works when the stop is
19:57
pressed then the reset will go to both
19:59
pulse relays when the reset is on the
20:03
pulse relay output will be off very
20:05
simple you see I will press the input I2
20:09
I'll press the
20:10
stop and I will
20:13
hold what happened the stop is zero it
20:18
is pressed right because of this
20:19
normally closed content it will be open
20:22
content so right now it is off because
20:26
of
20:26
not the relay reset input is on
20:31
similarly the second pulse relay reset
20:33
input is also on that is why whenever
20:37
the pulse relay reset input is on the
20:39
pulse relay output is off so both pulse
20:43
relays outputs are off and pulse relay
20:45
outputs are
20:46
off and connected outputs will be off
20:50
very simple
20:53
okay and this R Block is used such that
20:57
we can turn off the high speed whenever
21:00
the low speed is selected okay this is
21:02
an interlock both end and R are
21:06
interlocks now simulate this program in
21:09
your laptop or computer
21:12
and understand why we
21:16
connected
21:18
okay the main reason exact
21:22
reason for this end and
21:26
R first inputs what is the main purpose
21:29
of the endgate first
21:32
input similarly what is the main reason
21:35
for R gate first input okay so analyze
21:41
and share your understanding with us
21:45
through the comment section thank you
#Science