Up next in 10

This tutorial was contributed by creator Softoni! Subscribe to their channel: https://www.youtube.com/@softonimotion
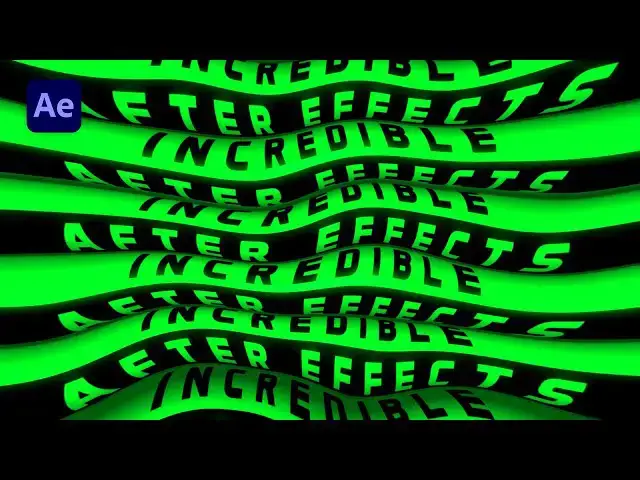
Here's more from the creator: 'Hey everyone, in this after effects tutorial I will show you how to create INCREDIBLE typography text animation and creative cylinder effect that you can use for your own purpose - your slideshows, intros, promos, lower thirds in After Effects without using any plugins. This technique is a cool way to make your videos or images looking even better and to impress your audience. Very easy to make, just follow my steps! Subscribe now.'
View Softoni's store here: https://filtergrade.com/vendor/softoni/
View all After Effects Templates on FilterGrade: https://filtergrade.com/product-category/after-effects-templates/
- - - - - - - - - - - - - - - - - - - -
Follow FilterGrade!
Instagram - https://www.instagram.com/filtergrade/
TikTok - https://www.tiktok.com/@filtergrade_
Facebook - https://www.facebook.com/filtergrade
Twitter - https://twitter.com/filtergrade
Pinterest - https://www.pinterest.com/filtergrade/
Newsletter - https://filtergrade.com/filtergrade-newsletter/
- - - - - - - - - - - - - - - - - - - -
Show More Show Less View Video Transcript
0:00
hello guys soft Tony here and welcome
0:03
back to this brand new After Effects
0:04
tutorial and in this one we're going to
0:06
create this incredible and Ultra Modern
0:09
typography here in After Effects so
0:12
before we begin hit that like And
0:14
subscribe button and turn on the
0:15
notification Bell so you never miss any
0:18
of my future content and without wasting
0:20
any more time let's jump into after
0:22
effects and get
0:28
started
0:31
[Music]
0:36
all right we're here in After Effects
0:38
and first as always let's create a new
0:39
composition control or command plus s or
0:42
hit on this little icon this is going to
0:44
be final composition for the final Let's
0:46
Do 90/20 by 1080 frame rate 30 frames
0:50
per seconds and duration I will leave
0:52
this one to around 10 seconds long hit
0:54
okay and now let's create another two
0:56
compositions let's hit here again on
0:58
this little icon this is going to be
1:00
Text Plus elements and for the width
1:03
let's type 560 by 1080 and then hit okay
1:08
and let's also create third composition
1:10
this is going to be text 01 and make
1:13
sure that WID now is 90/20
1:16
by 140 now hit okay and go here in text
1:20
01 composition let's create solid layer
1:23
go right click to create a new solid
1:25
this is going to be background for the
1:28
width and height also 9 20 by 140 hit
1:32
okay and then go here in effects and
1:34
pres it find fill effect drag and drop
1:37
onto the background and for the color
1:39
let's type here hexa code 00 F
1:44
f42 and then hit okay now let's create
1:47
our text hit control+ T I will just type
1:51
here
1:52
incredible I'm using this aromatics font
1:55
it's free font you can find it on Google
1:57
okay now hit here on this text go here
2:00
on the paragraph make sure to hit the
2:03
center text like so also go in align
2:06
option and Center it something like this
2:09
if you can find a line and paragraph
2:11
option just go window and you will find
2:13
a line here and paragraph option here
2:17
now let's open this little triangle go
2:19
here on animate find tracking option and
2:22
I will do here 30 for this incredible
2:25
text and if you have a longer text of
2:27
course you can play around here with
2:29
with this number but 30 is okay for me
2:33
now you can also go here on align to
2:35
align it again and now let's import this
2:38
text o1 here in Text Plus elements
2:41
composition open up this text plus
2:43
elements composition drag and drop here
2:45
from the project window here on this
2:48
text plus element composition like so
2:51
hit R for rotation and let's do here 90
2:56
okay for the next step what we can do is
2:58
to hit on this side the composition go
3:01
here on align option and make sure to
3:03
align it all the way to the left now hit
3:06
control+ D or go edit and then duplicate
3:09
this text o1 and then you can use arrows
3:12
on your keyboard move it on the right
3:14
side like so make sure that those two
3:16
compositions are overlapping like this
3:20
okay let's also change color of this
3:22
composition for better view hit control+
3:24
K and I will do background color maybe
3:26
to black color hit okay hit okay here
3:30
also again and now let's select this
3:33
text o1 both composition and then hit
3:35
control+ D once again move it above
3:38
something like this and you can also use
3:41
shift and right arrow on your keyboard
3:44
to do scene like this okay this is
3:48
looking good to me and now let's create
3:51
our text O2 as you can see this is going
3:53
to be our text o01 and this is going to
3:56
be text O2 again text o01 and here it's
4:00
also going to be text O2 okay now let's
4:03
hit control+ D here in the project
4:05
window now we have also text O2 select
4:09
second and fourth text o1 hold alt on
4:12
your keyboard and just drag and drop
4:14
onto those two compositions Now open up
4:17
this text O2 and now let's change colors
4:21
hit here on the background hit F3 to
4:23
show effects control we can copy this
4:26
hexa code for later hit control+ C hit
4:29
okay and here also you can change color
4:31
to black color and go here on incredible
4:34
text also find in the fact and PR it
4:37
fill double click and let's copy hexa
4:40
code or go 00 f f42 for this cool green
4:45
color I will also rename this incredible
4:48
text to after effects of course you will
4:52
type your own text and as you can see
4:54
now we have this cool looking scene here
4:58
in the text plus elements okay one step
5:02
that we have also forgotten to do is to
5:04
hit control+ K and to change this height
5:07
instead of 1080 to
5:09
9020 hit okay and now as you can see our
5:13
text o01 and text O2 are all the way up
5:16
to boundaries of the composition okay
5:19
now let's import this uh Text Plus
5:21
elements here in the final composition
5:23
go here again in the project window drag
5:25
and drop Text Plus elements and also we
5:29
can change background color hit control+
5:31
K we will do maybe black like before hit
5:34
okay and then let's add our next effect
5:37
go here in the effects and preset find
5:39
CC cylinder drag and drop onto the text
5:42
plus elements and here also we can make
5:45
a few adjustments hit R for rotation
5:47
type here minus 90 and basically we can
5:51
play around here with the options okay
5:54
for the radius instead of 100 let's go
5:56
to around 90 something like this open up
5:59
this uh rotation option let's animate
6:02
this y parameter y rotation set up the
6:05
first key frame here at zero frames okay
6:07
type here one and then go to around 10
6:10
seconds and instead of one type here
6:13
zero now when we hit zero we have cool
6:16
rotation of our incredible After Effects
6:20
text okay now let's open also light
6:23
option and for the light intensity
6:25
instead of 100 let's go to around
6:27
150 and for light height instead of 24
6:31
type here 40 okay now let's close this
6:34
CC cylinder for now we can duplicate
6:37
this text plus elements but before that
6:40
let's hit P4 position and move all the
6:43
way down somewhere like here okay here
6:47
on the bottom of our scene now hit
6:48
control+ D and then for this uh second
6:52
text plus elements move up you can use
6:54
arrows also on your keyboard and go
6:57
somewhere like here something like this
7:00
okay hit Double U to show all of the key
7:03
frames grab the wire rotation from this
7:06
uh uh CC cylinder effect okay now hit
7:09
right click go here on the key frame
7:12
assistance and select this option time
7:14
reverse key frames now hit zero on your
7:17
keyboard to see the change and this is
7:20
already looking cool to me now hit this
7:23
text plus elements and this also hit
7:26
control+ D once again move them up above
7:29
our first text plus elements and then
7:33
let's also readjust it here in the final
7:36
scene something like this okay you can
7:38
also change the colors of the
7:40
composition go right click here and I
7:42
will change random color maybe red now
7:45
let's also hit control+ D once again for
7:48
those two compositions move it above
7:51
like before also hit arrows on your
7:54
keyboard move it up in the scene
7:56
something like this okay change color of
7:59
the composition and you can duplicate
8:02
this one once again hit control+ D okay
8:06
and to make sure that our scene is
8:09
filled with this after effects and
8:11
incredible text hit zero on your
8:14
keyboard and now we have really cool and
8:17
awesome movement of the after effects
8:21
and this first incredible text okay now
8:25
let's also create background here in the
8:27
finals to fulfill the gaps go right
8:29
click to create a new solid layer this
8:31
is going to be background of course also
8:34
9020 x 1080 hit okay move this solid
8:37
layer all the way down above the
8:39
compositions now go in effects and
8:41
preset find fill effect okay drag and
8:44
drop onto the background and here you
8:46
can use ey dropper like this in the
8:48
scene and let's change color to maybe
8:51
darker shade of the green color
8:53
something like this and then hit okay
8:56
now select all of the text plus elements
8:58
composition okay and let's find here
9:01
drop shadow effect double click and for
9:05
the distance and softness type here 20
9:08
okay I will close this effects control
9:10
for now and now it's time to add our
9:13
first adjustment layer go right click to
9:15
create a new adjustment layer this is
9:17
going to be turbulent displace okay go
9:21
in the fact and pres it find turbulent
9:22
displace effect drag and drop onto the
9:25
adjustment layer okay and here basically
9:28
you can play around with all option
9:30
turbulent bulge twist and whatever fits
9:33
to you I will do twist and for the
9:35
amount you can also play around I will
9:38
do maybe 30 and for the size
9:41
220 you can play around with all option
9:44
until you're satisfied with your final
9:46
results
9:47
220 okay now let's create another
9:50
adjustment layer okay this is going to
9:52
be curves effect go here in effects and
9:56
preset find curves drag and drop on onto
9:59
the adjustment layer I will just draw
10:01
this kind of curve to make this scene a
10:05
little bit darker cool and also let's
10:09
add another adjustment layer create new
10:11
find here new adjustment layer this is
10:13
going to be noise go in effects and pres
10:15
it find noise effect okay drag and drop
10:19
onto the adjustment layer uncheck this
10:22
option use color noise and let's type
10:24
here
10:25
5% and also let's add fourth adjustment
10:28
layer go right click to create a new
10:30
adjustment layer this is going to be
10:33
Optics Optics compensation go into fact
10:36
and prit find Optics compensation effect
10:39
drag and drop onto the adjustment layer
10:42
and check this optional reverse lens
10:44
Distortion and type here maybe 90 or 91
10:48
or two something like this and as you
10:51
can see when we hit zero our scene is
10:54
looking incredible you can also add here
10:57
more Effects light effects whatever fits
11:00
to you play around with the option maybe
11:02
to do this field of view opposite
11:06
everything is pretty much up to you we
11:09
can also animate here turbulent display
11:11
Evolution option hit here on this
11:13
turbulent display effect again uh hit
11:16
alt on your keyboard on this Evolution
11:18
and type here time asterisk maybe around
11:22
60 or 50 if you want to go slower just
11:26
type here lower number if you want to
11:27
see faster animation type here higher
11:30
number and now in our finals hit zero
11:33
and this is looking really cool and
11:35
incredible to me all right guys that was
11:39
everything for today's tutorial hope you
11:41
learn something new like always if you
11:43
haven't subscribed to my Channel please
11:45
hit that subscribe button also leave a
11:47
like and comment Down Below in the
11:48
comment section take a look on my
11:50
channel on my profile for even more
11:53
great tutorials and until next time stay
11:56
creative and bye-bye
12:00
[Music]