0:00
hello guys of Tony here today we will be
0:03
diving into one of the most common
0:05
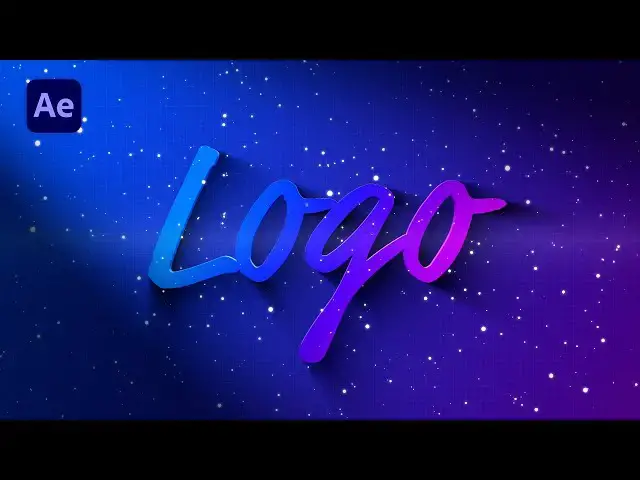
requests in visual design creating a 3D
0:08
logo in Adobe After Effects so I'll be
0:11
showing you the steps to achieve that
0:12
from start to finish if you ever wanted
0:15
to learn how to create an impressive 3D
0:17
logo that will elevate your vendor
0:19
project then you're in the right place
0:21
but before we begin I want to ask for
0:24
your support if you find this tutorial
0:25
helpful please give it a thumbs up and
0:28
consider subscribing to my channel for
0:30
more exciting content like this your
0:32
support means a lot of to me and helps
0:34
me continue creating valuable tutorials
0:36
for you now let's Jump Right In and
0:39
start creating our 3D logo in After
0:54
all right we're here in After Effects
0:56
and I have already created my first
0:59
composition hit Control Plus n or this
1:02
little icon here to create a new one
1:04
mine is final here uh 30 frames per
1:07
seconds 90 20 by 10 88 seconds long hit
1:11
okay and also we will create another
1:14
composition uh hit also Control Plus n
1:17
and I will rename it the logo you can
1:19
also type your own text and then hit ok
1:23
now as you can see I already have my
1:26
soft Toni logo here just drag and drop
1:29
your media here in our a full HD logo
1:32
comp scale it down or up if you need
1:35
like so maybe I will leave it to 90 or
1:39
so and also now it's time to drag and
1:42
drop our logo composition here in our
1:46
final count like so now go here in
1:50
effects in preset and type bevel Alpha
1:55
Alpha drag and drop onto our logo layer
1:59
like so and for Edge thickness type here
2:02
9 light angle type 0 and light intensity
2:05
you can play around but I will type here
2:08
0.5 now as you can see we have this cool
2:12
logo shape here in our final composition
2:15
okay also now it's time to hit P for
2:19
position and also turn on this 3D layer
2:23
for this logo composition if you can't
2:25
find this 3D icon just hit here toggle
2:29
switches and nodes and turn on this
2:31
little icon now it's time to also rename
2:35
this logo to logo 01 and this is really
2:38
important step to duplicate this logo 1
2:42
40 times for this logo or one hit
2:46
control plus d this is going to be logo
2:48
O2 grab those two a composition hit p
2:52
and for the Z value hit for this logo 1
2:56
hit here 1 and for this second one type
3:00
here two for this duplicate once again
3:03
type here our position
3:05
three and just make sure that each
3:09
duplicate is larger by one number than
3:12
the previous one I will also speed speed
3:14
up this part so you don't have to wait
3:17
okay now as you can see we have all of
3:20
our 40 logo compositions here and uh for
3:24
the set position our first one is one
3:26
and uh all all the way up to 40 uh where
3:30
is our set position also 40. now it's
3:34
time to hit this first logo one and
3:36
delete this bevel Alpha effect also hit
3:40
control plus a to choose all of our logo
3:44
composition then go right click and find
3:46
here pre-compose I will rename it to
3:49
plus elements just make sure to move all
3:54
attributes into the new composition and
3:56
then hit ok now in our finals we have
4:00
this logo plus elements composition also
4:02
it's time to create our background hit
4:05
right click and then go new to create a
4:07
new solid we will rename it
4:09
background hit OK and go here in effects
4:13
and preset and find here ramp effect
4:16
drag and drop onto our background move
4:19
the background below our logo plus
4:21
elements and also it's time to make also
4:24
a few adjustments here for our
4:26
background hit here on gradient ramp for
4:30
this start of ramp and go to maybe here
4:32
for end of ram but go here and now you
4:36
will change the colors according your
4:38
logo colors for me it's okay to change
4:41
maybe a blue combination with purple
4:44
combination something like this for this
4:48
one here for the second one I will
4:51
choose blue color and this is looking
4:53
really cool for me for my logo colors
4:57
for now okay our next step is also to
4:59
duplicate this logo plus element Ctrl D
5:03
or go edit and then duplicate for this
5:06
second one hit enter and rename it to
5:10
and now it's time to also add a few
5:13
effects type here fill effect drag and
5:16
drop onto our shadows for the color
5:18
change to Black of course and our next
5:21
effect is going to be radial fast blur
5:25
also drag and drop on our shadows and
5:28
for the center uh grab this point and
5:32
maybe to go like here for the amount
5:34
type here 80 or 90 according your needs
5:37
but for Me Maybe 90 this is looking
5:40
really really cool also you can play
5:42
around with the opacity hit T if you
5:45
want this kind of Shadow just to move
5:47
opacity here close to zero if you want
5:50
to see the better our shadows just leave
5:53
it at maybe 100 or 90 percent like so
5:58
alright our next step is to create here
6:01
a camera in our final single right click
6:04
and then find here camera hit OK also we
6:08
will create our null object our camera
6:10
control right click then go new find
6:13
here now object and for this null object
6:20
control and also our next step is to
6:24
parent our camera with our camera
6:26
control here with this parent and Link
6:29
if you can see this one just go right
6:32
click columns and then you can find here
6:34
parent and Link option and just do here
6:38
like so okay now it's time to animate
6:41
our logo but before that just make sure
6:43
to turn on this uh continuously
6:46
rasterizing for the our logo plus
6:48
elements and Shadow like this and our
6:51
next step is also to hit this little
6:54
triangle here on our camera or one go to
6:56
zoom here and set up our first keyframe
6:59
hero here or our zero frames and then go
7:03
to around 6 seconds or so and type here
7:08
1900 and now as you can see in our
7:12
finals we have the school movement in
7:15
our final camp and also our next step is
7:19
to animate our scale and rotation here
7:22
on our now object our camera control go
7:25
to around one second one second and 50
7:28
frames hit s set up our first keyframe
7:31
and then go to around zero and type here
7:35
120 also hit R for rotation uh just also
7:39
make sure to turn on this 3D icon for
7:42
our camera control and also will animate
7:46
our rotation while you're holding shift
7:49
you can hit U to uh see all of our
7:52
keyframes and set up our first keyframes
7:56
also here on our one second and 15
8:02
for the X Type here maybe 45 for the Y
8:07
maybe 30 and now in our finals we have
8:11
this cool movement of our logo you can
8:14
also play around with the numbers uh try
8:17
a different one maybe here 60
8:19
for the Y rotation according your needs
8:22
also 60 and just uh also for that play
8:27
around like so then choose all of our
8:30
keyframes for our rotation and scale
8:35
and then hit F9 on your keyboard go to
8:38
the graph editor and draw a curve like
8:41
this and now in our finals we have this
8:44
really cool logo animation
8:48
also what we can do is to go again here
8:51
in our logo and instead of 90 maybe
8:54
leave it to 100 and our logo looks
8:58
bigger here in our final composition and
9:01
when we hit zero we're getting this
9:04
really cool animation also if you want
9:06
you can readjust our keyframes instead
9:09
of 150 you can go to 2 seconds just play
9:12
around until you're satisfied with the
9:18
okay now also what we can do to bring
9:22
our logo on the highest level is to
9:24
create another shadows and lights go
9:27
right click find here adjustment layer I
9:30
will rename it just to spotlight
9:34
like so go here in the facts and preset
9:37
also if you can't find the facts and
9:38
preset just go windows and I will find
9:41
it here and find here CC Spotlight drag
9:45
and drop onto our adjustment layer and
9:48
also you can play around with the
9:49
handles like so I really like this
9:52
effect for this intensity type here 60
9:55
Edge softness to maybe 100 also cone
10:00
angle you can play around
10:01
also height completely depends on you
10:06
and in our finals when we hit zero we
10:10
have this cool shadows uh here in our
10:13
finals all right our next step is to
10:16
create another adjustment layer rule
10:18
right click find here new find also
10:21
adjustment layer we will rename it to
10:24
light well here in the facts and precept
10:27
and type here light sweep like so and
10:31
drag and drop onto our light layer for
10:34
the direction type here 90 and drag this
10:38
y parameter to the center of our
10:41
composition also for the edge thickness
10:43
and Edge intensity change here to zero
10:47
you can play around with the width maybe
10:49
to around 90 and also hit t for opacity
10:54
we will lower down to maybe around 40
10:56
percent or so and now in our finals we
10:59
have this school light here in our
11:01
center of our composition
11:03
also what we can do is to create a solid
11:06
layer go right click find here new and
11:09
then create a solid layer I will rename
11:11
it star burst hit OK move it above our
11:17
logo layer and also find here in the
11:20
facts and preset star burst effect drag
11:24
and drop onto our layer and also find
11:26
here fill effect drag and drop here in
11:30
our finals for the scatter go to around
11:33
you can play around maybe to around 300
11:38
0.2 change color to white and now as you
11:42
can see we have this cool particles here
11:45
in our finals also type here another
11:49
effect roughen edges drag and drop onto
11:52
our layer and also you can play around
11:56
with the options to get more realistic
11:58
particles here in our finals readjust it
12:02
a bit more until you're satisfied and
12:04
also what we can do is to add a little
12:06
bit glow for our particles go here in
12:09
the facts and freezer type glow and
12:11
dragon drop here in our finals and now
12:15
as you can see this is looking really
12:17
really cool to me and when we hit zero
12:19
we have this really cool animation in
12:24
and for our last step we can also create
12:27
another solid layer right click create a
12:29
solid layer we'll rename it to grid and
12:34
also find here grid effect drag and drop
12:37
onto our grid layer like so move our
12:40
grid layer below our shadows layer and
12:43
also for the grid instead of this corner
12:46
Point change here to bit slider or with
12:49
change here to 20 Border to 1 and also
12:53
we can play around with the blending
12:54
modes and opacity go here find overlay
12:57
and now as you can see we have also
13:00
these cool grid lines here in our finals
13:02
also you can hit T and also lower
13:06
opacity to around maybe 50 including
13:09
your needs and now when we hit zero you
13:12
can also see our cool 3D logo animation
13:17
all right uh that was everything for
13:20
today tutorial if you enjoyed this one
13:22
and found it helpful I would greatly
13:25
appreciate if you could hit that
13:27
subscribe button and consider checking
13:29
out uh the other videos on my channel by
13:32
subscribing you'll stay updated with my
13:34
latest content and help support me in
13:37
creating more tutorials like this in the
13:39
future I'm always open to feedback and
13:41
suggestions so please feel free to leave
13:43
comments below and let me know what
13:45
other tutorials or topics you would like
13:48
to see on my channel thank you for your
13:50
support and I'll see you in the next
13:53
video Stay creative and bye bye