Up next in 10

This tutorial was contributed by creator Softoni! Subscribe to their channel: https://www.youtube.com/@softonimotion
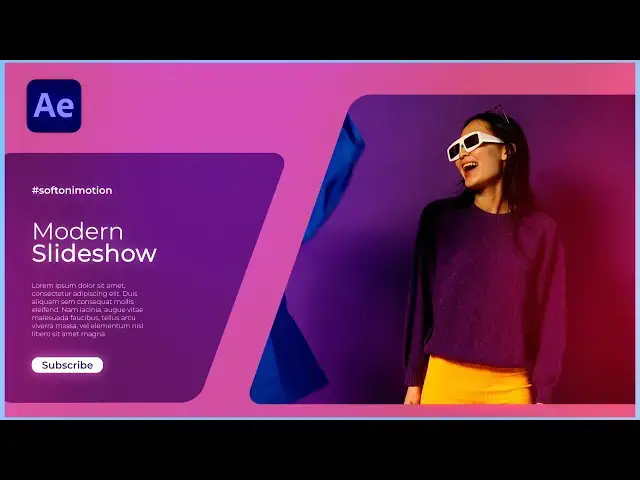
Here's more from the creator: 'Hello, everyone! Join me in my latest After Effects tutorial, where we'll explore the creation of a Modern and Unique Slideshow.
⚙️ What to Expect:
Unlock the techniques to design a modern and unique slideshow using After Effects.
Discover creative methods to make your slideshows stand out with a distinct and contemporary touch.
Learn step-by-step processes to craft a visually appealing presentation that resonates with a modern aesthetic.
👍 Stay Tuned:
If you're excited to elevate your slideshow game, make sure to hit the subscribe button and give the video a thumbs up. Your support encourages the creation of more engaging content!
🚀 Let's Dive In:
Join me on this tutorial journey, where we'll navigate through the steps of creating a slideshow that blends modern design with uniqueness in After Effects.'
View Softoni's store here: https://filtergrade.com/vendor/softoni/
View all After Effects Templates on FilterGrade: https://filtergrade.com/product-category/after-effects-templates/
Show More Show Less View Video Transcript
0:00
hello guys soft Tony here and in today's
0:03
tutorial we will be creating a modern
0:05
and unique slideshow that will Elevate
0:07
the quality of your videos to the
0:09
highest level we will be combining shape
0:11
layers with images and achieving great
0:14
results in a simple way this is a truly
0:16
a technique that everyone can use to
0:18
make their unique slideshow or intro and
0:21
before we start make sure to subscribe
0:22
to my channel if you haven't already hit
0:25
the like button and turn on the
0:26
notification Bell so you don't miss any
0:29
of my upcoming video tutorials and
0:31
without any further Ado let's jump
0:34
straight into after effects and start
0:39
[Music]
0:48
creating all right we're here in After
0:50
Effects and first like always let's
0:52
create new composition hit on this
0:54
little icon or control or command plus n
0:56
on your keyboard and this is going to be
0:58
final composition like usual and for the
1:00
width and height full HD 90/20 x 1080 30
1:04
frames per seconds and for the duration
1:06
for this final I will do to around 30
1:08
seconds and of course you can type here
1:10
your own number now hit okay and let's
1:13
create another composition hit here
1:15
again this is going to be slide 01 also
1:18
90/20 x 1080 and for the duration I will
1:21
do now 5 Seconds hit okay and as you can
1:24
see here in the project window I already
1:26
have this media 01 and media o02 this is
1:29
free footage from pixels.com okay and
1:33
now also let's create here scene in our
1:36
slide 01 open up this slide o01
1:38
composition go right click to create new
1:41
solid layer this is going to be bg1
1:44
background 1 9020 by 1080 and then hit
1:47
okay now go here in the facts and
1:49
presets and if you can't find the facts
1:51
and presets just go window and you will
1:53
find effects and presets here okay now
1:56
let's type fill effect drag and jop onto
1:59
the background 1 and for this particular
2:02
tutorial I will do this color type here
2:05
this hexa code 8 CC B E1 and then hit
2:10
okay now let's duplicate this background
2:12
o1 hit Control Plus D or go edit and
2:15
then duplicate this is going to be
2:17
background O2 it ask for scaling and for
2:20
this one let's go to around
2:23
98% okay select this background O2 again
2:27
go here in the facts control and let's
2:29
type this hexa code D1 6 2 8 9 this is
2:35
going to be our second color and then
2:37
let's hit okay now let's create shapes
2:40
here in our slide o1 composition but
2:42
before that let's turn on titles and
2:44
action save for easy drawing okay make
2:46
sure to unselect everything here in our
2:49
timeline and then go here or hit Q on
2:51
your keyboard find this rectangle tool
2:54
okay and let's draw a shape like this I
2:57
will do somewhere around here okay let's
3:01
rename this one to left shape okay and
3:05
then open up this rectangle one option
3:07
go here on rectangle pad then right
3:09
click and let's select this option
3:11
convert to bizier pad now let's go here
3:14
on ADD find here around corners and you
3:16
can play around with the corners and for
3:18
the round option I will do to around 50
3:21
this is looking cool now select here
3:23
again on our pad then hit V on your
3:27
keyboard and let's readjust our shape
3:30
you can also use shift on your keyboard
3:32
and let's draw something like this and
3:35
this is already looking awesome okay and
3:39
let's also add fill effect go here in
3:41
effects and PR it drag and drop on our
3:43
left shape and let's type here this hexa
3:46
code 68 28 44 and now we have this kind
3:51
of Darker pink color now hit okay and as
3:55
you can see we have this cool shape and
3:57
let's draw another shape make sure to
4:00
also unselect everything go here again
4:02
on our rectangle tool and let's draw
4:05
from somewhere around here perfect
4:08
rectangle something like this okay and
4:11
let's also repeat the process this is
4:13
going to be right shape then also open
4:17
up this rectangle 01 go here right click
4:20
and convert to bizier pad and then go
4:23
add find your around corners and like
4:25
before let's click here instead of 10 50
4:29
and this this is looking cool now also
4:31
open up right shape options select this
4:34
part o1 hit V on your keyboard again
4:37
hold shift on your keyboard and move it
4:39
to the right or left side go something
4:43
like this and also select this point
4:45
here and move it to the right side
4:47
something like this and now it's time to
4:50
make our further adjustments let's
4:52
animate our shape go here at 1 second
4:55
hit P4 position set up the first key
4:57
frame then go to zero frames and let's
5:00
move this y parameter to maybe somewhere
5:02
around here outside of our composition
5:05
okay now select both of the key frames
5:07
hit F9 on your keyboard or go right
5:09
click key frame assistance easy ease
5:12
then select this option graph editor if
5:14
you can find curve like this right click
5:16
and you will find edit speed graph here
5:19
okay and let's draw a curve like this
5:22
hit zero on your keyboard and now we
5:24
have this cool animation of our right
5:27
shape let's also animate our left shape
5:30
go here also at 1 second for this left
5:33
shape hit P4 position set up the first
5:37
key frame like before then go here to
5:39
zero frames and for this y parameter
5:41
move up outside the borders of our
5:44
composition select this again both of
5:47
the key frames F9 go to graph editor and
5:50
let's draw the same curve like before
5:53
hit zero again and now we have cool
5:56
animation of our shapes now it's it's
5:59
time to import our media o1 here in
6:02
slide o01 composition just drag and drop
6:05
here below this right shape and now
6:08
let's change track mat and if you can
6:10
find track mats hit here toggle switches
6:12
and modes and find here Alpha mat and
6:15
also turn on this option toggle mask and
6:17
shape PA visibility to see the borders
6:20
of our media okay now hit s if you need
6:23
for scaling I will do to around maybe 37
6:28
okay and reposition it here here in our
6:31
slide o1 composition maybe to do
6:34
something like this hit zero and this is
6:37
already looking cool let's also animate
6:40
our media o1 go to maybe 1 second hit s
6:44
for scaling set up the first key frame
6:47
here then go to around maybe seven or
6:49
eight frames ahead and let's type here
6:52
your own number for me this is going to
6:55
be maybe 42 select both of the key
6:58
frames hit F9 go to gra editor and draw
7:01
the same curve like before hit zero and
7:04
now we have this type of cool
7:07
animation we have to move this media o1
7:10
slightly to the left because it doesn't
7:12
fit completely in our shape and just do
7:15
something like this you can see the
7:17
borders of our media 01 hit zero again
7:21
and now our animation is looking cool
7:25
for the next step let's precompose this
7:26
media o1 and right shape select them
7:29
then go right click select this option
7:31
precompose this is going to be right
7:34
shape plus media and then hit okay now
7:38
let's duplicate this background O2 hit
7:40
control+ D move this above right shape
7:43
plus media let's rename this one to mat
7:46
and find here on this right shape plus
7:48
media Alpha mat and now as you can see
7:51
our right shape and media are inside the
7:53
borders of our background and this is
7:56
looking nice hit zero and this is
7:59
looking awesome okay now let's create
8:02
text here inside of our slide o1
8:04
composition make sure to unselect
8:06
everything and then hit control+ t or go
8:09
here on this little icon horizontal type
8:11
tool and I will click somewhere around
8:13
here for the font I'm using this monster
8:16
R regular and for the font size go to
8:19
around 70 I will just do random text
8:21
modern let's readjust This Modern text
8:24
to maybe somewhere around here you can
8:26
use arrows on your keyboard and now
8:28
let's an open up this Little Triangle go
8:31
to animate and find position now let's
8:34
go here to add option do not go here to
8:36
animate just go here to add find here
8:39
property and let's also find opacity for
8:42
the position let's go to maybe around
8:44
100 for this x parameter and for the
8:47
opacity let's go to around zero Now open
8:50
up this range selector 01 go to zero
8:52
frames and let's animate offset let's
8:55
type here minus 100 and then let's set
8:58
up the first key frame then go to around
9:00
1 second and let's type here 100 and now
9:04
as you can see we have this basic
9:06
animation Now open up this Advanced
9:08
option and for the shape instead of
9:10
square change here to Ram up and hit
9:13
zero again and this is all ready looking
9:16
better now select both of the key frames
9:18
hit F9 hit zero again and this is
9:21
looking awesome now let's duplicate This
9:24
Modern text hit control+ D and use
9:27
arrows on your keyboard I will move this
9:29
one somewhere around here let's rename
9:31
this one to slide show something like
9:35
this double click then go here to
9:38
character and select this option Fox
9:40
bolt hit zero again in the finals and
9:43
this is looking cool now what you can do
9:45
is to reposition here in the scene maybe
9:48
to go seven or eight frames ahead hit
9:50
zero again and this is looking nice now
9:54
let's also create our third text hit
9:56
control+ T again and draw a box
9:59
somewhere around here like this and I
10:03
have already my text copied I'll just
10:05
hit control+ V and for this font size I
10:08
will do 20 turn off this fox bolt and
10:12
for the moner I will do instead of this
10:14
regular to maybe light hit here zero
10:18
again as you can see nothing happens
10:20
with our third text what you can do is
10:22
to open up this first text and find here
10:25
animator 01 hit control+ C to copy and
10:29
just hit control+ s paste it on our
10:32
third text hit zero and this is looking
10:35
awesome for the next step let's also
10:38
create subscribe button go here again
10:40
and find rectangle tool okay make sure
10:42
to unselect everything here and let's
10:45
draw a shape like this okay now let's
10:48
rename this one this is going to be
10:50
subscribe button okay then open up this
10:54
rectangle o1 select this option
10:56
rectangle PAAD go right click convert to
10:58
B pet okay now let's go add and find
11:02
here again round corners and for the
11:04
round corners instead of 10 let's type
11:06
20 and as you can see our shape is
11:09
looking cool now what we can do is to
11:11
duplicate This Modern text once again
11:13
hit control+ D move above subscribe
11:16
button and go here in the facts and
11:18
preset find F drag and drop onto our
11:20
modern to text and this is going to be
11:22
let's your name subscribe for the font
11:26
size let's go to around maybe 25 okay
11:30
and for the color let's go to Black and
11:32
move it down above our subscribe button
11:35
shape and let's double click again and
11:37
for the font size instead of this 17
11:40
let's try maybe 25 or
11:43
30 okay reposition again use arrows and
11:47
also let's go instead of this regular
11:50
maybe find this semi bold option hit
11:53
zero again and now we have also this
11:56
subscribe text and this is looking cool
11:59
let's duplicate This Modern text once
12:01
again hit control+ D move this one above
12:04
to somewhere around here and for this
12:06
one let's go to around also 30 for the
12:09
font instead of regular let's find again
12:12
semi bolt and I will just type sof Tony
12:15
motion now let's hit zero again and this
12:19
is looking cool in every moment you can
12:22
select all of our text and if you're not
12:24
satisfied with the position move it up
12:26
or down it completely depends on menu
12:29
now let's create masks for our subscribe
12:32
text and for the left shape first let's
12:34
click on our subscribe button hit
12:36
control+ D move this one above our text
12:39
and then let's rename this one to mat
12:42
okay select the Subscribe text find here
12:44
on track mats Alpha mat and when we hit
12:47
zero as you can see subscribe text will
12:49
be animate inside of our subscribe
12:52
button shape okay now let's select this
12:55
background O2 hit control+ D let's also
12:58
rename this one to mat select this mat
13:01
background move it above our left shape
13:04
layer and then here in track mats find
13:06
also Alpha met and now as you can see
13:09
our left shape will be inside the
13:11
boundaries of our background behind now
13:14
hit zero again and our animation is
13:17
looking awesome and for the final step
13:20
let's also create small shape Above This
13:22
left shape hit Q again and let's maybe
13:25
draw something like this this small
13:28
shape and this is going to be shape O2
13:32
and let's also open up this rectangle
13:34
repeat the process like before go right
13:36
click onver to bizer pad then go add
13:39
find here round corners and for the
13:41
round corners let's also type 20 and now
13:44
as you can see we have this cool shape
13:46
here maybe instead of 20 let's go to
13:49
around 15 or so and we can also animate
13:53
this shape go here maybe at 1 second hit
13:56
P4 position set up the first key frame
13:59
go here at zero frames and this x
14:02
parameter move all the way to somewhere
14:04
around here now select both of the key
14:07
frames hit F9 go to graph editor and
14:10
draw this type of curve hit zero and our
14:13
animation is looking awesome you can
14:17
also animate this subscribe button but I
14:20
will leave this one to you now it's time
14:22
to go here in the final composition I'll
14:24
close this effects control for now
14:26
select this slide o1 and import it here
14:29
here in our final composition let's
14:31
duplicate this slide hit control+ D move
14:34
this one to maybe 4 seconds or so and
14:37
let's also duplicate here in the project
14:40
window this slide o1 hit contrl plus d
14:42
this is going to be slide O2 select this
14:45
upper slide o1 then while you're holding
14:47
alt on your keyboard just drag and drop
14:49
this slide O2 on top of this slide o1
14:52
double click let's also select this
14:55
right shape media and let's find it here
14:58
hit control plus d and repeat the
15:00
process hold alt and drag and drop here
15:03
on top of the media and now we can
15:05
change our media O2 to completely
15:08
different image now let's find here this
15:11
media O2 hold alt like before and drag
15:14
and drop on our media o1 we can readjust
15:18
our scale hit you to show all of the key
15:20
frames for the first key frame let's go
15:22
maybe to around 30 and for the second
15:25
key frame let's go to around 35 and now
15:28
when we go here in the final composition
15:30
this is going to be our first slide and
15:33
this is going to be our second slide now
15:36
let's create transition for our slide O2
15:38
make sure to unselect everything and
15:40
just double click on this rectangle tool
15:43
okay let's rename to transition 01 okay
15:47
now open up this content option
15:49
rectangle rectangle pad go right click
15:51
convert to bazer pet and then go to add
15:54
find here again round corners and for
15:57
the round corners let's play around I
15:59
will do maybe 50 okay now let's make
16:01
this transition o one shape layer
16:03
smaller it will also begin here from 4
16:06
seconds okay then go here at the end of
16:08
this slide O2 and select this transition
16:11
o1 hit control shift plus d and delete
16:14
the rest of this transition O2 now
16:17
select this transition o1 hit s for
16:19
scaling and also while you're holding
16:21
shift hit R for rotation set up the
16:24
first key frame here at maybe 4 seconds
16:27
for scale type here zero then go to
16:30
around maybe 5 seconds and let's type
16:33
here
16:34
105 okay now let's also animate rotation
16:38
set up the first key frame also here
16:40
type 45 then go to around 5 Second also
16:43
and let's type here zero select both of
16:46
the key frames hit F9 go to graph editor
16:50
and draw the same curve like before and
16:53
for the final step let's find here for
16:55
this slight O2 Alpha met now hit zero we
16:58
we have this first animation and as you
17:01
can see now we have this second and this
17:04
is looking great now what we can do here
17:07
inside the slide O2 change colors for
17:10
this background let's hit F3 to show
17:12
effect control maybe to do this darker
17:15
blue color hit okay also let's change
17:18
this background O2 for this second one I
17:21
will just type E A
17:24
580 to get this cool orange color and
17:28
let's also select this left shape change
17:31
color to maybe white color you can play
17:34
around here with the colors of course
17:36
maybe this one okay and now for the rest
17:39
of the text let's select them and then
17:42
go here in effects and present find F
17:44
effect and let's change colors to this
17:47
black color hit okay and also for this
17:50
subscribe button also go here in the
17:53
effect and preset find F double click
17:55
and let's type here hexico 2525 and and
17:59
25 to get this kind of color copy this
18:02
one and paste it also on this shape O2
18:05
and for the final step let's also change
18:07
this subscribe to this white color and
18:11
now as you can see we have this cool
18:13
color combination white black and orange
18:16
color and this is looking awesome now go
18:19
back here in the final composition hit
18:21
zero this is our first slide and from
18:25
the four seconds this is our second
18:27
slide and this is looking great
18:29
what we can do is to also make movement
18:31
for this slide o1 hit S4 scaling on our
18:34
first frame hit 103 set up the first key
18:38
frame go to around 5 seconds and let's
18:40
type here 100 now copy the scale
18:44
properties go to slide O2 at the
18:47
beginning and paste it here to get the
18:50
same Movement Like This movement on our
18:53
slide O2 hit zero as you can see we have
18:55
this cool movement and this is our
18:59
second slide all right guys I have shown
19:02
you this cool technique you can use it
19:04
in your own project in your own videos
19:06
to create your own intros or slideshows
19:09
use the same way to create even more
19:11
slides here in the final composition you
19:13
can change colors everything you can
19:15
change text everything is up to you if
19:19
you found this video helpful please hit
19:21
that like button and if you haven't
19:22
subscribed to my Channel please hit that
19:25
subscribe button and turn on the
19:26
notification Bell so you never miss any
19:29
of my upcoming video tutorials also take
19:32
a look on my channel and on my profile
19:34
for more great tutorials and you can
19:37
also leave me a comment Down Below in
19:38
the comment section if you have any
19:40
suggestions what to do next just write
19:43
me in the comment section below and
19:45
until next time stay creative and
19:49
bye-bye
19:52
[Music]