Up next in 10

Banner component - Hospital Landing Page Part 3
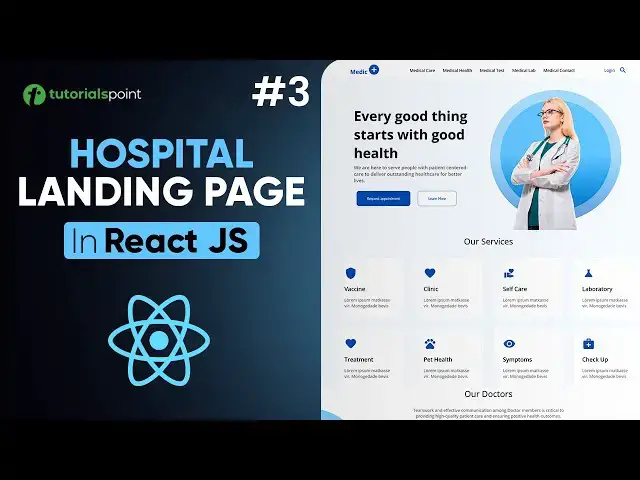
Welcome to the third part of our React Website Tutorial where we’ll be building the Banner component for the Hospital Landing Page. In this video, we will guide you through creating a professional and visually appealing banner that enhances the user experience on the homepage. This beginner-friendly tutorial is perfect for those who are new to React JS or want to enhance their front-end web development skills.
Whether you're a beginner or intermediate web developer, this React JS tutorial will help you build a real-world project and deepen your understanding of React. By the end of this series, you'll have a fully functional hospital landing page with a clean and modern design, ready to be deployed!
What you'll learn in this tutorial:
✅ Build a visually appealing Banner component using React
✅ Implement responsive design with CSS for all screen sizes
✅ Best practices for creating reusable UI components in React
Resources:
Download the source code and assets for this project on GitHub:
https://github.com/realtutorialspoint/hospital-landing-react
Part 1: https://youtu.be/7l0eNLH9srA
Part 2: https://youtu.be/9v1ktYxe0qA
Don’t forget to like, comment, and subscribe for more tutorials on React JS and web development! Stay tuned for part 4, where we continue building out this project and dive deeper into React's features.
Show More Show Less View Video Transcript
0:00
hey welcome to tutorials point we are
0:02
continuing to build our Hospital landing
0:04
page using reactjs you can find the
0:06
links for GitHub and previous Parts in
0:09
the description below now in this video
0:11
we will build the banner component so
0:13
now it's time to design our Banner
0:15
component now in our components folder I
0:17
will create a new folder and let's call
0:20
it Banner okay now inside our Banner
0:24
I'll create a new file let's call it
0:27
banner. jsx
0:30
enter we'll also create a CSS file for
0:32
it so banner. CSS okay now in our
0:37
banner. jsx I will write R Ace to get
0:41
our react snippet quick quickly okay we
0:45
don't need this import react from react
0:47
let me just delete it instead I'll
0:49
import this banner. CSS file so I'll
0:53
write import banner. CSS okay let's hit
0:58
save now we need to import this Banner
1:00
component into our app.js file so here
1:04
simply write banner and it will
1:06
automatically import it for us as you
1:08
can see something like this hit save
1:11
let's go back to our browser to check
1:13
and as you can see we have this Banner
1:16
great let's go back to visual studio
1:21
code now let's go inside this Banner let
1:23
me close the Explorer for now okay now
1:27
first our HTML now now let us start with
1:32
our main de let me give it a class name
1:36
of banner container all right now inside
1:41
our Banner container we are going to
1:42
have multiple DS okay so let me just
1:45
give it some spacing so that you can
1:47
understand better so the first de is
1:49
going to be Banner
1:52
heading okay this is going to be our
1:55
first T now inside this we are going to
1:57
have simple text so I'll create h2 tag
2:00
and I will and I will write this text
2:03
every good
2:06
thing starts with good health all right
2:13
okay next up let me just save it and
2:15
check if it is in our browser yeah there
2:18
it is
2:21
great all right let's go back to visual
2:23
studio code okay so we are going to
2:27
create another deal and let's call this
2:30
still D okay what should we give it a
2:32
class of let's say Banner sub uh heading
2:37
okay now inside there is going to be a
2:38
paragraph text let me just write it we
2:41
are here to serve people
2:47
with patient center let me just copy
2:51
paste it it's really too long to write
2:54
so let me just copy and paste it here
2:59
yeah something like this this will be
3:00
our second div and then we are going to
3:03
have a third div so let me just create
3:05
another div and give it a class name of
3:09
banner buttons this will hold our Banner
3:11
buttons right so basically in this video
3:14
we are going to have two buttons okay so
3:17
let me create two buttons as you can see
3:20
it is very easy to create using
3:21
shortcuts we have two buttons now the
3:24
first button is going to have a text of
3:27
request appointment
3:31
and the second button is going to have a
3:33
text of learn Moree okay let's give them
3:36
class names also so that we can Target
3:38
them easily right so let's give this one
3:42
Banner
3:44
appointment uh button you know it's
3:47
it'll be easily recognizable for us for
3:50
the second one let's give it a class
3:51
name of banner learn uh
3:55
button great so this is another de let's
3:58
create another one
4:00
and this is just for the design part so
4:02
I'll create a de and let's call this
4:06
Banner graphic it is going to hold a
4:08
couple of images for us that will
4:11
actually style our Banner so I'll create
4:13
image element actually two image
4:16
elements all right and I'm just going to
4:19
the first image element will be a
4:21
ellipse icon or ellipse shape and the
4:24
second image will be of a doctor all
4:26
right now we need to import these images
4:28
I have already stored them in our assets
4:31
image files right so let me just import
4:35
P now first is going to be our
4:39
ellipse so I'm just going to write
4:41
import ellipse from our assets images
4:47
and then we have this ellipse right and
4:50
another I'm just going to import
4:53
doctor okay a typo doctor
4:57
from our assets and then images and
5:01
inside we have this Banner doctor. PNG
5:05
let me save it and let's go back to
5:08
browser to
5:09
check okay where are those images by the
5:13
way so we have this paragraph We have
5:15
the buttons and the images are not there
5:18
let me check let's go back to okay we
5:20
have not yet written them here so let me
5:24
write for the ellipse will be ellipse
5:26
image and for this of course a
5:30
doctor image right let's save it go back
5:33
to browser and yeah this is the ellipse
5:36
and if I zoom out you will see this
5:38
doctor image now of course we're going
5:40
to change its width so yeah it'll be all
5:42
fine so let's go back to visual studio
5:44
code that is it for our basic Banner
5:47
HTML right now we need to style it so
5:50
let me just split our banner. CSS so
5:52
that we can easily see what we are
5:55
targeting great
5:59
so first up let's start with our Banner
6:02
container let me copy and let me just
6:05
Target it our Banner container I'll give
6:08
it a display of
6:09
flex okay let me just go back to browser
6:12
to check as you can see display Flex it
6:15
is and then uh let's give it a
6:18
background color a slightly different
6:20
background color I'll just write it for
6:22
you
6:23
RGB the first one is
6:26
62 and then we have one
6:30
61 and then we have 255 and then some
6:34
opacity of
6:37
04 let me just save it let's go back so
6:41
a little bit of bluish if you're able to
6:44
see okay all
6:47
right now after this I'll just give it
6:50
some baring as
6:53
well so I'll write
6:56
paring let's say 50 BX okay let's check
7:00
it yeah looks okay for now okay next up
7:03
is we are going to Target our Banner
7:05
content where is our Banner content by
7:08
the
7:09
way okay I did not give it a div so
7:15
basically to make our styling more
7:17
easier what I'm going to do is I'm going
7:19
to wrap uh all of these DS inside a new
7:22
de so that we can easily style them I'll
7:23
show you how I'll create a new de and
7:26
give it a class of banner content
7:30
all right so let me just wrap it up to
7:34
the buttons and this of course the
7:36
graphics uh D will be different okay so
7:39
let me just format it okay let me save
7:42
it great now after targeting our Banner
7:47
container what is next we need to do
7:49
something about our Banner content which
7:51
essentially contains the heading the sub
7:53
heading and all the buttons of course
7:55
the images are in a different div so
7:58
what we are going to do is we're going
7:59
to Target this Banner container I'll
8:01
write
8:03
Banner container sorry Banner content
8:06
first and then let's give it a display
8:09
of flex let's check it let's go back to
8:12
browser all right it's working for now
8:15
musically display flexes they are side
8:17
by side right after the display Flex it
8:20
is going to have a flex direction of
8:22
column and they'll be back in column as
8:25
you can see
8:26
great okay what else is there let's say
8:30
justify content Center and also give
8:34
them some gap of maybe 10 pixels let's
8:37
go back to
8:38
check okay where are they by the way
8:41
okay here they are here they are because
8:42
of this image we being to Target this
8:44
shortly all right me just zoom in back
8:47
to the original size let's go back to
8:48
visual studio code and firstly what we
8:51
are going to do is we are going to
8:53
Target this image because this is making
8:55
our job tough this doctor image is too
8:57
big right so I'm going to Tar Target it
9:00
the class name for its parent D is
9:02
Banner graphic so come here and I'll
9:05
write Banner graphic now inside banog
9:07
graphic there is a image right there is
9:09
a image understand this this this is
9:11
basically basic HTML and CSS here so
9:14
inside our Banner content Banner graphic
9:16
there is an image but there are two
9:17
images we want to Target this last one
9:20
right the doctor one so I'll write last
9:24
child simple okay now for the last child
9:27
I'll give it a width of 800 pixels is
9:30
enough for us right let me save it let's
9:33
go back to check and yeah it's much
9:36
smaller and we are able to see things
9:38
more clearly now okay so this is the
9:40
ellipse image this is the doctor image
9:42
and this is our Banner content which has
9:45
this heading subheading and these
9:47
buttons great let's go back to visual
9:50
studio
9:51
code and let's continue with our Banner
9:54
content I think we should also give it
9:56
some padding so I'll just introduce some
9:58
padding here let's say for top and
10:00
bottom zero for right and left it'll be
10:03
77 pixels hit save let's check all it
10:09
looks good but the Gap is too much let
10:12
us let us use 8 pixels instead let's
10:15
check again yeah looks fine for now all
10:18
right now after this our Banner content
10:21
what is next is of course this Banner
10:24
heading that has a h2 tag inside let's
10:27
target this one so I will just copy and
10:30
paste this I'll write Banner heading has
10:33
a H2 inside and we need to manipulate it
10:36
so I'll write font size of 52 pixels now
10:40
this is the shortest form to write this
10:43
I'll hit enter and there it is save it
10:46
let's go to check it out as you can see
10:48
the font size has been increased of
10:50
course uh this looks kind of you know
10:53
like jumbled because of these images we
10:55
are going to Target them shortly and of
10:56
course all of this will be resolved I'll
10:58
show you how let's go back to visual
11:00
studio code and yeah now after this
11:04
we're going to Target our paragraph
11:06
element which is inside Banner
11:08
subheading so let me just copy it all
11:12
right so let me just write Banner
11:14
subheading has a paragraph inside give
11:17
it a font size of 18 pixels a font
11:20
weight of 500 and we're going to give it
11:23
a light gray color I've already written
11:26
it down 5 C 5 C
11:30
and five sorry it's 5 C 5 C 5 C yeah
11:36
let's save it let's
11:37
check yeah a little bit of light gray I
11:41
would say okay let's go back to vs code
11:44
and let's see what else we need to
11:45
Target now of course this after this
11:47
Banner subheading we have these Banner
11:50
buttons right let's target these Banner
11:52
buttons so let me just copy their class
11:55
quickly and for our Banner buttons we
11:59
are going to Target them give them a
12:01
display of flex it's save let's see what
12:05
is happening with them yeah display Flex
12:08
all right nothing much let's give them
12:10
Sim gap of let's say 30 pixels let's
12:13
check it uh that is too much maybe 28
12:16
would work here
12:18
28 all right this looks fine for now and
12:22
let's give them some
12:24
margin okay so I'll write a margin of
12:28
20p from Top from right Zero from bottom
12:32
Zero from left I want 10 pixels let's
12:35
save and let's go back and yeah they
12:38
look fine let's give them more styling
12:41
but we are initially targeting this div
12:43
right now we need to Target these
12:45
buttons specifically right so what I'm
12:47
going to do is I'm going to say in our
12:50
Banner buttons there are button tags or
12:54
button HTML elements right we need to
12:56
Target them great now we are going to
13:00
give them some padding so that they look
13:03
much better 20 pixel top and bottom 40
13:06
pixels right and left and let's give
13:08
them a border radius of 10 pixels and of
13:13
course cursor pointer for buttons is
13:15
always there let us save it let's go
13:17
back to browser and yeah they are bigger
13:20
and look much better we're doing we're
13:23
going to give them more styling of
13:25
course
13:27
okay let's go back to visual studio code
13:32
now let's target each of these buttons
13:33
we have already given them classes let's
13:35
start with this one b um Banner
13:39
appointment
13:40
button so for the banner appointment
13:43
button we are going to give it a color
13:46
of blue one so it's 174 EB 2 and then a
13:52
background color of
13:55
white and we're going to give it a
13:58
border of one pixels solid and of course
14:01
the same blue
14:03
color and this one all right great let
14:06
me just save it let's go back to check
14:09
it and yeah this looks okay let's go
14:15
back and
14:18
then what else do we need to do okay now
14:21
next is this Banner learn button let's
14:24
target this one now inside the ban learn
14:27
button what are we going to do let's
14:29
give it a color of this blue one of
14:32
course are you sure about the blue one I
14:36
mean okay let's first check a background
14:39
color is going to be white again for
14:42
this and of course the Border actually
14:44
pretty much same as this let me save it
14:49
let's go back to check and they look
14:51
both same okay let's give this a blue
14:53
color fully so that they look
14:55
distinguishable right so I'll go back
14:57
and for this Banner appointment button
15:00
I'll give it a color of white no border
15:04
for now and the background color is
15:07
going to be that blue one let me save it
15:10
let's go back and yeah looks much better
15:15
all
15:16
right what else is there you know
15:20
actually we need to remove these borders
15:22
for our buttons and I don't want to do
15:25
it again and again so we are just going
15:26
to go to our uh what do you call it
15:29
index. CSS let me see yeah and I'm just
15:32
going to specify this for every single
15:35
element remove its border so border
15:37
would be zero hit save let's go back and
15:40
as you can see the border is
15:41
automatically removed from everything
15:43
right makes a life easier by developing
15:46
reactjs apps or any front end apps let's
15:49
close this okay close the Explorer so
15:52
where were we okay so Banner learn
15:54
button has been designed let's give it a
15:57
h class also so I'll write do Banner
16:02
learn button and H so what should be
16:07
done when the user hovers over it let us
16:09
see go back to browser so when you hover
16:12
over this the color should change to
16:15
this blue right and the text maybe to
16:17
WIP look it it'll look better right more
16:20
interactive a good user experience is
16:22
important you need to understand that so
16:24
I'll write a color of white and
16:27
background color that same blue hit save
16:30
let's go back to check it see if I H as
16:33
you can see it looks much much better
16:37
okay let's go back to vs code so we are
16:40
done with our Banner content div and all
16:43
the Dives inside it the heading
16:45
subheading and the buttons now it's time
16:47
to Target our images that is the banner
16:49
graphic all right so let
16:52
us Target this one I'll take its class
16:55
Name by copying it and put it here
16:59
all right so I'll give it a width of
17:02
100% okay let's check it all right uh
17:07
nothing much of now okay let's see now
17:11
firstly as I uh as you saw earlier we
17:14
need this doctor in front of this uh
17:17
ellipse image right so how are we going
17:20
to do that of course by using the
17:22
position property in CSS so I'm going to
17:25
Target this one something like this what
17:27
I'm going to do is let's first to Target
17:30
this ellipse so I will write inside our
17:35
Banner graphic we have an image and okay
17:40
inside our Banner graphic we have a
17:42
image tag and I want to Target its first
17:44
child you know the first image being
17:46
ellipse and in here let's give it a
17:49
width of 400 pixels by the way this one
17:53
should be here you know best CSS
17:56
practices okay great so let us check if
17:59
this is 400 pixels are enough I think
18:02
that's too small let me just change it
18:05
to 600 or uh 500 let's say in fact let's
18:10
go okay for now it looks better now we
18:12
need to take this doctor and put it in
18:15
front of the syps so that it looks much
18:17
good for the user let's go back to vs
18:20
code and we are going to make this
18:24
images the doctor's image position we
18:27
will make it Absol
18:29
right and for this we need to make its
18:31
par and dev's image what par and D's
18:33
position should be relative so it's p
18:36
and Dev is Banner graphic so I would
18:38
give it a position of relative something
18:41
like this and then I'm going to say from
18:45
the left uh give it something like I
18:47
don't know - 100 pixels maybe it'll work
18:50
for us I'll show you see here and yeah
18:54
we can give it more let's bring this
18:56
doctor somewhat here I'll go back let's
18:59
say minus 150 pixels save again go back
19:04
and a bit more can it be so I don't know
19:07
180 pixels save it and yeah I think it
19:11
looks
19:13
fine so yeah I think the banner looks
19:16
good for now right we have this good hor
19:20
effect so yeah that is it for this
19:22
Banner component now next up we are
19:24
going to basically build our next
19:27
component which is going to be services
19:29
so let's go back to visual studio
19:33
code let me just close this now we are
19:37
in our
19:38
app.js that will be enough for this
19:40
video in the next video we will build
19:42
the services component now make sure to
19:45
like this video share it with your
19:46
friends and I will see you in the next
19:48
one
#Education