Up next in 10

React.js react-loader-spinner Example to Add Async Loading Spinner Animation in TypeScript
Dec 22, 2025
Get the full source code of application here:
Show More Show Less View Video Transcript
0:06
Uh hello friends, today in this tutorial
0:08
I will be telling you that how to
0:11
display a loading spinner bar inside
0:14
your ReactJS application. So these
0:17
loading spinners will be very much
0:19
different. It can take the different
0:22
kinds of shapes. So the name of the
0:26
dependency we will be using a special
0:28
dependency for this for our ReactJS
0:30
application. So the dependency name is
0:34
react loader
0:36
spinner. So basically it will be a
0:38
animated spinner or loader. So whenever
0:42
you just uh want to retrieve some data
0:45
from the API or some in the background
0:48
this will be shown to the user. So this
0:50
will be having great user experience. So
0:53
this is the actual module which is there
0:56
and it's a very popular library. You
0:58
will see that 96,659
1:02
weekly downloads are there. So it's a
1:04
very good library. So basically various
1:08
kinds of shapes are also there which
1:11
give you the feeling so of great user
1:15
experience. So I have written a complete
1:18
blog post on this topic. All the source
1:21
code will be there inside video
1:22
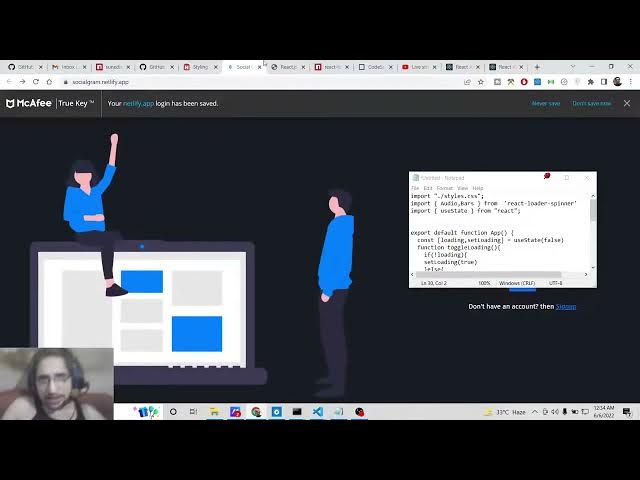
description. So you can see this is a
1:25
screenshot. So various kinds of uh
1:29
loading animations are there. Various
1:32
shapes are there. Circle is also there.
1:35
You can see audio ball triangle bars
1:39
circles grid hertz oval rings puff tail
1:43
spin three dots. You can also change the
1:46
color as well. Height width all these
1:48
things you can change. So I will be
1:50
showing you step by step on how to
1:52
implement this. So this is a full source
1:55
code alongside with a complete example.
1:57
If you want to get all the source code,
2:00
you can go to the video description link
2:02
here and simply you can copy all the
2:04
source code. So now let's get started
2:07
guys by building this application. So I
2:10
will go to my projects directory and
2:12
here I will create a new brand new
2:14
ReactJS project. So I will make a new
2:17
directory which is loading spinner. I
2:21
will go into this directory and inside
2:24
this I will create a new
2:27
reactjs project by npx create react app
2:31
and then loading app.
2:34
So basically this will create a brand
2:37
new application of react inside this
2:40
directory. So you will see creating a
2:42
new react app. So it will install all
2:45
the packages. So just wait. So if you're
2:48
joining it for the very first time guys
2:50
then please hit the like button,
2:51
subscribe the channel as well. So you
2:54
can see it is just installing these
2:56
packages.
2:58
So this will hardly take uh 15 to 20
3:01
seconds. So if you have a very nice
3:04
computer then then it will take less
3:07
time. So it totally depends upon your
3:09
internet speed and how much you have
3:12
RAM. So it is just installing the
3:14
packages. So just wait.
3:19
So
3:22
now it is installing the dependencies.
3:24
So you can see that.
3:27
So now I think it is done. So now it is
3:32
done guys. So we can move into the
3:34
projects directory and open this inside
3:37
uh visual studio code text editor. So
3:39
simply this I will open inside Visual
3:42
Studio Code text editor. So this is our
3:44
brand new ReactJS project guys. So if I
3:48
just basically launch it, you will see
3:51
that if I want to launch it, I will
3:53
write npm start. So this will start this
3:56
ReactJS application on localhost 4200.
4:01
So it is starting the development
4:03
server. Oh sorry localhost 3000.
4:22
So it is taking some time here. So just
4:26
now you can see that this is our ReactJS
4:29
application. Hello World ReactJS
4:31
application. So now what we need to do
4:33
is that we need to remove all this
4:37
stuff. We don't need this. So we can
4:39
remove this
4:41
and also remove the logo.
4:44
And if I refresh it, you will see that
4:46
all is gone. So now we need to install
4:49
this dependency guys which is very much
4:51
easy which is react loader spinner. So
4:55
simply the command will be simple. Just
4:57
go to your command line, stop this
4:59
application and just install it react
5:03
loader spinner.
5:05
So just install this dependency by
5:08
executing this command and uh basically
5:12
you need to add a flag to it [snorts] or
5:15
force.
5:17
So basically we do it because uh if the
5:20
dependency is not compatible with the
5:22
latest version of react then we just
5:25
need to add d-force to it to install it.
5:28
So now this is installed guys. So now we
5:31
what we need to do is that we need to
5:33
import this dependency inside our reacts
5:36
application.
5:38
So just we will go into our dependency
5:41
and the very first thing we will do.
5:45
We will import
5:48
from what we have installed which is
5:52
react loader spinner. So inside this
5:56
dependency we need to we can do audio.
6:00
First of all, let me take a very simple
6:02
example to show the audio sorry loading
6:06
spinner. So inside this guys, we will be
6:11
showing this. So this will be audio.
6:14
Close the tag and this takes some
6:17
parameters guys which is the width. How
6:19
much width will be there? So this can be
6:23
100. Height can also be 100. Color you
6:28
can give any color. Let's suppose I give
6:30
it blue and you can also give a label to
6:34
it which is loading.
6:39
So [snorts] that's it guys. If you now
6:41
refresh the application hopefully you
6:42
will see just start the application npm
6:46
start.
6:50
So now basically you will see that uh
6:54
loading bar will be there or blue color.
7:08
So now you can see that guys this is the
7:10
loading bar. You can see here this is
7:12
very much animated loading bar [snorts]
7:15
and this is shown in many audio based
7:18
applications when you are selecting a
7:20
song. So these are the loading bars
7:23
which you see inside the applications.
7:25
You can change the color as well. Let's
7:27
suppose I want to change to black.
7:31
So if you now refresh it, it will now
7:34
change to black. So you can just change
7:36
to any color favorite color that you
7:38
have. You can change to red,
7:44
yellow
7:47
and also you can change the width and
7:48
the height as well. So if you want a
7:50
higher width, you can see that you can
7:54
change the height as well.
7:58
You can see
8:00
the height is also changed.
8:04
This is the one animated I'm just
8:07
showing you guys in this tutorial. So
8:10
you can also in the documentation you
8:12
will find out that there are various
8:16
uh things that you can do here. There is
8:20
one such which is called as bars. You
8:23
can also instead of audio you can use
8:26
bars.
8:27
So if I refresh it, you can see this is
8:31
now different bars. Here you will see
8:33
that
8:40
this is now different. Here you can see
8:42
that the animation changes.
8:44
So all this is given inside my blog
8:47
post. If you just try to read it, all
8:50
these parameters are given. This is ball
8:52
triangle. If you want to import it,
8:55
simply import it here.
9:03
And now you can see that this is ball
9:06
triangle.
9:12
You can also have a circle loading bar
9:15
as well.
9:25
You can see that so various shaped
9:28
animations are there for you to show
9:30
loading bars.
9:33
So it's a very nice library which is
9:36
used by many people, many developers.
9:40
You can also have a grid loading bar as
9:44
well.
9:50
You can see that
9:54
you can also show her
9:56
loading bar as well. So replace it by
9:59
hertz.
10:05
You can see that.
10:08
So various shapes are available to you.
10:10
Oval if you want to show oval.
10:21
You can see that I think this is more
10:24
widely used. So many people use this
10:27
ovalshaped uh loading bar.
10:30
But you can try out any sort of
10:32
combination that you want. All these
10:35
things are customizable. So you can
10:38
choose your favorite loading bar which
10:41
is there. You can see that.
10:54
You can see this is ring bar
10:58
tail spin.
11:09
So you can see that this is also widely
11:11
used. This is the loading part. And
11:16
lastly there are three dots which is
11:27
you can see that. And now what we can do
11:30
is that guys we can make it slightly
11:32
more dynamic by adding a simple
11:36
condition which is loading set loading.
11:39
We are using some hooks for this. So we
11:43
will use the hue state hook and the
11:45
default value for this will be false
11:48
when we load the application.
11:50
So we can just toggle it. So you can see
11:52
it is successfully imported this from
11:54
react library which is use state hook.
11:58
And here we will be have a simple
12:00
button.
12:03
So here we will simply say toggle
12:06
loading bar.
12:09
So when the user clicks on this button,
12:11
this is
12:13
on click. So this function will execute
12:17
which is the custom function we will
12:18
write which is toggle loading. So we
12:22
need to write this function toggle
12:23
loading. So inside this function guys we
12:26
will just compare it. Basically if uh
12:29
the loading is false
12:32
like this then we will make this true.
12:35
Set loading to true.
12:38
If the value is
12:41
true then in that case we need to make
12:43
it false. So we are just using this uh
12:47
use state function to just manipulate
12:49
the state of the ReactJS application
12:52
which is this simple loading variable.
12:54
Now we need to display this based upon
12:56
the condition. So this is quite easy. So
13:00
right here we will simply
13:02
if the loading is true we will use the
13:06
turnary operator for this. So
13:11
if you study the programming languages
13:13
you have seen this operator. So
13:16
basically it is saying that if the
13:17
loading parameter is true in that case
13:21
we need to show this. So we will show
13:24
this
13:29
and if the loading is false then we will
13:31
simply say
13:33
processing completed.
13:38
And now guys what will happen now? You
13:41
can see the value is false. So if the uh
13:46
application loads for the very first
13:48
time this will be shown to the user
13:50
processing completed. Let me show you.
13:52
You can see that processing completed.
13:55
So once I hit this button which is
13:57
toggle loading bar this will be shown to
14:00
the user. You can see that
14:02
once again if I hit this processing
14:04
completed like this. So you can just
14:07
make this customize this accordingly.
14:10
When you request some data from the
14:11
server or API you show the loading bar
14:14
when it is completed then it will be
14:17
hidden. So you can use the same logic
14:19
that I have used using react hooks to
14:23
show and hide the loading bar. So in
14:25
this way guys you can use this loading
14:27
bar library inside your react chase
14:30
application. All the source code will be
14:32
there inside video description and uh I
14:35
will be seeing you in the next video.
#Jobs & Education