Up next in 10


In this video, I review the Vacuum Sealer Automatic Air Sealing Food Saver.
Check it out here:
USA: https://amzn.to/3SkUoC3
CA: https://amzn.to/48zpefO
DISCLAIMER: This video and description contains affiliate links, which means that if you click on one of the product links, I’ll receive a small commission. This helps support the channel and allows us to continue to make videos like this. Thank you for the support!
Show More Show Less View Video Transcript
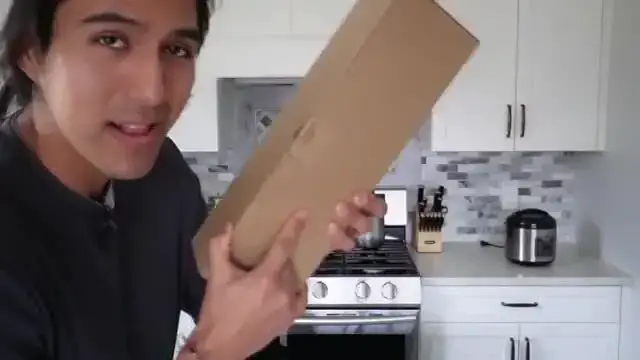
0:00
So I just got the NLEF and vacuum sealer, so I want to do a quick unboxing and go ahead and test this out to see how well it works
0:05
So this opens up from the top just like so. And the first thing I see over here is going to be this portion
0:12
And this is going to go ahead and basically be to suction from a cup that's going to be sold separately
0:17
And then right here we're going to have the outlet. It looks like everything is going to be attached so I can take it out
0:22
We are going to have this plastic piece here. And then I can take out the rest of it
0:28
Just like so and then at the bottom we are gonna have one more thing which is gonna be the user manual
0:34
And now right here it does come with ten Baggies and now these are gonna be 11.8 inches and here you can go ahead and see what they go ahead and look like
0:42
And here's a closer look at the individual one So this is gonna be the clear plastic on the front and on the back side
0:48
We're gonna go ahead and have the textured one and I can go ahead and just take these portions off and
0:53
and there it is. So it's actually really small, really portable. And then right here, there's going to be one more thing
1:00
and it says, support card, do not discard it. Please take it out and put aside when the machine is in use
1:06
Please put it in between the upper and lower ridges of the machine when the machine is not in use
1:10
Okay, so this is meant to be kept, so I'll just put this to the side. Or actually, I'll leave it in here for now since I'm not using the machine itself
1:18
Whoops. And yeah, we can definitely see this part went ahead and helped it right now
1:21
it accidentally slammed against it. Now taking a look over here, here's what we can go ahead and
1:28
see what the bottom portion looks like with this strip. Then right here is going to be, oh yeah
1:34
like a rolling pin. And then we're going to have some like foam material. And now taking a look at
1:39
the back side or the front side, there's going to be these four different buttons. So we're going to
1:44
have vacuum, seal, food, which is dry or moist. And then there's going to be a vac seal and then
1:51
cancel. So yeah, let me go ahead and just plug this in and test it out. Alright, so the first
1:56
thing I want to test out is going to be some dry food and I going to go ahead and put these pistachios in there Now this is going to go ahead and basically test out the strength of this just because they going to be kind of sharp with jagged edges So hopefully you go ahead and put these pistachios in there Now this is gonna go ahead and basically test out the strength of this just because they gonna be kind of sharp with jagged edges so hopefully it go ahead and hold it in place
2:09
I'll go ahead and just put a good amount in here. There, that's a lot of pistachios
2:17
I love my pistachios. And then this, I can just lay it flat down just like this
2:24
there and I can go ahead and push this down and I have to go ahead and give it a good push until
2:30
I hear the click or to make it easier I can kind of just push these buttons down and then softly
2:34
press and then let go yeah that's firm in place otherwise here you'll hear the click now
2:41
just like that and now this is nice and tight and now the first thing to do is either press the
2:47
vacuum and then seal otherwise I can just press this one which will do the vacuum and seal but
2:53
I just want to test out the vacuum first and I do have to go ahead and make sure that this is set to
2:58
dry food which it is so I'll leave it as is and now here you can kind of see a closer look at what
3:05
it's going to go ahead and look like when I press the button vacuum. Oh wow, that's really tight
3:30
That's so cool. This is really compressed, wow. And now I can go ahead and seal it just by pressing the button
3:37
I'll go ahead and do that
3:47
And so far, oh now it's doing it. There, finished sealing, and now I can go ahead and open it up
3:58
Oh wow look at that That looks pristine nicely And of course when this is not in use I can go ahead and put that cardboard piece here I put it over here somewhere Right here Just so these parts don go ahead and touch I leave it like that for now
4:17
And here is a closer look at the pistachios in the sealed baggie
4:24
And yeah, this definitely went ahead and secured it really well. Now there's two ways to go ahead and open the baggie up
4:30
The first way is with these little preparations over here. Now I don't want to go ahead and rip the baggie
4:36
I actually want to go ahead and reuse it again and you put something else in here. So the second way would just be cutting this open
4:41
Now I don't want to use scissors because I'm not going to cut it evenly. So I'll use the included tool which is going to be this bit over here
4:48
So to make sure I do a good job, I'll just go ahead and lay it as flush as possible
4:54
Just like that. And I have to make sure that this part is on top. And there, that looks about straight
5:01
That's about good. So I can go ahead and just pull this over. And there, they went ahead and cut it nice and even
5:11
And here you can go ahead and see what it looks like. So now I'm going to open the baggie back up and there's all my pistachios
5:17
And I'll go ahead and put it back in the original bin. And now it comes for the second test, which is going to be the most important one, chicken
5:27
So here I have some marinated chicken. So I just want to go ahead and test it out to see if all the juices of liquids stay in here
5:34
So here's what it goes ahead and looks like. So it's not, I guess, it's not too, too juicy
5:39
But nonetheless, it is. Actually, is this marinated? I forgot. It might
5:45
Yeah, it is. I'm going to just put one piece of chicken breast in here
5:55
Just like that. Yeah. I'll leave it there for now. Yeah. And then again same as before I can lift this up Put this right over here I can go ahead and just push this portion down and then click it into place And now I want to make sure that this is for moist food
6:16
So there, now the blue light is at moist and I can go ahead and seal it as well too
6:20
And there, that's what the chicken breast looks like
6:33
And then now time to seal. All right, I can go ahead and open this up, and I'll put this cardboard piece in
6:59
And there, that's what the vacuum sealed chicken goes ahead and looks like
7:03
and now it's ready to go ahead and be stored in the freezer or in the fridge just so it can go
7:08
ahead and last a lot longer and yeah it definitely did a good job and yeah I definitely could have
7:14
stored a lot more but again once again again it's going to be open from the bottom or from the top
7:18
but because this of course is not going to be reused I just open it from the bottom just to
7:22
make it nice and easy just like so but yeah that's a quick look at the vacuum sealer
7:31
and one more thing i forgot to go ahead and test out is actually going to be with this attachment
7:40
over here for soups now although i don't have the appropriate container i just want to go ahead and
7:44
show you how this would work and for starters this is some real thick yeah heavy plastic
7:50
but this goes ahead and attaches on the right side of the vacuum sealer just like so
7:56
And then over here, this is where it would attach to the other container
8:01
So I can go ahead and just press vacuum from the front. And you can see it's sucking my hand
8:08
So yeah, that's a quick look at the vacuum sealer
#Computers & Electronics
#Product Reviews & Price Comparisons
#Vacuums & Floor Care