Up next in 10

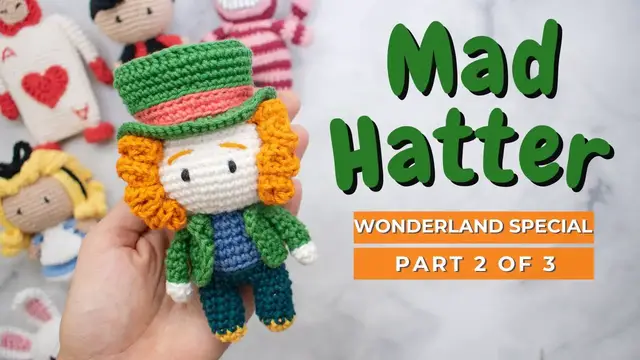
Mad Hatter crochet pattern! Complete video tutorial of The Mad Hatter amigurumi pattern, easy to follow and with written instructions. This crochet doll is one of the six patterns from the Wonderland collection! Have fun!
FOR PART 1: https://youtu.be/nt0Acxjh9eo
FOR PART 3: https://youtu.be/jbv1zC9r2Q4
Chapters:
00:00 Mad Hatter arms
05:32 Jacket
12:24 Assembly the arms and body
You can find the complete Mad Hatter crochet written pattern free on my website here:
https://littlecrochetfarm.com/mad-hatter-crochet-amigurumi-free-pattern/
For a low cost (4 USD) and printable pattern, you can find it here:
Ravelry: https://www.ravelry.com/patterns/library/mad-hatter-amigurumi
Etsy: https://www.etsy.com/listing/1234455953/mad-hatter-amigurumi-pattern-crochet-mad
If this video was helpful to you, consider supporting my channel by doing one of these little actions below:
★ You can like this video, or
★ You can share it with your friends on social media, or
Show More Show Less View Video Transcript
0:00
Now we will move on here again, starting with the... not again, but now starting with the white
0:05
we'll work the hands of the mat header. So we'll start with the magic ring again
0:13
So here we can see how it's done. If you have more questions, take a look in the video tutorial down in the video
0:20
And you will work six single crochet again inside the magic ring
0:25
So just like the beginning here, but this time in white. Okay, so 1, 2, 3, 4, 5, 6, super good
0:38
Pull it tight, close this magic ring. And move on now for the next round
0:48
Here you will work for round 2, 6 single crochet, okay? So you'll just work on top of this, just 6 single crochet
0:59
I just want to stop and show you how I secure the beginning of my yarn, especially when it's a very tight
1:07
detail like this one. I stop in the beginning of the round
1:13
just to wave in this inside and make sure that this will remain very nice and close
1:23
Okay, super good. Once you're done, you can continue working your round here
1:29
okay I will move a little bit fast and now here I want to show you one thing you organize a little
1:44
bit the your stitches because your stitches can be you know curling outside because it's very
1:51
tight detail. So organize your stitch and make sure that your right side is
1:57
facing out and you will work for the third round six back loop slip stitch
2:04
Here I'm working in green because green is the color that I chose to work the
2:10
jacket of our manhattan or the suit that he is wearing. All right and here once
2:19
again we will stop to cut this white, this off-white color yarn and we will use it, we will
2:26
give it again a tight knot that will be hidden inside of these arms. All right, super good
2:39
And we'll move on here for the next rounds. So now for round number four, you will work
2:47
on the back loop of the stitch, okay? So you work six back loop single crochet
2:54
So work your six back loop single crochet here, and it's very fast, it's a small, very small detail to work and make sure to grab
3:06
the complete back loop, not inserting your needle in the middle of the thread, as I told you before
3:11
This is super great. So once you're done, we will work now normal single crochet from round 5 to 7
3:22
So this will be the length of the arms, okay? So here work the next round 5 6 and 7 just 6 single crochet And once you done you come back here with me
3:41
Super good, so here we have this nice tiny little arm and those are the remaining tails
3:48
you know, I'll hide it inside, you don't need to add stuffing material to this arm
3:52
it's a very small arm, so we'll just hide this inside over here
3:59
Okay, super good. And now we will move on for the last round for now
4:09
So for round number eight, you will work three single crochet. Here you will fold the arm, so in half you have six stitches in total, right
4:17
So we will crochet three from one side and three with the other side together, closing
4:22
this arm. first stitch might be a bit tricky to grab because it's the first and the last stitch
4:31
but once this is done all the remaining two should be very easy. So we grab this
4:38
those two and the last two here. Okay, so this is how you should follow your
4:46
instructions here. Super good, this is looking very nice. You can cut this thread and fasten
4:55
off this arm, we will not need a tail here for sewing. So let me just finish this one off
5:09
So let's just hide this remaining tail here. super good, and now inside the arms, great, and once you're done, you work another one
5:26
following the same instructions, alright? Super good! Now let's work the jacket since the arms are done
5:37
So here for the jacket you will chain 21, okay? So make 21 chains here
5:46
I will work all of my chains. Alright, almost there
6:01
Super good. Once you work all of them, you will skip the first chain and start working on the second
6:08
chain from the hook. You work 20 single crochet, okay? So work your rounds
6:16
We are working in, not rounds, work your row here. We are working in rows, not in rounds anymore
6:22
And I will catch you up here for the next instructions. Good
6:28
So here is just what I want to show you one thing. at the end, chain one, turn your work and you continue working like this, 20 single crochet
6:38
arrive at the end, chain one, turn, again 20 single crochet. So you work rounds two to five
6:45
not rounds, rows two to five, okay? So rows two, three, four and five and then I will come back
6:52
here for next instructions. Great! So once your rounds are, once your rolls are done
7:00
you will work this what we have here on the screen so this is the pattern okay we will work together with the arms so we will start with two single crochet so one and two and then we will crochet the next three with the arms okay So this is on the back
7:19
side and this is on the front side, so we'll work here together with the arms
7:24
3 single crochet here, crocheting these two pieces together, so 1 and 2 and 3
7:38
All right, this is great. Now what you're gonna work here is 10 single crochet
7:50
which will be the distance on the back between one arm to another
7:53
So this is one, two, three, four, five, and now we have five more, six, seven, eight, nine
8:17
I was there 10 okay now we work together with the other arm alright so 3 single
8:25
crochet here with the other arm so this is on the back side and here it will be
8:30
facing out super good so we'll work here 3 single crochet okay grabbing the 2
8:38
two stitches here so one two and three okay that's great and two stitches more
8:52
remaining here at the end of this suit or this jacket or this piece that we are
8:59
working. Great! This is looking very nice. Alright, now once it's done we will work
9:11
a little bit different here. So this is what we have in this in the screen. You
9:16
will work, you will chain one and you will work two double crochet in the first
9:22
stitch. Okay, now you will continue working here on the side and you will
9:32
work three single crochet. I will just show you here at the beginning because
9:42
then you can duplicate on the other side and also there is a pattern here that
9:46
you can follow. Arriving at the end, you will change, not change, you will work two
9:51
single crochet here in the corner, and now you'll continue working here the
9:58
single crochet in the foundation chain. Okay? So it's 18 single crochet you have
10:05
remaining here to work, because when you arrive in the other corner, which is this
10:09
one, so I arrive on the corner, you work again two single crochet and then you
10:16
start going up with three single crochet on the side. Alright, this is looking nice
10:28
you chain one and you work two double crochet here on the last one which is the
10:37
first stitch from the from the round from the roll I mean And you will work here now 18
10:49
single crochet, okay, all the way until the end over there, over here. Great. So
10:56
work your 18 single crochet here and now we'll come back to see you. Great, so you
11:04
arrive it here, let's just join here with a slip stitch, and you have
11:10
That's great! This will look very nice once we put, the corners will be facing a little bit outside
11:16
the soot should be opened. That's great! I will leave a little bit here tail for sewing
11:24
And I will just prepare this stitch, this thread. I will bring this tail here to the back and then you skip one stitch, okay
11:43
Skip one stitch, bring it to the back and then you take just the back loop of the last
11:49
stitch. And then we have it here, you see an uneven, not uneven, uneven finishing
11:59
off. Anyway, you cannot see it's disguised. Super good. This is looking nice
12:11
Maybe I pull it too tight. All right, so let's cut this tail here. We don't need
12:16
that anymore from the beginning and let's continue moving on. Super good. What we're
12:23
going to do here now is we will just stop a little bit with the pattern and we will
12:27
now introduce here the suit to his body, okay? So let's just organize it here. So you
12:37
place the position of one arm here, you grab a couple of pins and you fasten this
12:43
so it will not be moving around. So you add as many pins as you feel comfortable
12:52
to work with it. I always like to add pins before sewing the tails. And now here
12:59
we have this tail like coming off here and you will just tight a couple of
13:07
stitches. So we'll start from the beginning, from where it's very near the
13:14
opening of the suit. We can remove this slip, this pin, this first pin and now I
13:27
will continue here. I'll just show you a couple of stitches that you will work
13:33
Work your stitches very nice, tight, and close, coming from inside of the toy, of
13:39
course, to the outside. And substitute the pins for one tiny stitch here. I will
13:50
also add here under his arms, so it's not moving too much. So I start adding here
13:58
don't need to sew it completely all of the stitches from the suit but sew key
14:04
places, you know, in the opening of the jacket, in the underneath of the jacket
14:10
you know, this is how it should be looking like, this is beautiful and you
14:14
can now cut this yarn and fasten off
#Crafts
#Fiber & Textile Arts