Up next in 10

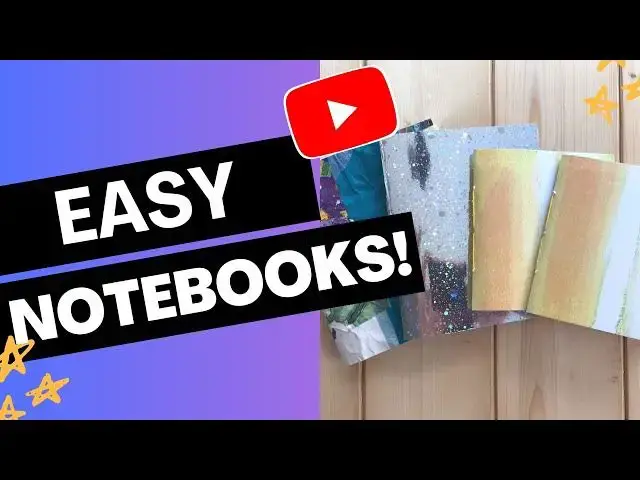
Super Quick and Easy Pocket Notebooks - Step by Step
Aug 5, 2024

Create your own cute pocket notebooks in minutes following this step by step video. All you need is a bit of card and paper and away you go.
The fabric paper video is less than 5 minutes long and is at https://youtu.be/N3af416kSOU
The art journal is at https://youtu.be/39urqDjASWk
If you enjoy crafting my blog is full of great ideas and tutorials. Plus if you subscribe you gain access to my free resource library, which includes a home crafts e-book, planners and much more, and get to hear about my latest projects first. Take a look at https://christines-crafts.com/
Enjoy watching and creating your own pocket notebooks. Please leave me a 'thumbs up' if you enjoyed this video and subscribe so that you get to see all my videos as they are posted.
You can also find me across social media. To see all my information and ideas find me at https://christines-crafts.com/share-christines-crafts/
If you are thinking of opening an Etsy store then use this link and get off to a great start with 40 free listings https://etsy.me/32xoPdg
Show More Show Less View Video Transcript
0:00
Hi, I'm Christine of Christine's Crafts and in this video I'm going to show you how to make these super cute DIY pocket notebooks
0:07
Whatever you want one for these are ideal. There is something special about making your own
0:11
You can make them from card or this fabric paper which is the video coming up that will show you how to make that and let's get started
0:20
All you need is something for your cover in this case I'm going to do a cardboard one but it could be the fabric paper and you can have that as thicker as thin as you like. It's up to you how you need
0:30
rigid you want your notebook and here's some of that fabric paper so there's a video on the screen
0:35
now that you can click at the top and you can find a video to make your own fabric paper
0:41
and you're going to want some paper to go in your notebook and that's up to you you can use just
0:46
ordinary pads a four letter pads that you'd normally do your notes at school on or you could
0:52
use some plain paper from your printer or sketch pad and you're going to want some thread and
0:56
a needle to just sew your pocket notebook together I'm using embroidery thread, but you could just use some string or strong cotton
1:05
So your cover is where we start. You're going to decide on the size of your notebook
1:11
And however wide you want your notebook to be, you're going to cut your card twice as wide
1:15
So I'm going to leave mine. That's perfectly okay for me. And then decide how tall you want your notebook
1:21
And that's the height you're going to cut your card or whatever you're using
1:25
I'll keep referring to it as card. So I'm going to make this one five inches
1:29
all so I'm just going to mark it at five inches. Now if you've got all the equipment
1:34
and you've got your rotary cutter and your mat and everything this is probably a lot easier and a lot quicker but I like to show you with really basic tools then
1:41
everyone can make them. So you're just going to mark that and cut it out so that
1:48
you've got a cover. It's that simple. Just be nice and accurate so you get a nice
1:54
tidy job and then fold your cover in half. I do it just by much muching by matching up the edges And then you want a nice clean crisp fold So I going to use something called a boning tool but you can just use the back of the ruler the back of a pen
2:15
anything. Just be careful you don't catch your cardboard, that's all. Then we're going to make
2:19
some pages. So I'm just going to take a few off this sketchpad. How many pages is up to you
2:26
Now I'm going to tell you when you've seen this, I use 10 pages. You can use more, but if you're going to
2:31
use a lot more you might want to make your notebook a little bit differently and I'll explain
2:35
about that towards the end of the video don't make your pages as wide as the notebook because
2:41
they'll stick out so what I recommend is that you make them half an inch narrower so where
2:49
these this cover was eight and a quarter inches I'm making my pages seven and three quarters
2:56
so I'm just going to mark the whole page at that widget
3:01
And then when it comes to the height of your pages, I'm going to do the same thing
3:08
So for mine being five inches high, I'm going to make my pages four and a half inches high
3:14
So what matters is that you're half an inch less than the cover. And this should make them sit nicely and you're not going to have any worries about your pages sticking out and getting damaged
3:28
So once you've marked it up, if you've got a rotary, that's ideal. If you haven't, just cut them out with scissors. And what I would say is
3:38
I didn't, but I'd recommend just clipping them together with a bulldog clip or a paper clip
3:43
or something like that just to keep them steady. Because whilst you're cutting, they tend to
3:47
wander a bit if you're cutting more than one at a time. And then they can end up slightly different
3:52
So it's do as I say, not as I do in this little instance. I should have clipped them together
3:58
And just repeat for as many as you want. Then we're going to mark up to make our actual notebook
4:07
So on the cover along that fold in the middle you want to mark the centre Should the little pencil dot is fine And then one inch at either side of it So it going to end up with three little dots
4:23
And then you're going to repeat that on the pages. Now, I've not folded mine yet
4:28
Far too many to fold in one go. It just doesn't work very well. So I recommend you do a few pages at a time
4:35
Fold them in half. Make a crisp fold. Do the same with the others
4:41
And then you're going to mark the centre. Now, I would only mark one page
4:46
You don't need to mark them all. You'd be there forever. So you're just going to get one page
4:52
put your ruler back on, make sure you're on that centre fold, mark the centre
4:57
so you're looking how tall it was, mark the centre, and then one inch either side
5:04
And all that matters here is you're making sure you stay on that fold. And then we need to make
5:11
the holes. Now some people say use a fancy tool here you can do if you've got one but if not just
5:18
use the needle that you're going to sew with so it should be a nice quite a wide fat needle with a big
5:24
eye but it does need a sharp point and you're just going to pierce it through the cover through
5:30
those three holes now be careful don't stab yourself be incredibly careful you could put
5:37
your cover against a foam block so that you're pushing it into that and you cannot catch your
5:41
What I recommend is that you make sure the needle goes all the way through
5:45
And when it comes to the pages, just do a few at a time
5:49
Otherwise you can get in a bit of a pickle and they wander around. And again, ideally if you clip them together to do this
5:56
So once you've got all your holes, it's time to sew. So get yourself a length of your chosen thread
6:04
Just a normal sewing length we'll do. Um, maybe a foot, a foot and a half
6:10
foot and a half that sort of length will be plenty and thread up your needle and then we're
6:16
going to sew but don panic it something called a pamphlet stitch and it is really really easy anyone can do this so we going to take the thread and we going to go in through the centre hole So we lined up our cover and our pages
6:32
And sometimes you've got to wiggle it a little bit to get it through, especially the first one, if things aren't lined up quite right
6:39
And then through the cover. And then back through one of the other holes that you made
6:49
It doesn't matter which one. Just make sure you come back through the cover and through the pages
6:57
If you have a bit of trouble, just separate them and take your time to get it through
7:02
If you're enjoying this video, please give me a thumbs up so it spreads to more people
7:06
And then everyone can make their own little pocket notebooks, whatever they use them for
7:10
I'd love to hear in the comments below what you use your notebook for. My most recent one went on holiday
7:16
Put my key information in it and then recall. what we did on holiday. It was lovely. It was really nice to write rather than just use your phone
7:24
So once you've got that back through and you can see I had a little bit of trouble
7:29
we're going to take it back down through the pages through the other hole that we haven't used yet
7:38
A bit of wiggling. Don't worry, so you have to do this. It's perfectly normal
7:46
And then you keep pulling in it. it tight. We're keeping it nice and tight, nice and tidy. And then the needles coming back up
7:53
through the centre hole, but make sure it comes the other side of your stitch so that you're
7:58
going to tie your tails off over that stitch. And then just tie them together. Just use a
8:04
reef knot, a granny knot, you know, just any knot you like, just so it knots them together
8:10
And then cut the ends off, but I recommend leaving some end. And then one little option you've
8:17
got now you've completed your book is you could clip the corners so it's got nice rounded
8:21
corners you could decorate your notebook whatever you do enjoy your notebook and if you fancy
8:27
making an art journal please click on the video on the screen now and enjoy
#Hobbies & Leisure
#Crafts
#Crafts