Up next in 10

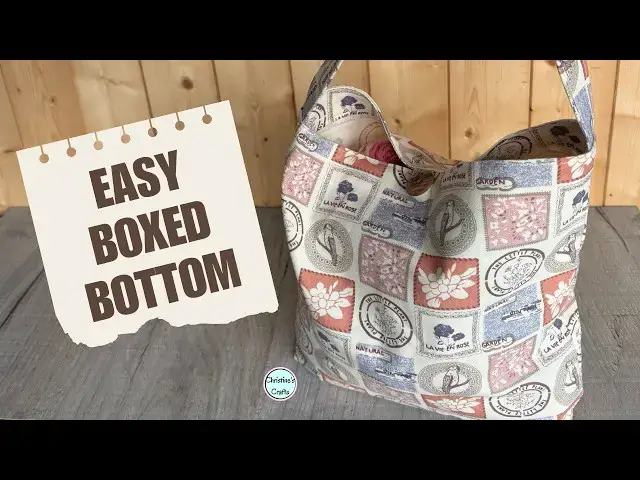
How to Make a Bucket Bag for Beginners | Easy Box Bottom & Button Loop
Sep 13, 2026


Learn how to make a sturdy bucket bag using just two pieces of fabric. This simple, pattern-free project is perfect for beginners.
In this tutorial, I will guide you through the process of creating a box-bottom bag from scratch. You can easily customise the strap length to suit your style, making this a practical and mindful sewing project that uses minimal materials.
Whether you are looking to refine your sewing skills or just want a quick, functional bag, this guide breaks down every step clearly. I love using simple techniques that allow for creativity without the need for complex patterns. It is all about using what you have and enjoying the process of making something useful with your own hands.
--------------------------------------------
You will need:
Fabric
Button
Sewing Supplies
--------------------------------------------
Timestamps:
00:00 - The finished bag
00:31 - Cut out Fabric
01:32 - Press Folds
5:00 - Sew Loop, Strap & Facing hems
07:51 - Sew Bag Pieces together
09:55 - Form Boxed Bottom
14:35 - Sew Loop in Place
17:00 - Sew Facings together
19:10 - Assemble Bag
26:14 - Sew on Button
--------------------------------------------
Measurements if fabric pieces:
2 bag pieces - 12" by 12"
2 facings - 12" by 2"
Strap - mine are either 15" long or 32" long and 4" wide (giving a 1" wide strap)
Loop - 3" by 1" for a 1" button
Video showing how to sew a button on - https://youtu.be/kVIryts8b4E
--------------------------------------------
If you enjoyed this, why not try my other sewing tutorials? Subscribe for more budget-friendly craft ideas delivered straight to you.
--------------------------------------------
Enquiries: [email protected]
--------------------------------------------
➡️ Want to see loads of written tutorials too? If yes, click here: https://christines-crafts.com/
🆓 Access my resource library for free: https://christines-crafts.com/enjoy-the-craft-gardening-resource-library/
--------------------------------------------
Get vidIQ to grow your channel faster! 🚀
https://vidiq.com/ChristinesCrafts
#SewingForBeginners #DIYBbag #ToteBagTutorial
Show More Show Less View Video Transcript
0:00
What if I told you this sturdy box
0:02
bottom bucket bag started as just two
0:04
pieces of fabric. No pattern needed,
0:06
just a button and fabric. And I'll show
0:08
you every step. So easy to follow and
0:11
make the strap whatever length you want.
0:13
So, first of all, choose your button and
0:16
measure it. And I say this before we cut
0:18
any fabric out because you're going to
0:20
make your own little loop and you need
0:22
to know how big to make it. So, choose
0:25
your fabric, choose your button, and
0:28
then we'll start cutting up some of your
0:30
fabric. So, the first thing you need are
0:33
the two pieces for the bag. You can make
0:34
them any size you like, but if you want
0:36
to do mine, it's 12 in by 12 in. And you
0:40
want two of those. Now, you could make
0:43
it wider, taller, whatever you like, but
0:46
I'd watch the video through first, and
0:47
then you can make your own judgment.
0:50
You're also going to need a strap. Now,
0:53
this one is 4 in wide and 15 in long
0:56
because I'm making a short strap. But
0:59
when I did the longer one, I made it 32
1:01
in long. And however wide you cut it,
1:04
your strap will end up a quarter that
1:06
size. You also need two facings. So,
1:10
those need to be 12 in wide or however
1:12
wide your bag is and 2 in tall. And you
1:16
want two of those.
1:18
And then when I talked about that loop,
1:20
my buttons an inch, so I've cut it out 3
1:23
in by 1 in. You might need yours longer
1:27
if your button is bigger. Don't worry
1:30
about going smaller. It's fiddly enough.
1:33
So, let's look at that strap. The first
1:36
thing you're going to do is press it in
1:38
half,
1:40
open it up, and then in turn press each
1:44
side into the middle. Now, if you're
1:47
looking at this, you're going to go,
1:48
"But you have already got press marks."
1:50
Yes, I've already ironed this lot once
1:54
and then realized I hadn't hit record on
1:57
the phone. Uh, not very professional,
2:00
but there you go. I'm not. So, I had to
2:03
just press them out flat and go again.
2:05
But anyway, so once you've pressed the
2:07
two sides in, you're then going to just
2:11
fold it all back closed. So you should
2:14
have no raar edges except at the end.
2:17
And just give it a good press. And
2:18
you'll see that's your strap. Obviously,
2:21
we're going to sew it later, but you
2:23
have now got your strap piece.
2:28
Now, let's do the same with that little
2:31
loop piece.
2:33
So, you'll see why I say don't go any
2:35
smaller. You're going to fold it in
2:37
half, open it up, and in turn, bring
2:41
each edge into the center.
2:44
If you go any smaller than an inch wide,
2:46
I just think it'll be too difficult to
2:48
sew and too difficult to work with. You
2:51
could make it a little bit wider. If you
2:54
do, I suggest you go a little bit longer
2:56
as well, just give you a bit more
2:57
leeway.
2:59
And again, once you've done all your
3:01
your folds, close it all up and give it
3:05
a good press.
3:08
And then remember those facings
3:10
or we're going to use those now. Now,
3:12
make sure they're the right way up
3:14
because you want to press up from the
3:16
bottom. I'm going to say about 38igh of
3:19
an inch, a centimeter, something like
3:20
that. It's not an exact measurement.
3:23
Just press the same all the way along
3:25
the bottom. So again, make sure you're
3:27
doing it along the bottom, especially if
3:30
your fabric has a very strong top and
3:32
bottom on its pattern.
3:36
And then I think we're ready to get
3:39
started. We'll have done all our initial
3:41
pressing. Now, you'll do pressing later
3:42
on, but you'll also see my little trick
3:44
for if you don't want to iron later on,
3:47
you can cheat. So you should have two
3:50
facings pressed,
3:52
a strap, and your little loop ready for
3:55
your button.
3:57
So the little loop for the button,
4:00
you've got that all closed up and either
4:02
pin or if you prefer to use the clips,
4:05
you can clip it closed.
4:09
Ready to sew along the length. And
4:12
you're going to sew along the length
4:14
that's open.
4:16
that side there.
4:19
Okay.
4:20
Now, we're also at the same time going
4:22
to do the strap because it's done in the
4:24
same way. So, again, just pin it closed.
4:28
But what I do recommend with the strap
4:30
is that you do two lengths of sewing.
4:33
You don't have to. I just think it looks
4:35
better.
4:37
So, they both need sewing. Now,
4:40
remember, your strap might be a lot
4:42
longer, and that's okay if it is. and
4:45
your facings. If you remember pressing
4:47
that up at the bottom again, just pin it
4:50
in place because we're going to sew it
4:52
in place. Now, I'm busy putting all
4:54
these pins in here and later you'll
4:56
realize I've put them in the wrong way
4:57
around. So, we're going to put those in
4:59
the right way round because it's much
5:00
easier to sew with all the bulk of the
5:03
fabric out outside the machine and your
5:06
pins so that you can easily pull them
5:07
out. So, take your little loop to the
5:10
machine, line it up.
5:14
That first pin will have to come out.
5:17
Let's move those pins. And then just set
5:20
off and do a few stitches. And I do mean
5:23
a few.
5:25
And then that's not got started
5:27
properly. There we go. Reverse.
5:32
You can see I'm just doing three or four
5:34
stitches. And then you're going to run
5:37
along that length. So you're sewing the
5:39
edge that was wide open.
5:42
And then there'll be no raw edges except
5:44
for at the ends which we're going to sew
5:46
into the seams later so no one will ever
5:49
see them. And then when you get to the
5:51
end,
5:54
a little reverse
5:57
and then forwards. And I do apologize
5:59
for that. My son for some reason came in
6:01
and thought it would be a good idea to
6:03
touch the thing I'd got the camera clip
6:05
to. You'd think he was a little boy,
6:07
wouldn't you? But he's not. He's a full
6:09
grown man. Anyway,
6:11
you're then going to take your strap and
6:14
sew it in exactly the same way. So,
6:17
that's why I've sped it up a little bit
6:18
here. You're just running down that open
6:21
edge. Again, doing a little bit of
6:24
reversing at the start and at the
6:27
finish.
6:29
There we go. And a little reverse.
6:33
Now, I always think your strap looks
6:37
better
6:38
if you do exactly the same stitching but
6:41
down the other side. And I probably
6:43
should have said that this is basically
6:45
top stitching. And so I tend to make my
6:47
stitch length a little bit longer. So
6:49
for me that's three instead of 2.5,
6:52
which I believe is millimeters cuz my
6:54
machine's from Germany.
6:56
I don't know what that is in inches, but
6:58
just make it a little bit longer because
7:00
they look a bit better on top stitching.
7:03
And then obviously you're going to sew
7:06
those two facings
7:09
in exactly the same way.
7:13
And here just try and sew the same
7:15
distance from the bottom all the way. I
7:18
tend to use the edge of my foot. It
7:20
works really well as a as a guide.
7:24
And it just runs along the edge of the
7:26
fabric. And you'll see I cut my threads
7:27
off as I go. Personal preference. You
7:29
don't have to. You can go and cut all
7:32
your threads off at the end when you've
7:33
sewn a whole load of pieces, but I tend
7:36
to do mine immediately. I just think it
7:38
keeps things tidy and it stops me
7:40
forgetting and getting them caught up in
7:41
seams and goodness knows what. We all
7:44
have our own little sewing habits and
7:46
that's one of mine.
7:51
And then we can start assembling. So, do
7:53
you remember those two big squares that
7:54
you're going to make your bag out of?
7:56
You want to put them face to face. So
7:58
you've got two right sides together. And
8:01
you want to pin all the way down one
8:04
side,
8:06
all the way across the bottom and then
8:09
all the way up the other side. And
8:11
you're going to keep the top of your bag
8:14
open. That sounds really obvious,
8:17
but it's worth saying. So, do just keep
8:20
the top of your bag open
8:23
and check that you've got your fabric
8:26
the right way up. You've still got time
8:29
to adjust.
8:31
Okay, so it's back over to the machine
8:35
and sew all the way around. Now, just
8:39
make sure you do your little bit of
8:41
reversing at the beginning and your
8:43
little bit of reversing at the end. We
8:44
want a nice secure seam. And quarter of
8:48
an inch is a good size for your seam
8:49
allowance. No hard and fast rules. The
8:52
same way as this bag could be any size.
8:54
Your seam allowance could be, but
8:55
quarter of an inch is a nice size for
8:57
your seam allowance.
9:00
And then when you get to the bottom,
9:04
you simply
9:06
put the needle in,
9:10
lift the foot, and turn the bag 90°.
9:14
And then you can go again. If you're not
9:16
lined up properly when you turn, simply
9:18
put it back how it was. Do another
9:20
stitch or two or three and then try
9:24
again. As long as you leave that needle
9:27
in when you turn, everything will be all
9:29
right. And don't be too rough. Don't be
9:32
trying to pull that fabric and try and
9:33
snap your needle, but you should be
9:35
fine. And then when you get to the top,
9:39
we're going to do that reverse again.
9:43
And then you will have basically a bag
9:46
because you've sewn your three sides.
9:53
So what we're going to do now is give it
9:55
a boxed bottom.
9:57
So what you'll have to do is press those
10:02
seams open. Now I said I had a cheat. If
10:05
you don't want to press them open, if
10:06
you haven't got your iron set up, you
10:08
can always run your fingernail along the
10:10
seams. Usually, you would do this for
10:13
really small seams that perhaps you
10:15
can't get the iron in. So, I do
10:17
recommend you take this over to the
10:18
ironing board, but I wanted to show you
10:21
a little cheat that there is if you want
10:23
to cheat. So, I've pressed that side
10:27
open, and we need to press the bottom
10:30
open as well.
10:32
So, let's just get ourselves in there
10:34
with that fingernail and give it a good
10:37
bit of attention.
10:40
Now, line it up so that your side is
10:44
directly on top of the bottom seam. So,
10:48
you can see me doing it there. And you
10:49
end up with that lovely point.
10:53
And you want them perfectly lined up.
10:55
Now, the best way of checking if they're
10:57
perfectly lined up is sticking a pin
10:59
through the seam. Now, how far down you
11:02
sew this seam is up to you. I'm going to
11:05
recommend an inch, and that gives you a
11:06
nice little box at the bottom. I have
11:08
done them an inch and a half, and I've
11:10
done them two inches on larger bags.
11:12
It's up to you, but you will see me
11:14
adjusting. Now, I've put the pin in, and
11:15
it didn't quite go through both seams.
11:18
So, I'm just adjusting.
11:22
And then at one inch down, put a couple
11:25
of pins in. And that is where we're
11:28
going to sew.
11:31
straight along there.
11:33
Now, obviously,
11:35
we need to do the same with the other
11:37
bottom corner as well. So, again, you
11:40
need to get those seams pressed open.
11:44
Line them up perfectly. Now, I say
11:47
perfectly, if they're not perfectly, it
11:48
doesn't matter. No one will ever notice,
11:51
but the more you try to line them up,
11:53
the better your result will be.
11:56
So, again, I'm just going to measure
11:57
that. get my pins in
12:01
and then they're ready for sewing those
12:04
two seams to get those corners. So, take
12:08
it back to your sewing machine. Make
12:10
sure your seams are open. It's very easy
12:13
for them to flick back again. So, just
12:15
make sure they are pressed open.
12:18
Start at one side.
12:20
Few stitches reverse
12:25
and then sew all the way along the
12:27
length.
12:31
And then when you get to the other end,
12:34
a little reverse again. Now, I know I
12:37
keep telling you the same things, but
12:39
you know, this this video is intended
12:41
for everyone to be able to follow, not
12:43
just seasoned seers. So, I'm trying to
12:47
make sure I don't leave you anywhere.
12:51
And then happy with one,
12:55
it's time to sew the other one in
12:57
exactly the same way. So, again, just
13:01
check that your seams stayed open. You
13:04
want those seam allowances flat.
13:08
There. You see, I could tell something
13:10
wasn't right under that one. It didn't
13:11
feel right. So, just made sure. And then
13:14
again little reverse at the beginning.
13:19
Sew along the length
13:24
and then a little reverse at the end.
13:27
And this is what's going to form that
13:28
lovely box at the bottom. So if you make
13:31
a lot of these, I do recommend you
13:33
experiment with different sizes because
13:36
you can make quite a squat box if you
13:39
make this a a longer seam.
13:42
Just get that trimmed up.
13:46
And then we need to cut the excess off.
13:48
So you want to cut the corner off to
13:50
leave yourself with a seam allowance.
13:52
Again, I'd say about quarter of an inch.
13:55
And just cut that corner off. Otherwise,
13:56
you've just got that bulk there in the
13:58
way. Nobody wants that in their bag, do
14:00
they?
14:01
So just cut that off nice and tidy.
14:07
So now you've got a bag.
14:10
We can turn it out to the right side and
14:14
attach the loop fastener.
14:17
Now, I always attach the loop fastener
14:19
first before everything else because I
14:20
want to give it a bit of security. But
14:22
you're seeing now those corners that
14:24
you've just made, that lovely box edge
14:26
at the bottom.
14:28
Well done.
14:30
And now we'll put that loop on. So,
14:33
we're going to sew the loop on and then
14:35
it will get sewn on again, which just
14:37
makes it nice and secure.
14:40
So look at the top of your bag
14:44
and in the center we're going to form a
14:47
loop
14:49
and sew it to the top of the bag.
14:52
So [clears throat] measure the bag
14:56
and then make sure you put your loop
14:59
right in the center. So for me that's
15:00
about 5 and 1/2 in.
15:04
And you can do this using pins or you
15:08
can use clips. It doesn't matter. If you
15:11
like using clips, use those. These sorts
15:15
of things are really personal
15:16
preference. And I've got to say,
15:17
depending what I'm doing, I use pins or
15:19
clips. So, there are no hard and fast
15:22
rules.
15:24
You do what suits you and indeed what
15:26
you've got available.
15:28
Now, pin it in place. And the best way
15:31
you can do it, pins or clips, is to use
15:34
two because then when you remove one,
15:36
the other one still stays where it's
15:38
supposed to be. Now, don't do what I've
15:40
done. Let me show you, which is to pin
15:44
it through both layers.
15:47
Okay? Make sure you're only attaching it
15:51
to one side of the bag. So you should be
15:55
able once this is pinned on to to open
15:58
the bag right up. We do not want to sew
16:02
it to both sides.
16:05
Okay. So you can see I've checked there.
16:07
So we're just going to sew that on. And
16:09
we're going to sew it really really
16:11
close to the edge. You're going to use a
16:14
quarter inch seam allowance for the next
16:16
seam. So it needs to fall within that.
16:19
So less than quarter of an inch. So
16:21
about an eighth of an inch is ideal.
16:24
And the best thing I can say to do is to
16:26
get it under your foot, take that first
16:29
pin out and sew.
16:32
And then when the second one started to
16:35
go under the foot and it's holding it in
16:36
place a little bit, take [clears throat]
16:38
the second pin out. And then reverse
16:41
back over both again. So you've sewn
16:43
both down. You're going to reverse back
16:45
all the way over both of them. And then
16:48
another little bit forwards.
16:52
And that will have secured it nicely.
16:57
As you can see, that's going to be
16:58
great.
17:00
So, now we need to think about the
17:02
strap. We've made our strap, but we need
17:06
to attach it. And those are the facings
17:08
as well. So, before we attach everything
17:12
else, we're going to sew the two facings
17:14
together. So, just pin them together
17:17
right sides facing. And you'll see that
17:19
the two neatened edges match up together
17:23
and the two raar edges match up. And if
17:25
you've got a slight difference, don't
17:26
worry. Just make sure the neatened edges
17:29
match up.
17:31
And then we're going to sew those. Now,
17:33
whatever seam allowance you used for the
17:35
bag, use for the facings because we want
17:38
them to be the same size. So for me,
17:40
that's quarter of an inch. But the the
17:43
crucial thing is whatever you did for
17:44
the bag, do for the facings.
17:47
And you can just reverse at the
17:49
beginning,
17:51
run to the end.
17:54
And then do your little reverse and then
17:56
forwards again just to secure it.
18:03
Okay. And then you're going to do the
18:05
same with the other side. And I'm just
18:08
going to drop in here that if you're
18:09
enjoying this video and you are finding
18:10
it useful, it's really helpful for me if
18:13
you give it a thumbs up, please, because
18:14
then YouTube sends it to more people,
18:16
which is great. It's great for me and
18:18
it's great for people trying to sew a
18:20
bag. Whatever it's for. I mean, you can
18:23
use these bags for anything you like
18:24
depending on what handle you put on and
18:26
how big a box bottom you make.
18:29
Personalize it. Make it your own. I've
18:31
used them for keeping wool in and
18:34
projects. And I've also used them for
18:35
popping a couple of books in and going
18:36
to the library. So, you know,
18:40
multi-purpose.
18:42
Okay. So,
18:45
once they're both sewn,
18:48
we need to open those seam allowances
18:51
up. So, again, it's back to your iron or
18:54
the trusty fingernail.
18:57
There we go.
19:02
And then we can finish assembling the
19:04
bag.
19:10
So take your bag and your strap
19:14
and position your strap on either end. I
19:17
mean, that's how it's going to go up
19:18
there. Mine's a short one to hold just
19:20
in my hand, in my fist. And then line it
19:24
up. Now, make sure your seam allowance
19:26
is open. Make sure your strap is
19:30
equidistant around that side seam. So
19:33
half of it's on the back, half of it's
19:34
on the front. Wrap it round and do the
19:38
same on the other side. Now notice it's
19:40
down towards the bag.
19:43
And then you're going to take your
19:44
facing and put that over the top.
19:49
So again, go to those side seams and
19:51
make sure everything lines up. So you've
19:53
two side seams and a strap and pin or
19:56
clip them together. Do the same at the
19:59
other side seams. Again, making sure
20:01
everything lines up.
20:06
And then go into the middle of one side
20:10
and pin or clip. And then go in between
20:14
just to hold it nicely. And the same on
20:17
the other side. Make sure your loop is
20:19
still down and it's not going to get
20:21
caught up where it shouldn't. But we are
20:23
going to sew over it again so it be very
20:25
secure.
20:28
And then we're going to have to go back
20:29
to the machine and sew around the top of
20:32
the bag. Now, a lot of machines open up
20:35
like mine, which makes it a lot easier.
20:37
You can just feed the bag onto the
20:39
machine. If it doesn't, you're just
20:40
going to have to be very careful not to
20:42
catch the other side of the bag in. And
20:45
this time you can just set off. You
20:47
don't need to do a little reverse
20:51
and just sew around the top of the bag.
20:53
Now make sure your strap is lined up
20:56
perfectly.
20:58
Make sure nothing's shifted as you go
21:00
over
21:02
and then sew steadily around the top.
21:05
Again, I've used a quarter of an inch
21:06
seam allowance. So whatever you were
21:09
using before, I recommend using it
21:11
again.
21:13
You just have to keep working your way
21:15
around. Keep making sure your bag is not
21:18
getting caught underneath
21:20
and making sure everything's still lined
21:22
up. So, for all this is quite quick, I'd
21:25
like you to go very slowly, especially
21:27
if you're a beginner. Just take your
21:30
time.
21:31
You can see there I've just taken a bit
21:33
of time to check everything. And I think
21:35
on the ends where you're sewing the
21:36
strap on, it's particularly important
21:38
that you take your time. If you're
21:40
thinking you might carry something very
21:42
heavy in this bag, I would think about
21:44
doing um a little reverse on the straps
21:46
as well. It wouldn't do any harm to make
21:49
that seam a bit stronger there.
21:53
So, when you get back to where you
21:55
started, make sure you go over the
21:57
stitching you started and then do a
22:00
reverse because what you're doing now is
22:03
securing both ends in one go.
22:06
And then cut my threads.
22:12
So, we now have a bag. And what we need
22:15
to do is take that facing and fold it
22:19
inside the bag.
22:21
Good idea to get over to the iron and
22:23
give this a press. But make sure what
22:25
you're doing all the time is getting
22:27
that seam right up to the top. You want
22:30
the seam right to the top.
22:33
And again, I've gone to key locations.
22:36
I've gone to the straps. I've gone to
22:38
the loop
22:39
and I've just made sure they're pinned
22:42
or clipped
22:45
and work your way around the top. Just
22:48
making sure that seam comes right to the
22:50
top and gives you a good neat edge.
22:54
The straps are actually really good
22:56
because you can pull them and it helps
22:57
pull that seam up.
23:00
And then once you've got all the way
23:02
around, we're going to do a little top
23:04
stitch all the way around. really close
23:07
to the top of the bag. I do it about an
23:09
eighth of an inch. Some people go
23:11
closer, but an eighth of an inch is
23:13
fine. You don't have to make life really
23:15
difficult for yourself. And it's just
23:17
going to hold that facing down nicely.
23:21
You can also do the same with the bottom
23:24
of the facing if you'd like another
23:25
strip of stitching, but that is a
23:27
personal preference. I do it, but you
23:29
don't have to. But I really recommend
23:32
that you do one at the top, really near
23:34
the edge.
23:36
And as before,
23:39
just set off and work your way round.
23:42
And you're going to do your reversing at
23:43
the end. And as you're going, just keep
23:46
checking. If you have any trouble when
23:49
you get to the straps, because remember,
23:51
you've a lot of layers of fabric there.
23:53
It's really thick. You may have to just
23:55
ease your foot up onto it, which you saw
23:57
me do, which is just to lift the foot.
24:00
Don't let any of your fabric move. And
24:03
just ease it forward slightly. Just ease
24:05
that fabric and then put it down again
24:08
quickly and carry on. Takes a little bit
24:11
of practice, but it can be really
24:12
helpful when you come to a thick section
24:14
like the straps are on here.
24:18
So, just keep going, working your way
24:20
around.
24:24
And again, when you get back to where
24:26
you started, make sure you overlap the
24:28
stitching. And then do a little reverse.
24:38
And then it really is for you to decide
24:41
if that's enough stitching on the
24:43
facing. That's absolutely fine.
24:47
But I find then the facing is a little
24:49
bit loose. Um when you're bringing
24:51
things in and out the bag, you can
24:53
sometimes catch it. It's just a little
24:56
bit untidy to me. So once you get all
24:59
the way around,
25:01
I tend to go again further down the
25:05
facing.
25:07
How far down the facing is up to you.
25:11
You could go in the seam that you've
25:13
already done. Do you remember when you
25:15
sewed the facing um hem of the facing?
25:19
Or you could go really near the edge of
25:21
the facing.
25:23
But it's a good idea to just set
25:25
yourself a distance from the edge of the
25:26
facing and stick with it because then
25:29
you'll end up with a beautiful straight
25:31
set of stitches that show on the outside
25:34
and look really nice. I tend to use
25:37
matching thread for everything, but you
25:39
could use a contrasting thread if you
25:41
want to, and depending on your fabric,
25:43
that might be really effective.
25:46
But it will just hold that facing down
25:48
and make your bag even more practical
25:50
than it already is.
25:54
Just keep going.
25:58
Make sure your threads are out the way.
26:01
Overlap. Little bit of a reverse
26:05
and forwards.
26:07
Some people don't do that because it's
26:08
top stitching, but I think it's worth it
26:11
just for that security.
26:13
So now you have a bag and it just needs
26:15
a button. Now unless you've made a very
26:18
long loop, your button's going right at
26:20
the top.
26:22
So, you just need to get yourself a
26:24
needle and thread and sew it in place.
26:27
Now, I do have a video about sewing on
26:29
buttons, which I'll link to, but I tend
26:31
to use a double thread, and I just do
26:33
two or three little stitches with a knot
26:35
in the thread. So, I'm really making
26:37
sure it won't come loose.
26:40
I'm sewing through the top layer of
26:42
fabric and not the facing. So, you won't
26:44
be able to see this on the inside. Then
26:46
you come up through the button, back
26:48
down through the button,
26:50
and then a little stitch of the fabric.
26:53
And keep repeating. Now, if you've got
26:55
four holes in your buttons, you're going
26:57
to be doing it slightly differently. As
26:59
I say, I've got a video I've linked to,
27:01
but basically, you're just going up and
27:02
down through the button, and then a
27:05
little stitch on the back, back up
27:07
through the button, down little stitch
27:09
for the bag. And you just repeat for as
27:11
many times as you like, but you want it
27:13
nice and secure.
27:15
And then once you're sure it's secure,
27:17
you need to finish your thread off.
27:19
There's nothing worse than losing your
27:20
button. So do make sure
27:25
that you Let's get to the end. You can
27:27
see I'm nearly there.
27:30
That you do a little stitch into your
27:33
fabric.
27:34
And then you're going to put the needle
27:36
through the loop. And that will form a
27:39
little knot.
27:41
And I recommend doing it a couple of
27:42
times.
27:44
And then take your needle and thread it
27:48
through between that top fabric and the
27:50
facing.
27:53
And just check you haven't gone through
27:54
the facing. So, it's hidden. And then
27:57
cut your thread off. It'll just stop
27:59
that knot pulling through. And there you
28:02
have it. Your bag's completed and should
28:04
fasten beautifully. Hope you've enjoyed
28:06
making it. And please let me know in the
28:07
comments below if there's anything that
28:09
I could have done better or any other
28:11
projects you'd like me to cover. So,
28:14
happy bag sewing and hopefully I'll see
28:16
you again on this channel.
Hobbies & Leisure
Fiber & Textile Arts