0:00
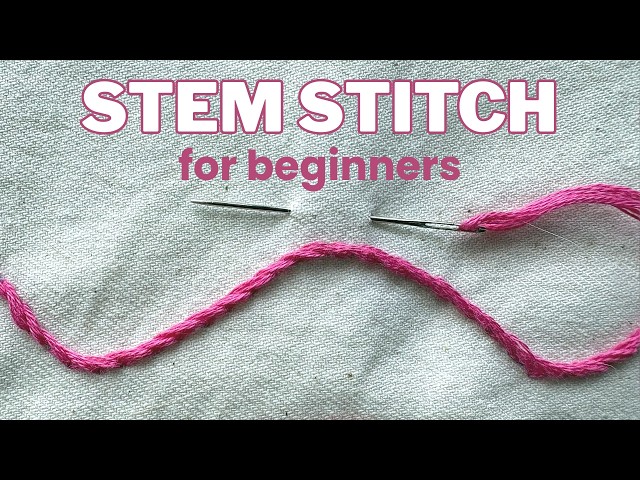
So this is the stem stitch, and as you
0:02
can see I've used it for stems, but you
0:04
can use it for so many different things
0:06
in your embroidery. It makes a really
0:08
nice straight line or a sweeping curve
0:11
or whatever you want. It's great for
0:14
So by the end of this video, you're
0:16
going to be doing your own stem stitch,
0:17
and perhaps you'll be doing it in a slow
0:18
stitching book like I'm doing here. So
0:22
if you're more interested in the slow
0:23
stitching book, do check that out on the
0:25
link above and in the description below.
0:28
And here are some more stem stitches,
0:30
and as you can see I've just done wavy
0:33
Lots of different techniques you can use
0:36
So let's see how we actually do it.
0:38
So you're going to need some embroidery
0:40
thread, and it's up to you whether you
0:42
use your embroidery thread as it is with
0:45
all six strands, or whether you'd like
0:47
to break it apart. Now I tend to work
0:53
so that's what I'm going to do today.
0:55
Now I've got my needle with quite a big
0:57
eye, so I could use the whole embroidery
0:59
thread. It's actually an embroidery
1:02
uh but I'm going to divide it. And the
1:04
easiest way of doing it
1:06
is to separate your thread,
1:08
and then take hold of those two separate
1:11
threads in one hand, and run your finger
1:13
down the length of the thread. Now you
1:16
hold the thread vertically to do this so
1:18
that it can swing free. I can't do that
1:20
cuz I won't be able to show you, but it
1:22
works beautifully if you do that.
1:24
And then you've got your length of
1:26
three. So just run your fingers down to
1:28
make sure it's not too twisted and
1:31
And then we're ready to go. The first
1:33
thing you need to do is thread your
1:36
Now you can wet the end of it and push
1:40
or you can fold it over the end tight
1:42
and then push that through.
1:44
And that's the way I tend to use.
1:48
So you want a long end and a short end,
1:51
and the long tail is going to have a
1:53
knot in it. So it's a good idea to just
1:57
pull one knot through like that.
2:00
And then, if you don't think it's big
2:02
enough, you can do another.
2:05
And then, you're ready to go. So, you
2:07
can see I'm all set up here. I'm going
2:09
to do one straight run of stem stitch.
2:11
It doesn't matter whether you go left to
2:13
right or right to left. Please don't
2:16
Just come up where you want to start,
2:18
which may even be top to bottom or
2:21
And pull the thread all the way through
2:23
so that the knot sits nicely at the
2:29
a little bit further along
2:32
the length of the stitch that you want.
2:35
But don't let the whole length pull
2:37
through. I'm holding that loop down at
2:38
the bottom, and I'm coming back up
2:41
halfway along that first stitch.
2:44
And then I'm going to pull that loop
2:45
down to the bottom again. My thread is
2:49
And then I'm going to go on the length I
2:50
want and come back at the end of the
2:53
last stitch. I can do it in one step, or
2:56
you can do it in two separate steps like
2:58
I'm doing here. So, I'm now bringing the
3:01
where the last stitch ended. Keeping
3:08
And then I'll go again. Get my thread
3:11
put my needle in, and bring it back out
3:14
at the end of the last stitch.
3:17
You see how that's all lying really
3:23
needle in at the length I want, back at
3:25
the end of the last stitch.
3:28
And there we go. Now, I've kept that
3:30
thread on the same side at all times. It
3:33
would have been perfectly all right if
3:35
I'd had it above, but I've kept it
3:38
What you don't want to do is have it
3:40
above for some stitches and below for
3:42
others. You won't get that beautiful
3:43
smooth line that you're looking for,
3:45
which you can see is appearing now.
3:50
you can see how now I'm doing it in one
3:53
movement. It's a beautiful flowing
3:58
Now, don't pull your thread too tight.
4:01
That's a common problem, which makes all
4:03
your fabric pucker up. So, just make
4:06
sure your your thread's sitting flat,
4:09
but it's not trying to pull the fabric.
4:13
Try to keep your stitches a similar
4:14
length, but please don't worry about it.
4:18
People get really hung up on this and
4:21
That's not what we're about here. We're
4:23
doing slow stitching, hand embroidery,
4:26
enjoyment. So, try and get them all the
4:28
same length, but don't stress about it.
4:31
You'll look at my videos and go, "Well,
4:33
hers are perfect." No, they're not. And
4:36
I'm quite happy with that. I really
4:39
Now, if your thread starts to get
4:43
just let your needle hang, and it will
4:45
untwist, and then you can carry on
4:51
it's growing quite quickly.
4:54
So, it's a really nice stitch to do.
4:58
Now, if you're enjoying this, I am doing
5:00
a series of these stitches, so do keep
5:03
an eye out for that. And if you
5:05
subscribe to my channel, hopefully
5:06
you'll get a notification and you will
5:08
know that the next one is out. You can
5:11
see from the page of my book that I'm
5:13
using here some of the ones that are
5:19
what else have I got? French knots,
5:21
cross stitch. We've got all sorts
5:24
And I do like to do them in books.
5:27
It's so relaxing. And I choose to do my
5:30
books like this with separate pages and
5:32
then put them together.
5:34
Now, you can see I'm coming to the end
5:36
of my stitching, and I'm just going to
5:40
And that just finishes it off.
5:42
I've got beautiful row there.
5:45
So, now onto the back,
5:47
I'm just going to go through the back of
5:49
one of those stitches,
5:51
do the same again and I could just keep
5:53
doing that over and again to secure it.
5:58
go through my loop to form a little
6:00
knot. I just find it's more secure.
6:06
there you go. You've completed your stem
6:08
stitch and I hope you're going to use it
6:12
and I hope you like the fact you can use
6:13
it for stems but for lots of other
6:16
and next time we're going to be doing
6:18
chain stitch. Happy stitching.