0:00
hi in this video i'm going to show you
0:02
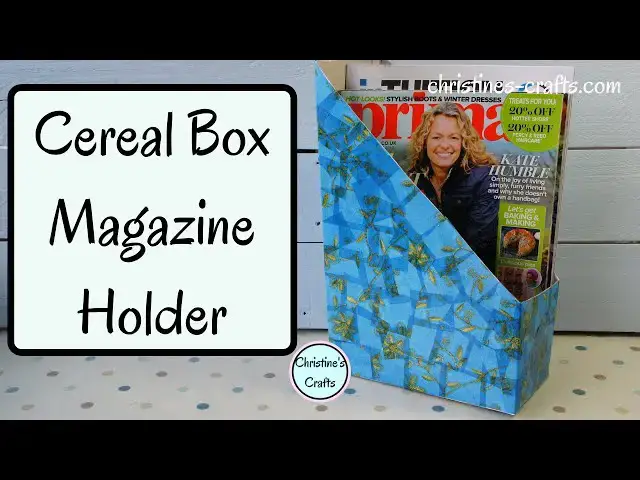
how to make a magazine holder from a
0:05
yep you can make them any size you like
0:07
you can make as many as you like how
0:09
about making a whole coordinated set for
0:11
your home office or for your shelves
0:13
in your living area so i'm christine
0:16
from christiescrafts.com
0:18
and this channel is all about crafting
0:21
so what are you going to need to make
0:24
first of all a cereal box the size you
0:27
choose will determine the size of your
0:28
holder and therefore what you can place
0:30
in it so just check what you want to put
0:31
in it before you choose your cereal box
0:34
you're going to need a ruler to take
0:37
and you're going to need a pen of some
0:40
you're going to need some scissors to
0:44
now i'm also going to paint mine with a
0:47
very simple white primer
0:49
and then cover it with some decoupage
0:53
the only reason i'm painting it is so
0:54
that the design on the cereal box does
0:59
so however you want to decorate yours
1:01
the first thing you need to do is make
1:03
so on the front of your cereal box at
1:07
measure how tall you want the back to be
1:09
now i'm doing it 12 inches
1:10
obviously you can scale this up or down
1:14
and on the other side the front of your
1:17
magazine holder so for me that's four
1:21
and when i've marked those two join them
1:25
and you can see that's forming the shape
1:26
of your magazine holder that's going to
1:35
then turn your magazine holder your
1:40
onto its end and we're going to mark
1:44
so we're going to need a horizontal line
1:46
on here four inches up
1:48
so just measure both sides four inches
1:58
so now we've got two sides marked up
2:02
and we've got the short face so now
2:06
and do the 12 inches on the other
2:09
short side so we're going to measure 12
2:16
and then join those marks up
2:20
and this is going to give us the
2:21
horizontal line to cut
2:23
on the tall end of our magazine holder
2:29
just join those up you can see by the
2:31
time we finish we're going to end up
2:33
with a complete black line
2:35
that goes all the way around our box
2:37
that we can simply cut along
2:39
now to do this diagonal side you can
2:43
look where your four inches is mark it
2:48
mark where your 12 inches is and mark
2:50
that round the corner
2:53
and then when we join those up
2:56
we have our other diagonal side
3:05
so now if you want to do a quick check
3:08
black line should run all the way around
3:12
and all of those lines should meet they
3:15
so it's one continuous line so now we
3:18
just need to cut it out
3:20
so simply take your scissors come in
3:23
get down to that black line and cut all
3:28
i've sped this film up obviously but
3:30
just take your time get a good
3:32
nice straight clean cut so you get a
3:36
and then discard the extra bit of
3:38
cardboard or use it for another craft
3:41
and that's it you now have a magazine
3:43
holder you can use it exactly as it is
3:45
i'm going to go on to talk about how to
3:47
decorate it an obvious way is just to
3:50
so you could paint it cover it enough
3:52
coat so that it's covered it and you'll
3:55
a nice magazine holder perhaps make it
3:58
the colour that matches your decor
4:00
in your room and that would be the job
4:03
but what i'm going to do is give it a
4:06
and then decoupage it which will show
4:11
so the first thing you need to do is
4:12
whatever paper you're using you need to
4:15
it or cut it up into small squares
4:18
now actually because it's a simple shape
4:20
i'm leaving my squares quite big
4:23
but you do need them small enough to
4:25
give you that texture and effect that
4:28
so just cut them up make quite a few you
4:31
will be surprised how many you're going
4:36
you've seen cut them up on mass so it's
4:38
not like each individual one
4:39
and then once you've got a nice pile you
4:42
can get on with decoupaging
4:44
so you need some sort of glue i'm using
4:47
mod podge pva glue all of them work
4:51
and wherever you're starting just put a
4:53
layer of the glue on now i'm starting at
4:55
one corner so i've gone round the corner
4:58
to make sure i can stick it on well
5:00
take your first piece place it on
5:04
and it should stick down so smooth it
5:07
and make sure you have plenty of glue
5:09
underneath the bit of paper
5:11
and also above because you're going to
5:15
to give it a nice coating to protect it
5:18
and also when the next bit overlaps you
5:20
want some glue for it to stick to
5:23
so make sure all your pieces overlap
5:27
and make sure you get glue completely
5:30
underneath them and on top of them
5:33
ideally you put them in place using the
5:35
brush and then just smooth them down
5:37
you'll see my fingers keep coming into
5:38
play because my brush is refusing to
5:40
behave and pick them up
5:42
as i get further on it picks them up
5:45
so now you'll see i've sped the film up
5:47
just to show you how it comes together
5:50
you can go right up to the top and form
5:52
a nice edge if you want to overlap over
5:55
the top that's entirely up to you
5:57
but what you are going to do is end up
6:00
whole thing absolutely covered so
6:04
obviously i'm not going to show you
6:05
every little piece you're just going to
6:07
see how it builds up and how all the
6:11
so there'll just be a little bit of film
6:15
just showing you it all building up so
6:17
i'm going to be quiet let you listen to
6:18
the music and watch it build up
6:20
and then i'll be back towards the end
7:07
so as we come to the end you can see
7:09
that as this is finished
7:10
you can leave it to dry and then you've
7:12
got a magazine holder all ready to use
7:15
so hopefully you've made one that
7:16
matches your decor set up a nice
7:18
exciting home office with yours
7:20
so thank you for watching if you like
7:22
the videos on this channel please hit
7:25
please give me a thumbs up and leave me
7:27
any comments i love to read your
7:29
comments and i always reply
7:30
so until next time bye